|
04/02/24
We have had issues with our trackside railroad lights for a year or so. They worked great for the first several years after they were installed. Each of our five poles has at least one light fixture, on and off switch and a power receptacle. The light circuit is on one breaker and the receptacles are always hot and on another breaker. All the wiring is in conduit and each pole has its own underground box.
|
|
Several months ago we started having intermittent issues with the GFCI receptacle on the last pole. I would reset the GFCI and it would be fine for an hour a few days or a few weeks and trip again. I would reset. After a bit it wouldn’t allow me to reset. We replaced the receptacle with no change. We uncovered and looked in the boxes. The gaskets had deteriorated a bit over the years so we replaced them. There was some moisture in the last two boxes on the line, but it wasn’t clear if it was condensation or a conduit leak. We thought we had isolated the issue to something in one of those two boxes or in between the two boxes. We replaced a couple of wires nuts and cleaned some connections and everything started working fine. A few days later both of the breakers started shutting off.
|
We aren’t electricians. After several more hours of trying to figure it out we left those two breakers off and handled other projects. I had a professional electrician out here this month working on something else for me and mentioned this issue. I ran the issue history by him. He was quiet for a few seconds and said matter of factly that he believed the problem was in the last pole the one that was initially tripping the GFCI. He said he had a postponement on a project and he could come out the following week and look at it if I was interested. I said I was and to schedule that. Dave and I located and dug out all of the underground boxes for him.
|
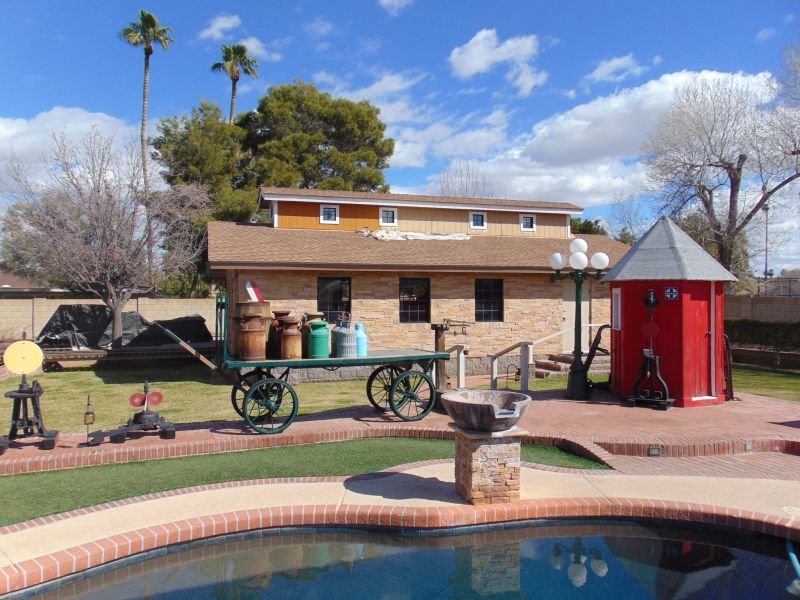
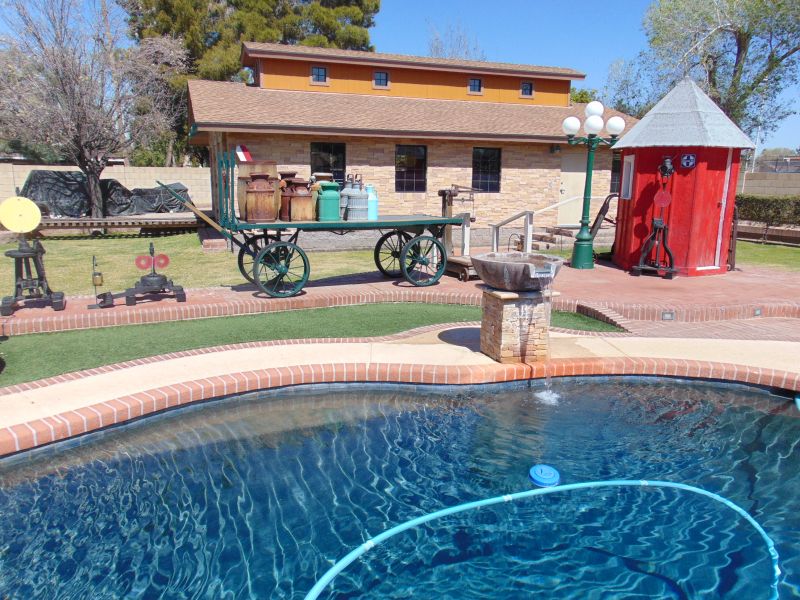
He arrived the following week and within a couple hours had determined that the issue was in the conduit sweep going from the box up into the last pole. He surmised that it is the low point of the conduit and that any moisture was collecting in the sweep and degrading the wires in there to the point that sometime there was an intermittent short. He bypassed the sweep and everything was fine and no shorts. He then went ahead and rewired it bypassing that sweep permanently. We went ahead and added a landscape box at each pole to cover and provide access to each underground junction box. It has been nice seeing those lights working the past few days.
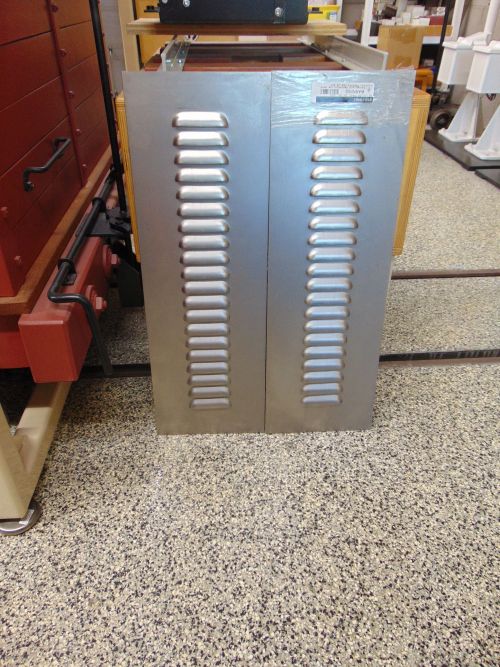
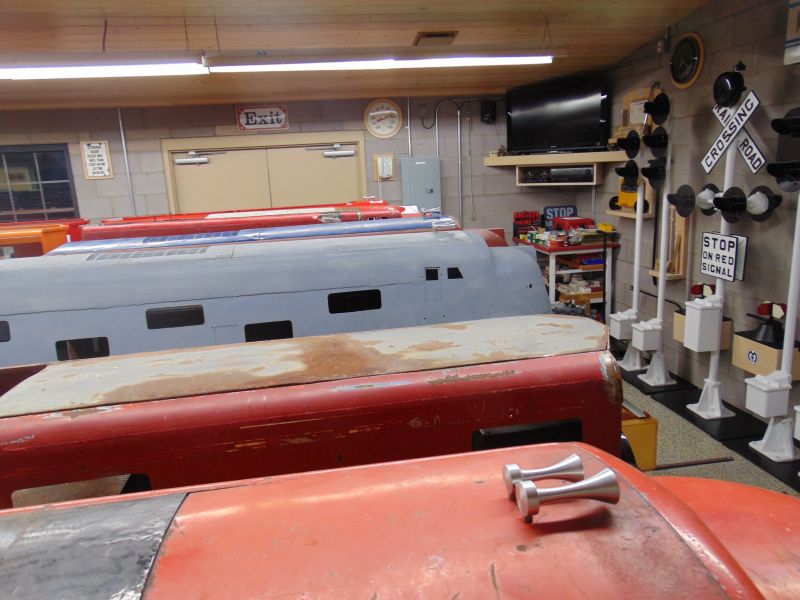
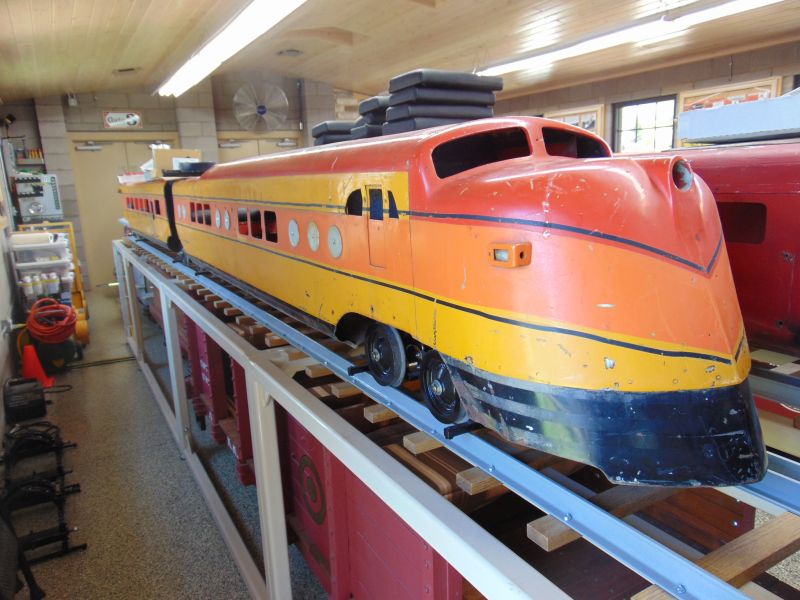
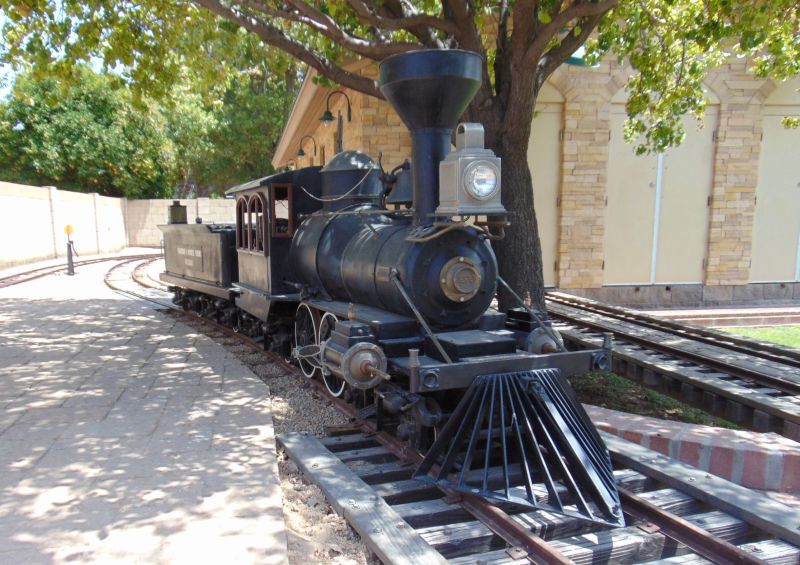
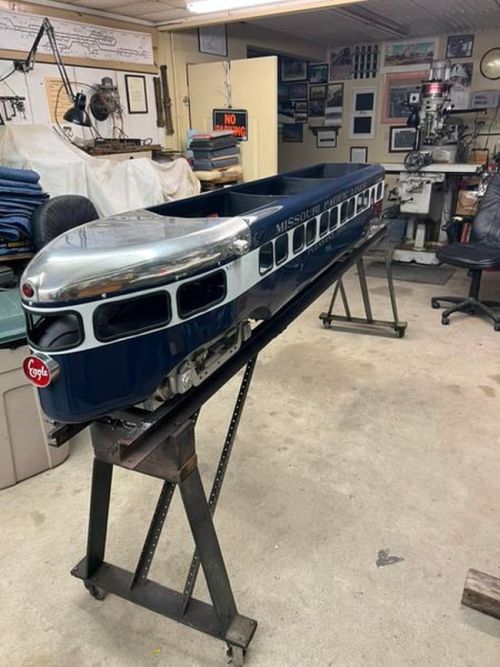
We trimmed the louver panels for the Coconino to the desired shape and size. We drilled and pre-fit them and I lightly sandblasted them to get good paint adhesion. We painted in flat black and then and painted the top of the cab for a better paint match. We also painted the screws and I got I the panels installed. We ground the points off the underside of the cab. We remounted the cab to the chassis and made some modifications to the cooling fan air deflector in the engine compartment, it should run cooler. I have been pretty busy with painting and some other projects and haven’t had much time to run her; she should see lots of action this Fall.
|
|
|
|
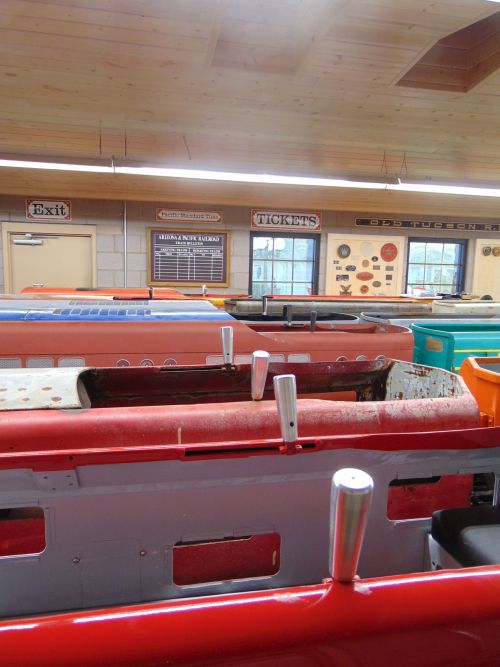
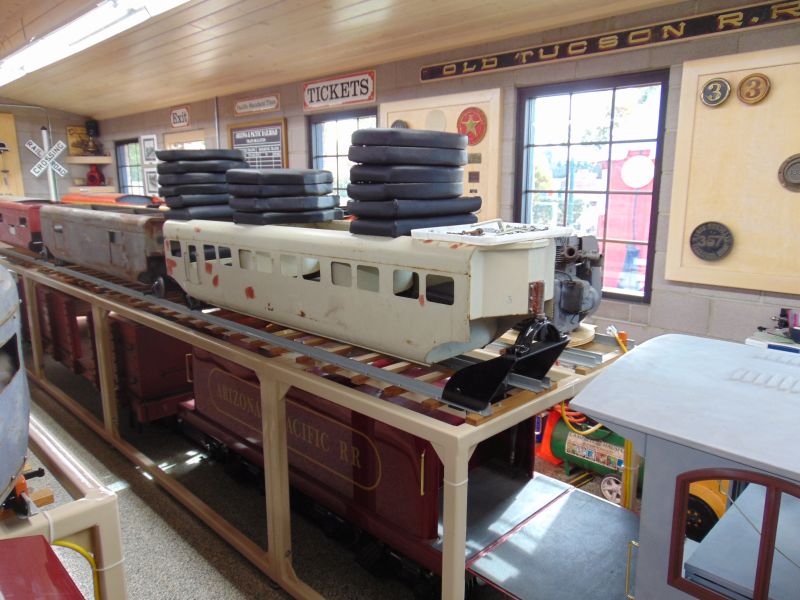
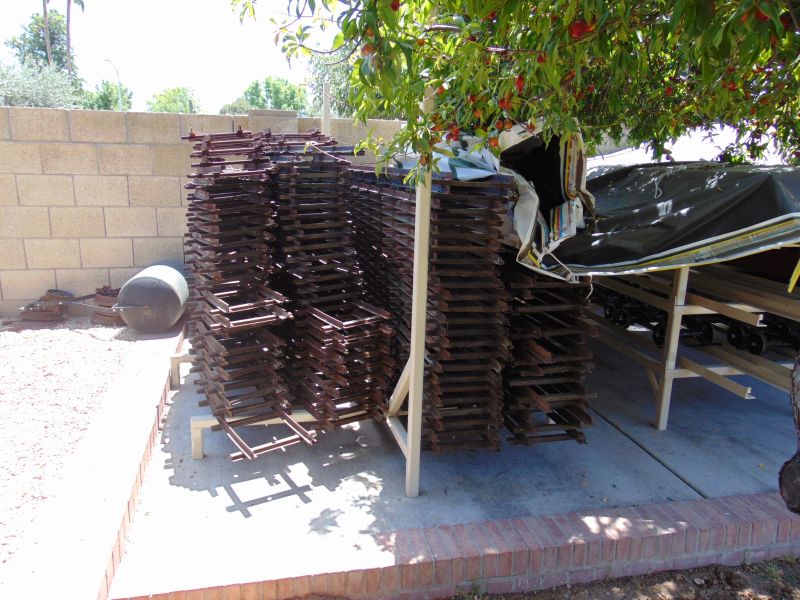
We sorted through and mounted assorted trim pieces to the trains on display in the engine house as we continue our evaluation of what trim fits and matches other trim pieces. I have been collecting bits and pieces of trim for these trains for 30 years from many different sources and there is some inconsistency.
We mounted a handful of Pullman windows in the postwar G12 observation car. The Pullman windows were an expensive option and most buyers opted for the Plexiglas windows. We mounted a few of those in one of our late model E10 coaches, but the Plexiglas is so clear that you can’t tell the windows are even there. I am considering a light car tint over the Plexiglas for a better look. We also acquired a couple of more trim pieces this month.
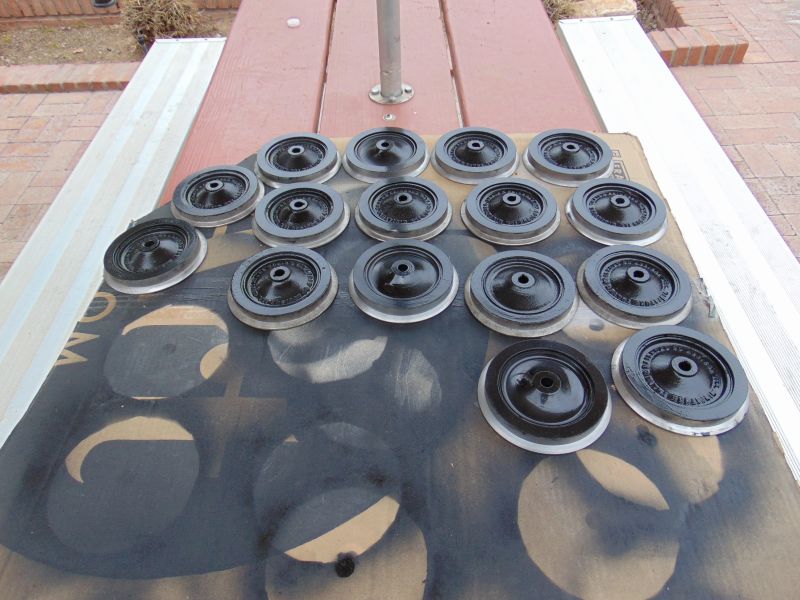
Work has begun on the displays I designed to display various MTC wheels in the engine house. The metal parts need fabricated and then the wood panels will be added.
We are also building the prototype for our steaming bays racks. Hopefully we will assemble the first one this fall.
We acquired six 6 foot x 15 inch by 8 foot tall industrial shelving units. We will have another storage building on site this fall and will use the shelving units to better organize our MTC parts. More to come on this project later this spring.
We mounted the balance of the bridge and trestle numbers.
|
We painted the mounting hardware of the full size switch stand new ties.
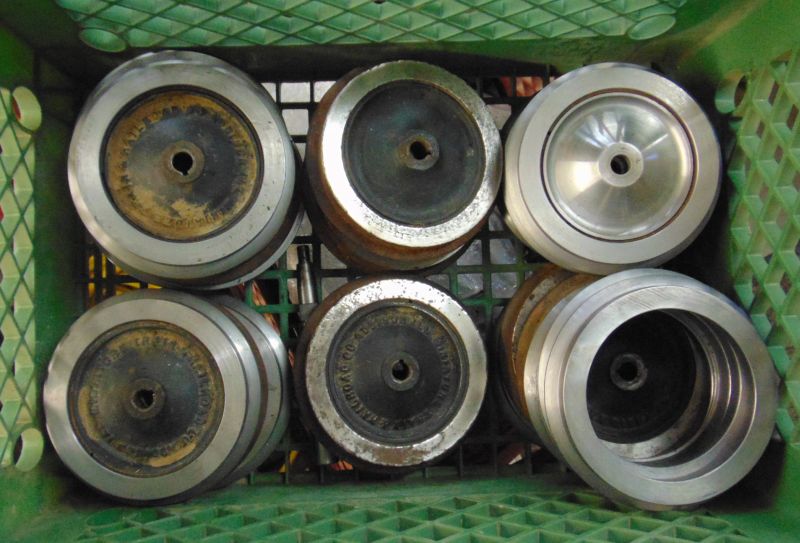
We started the touch up on our E10 wheels. We have a bit of wire wheel work remaining and they will be ready to install.
|
Our post-war G12 has the Pullman window shades option which was an expensive upgrade from the standard clear lexan windows that were common. They had spray paint and other substances on them that we worked several hours on to clean up. I hope to get them to the buffing and polishing vendor in April. They won’t look new, but will look pretty good.
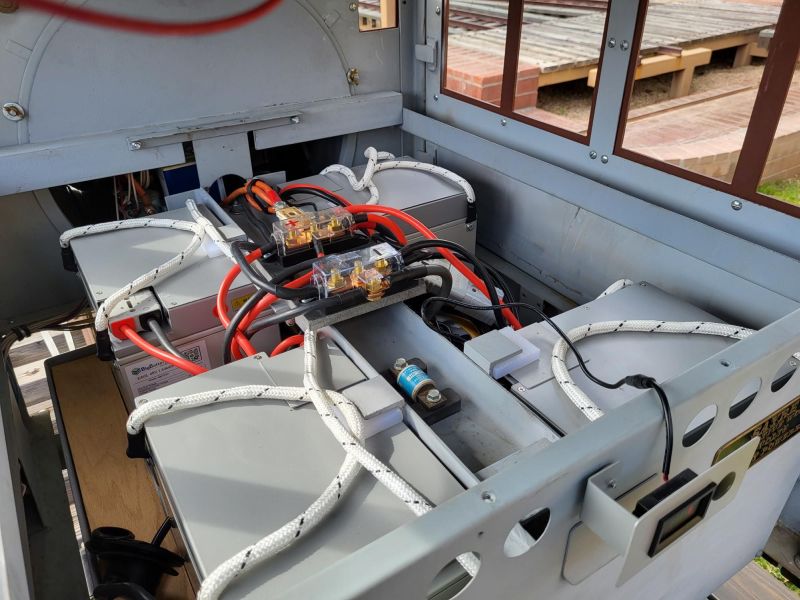
We finally received our replacement 48v 20 amp smart charger from Big Battery; it only took four months to replace the brand new defective one they had shipped previously. We got it mounted; it is unclear yet whether it works. Do not under any circumstances buy a “smart” charger for lithium ion batteries; buy a regular old fashioned charger instead. The “smart” chargers are less than worthless.
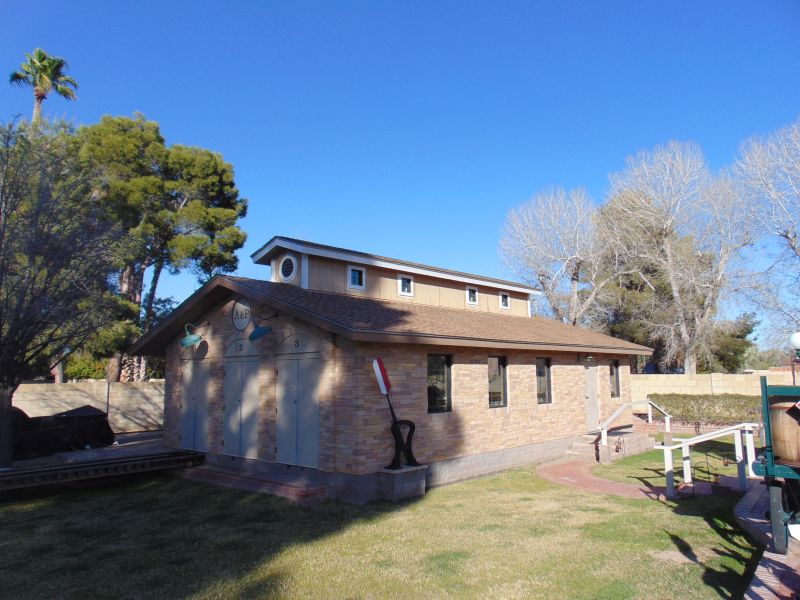
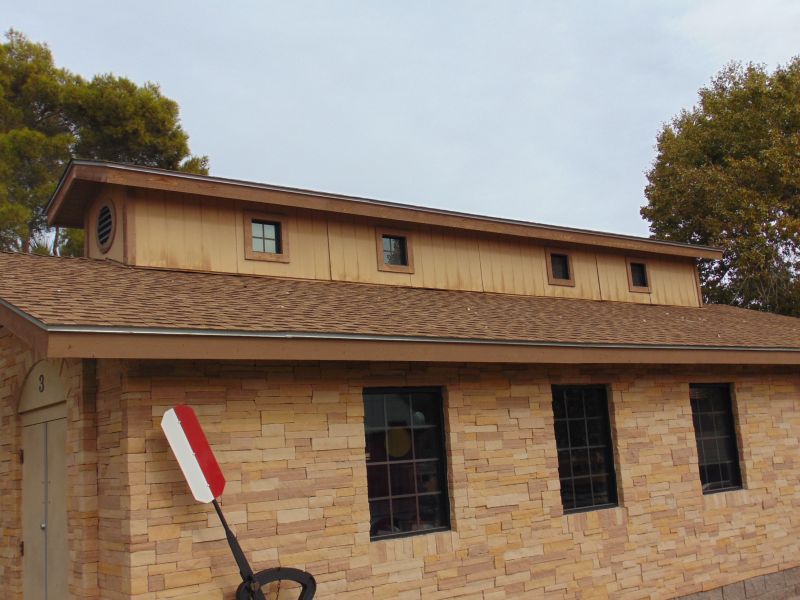
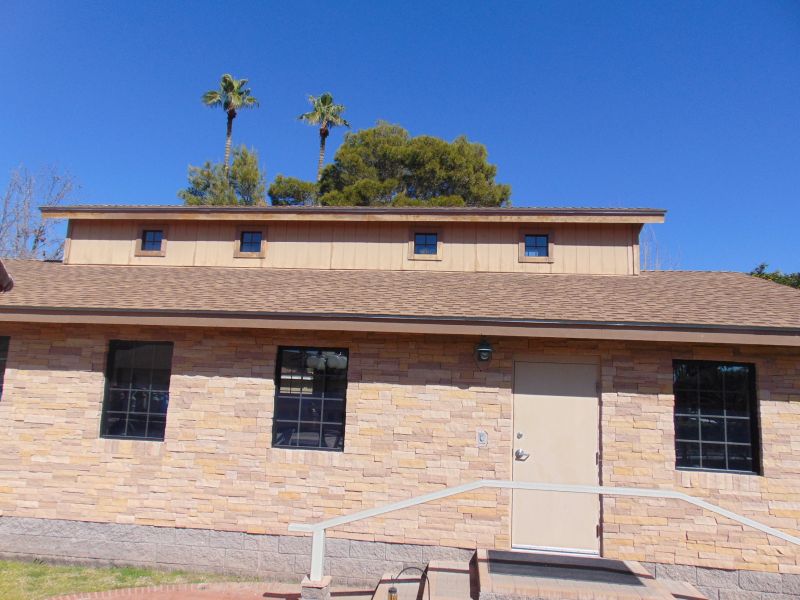
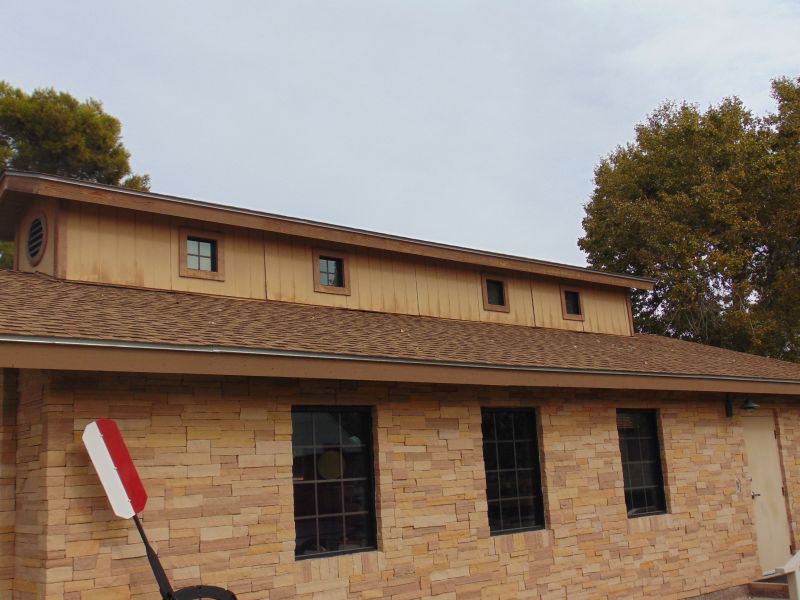
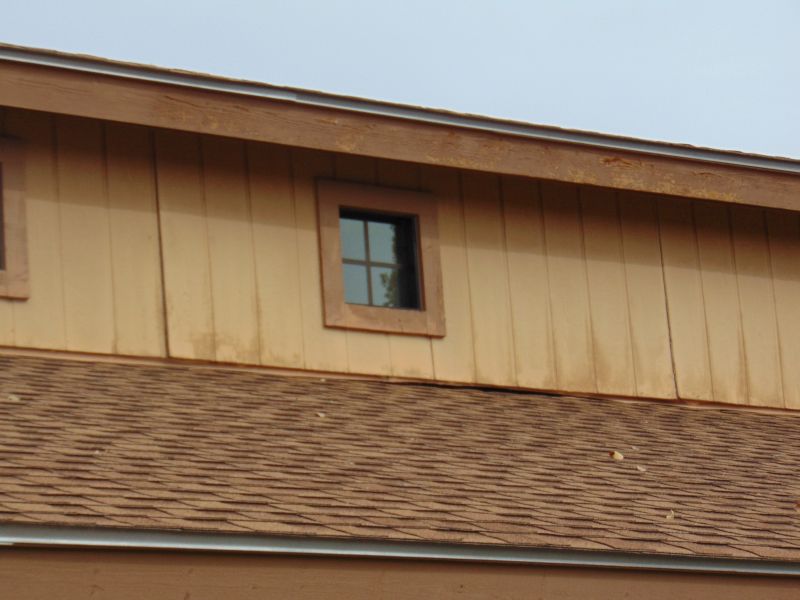
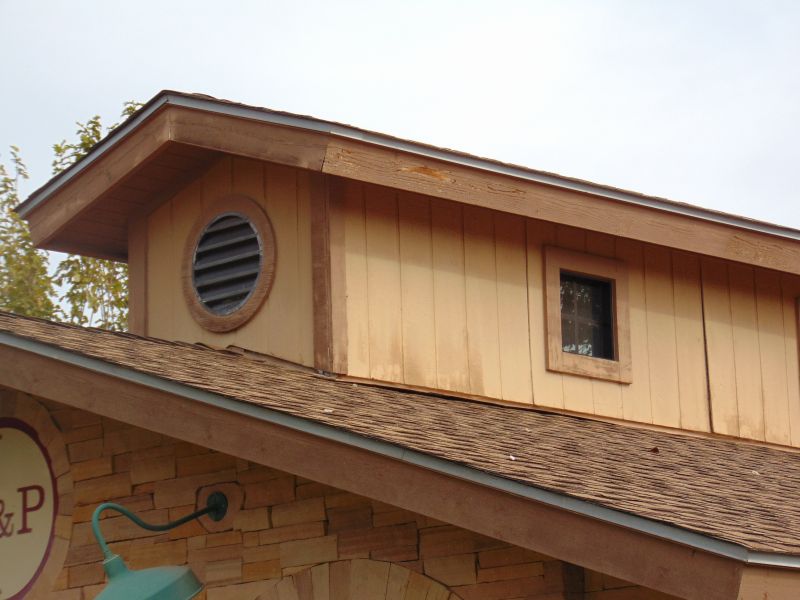
We got some additional work completed on the second level of the engine house, but progress was delayed many times because of several multi-day rain storms. I was finally able to match the brown paint of the upper trim work. The upper story was thoroughly sanded, had two coats of primer applied where it was sanded and the caulking has been completed. The yellow areas received two coats of paint as did the brown trim. The additional trim that we are adding should be completed and installed in early April. Some touch up remains as well as painting the vents. I am pushing to have this painting project completed by the end of April as it starts getting very hot up on the shingled roofs here after that.
|
|
|
|
|
Happy and safe railroading everybody!
01/28/24
We started on freshening up the upper exterior of the engine house this month. We re-nailed the panels and galvanized flashing into place, caulked some of the seams and cracks and started filling the checking with epoxy filler. There is still a great deal of caulking, sanding, priming and painting remaining. I am adding an additional horizontal trim piece to each side above the flashing and hope to start the painting in April and have it completed before the heat arrives in May. It will look very nice again once we get her finished in a few months.
|
|
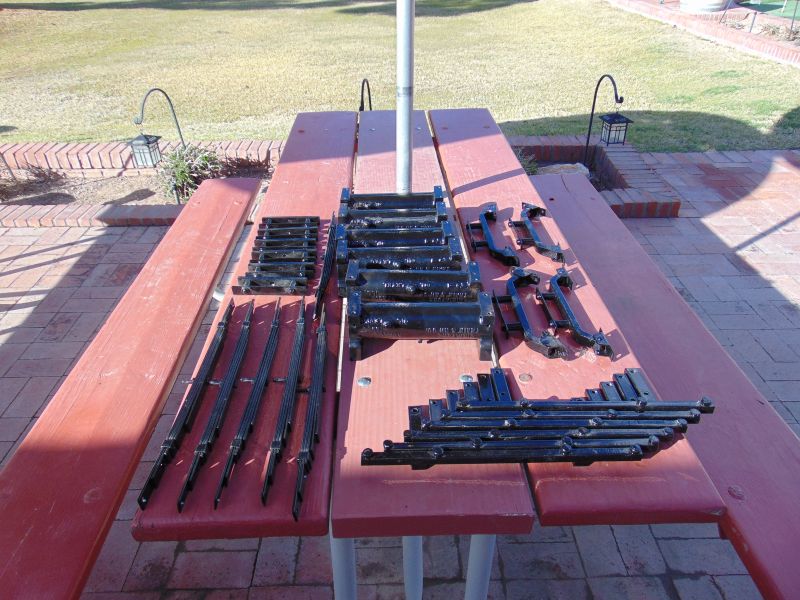
We have a collection of 12 full size switch stands most of which are different varieties from different railroads. Many are very top heavy and to eliminate the fear of one toppling over and hitting someone, all were mounted on wood 4 x4s for many years. Every few years, termites, ants and dry rot would get the best of the 4x4s and they were replaced with new ones to restart that cycle. I recently replaced the wood 4x4s with new steel ones. We boxed each end, had them powder coated and added rubber feet to keep them up off the ground. The first 4 switches had their 4 x 4s replaced in November. Seven more had their 4 x 4s fabricated in December. We’ll install them in January.
|
|
|
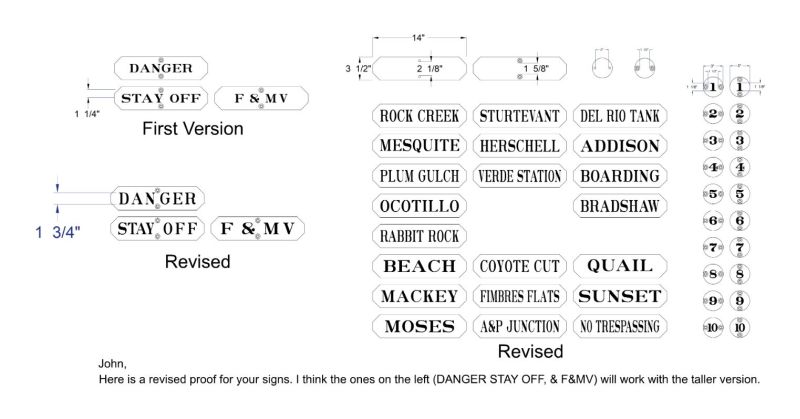
We started the process to add number plates to the second side of each of our five trestle signs. Originally, I had planned on only having the numbers on one side of the sign posts, but we operate in both directions and I realized it would be nice to have the numbers on both sides. We acquired and drilled the mounting holes in 10 additional 3 inch diameter by ¼ inch thick round discs. I had them powder coated in mustard yellow to match the originals and we will number them in January again using masks created by Darrin and Jana Weddle of Miracle Railroad Products. The extra fours discs will eventually be used to identify four future steaming bays that we hope to construct.
We continue our efforts to control the overheating issue with the Coconino. In that regard, we were able to source two rows of 20 3 inch louvers. We will be modifying the cab top to add the louvers and also will be redesigning the existing cab fan and deflector cooling system for the Wisconsin motor in January.
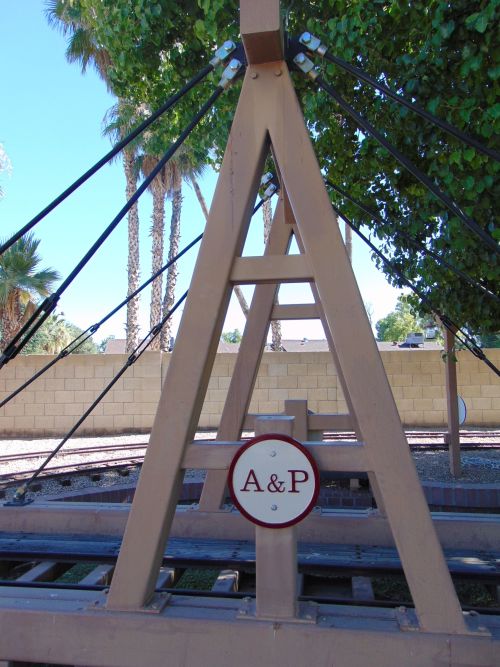
We added number plates to our 10 switch stands on the A & P. They turned out pretty well. Our switch no. 1 is where our first bridge originally stood and was the first track that we laid on the railroad the numbering follows the mainline in counter clockwise fashion and once the mainline loop is completed the sidetrack switches are numbered again in counter clockwise fashion. The number plates are mounted to the switch stand base and easily viewed when lining the switch. On our 16 gauge harp switch stand, the number plate is just below the flag.
|
|
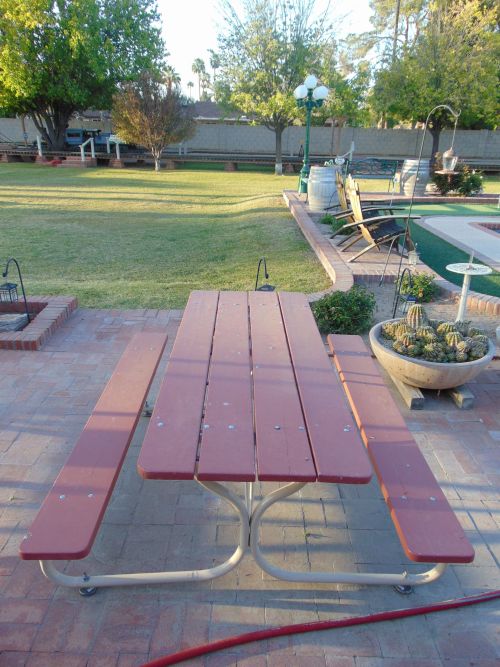
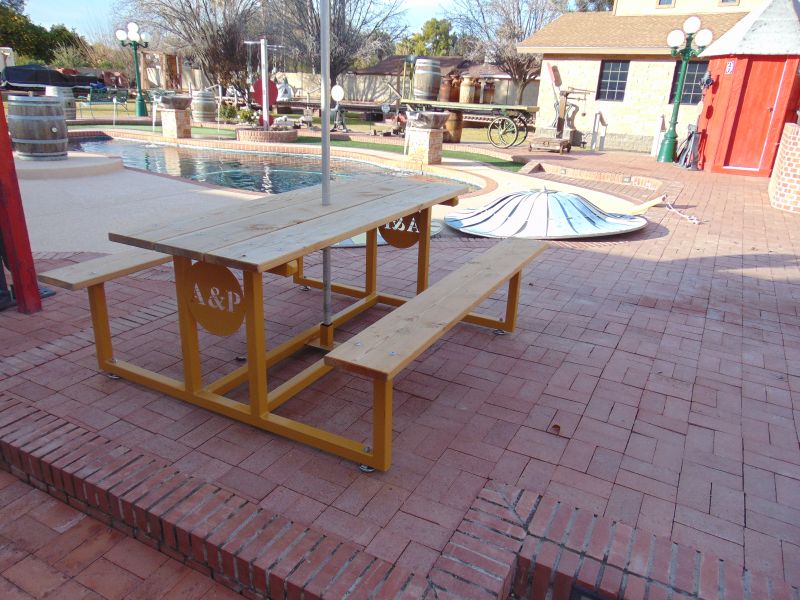
My now 1.5 year old puppy, Annie has chewed the corners off of the bench seats on 6 of my 7 picnic tables; this is an ongoing issue. Splicing and other repairs beyond making the seats a few inches shorter again wasn’t an option. A race track in the East Valley closed down recently and I was fortunate enough to acquire several of the aluminum planks used for seating and footboards through Facebook Marketplace at a very reasonable number. We shortened the aluminum planks from 8 ½ feet to 6 feet and reapplied the end panels. We got them installed this month on the six tables. The installation hardware is really slick and easy and none of the hardware shows. The mounting brackets are adaptable to virtually any existing hole spacing that needs matched.
|
|
|
|
We continued working on our three E10 switches and put in a couple of long days on this project. We are starting the fine tuning on two of them (one left and one right) and welding some track feet holes closed and drilling some others so that the ties will line up straight. They have been a great deal more work than I originally thought they would be, but I am still very happy to have them. Two of them await their final adjustments and the third still has a way to go – 25 man hours or so remain on the third one.
We also have acquired two G12 switches. Initially, I thought they were also a matched set of left and right, but it turns out that they are both left hand. They are on the East Coast. I am still working on the most economical way to get them to Arizona. Anyone have a right hand switch they would be interesting in parting with?
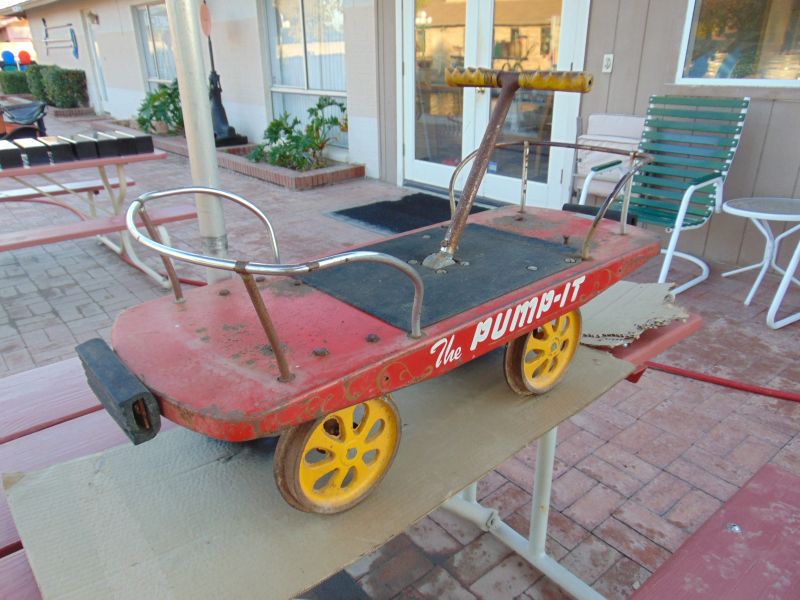
Dave acquired 2 more E10 postcards for our MTC collection and an Ottoway “Pump it” car from 1957 that we can now display alongside our Hodges Handcars. I acquired a couple of Sturtevant torque wrenches labeled “Lab” that I suspect came out of one of the several Sturtevant facilities in Addison, but I don’t have the provenance to prove that yet. They are cool pieces nonetheless.
|
I completed my first pass at designing a display for our MTC wheels for the engine house. I am hoping to display twelve wheels. Once completed, the display will include one of the first G16 wheels ever cast, a G14, G15 and G16 wheel from Rensselaer and a G16 wheel from the Miniature Train Division of Allan Herschell in North Tonawanda, New York. Others will include two E10 wheels, one from Glen Ellyn and one from Addison and two G12 wheels one with the Miniature Train and Railroad Company casting and one with the later Miniature Train Company casting. There will be a couple of spaces for future acquisitions. The displays, as currently envisioned, are a combination of steel and whitewashed Alder. This will be revised a couple of times before it heads into production, it will probably be fabricated and mounted over the summer.
Happy and safe railroading AND Happy New Year everybody!
In one of our relatively recent E10 acquisitions, we acquired quite a bit of E10 rail and parts of 3 E10 switches. One switch (left hand) was about 80% complete, one right hand was about 50% complete and a second left hand was about 25% complete. We had a mix of at least one of every part, but some were right hand and some were left hand. We are going to reproduce the parts needed to have a functional right and a left hand switch and may end up doing the same with the third switch. I have been collecting MTC products and equipment for thirty years and own 5 E10s, but these are the first E10 switches I have ever seen. G12 switches pop up from time to time, but not E10 switches. I’m very thankful that we had the opportunity to acquire these and restore them to operating condition.
|
We got a good start on the process this month and have made considerable progress on having the first two switches rebuilt. We didn’t have the frogs for any of the three E10 switches; I had several photographs of MTC G12 frogs and we used the same design scaled to E10 size. We also fabricated the frog wings using the one E10 one that we had as a pattern. The geometry involved and getting all the parts fabricated is more complicated than you would think. Like the E10 track panels that we restored previously, we will use oak ties with our E10 switches. I’m still uncertain about whether I will have them powder coated and how they will be displayed.
|
|
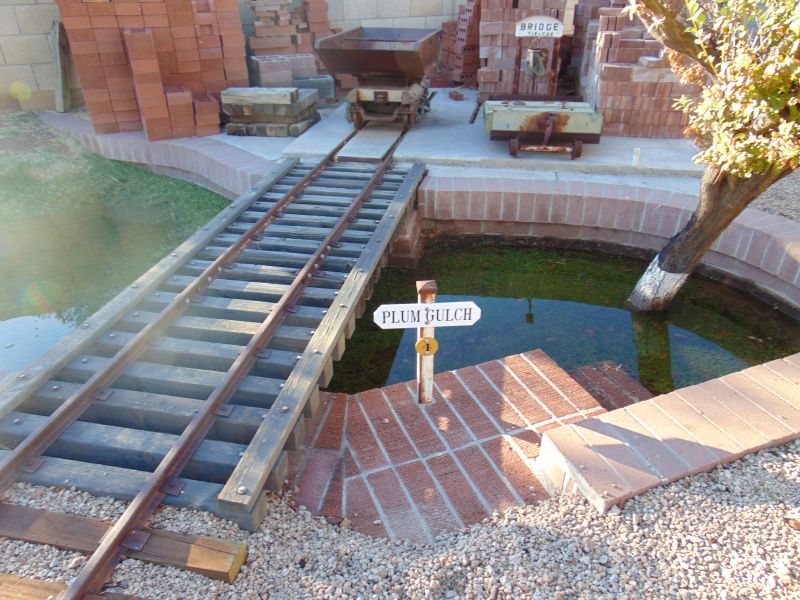
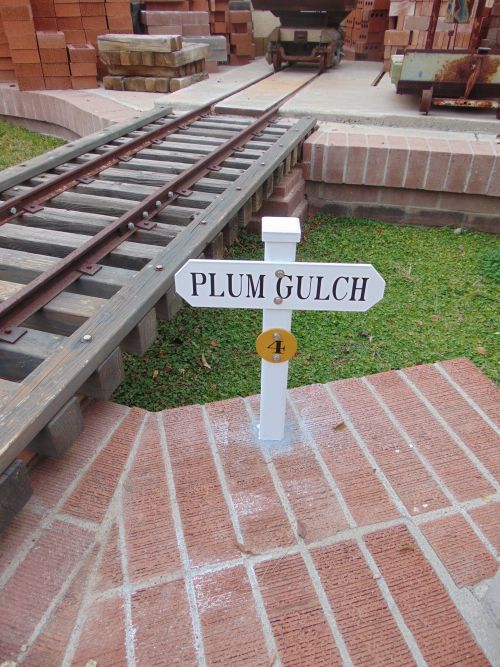
We cleaned, primed and painted our Plum Gulch sign post and added the cap, sign and trestle number. All of our signs are completed except for a depot sign on the back of the engine house.
|
|
We have a collection of 12 full size switch stands most of which are different varieties from different railroads. Many are very top heavy and to eliminate the fear of one toppling over and hitting someone, all were mounted on wood 4x4s to make them more stable. Every few years, termites, ants and dry rot would get the best of the 4x4s. I replaced the wood 4x4s with new steel ones. We boxed each end, had them powder coated and added rubber feet to keep them up off the ground. The first 4 switches had their 4x4s replaced this month. We have the 4x4s for 7 more switches in fabrication. We also repainted all 12 switches and cleaned all of their targets with Meguiar’s Ultimate Compound.
|
|
|
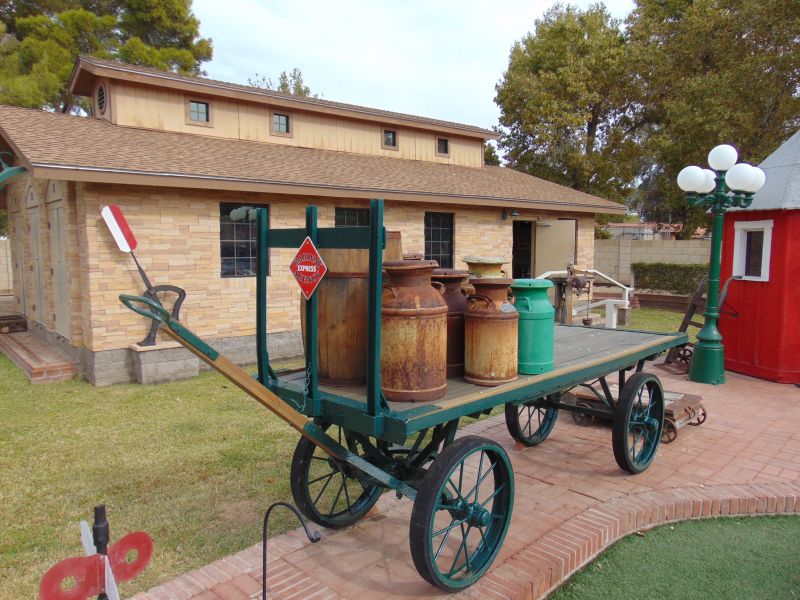
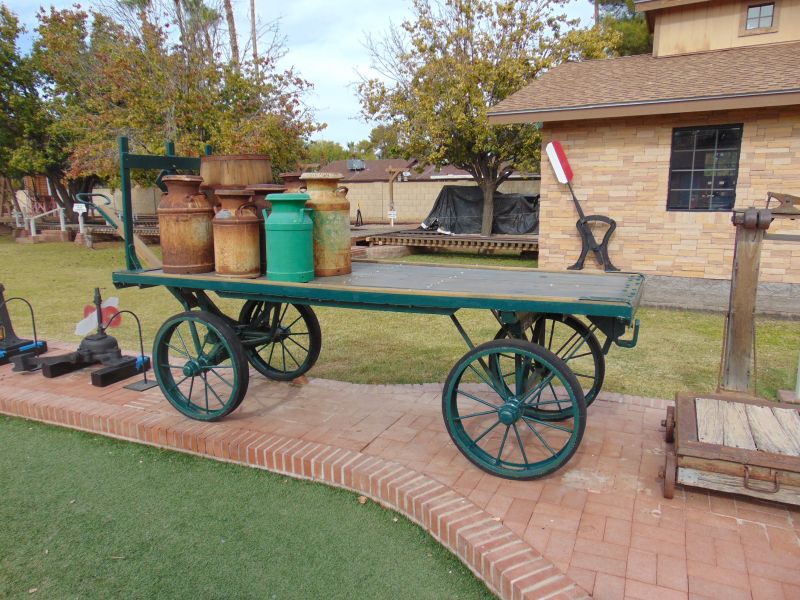
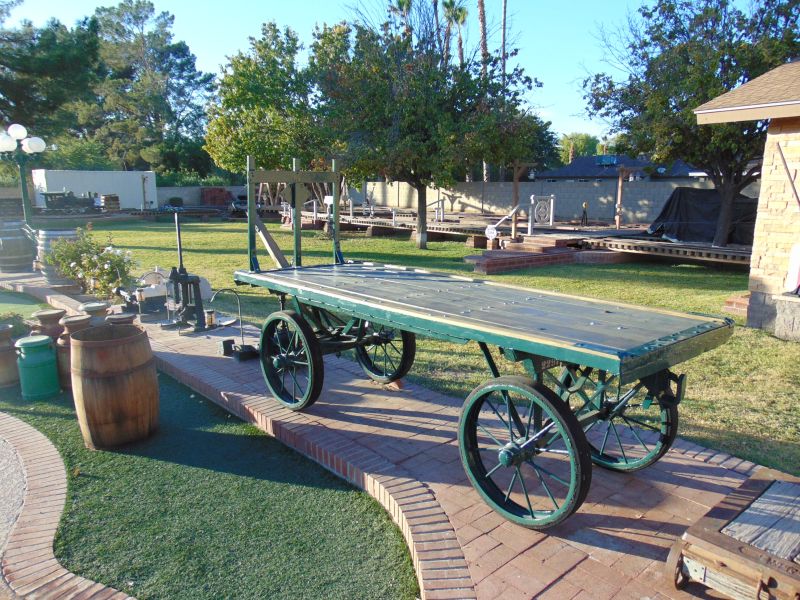
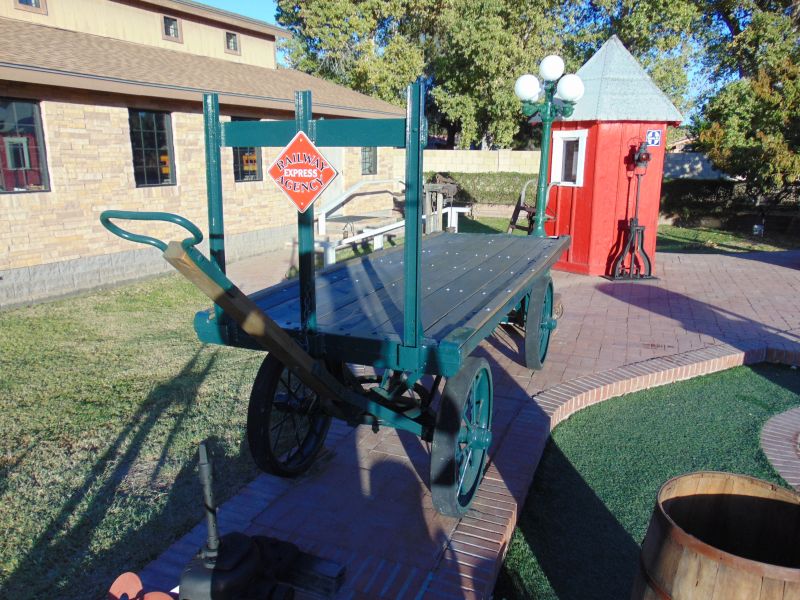
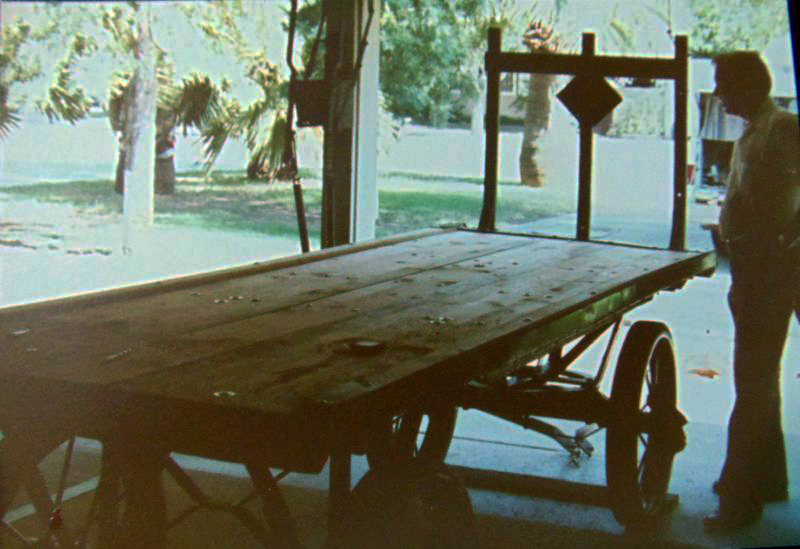
We got our milk and cream cans back in place on the baggage cart.

|
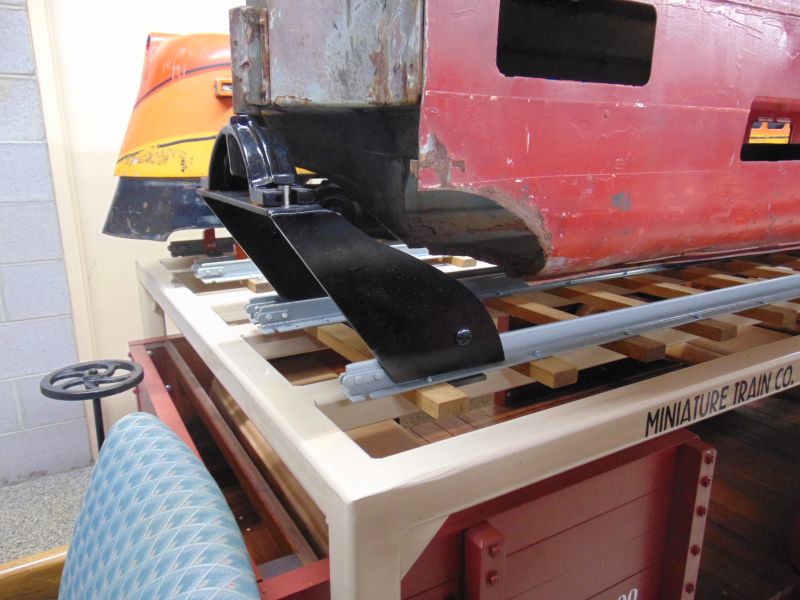
We pulled the leaking high pressure hydraulic hose on the Coconino, had one fabricated and installed the new one. I am glad to report no leaks.
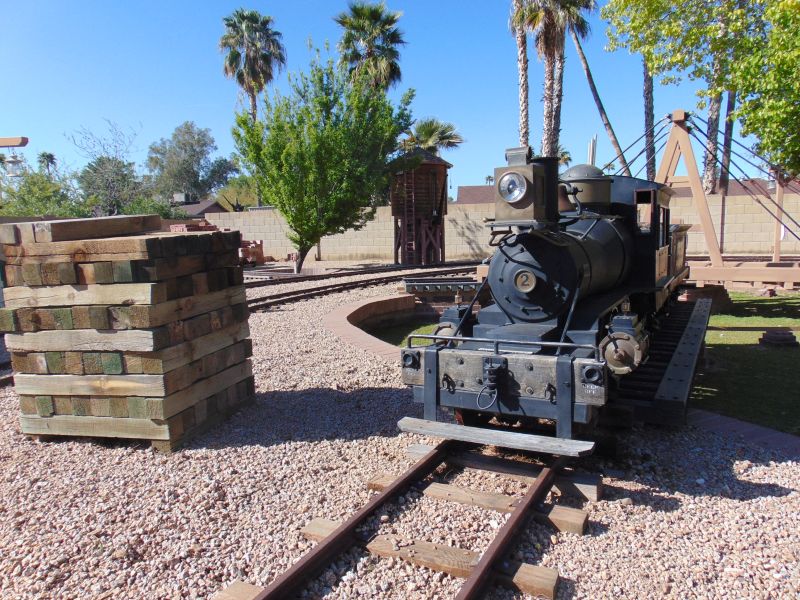
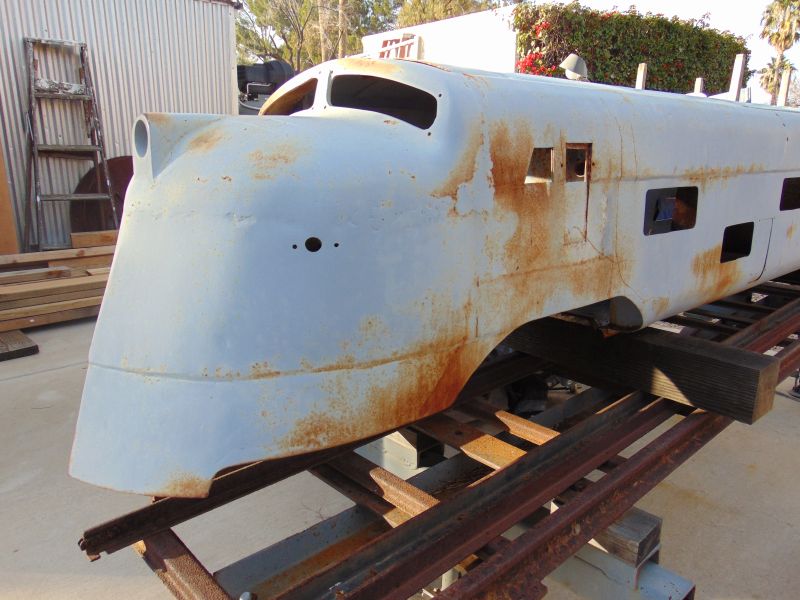
When our friend Malcolm Mackey acquired the S16 named Coconino many years ago, it was missing many parts and was a years long project. The cab top of the cab was badly damaged, but the sides were in reasonably good shape. He fabricated a new cab roof and reused the side panels. His new roof did not have the two rows of 28 4 inch louvers for help with dissipating the heat. We continue our efforts to control the overheating issue with the Coconino. In that regard, we were able to source two rows of 20 3 inch louvers. We will be modifying the cab top to add the louvers and will also be redesigning the existing cab fan and deflector cooling system for the Wisconsin motor.
|
|
|
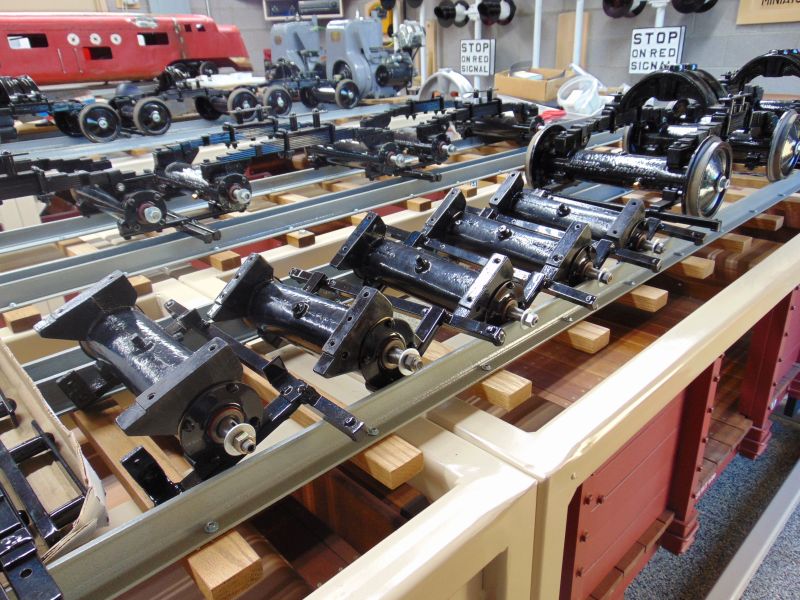
We bead blasted, polished and painted our 21 additional E10 wheels. We’ll start installing them on the trucks next month.
We started the process to add number plates to the second side of each of our trestle signs. Originally, I had planned on only having the numbers on one side of the sign posts but we operate in both directions and I realized it would be nice to have the numbers on both sides.
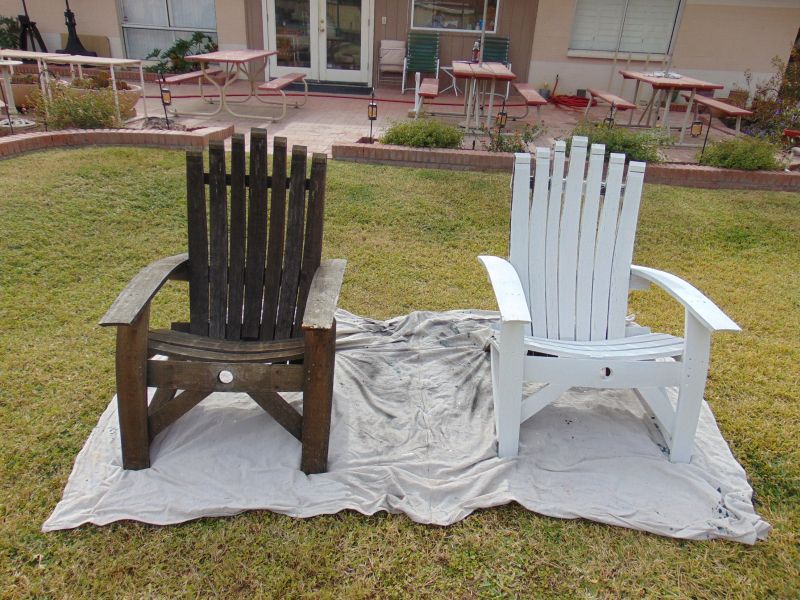
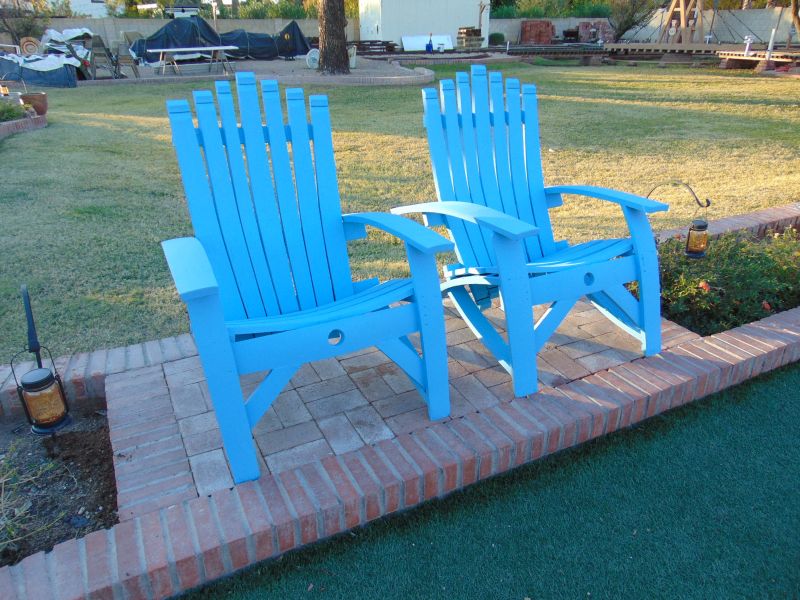
We finished sanding, priming and painting our two Adirondack style chairs made from wine barrel staves. I was looking for a Jimmy Buffet/Kenny Chesney vibe with my paint job and I think I accomplished that. Next up for seating refurbishment after the first of the year are the two park style benches on the north side of the engine house.
|
|
We got started on freshening the upper exterior of the engine house this month. We are re-nailing the panels, sanding, caulking, priming, painting and adding an additional trim piece to each side. It will look very nice once we get her finished in late April or early May.
|
We acquired another MTC torque wrench, another piece of G12 tooling and a couple of MTC catalogs for our museum this month.
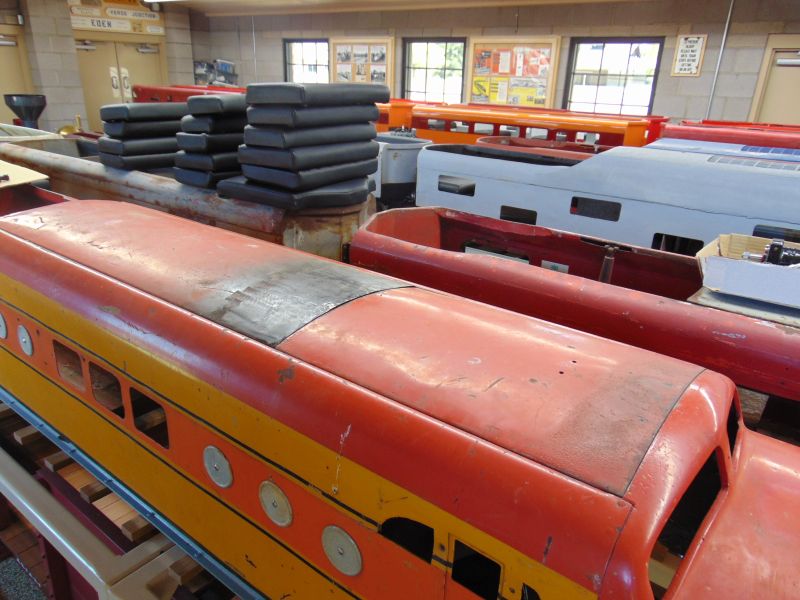
We are still working on matching our years’ long collection of trim pieces with our 4 E10s and 2 G12s that are stored in the engine house. We have an additional E10 that is not stored in there and several additional E10 and G12 cars. Most are still in need of fresh paint, but the bling is dressing up the equipment in the engine house for certain.
|
Our new lithium Ion batteries in the Sandusky have been a learning experience. We made the upgrade from the conventional lead acid batteries in late spring of last year just before it got hot here. Shortly after that conversion, we shut down actually running the trains for the summer. It turns out that if the batteries don’t see any activity for 30 days their internal electronics place them in “dormant” mode. The smart battery charger that was recommended and I purchased with the batteries will not get the batteries out of the “dormant” mode. I had to buy a second non-smart charger to accomplish that function. I am still somewhere in the middle of the learning curve, but I do like the performance of the batteries once you know how to maintain them.
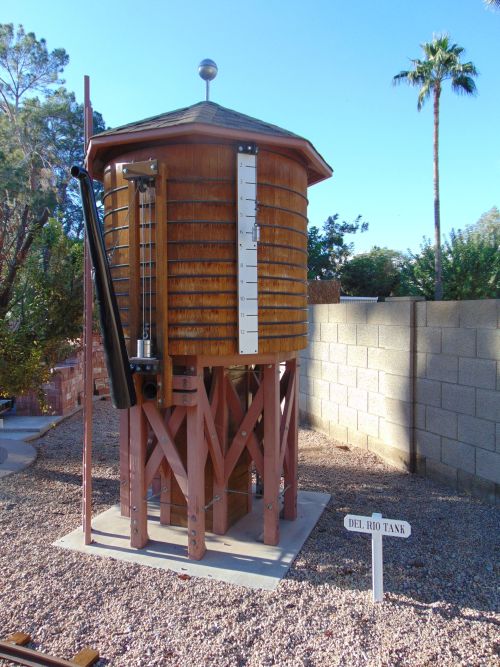
Other projects coming soon – repainting the support structure and base of our water tank, new wood and paint on our freight depot shipping scale, building some prototypes for a steaming bay or two off of the turntable and some displays racks for MTC wheels in the engine house.
We have a new vendor for our A & P shirts and should have the first batch of them on site in February.
Happy and safe railroading AND Merry Christmas everybody!
11/29/23
Jim McDilda of Redding, CA, who is restoring G16 no. 720, visited the Arizona and Pacific Railroad this month. We talked Bud Hurlbut, MTC, trestles, turntables, transfer tables, engine houses, wheel flanges, ballast, door opening dimensions and more topics than I can recall at the moment. It was a great visit.
Jim is donating tooling for G12 port holes to the A & P for inclusion in our MTC museum. We very much appreciate his kind donation of MTC items. Our long time friend Rick Nairn has made multiple donations over the years to our little MTC museum. Malcolm Mackey supported our activities in many ways over the years and a couple of anonymous folks have donated as well. All donations are greatly appreciated as we strive to collect, restore and preserve MTC and Allan Herschell products and equipment that were a big part of so many lives.
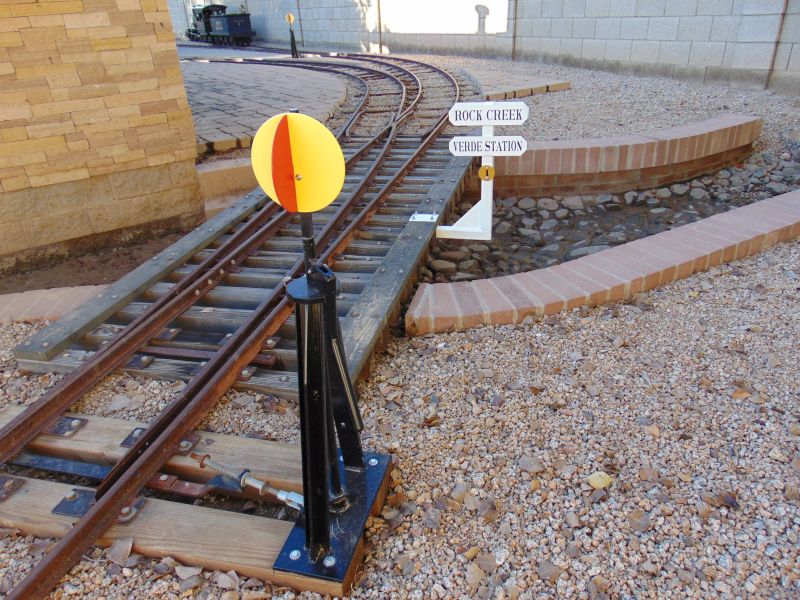
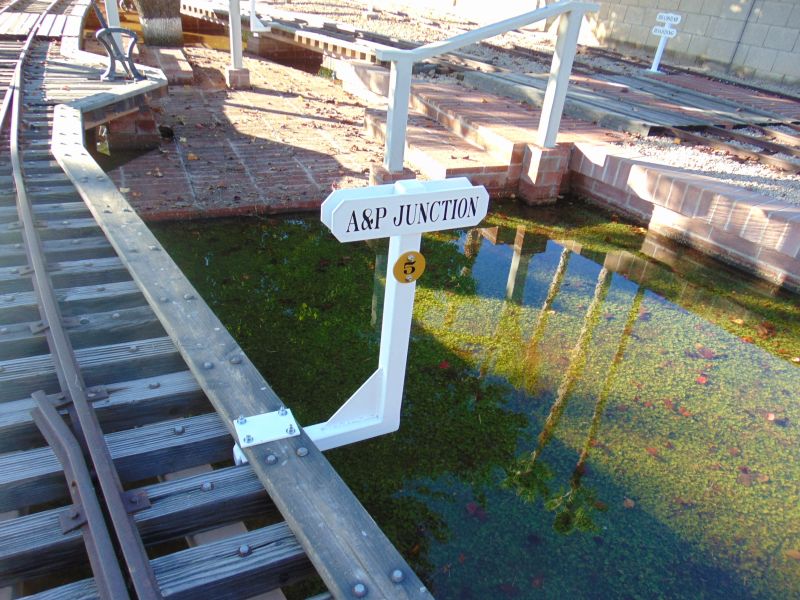
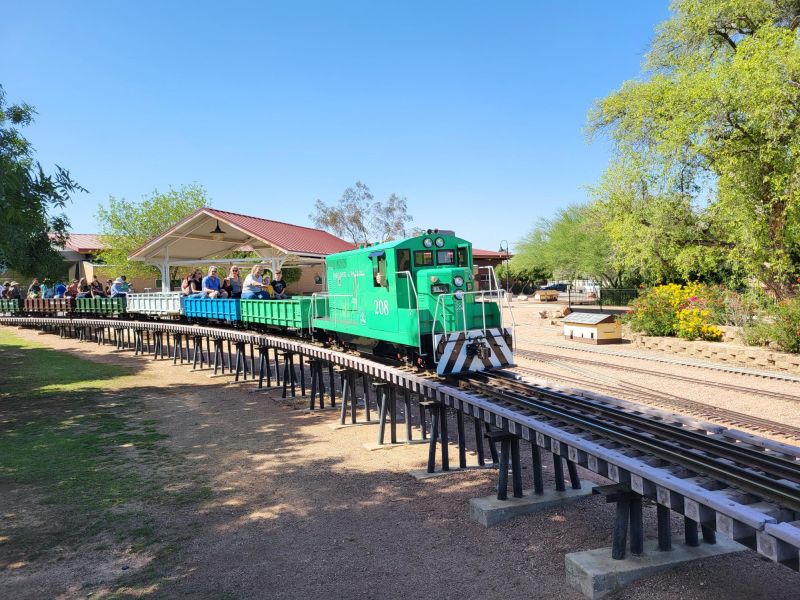
We spent a great deal of time this month working on our track side signs. Darrin Weddle of Miracle Railroad Products did a great job with our masks. Even with detailed masks, it is still a lot of work turning them into finished signs. The signs and sign posts are welded steel and power coated in flat white. The lettering is gloss black. The numbers indicating the trestle numbers are gloss black on mustard yellow powder coat. Next month, each switch stand will receive a white on red number denoting the number of that switch.
|
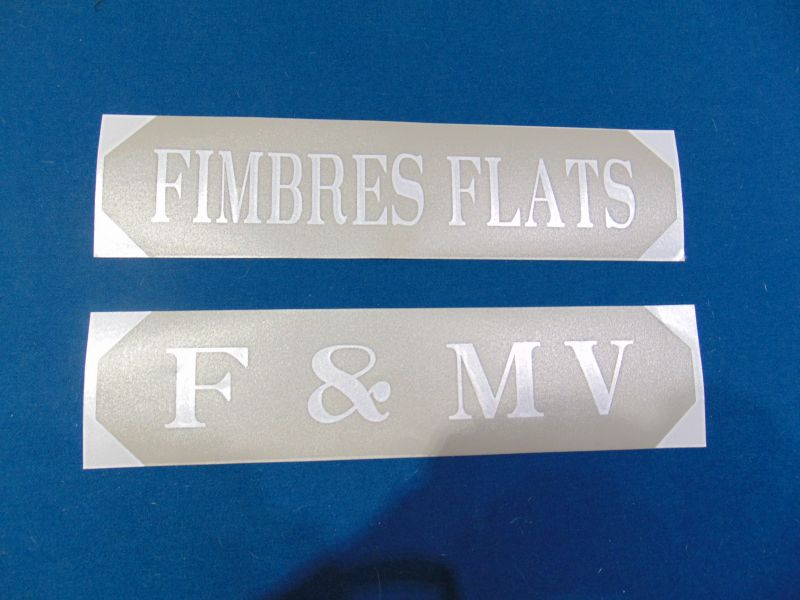
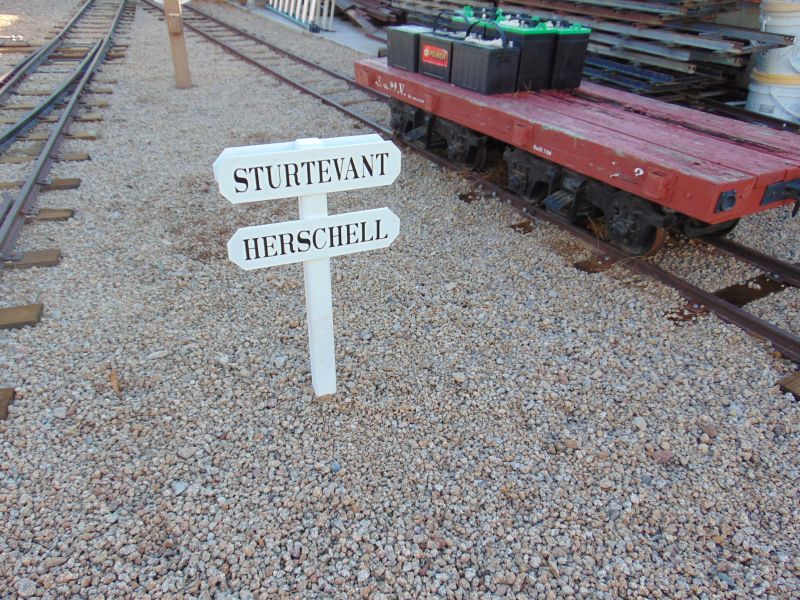
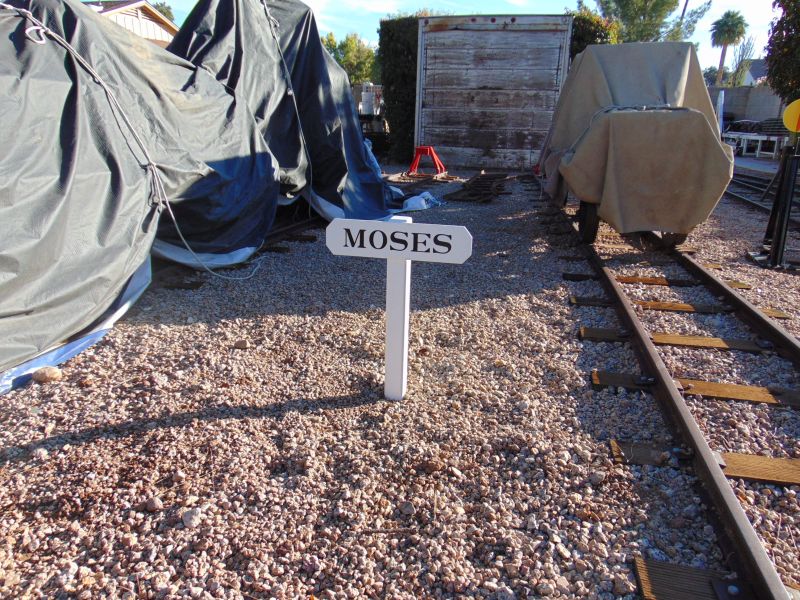
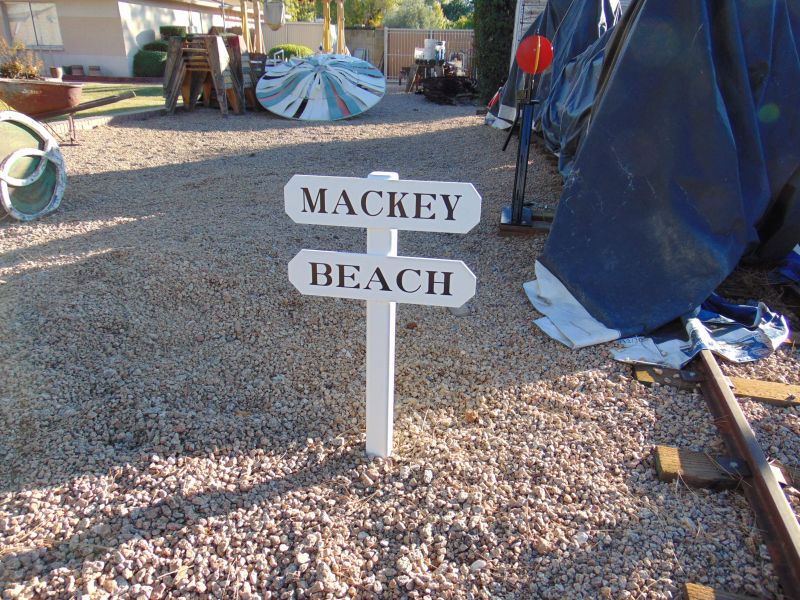
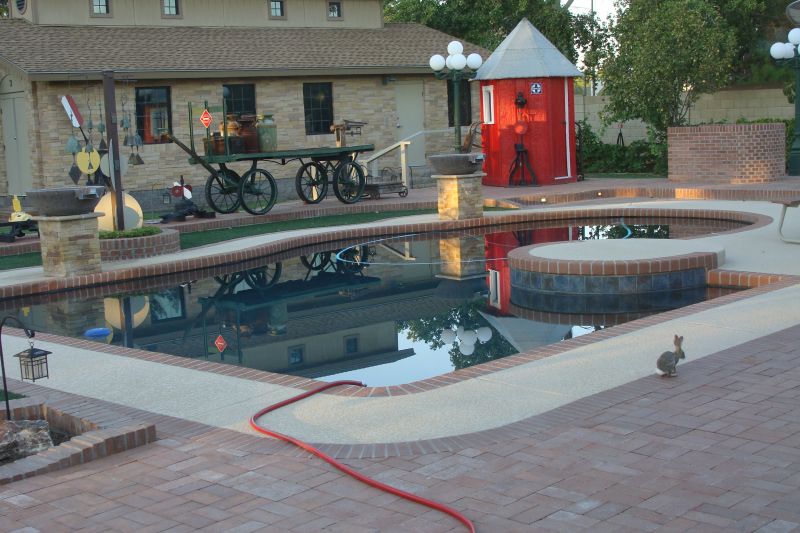
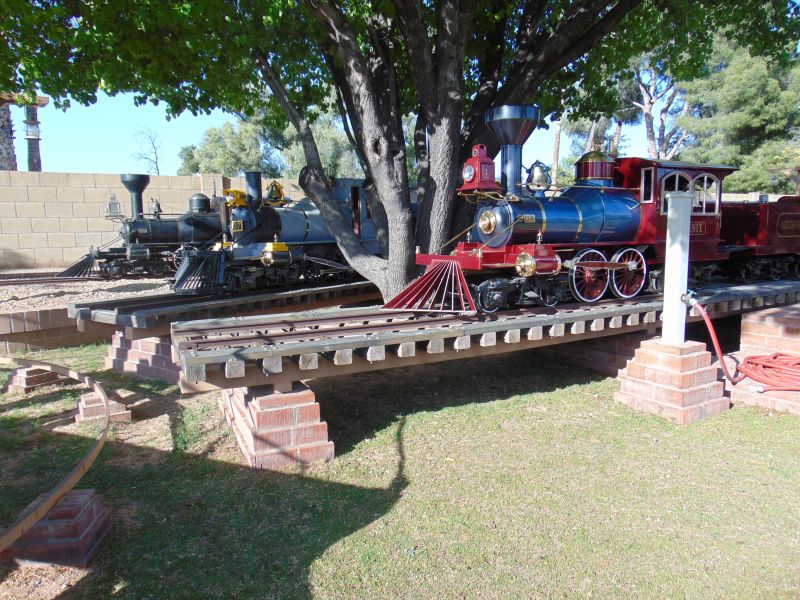
The six trestle signs were the first ones mounted and Rock Creek was the initial effort. We utilized stainless steel hardware to tie the upper and lower mounting plates in place. We have a total of 3 front yard signs on 3 posts and 31 signs on 16 posts in the backyard now in place. These signs have been a long time coming. We have been thinking and talking about signage for years. The trestles all had numbers and some were referred to by name, but the spurs, sidings and locations were hit and miss and some had a couple of different names over the years. We finally clarified and have formalized those names. Some of the names relate to early Arizona railroad locations such as Del Rio Tank and the Bradshaw Boarding area, others to historic figures in the park train world Sturtevant and Herschell named for Paul Alan Sturtevant and Allan Herschell. Some others are named for men that I respect tremendously that worked for MTC and later Herschell, George Moses and Bob Beach. Malcolm Mackey got me into this hobby and encouraged my efforts in many ways. Rabbit Rock was a location on the F & MV, Quail is a location at which many baby quail appear every spring from under the tarps that protect our MTC coaches from the elements. And the list goes on.
|

|
|
|
|
|
|
|
I was involved with Malcolm Mackey in restoring/replacing his wood signs on the F & MV over the years. Mother Nature was and is unrelenting in the Verde Valley of Arizona too. Malcolm’s overall railroad theme was of a narrow gauge Colorado Railroad (Rio Grande Southern) struggling to make it through the years of the great depression. He sought a weathered look and worked hard to make new materials look worn and distressed. At times, Mother Nature’s effects on his signs shortened their life cycle beyond what we had hoped. I have a few of the salvageable signs from the Flagstaff and Middle Verde Railroad on display in our engine house. Some are first generation and some second generation.
|
I elected to use powder coated steel for our signs on the A & P. In time, Mother Nature will win here too and the lettering will fade and need refreshed, but I am hoping to extend their lifecycle by a few years. As a homage to Malcolm and his Flagstaff and Middle Verde Railroad (the rolling stock and power units of which reside at the A & P) our signs are in the RGS lettering style.
|
|
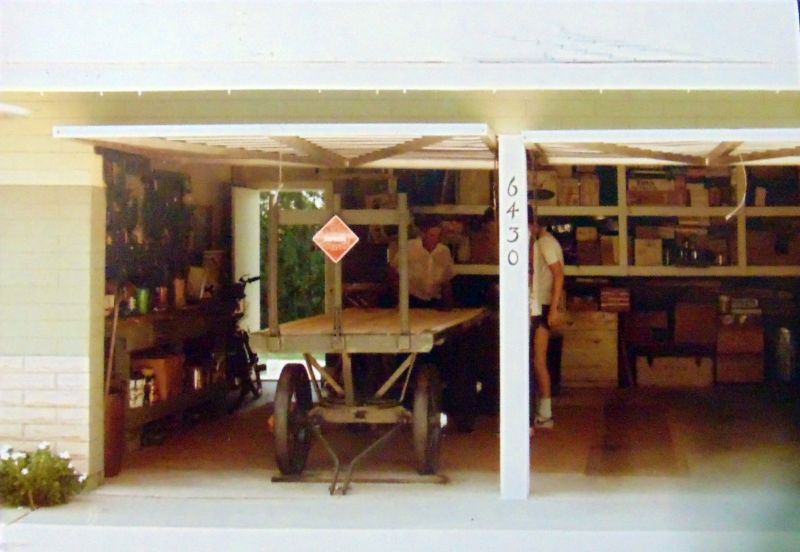
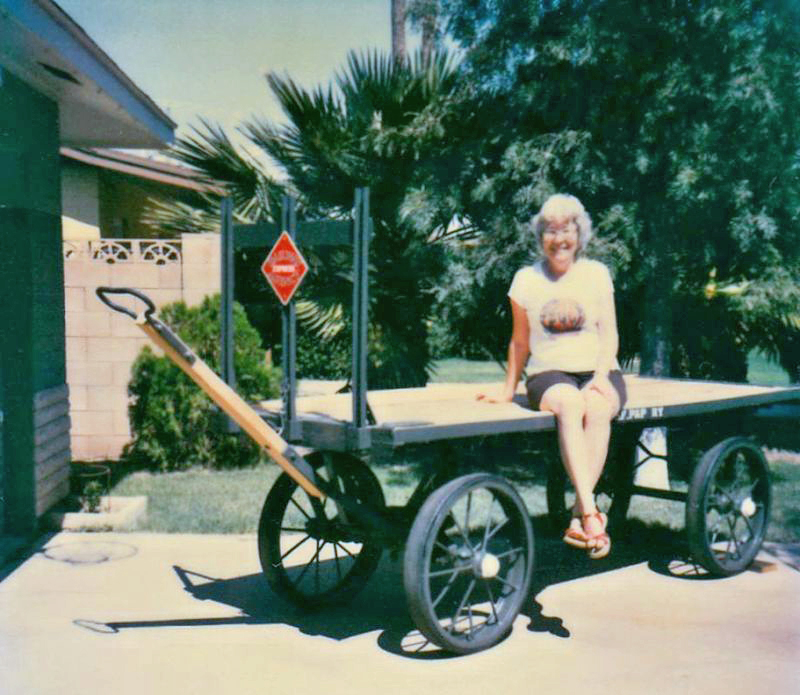
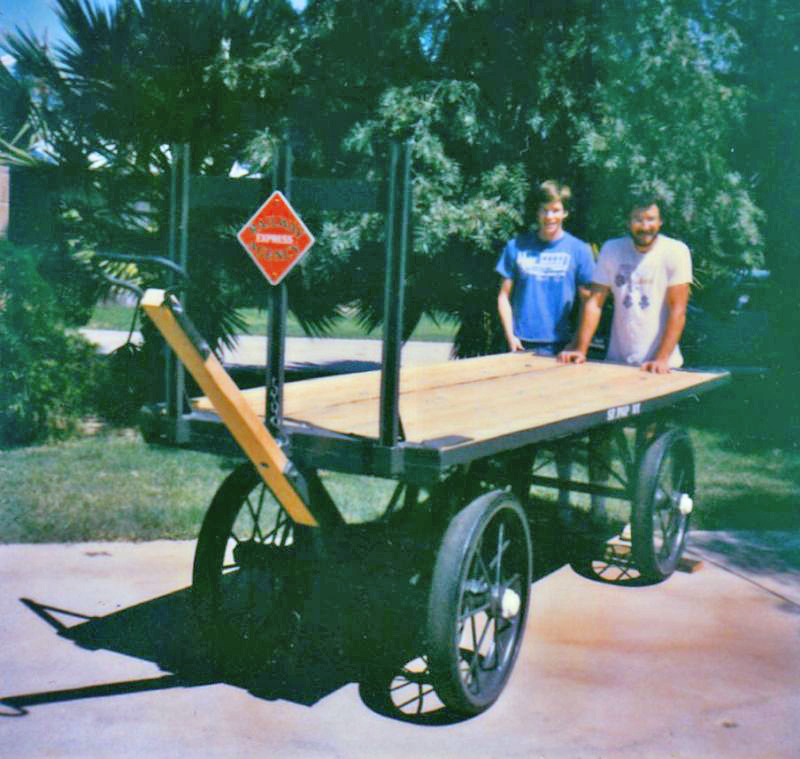
We completed our latest restoration of our baggage cart in October. We scraped, primed, caulked and painted the entire cart including the spoked wheels. We replaced two large support brackets that were repaired at some point with some very amateurish welding, stained and replaced the wood and replaced 90% of the hardware. The old girl looks pretty good for being roughly 100 years old.
|
|
We received most of our long awaited window springs and hood grilles for our post war G12 and late E10 last month. We will install them next month just to confirm the fit and finish and dress up the equipment on display in the engine house. We also received additional E10/G12 truck arches from the machine shop and I got them into and back from the powder coater mid-month. We also received 6 sets of E10 throttle and brake handles that I commissioned through our machine shop. Three sets mount with a set screw and three others are threaded into place. We have a couple of each on our current E10s.
|
|
I received news this month that our two reproduction G12 gas tanks are being produced and will likely be delivered before the end of the year. The fabrication of these tanks has been bumped numerous times as time-based projects for larger clients have been placed. I’m excited that these tanks are now in production.
We replaced the ignition switch on the Coconino with one designed for use with a magneto. We had her on the rails briefly before a hydraulic line failed and was spraying hydraulic fluid everywhere. I hope to get the hose removed, a new hose built and get it replaced in November.
We hosted several friends this month that visited the museum and got rides behind the Sandusky. Some were local and others from Colorado Springs. Everyone seemed to have fun and we may have a couple of junior engineers in the making.
|
|
Happy and safe railroading everybody!
11/28/23
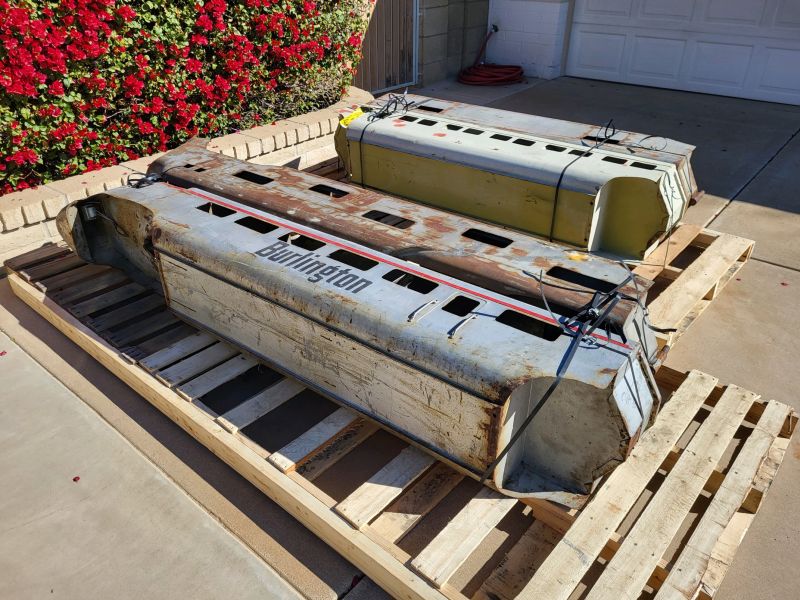
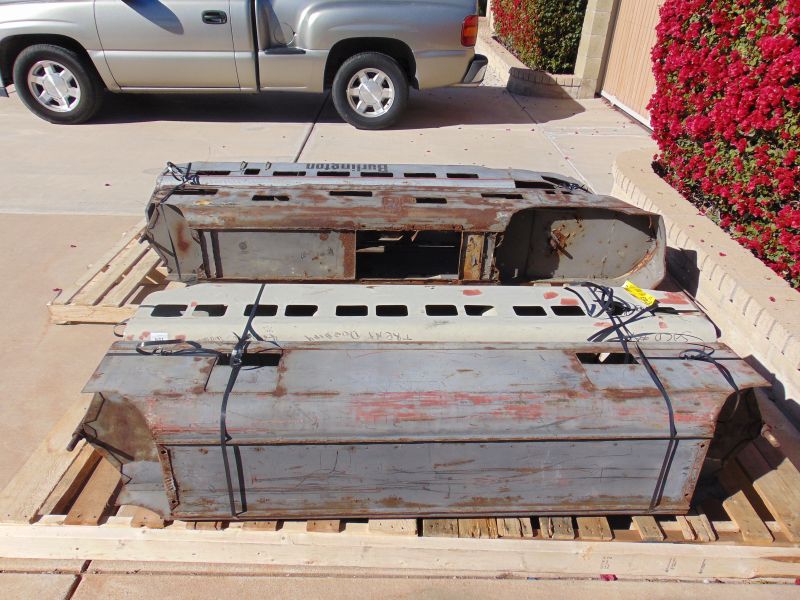
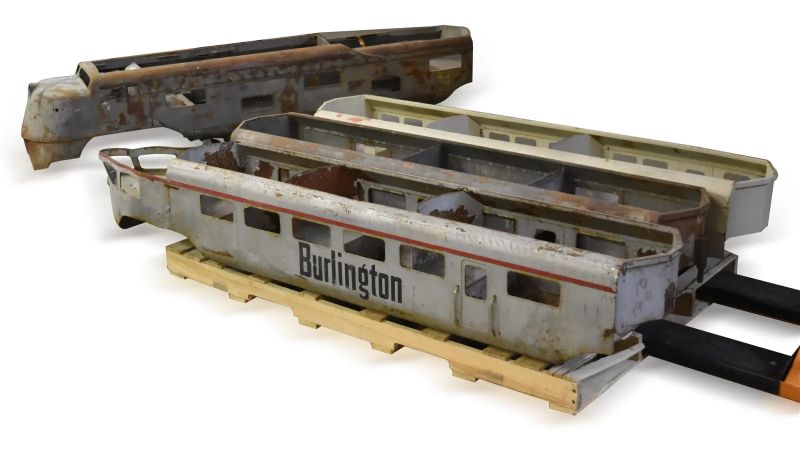
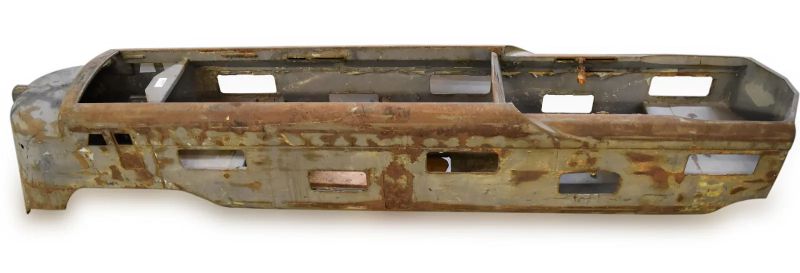
We started working on our post-war G12 ob car no. 168 – we removed 2 sheared off bolts in the top casting, repaired and reinstalled the ob end reinforcement panel and did a couple hours of preliminary bodywork around the ob end fender wells. It looks like a forklift or some other piece of equipment was used to lift this car at some point and it damaged the wheel wells, tore up the reinforcement panel and pretty much destroyed the rear seat. The “repair job” was poorly executed and may have been as irresponsible as the original damage. The vertical face of the rear seat on the Ob end was punctured and pretty mangled. The patch was welded in place by a beginner and not even centered. The top of the same seat had pinholes and was sagging in the middle. We cut the seat out and replaced the metal panels. We needed to use two panels instead of one. The front seam will be filled and finished by our body and paint man, we just rough things in and have the professionals finish it up. We replaced the four damaged grab irons with ones in nice shape. She was wiped clean and moved into the engine house with our other equipment waiting to go to paint and body.

|
|
|
We finished much of the painting the baggage cart and there will be some touch up. There is lots of square footage and many nooks and crannies. It has been very hot here so painting was completed a couple hours here and a couple hours there. The wood planks arrived and we ripped then to width, cut them to length stained them a very light gray and got the holes all drilled. We still have a bit of trim finish work remaining before she is completed.

|
|
|
|
We installed our E10 rack stands. The stands are a Jerry Graves design. They allow us to display a third E10 car on rack no. 3. The curves in the stands closely match those of the E10 wheel wells. We used truck arches to tie the new design in with the original MTC design.
Grab irons were cut, fit and mounted on our CA orange and yellow E10 observation car and our late version E10 coach, loco no. 20 and loco no. 24. The post-war G12s were much more consistent in size and location of the grab irons than the E10s, especially the pre-war ones. Grab irons were cut, fit and installed on our post war G12 ob car. They still need cut, fit and installed on two post war G12 coaches, two CA E10 loco coaches and E10 no. 45. We also test fit and temporarily mounted the original handles on the early version G12. They are very different than the post-war versions. They will soon go out for polishing and re-chroming.

|
We mounted the MTC breast plate logo on our post war G12 loco and also added its four grab irons and the headlamp bezel and lens.
|
We have the faux horns mounted on each of the five engines that are currently in the engine house. I have another set ready to go on E10 no. 45 when we start on her restoration.
|
I have been collecting the trim pieces for our E10s, G12s and G16s for many years, but as I have continued buying equipment the lists of parts missing and parts acquired are constantly changing. Keeping the lists updated is a job by itself. Hole spacing and the trim parts themselves changed slightly over the years of manufacture and means parts aren’t always interchangeable. It reminds me of that old Johnny cash song “One piece at a time”. When the parts are made over a twenty year period, they may not fit. I think his lyric said something about an “adapt kit”. Getting the parts tailored for and mounted on specific equipment is helpful in knowing what I have and will fit on which cars and what is still needed. We still have dozens of trim pieces and hundreds of window pieces to install. Seeing the old girls with all their trim is exciting for Dave and me. Yes, it will all come off before the equipment heads to paint and body, but will be tagged, bagged and labeled for its specific train, car and side and will be remounted upon its return.
We repaired the sheet metal damage to our E10 transition coach which has the smaller windows matching those of the G12 and utilizes the post war G12 window frames. We also riveted the truck pins to the car body.
|
We only received one of the two original cab side ladders for our pre-war Addison G12 when we found her. Our friend Russ Robinson, duplicated that ladder for the other side and he did a great job as it’s beautiful and an exact reproduction.
We repaired the whistle on the Coconino. Some moisture has caused the mechanism to be frozen in the open position releasing all the air before it actually entered the whistle. Everything is functioning again as designed.
The masks for our trackside signs arrived last month and we got started on them this month. We have a long way to go before they are trackside signs…
It is still hot here, but we had the Phoenix and the Coconino out and about the rails briefly stretching their legs. We are looking forward to cooler weather soon.
Happy and safe railroading everybody!
10/12/23
I approved the proofs for our first group of sign masks that Darrin Weddle and his team at Miracle Railroad Products in McAlester, OK have been working on. They should arrive in mid-September. I am looking forward to the next phase of that project which will get underway in late September or early October.
|
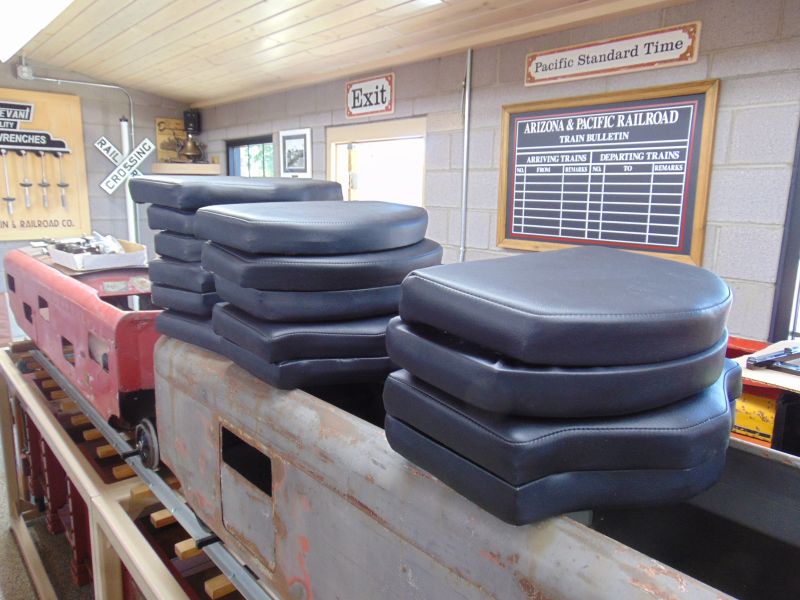
My neighbors, George and Tinker Fimbres, finished and delivered our next 10 E10 and G12 seats and, as always, they look great.
Our 16 E10 wheel tires were delivered this week and we matched them with an insulating ring and hub and got them pressed together. We have 21 wheels completed that just need a bit of bead blasting and paint work to complete them and have them ready for installation. We have a few extra wheel and axle parts just in case we take on another E10 project some day.
|
We built our prototype stands for atop our second E10 rack in the engine house. After testing them, we needed to make a design change and made those modifications and sent them back to the water jet vendor. The modified design is going to work well.
|
We have a depot baggage cart at the A & P that Dave and I got started on repainting the metal components and replacing the wood bed this month. We are replacing the hardware for the second time and there is a lot of hardware. The new hardware is on site and the wood will be ordered shortly.
|

|
|
|
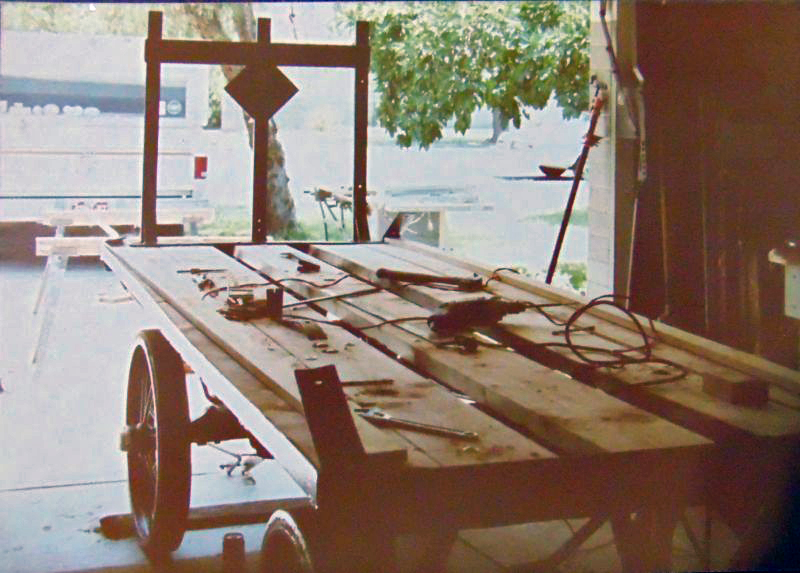
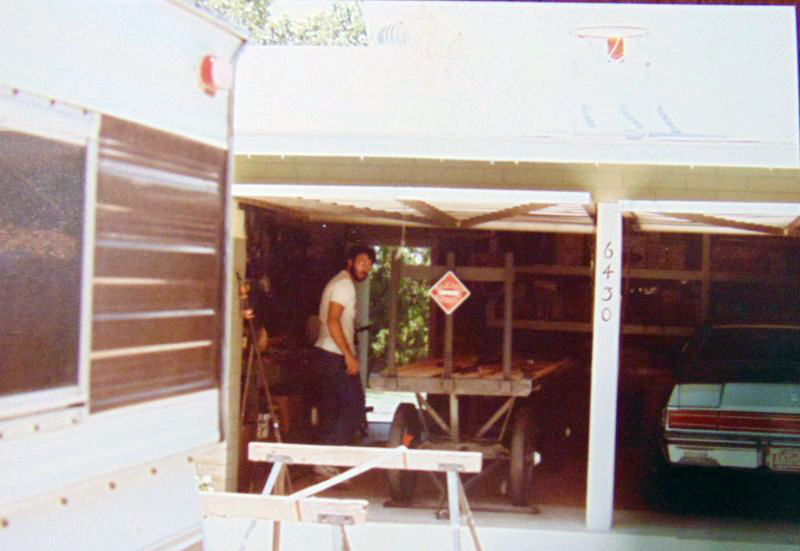
We had this old cart before we had the A & P. It’s an interesting story how she came to be here. I started work at a large insurance company in 1980. At the time I was writing articles about Arizona railroading and had two book length manuscripts I was writing about early Arizona railroads. One of the guys working a few desks from me at the insurance carrier approached me one day (circa 1981) and said I hear you’re a railroad guy. I responded that I hadn’t worked for the railroad, but was a huge fan. He said I might have something you would like to have.
He and his wife had just bought a house that for many years had been owned by a longtime railroad family. As the story went, the prior owner retired after 50 years in depot work with the railroad and it gifted him a baggage cart. It sat in the backyard for many years. He passed and then his wife and the house went up for sale. He showed me photos of this baggage cart sitting in the corner of the back yard. Only a few pieces of wood remained, one axle was badly bent, a wheel was damaged and the metal end of the tow handle was missing. My co-worker’s wife wanted a rose garden where it was sitting. He said if I removed it I could have it. The catch was I had to remove a couple of sections of wood fence panels to remove the cart and then replace them without any damage to the panels and it needed to be gone within two weeks or it was going to the scrap dealer. I said I was all in.
I enlisted my brother Dave, a high school student at the time, and a couple of our friends, one of whom owned a long bed Ford pickup, and the next Saturday we were off. I had no idea how heavy it was lol. We removed the fence panels carefully and without major difficulty. The baggage cart had been there a long time and the wheels had sunk in the dirt over the course of many rainy seasons and we had difficulty getting them free. The bad wheel and axle created difficulties rolling it and the end of the handle was missing so pulling and steering it was an adventure. We persevered and finally got it out of the backyard and into the alley behind the fence. It was much heavier than anticipated and lifting it high enough to get the first end and then the second end into the truck bed of a high riding truck was not an easy task. It was too long to fit in the bed and the rear set of wheels sat precariously near the far edge of the open tailgate. We didn’t have any professional tie down straps, just some rope and tied it down the best we could. We carefully replaced the fence panels and we were off across town.
All was great until we got to an overpass where the road went up and over the railroad tracks. As we started up the overpass the weight of the cart pulling and stretching the ropes while Dave and I were holding onto the cart trying to keep it in the back of the truck almost had the cart and both of us laying in the street. Just as it was about to get really ugly we crested the overpass and all the weight shifted the other way and helped us get the rear wheels fully back onto the tailgate. We were crazy lucky we didn’t kiss the asphalt and maybe get run over in the process…
I was still living in an apartment and didn’t even have a place to put it. My dad allowed me to temporarily put it in his garage. Dunbar Spring and Steel straightened the wheel and axle for me, my dad made an axle cap out of epoxy resin, an old college roommate with access to a blacksmith shop and crew had a repro of the original metal handle made and Dave, dad, friends and I cleaned up and painted the metal frame and chassis and replaced the wood based on old photographs. We have had her roughly 42 years and this is the 4th time that we have repainted her and replaced the wood. She has had several more coats of paint than that. The upper portions have had various shades of green over her years. The undercarriage was originally red with several coats of green over that. We scraped, wire brushed, caulked, sealed and primed the inside of the baggage cart frame where moisture collects and got started on the painting. We aren’t sure of her exact age. The very early ones had wood spoke wheels, then came all metal spoke wheels and then this version with hard rubber wrapping the metal spoke wheel. I have been told 1900 - 1920. She has been at the A & P since the beginning and feels like part of the family. We anticipate having her painted and fully reassembled late in September or early October.
|
|
|
|
|
|
We installed the faux horns on E10 no. 26. We also installed the drumhead, the rear driveline cover and the throttle and direction handles.
|
Happy and safe railroading everybody!
08/11/23
We moved our post-war G12 into the engine house this month and she will stay inside until she heads to body and paint. It is interesting seeing her sit next to the pre-war Addison version and noting all of the similarities and differences.
|

|
We received 12 of our 24 upholstered seats back from George and Tinker Fimbres late in June and they look great. As a result of a shipping mistake by one of their vendors providing seat fabric for a 1963 Chevy Nova that they are working on, our second group of 12 more seats was completed early and delivered in July. They are also working on a combination of 6 more E10 seats of various shapes and 4 more G12 seats of 2 different shapes and they should be finished in August. Once these are completed, they will have completed 99 E10 and G12 seats for us.
|
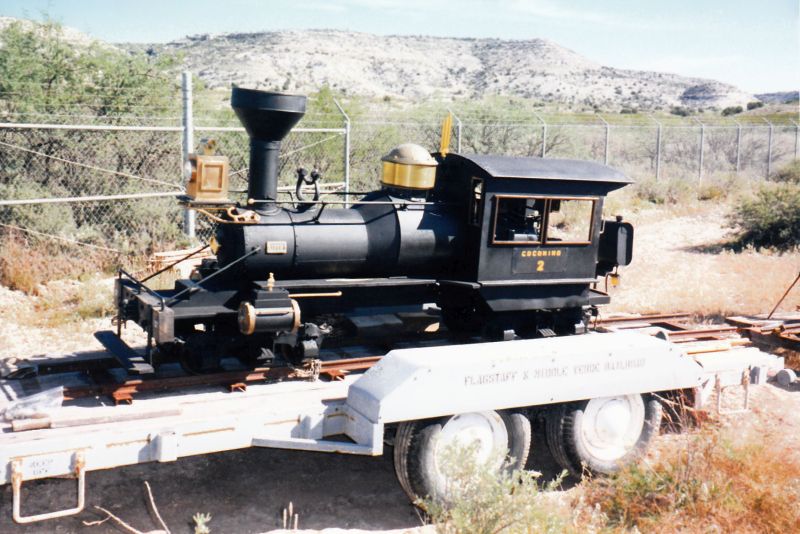
We started working on the Coconino. We replaced the battery, the fuel filter and the electric fuel pump. We also rebuilt the carburetor. For those of you that don’t know the history of the Coconino, she is no. 59-1866 and was the second S16 built. She started her life in an amusement park in Rye, New York. Our late friend Malcolm Mackey acquired her in 1991 and spent several years chasing parts to get her back together and running. She didn’t have her original Wisconsin VF4 engine (or any engine at all) when Malcolm Acquired her. Malcolm had two VF4 engines that each had issues and he delivered them to one of the two Wisconsin engine franchises in Phoenix and tasked them with building one good motor out of the two. The new motor was never right. The owner of the second Wisconsin franchise in Phoenix, Jerry Graves, was brought in as a consultant and determined the distributor rotor was incorrect for the reconstructed motor. That change solved the rough running issues, but the motor would overheat after running about 15 minutes in the Verde Valley at the Flagstaff and Middle Verde Railroad. Fast forward several years and the Coconino became part of the A & P stable of S16s.
|
|
|
|
|
She still regularly overheated after a few minutes of use in Peoria. We re-plumbed the hydraulics, replaced the hydraulic motors and re-geared the locomotive with no improvement to the overheating issue. A couple of years later, I burned up cylinder 4 when I overheated the engine. Cylinder 4 is the farthest from the cooling fan on the VF4 and usually the first one to incur damage. I had it rebuilt with cylinder heads from another VF4. The overheating problem was unchanged. A cooling fan was added and the exhaust was examined for a blockage and cleaned with no change.
This month we removed the distributor and coil and replaced it with a magneto and an ignition switch for use with a magneto. We have had 35 days of 110+ here and everything air cooled overheats at 110+. It may be mid-October before I know if we have the issue resolved. If the issue isn't resolved, the cam shaft may not be the right one for our Wisconsin. Hopefully, the magneto solves the problem as replacing the cam shaft is an expensive proposition.
We have 4 complete E10 trains and the power unit from a fifth. We have nos. 20, 24, 26, 45 and likely 48 or 49. We have 2 complete G12s (a very early Addison and a post-war 1947 model) and the coaches and an observation car from a third G12. We just need a third locomotive to have a third train.
We finished rebuilding our third and fourth gates and I think they look pretty good. Repainting the gate frames will be a next spring project.
|
|
We got a few more things done on E10 no. 26. We will soon remount our number plate to that instrument panel. It is the original plate, we just touched it up and clear coated it. The instrument panel needs wet sanded and clear coated again. The horns will be installed next month. The hood will be a fall/spring project.

|
We got our A & P logo plates reattached to our turntable. It has been a while and I missed having them on there. Thank you to Amanda Clack for getting the ball rolling on that project.
|
Jerry Graves designed the prototype for our new E10 display stands. We are having some 3/16 plate water jet cut and utilizing two of our reproduction E10 arches. Using these stands instead of trucks on the outside ends of the end cars allows a third E10 car to be displayed on the no. 3 engine house rack which is twenty feet long. We should have them back early in August. As with many prototypes, they may need some modification, we’ll see.
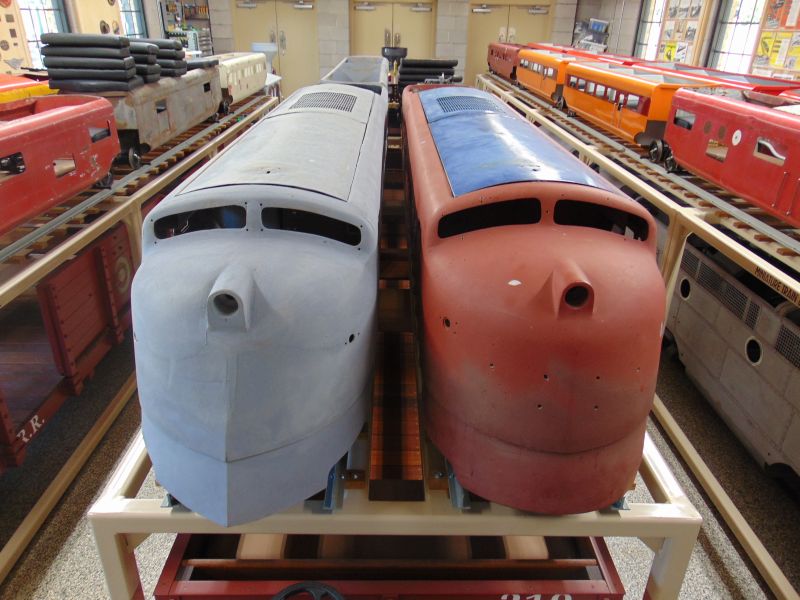
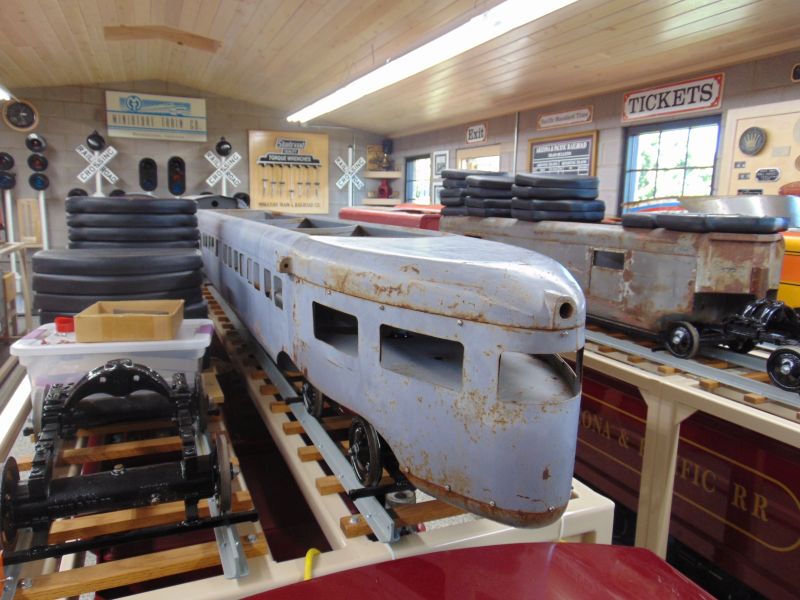
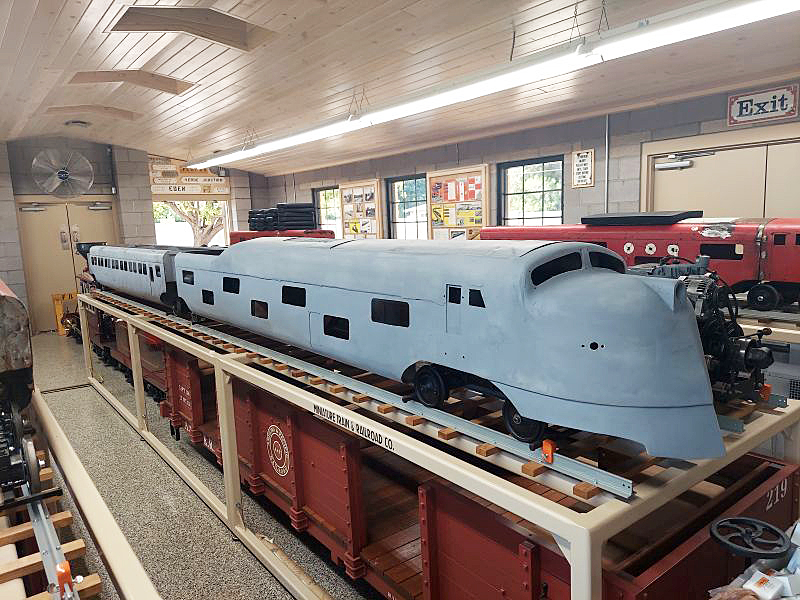
We got a great deal more work completed on our CA E10 locomotive including getting the two hoods properly radiused and fitting correctly. We rebuilt and mounted the two hood latches and mounting brackets and mounted the hood release rods. We filled several non-original holes in the instrument panel and straightened a bend and twist in the panel. We welded closed and re-drilled a dash mounting bracket that ran as we tried to drill out a sheared off bolt a couple of weeks ago. We primed and remounted the instrument panel. We also fabricated an electrical panel cover that was missing when we acquired her; we used the panel on no. 45 as a pattern. We also cut off a welded extension to the direction lever (F, N, R) and returned it to its original configuration. We moved our CA locomotive into our engine house where she will sit until she heads to body and paint.
|
|
|
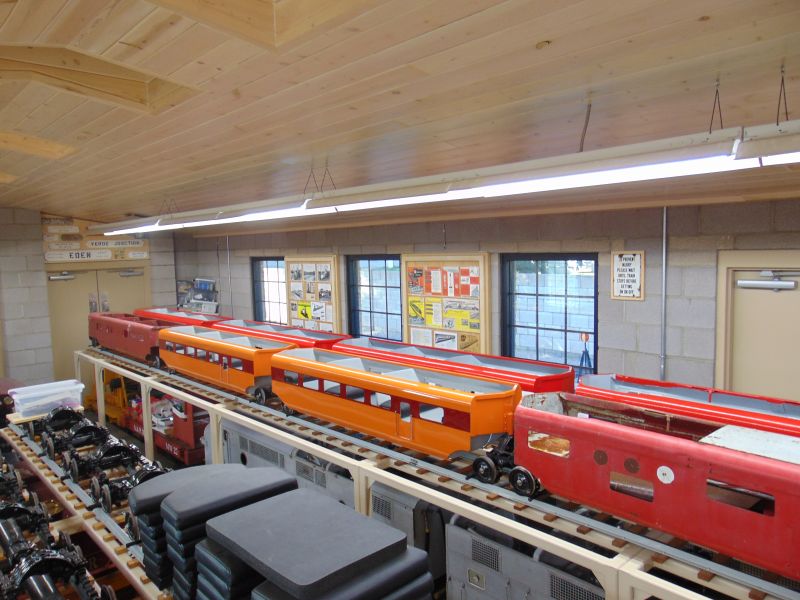
We still have 2 more pieces of equipment that will move into the engine house in the next few weeks. One is a late version E10 coach and the second is a 5 seat post-war G12 observation car. It is starting to fill up in there. We will have 13 pieces of E10 equipment, 4 pieces of G12 equipment and 8 pieces of G16 and S16 equipment in there; plus the track inspection car, two speeders and the track inspection flat car. We have 4 additional pieces of E10 equipment, 6 pieces of G12 equipment, 3 S16 locomotives and tenders, 3 G16 coaches and 13 other pieces of 16 gauge equipment that will be displayed elsewhere. I think that is 61 pieces of equipment that we are keeping for certain and some additional G12 equipment that we may eventually part out or sell. We may need to add a third layer of displays soon… just kidding. We need another building and if I keep working long enough and building supplies come down a little bit, we’ll build one in a few years.
Happy and safe railroading everybody!
|
07/21/23
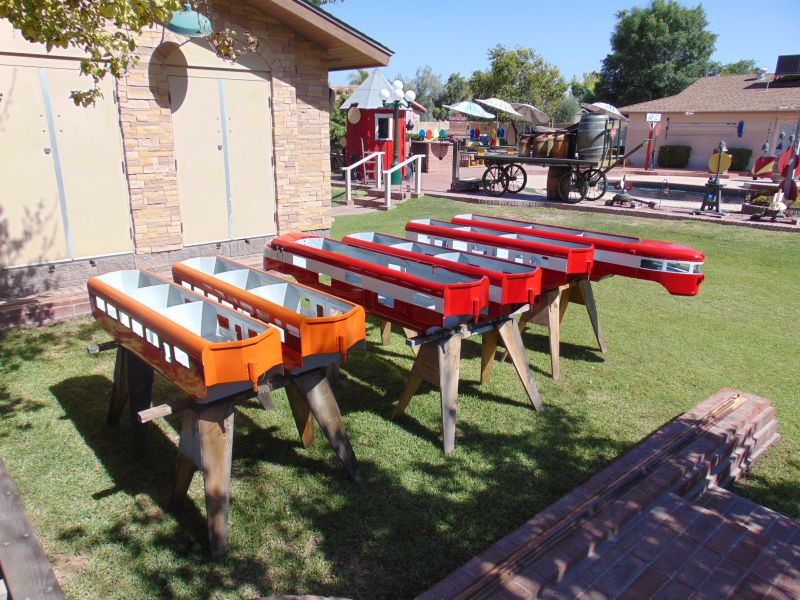
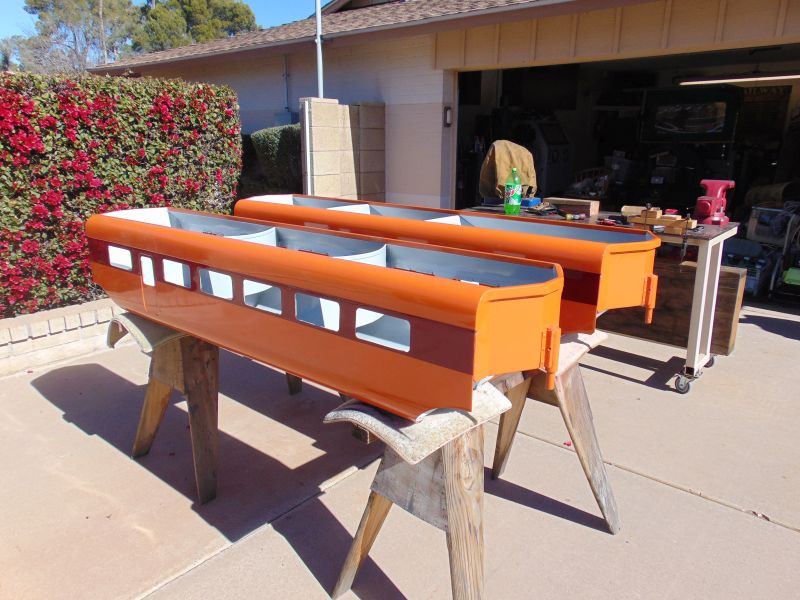
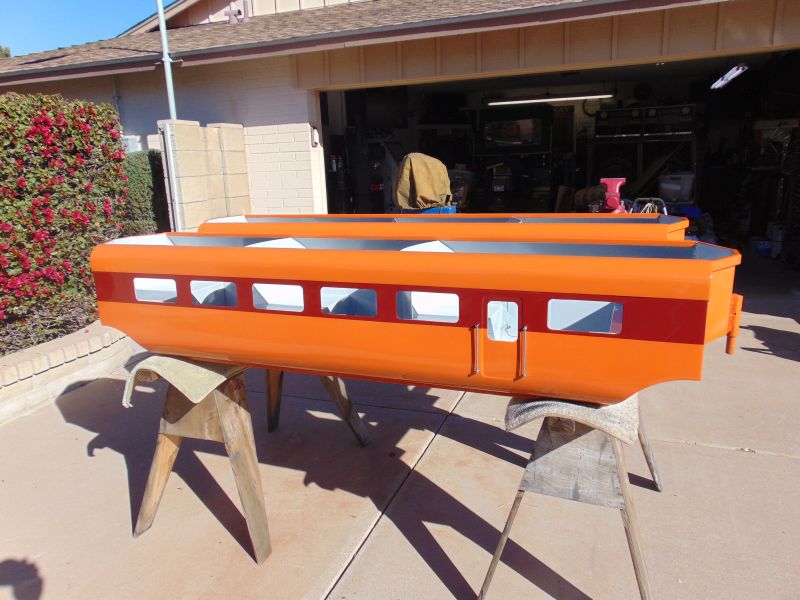
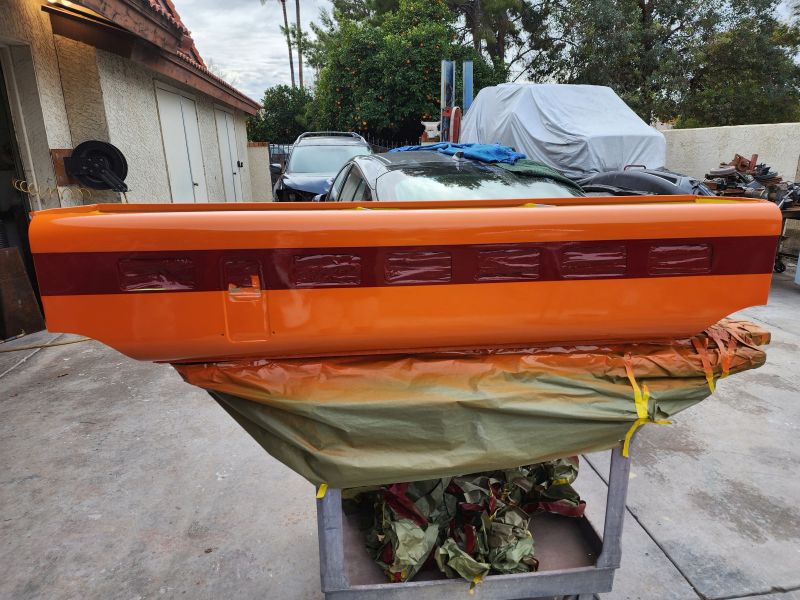
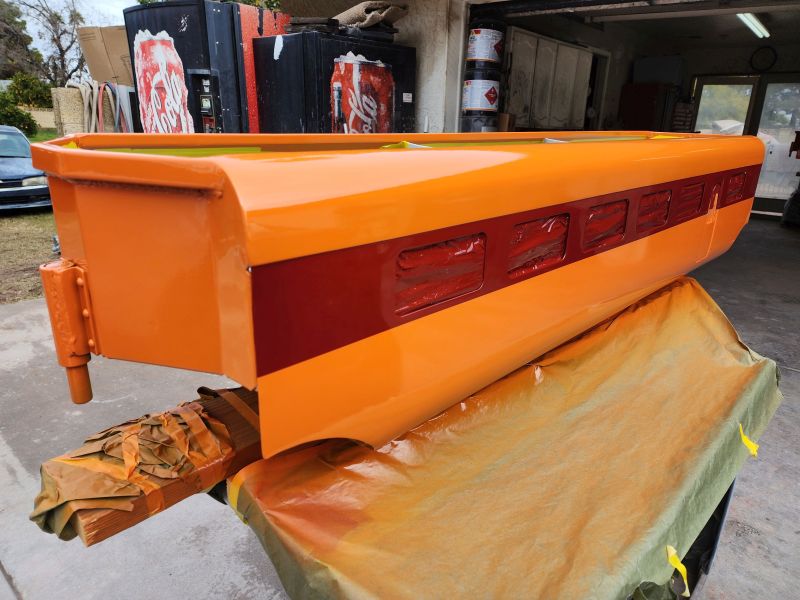
Scheduling has been an issue, but we finally got our painter out to touch up the red and white and orange and burgundy E10 trains. I damaged the paint on one of the cars moving it into the engine house, the locomotive paint I damaged drilling the holes for the cab horns. There were a couple of isolated clear coat runs on the orange and burgundy cars and the red and white observation car had a couple of areas with which I was unhappy. Our painter, Norm Clark, was over for several hours one day this month and worked on all six cars getting everything exactly the way I wanted them. The cars will get moved back into the engine house in a few days after the paint is good and hard.
|

|

|
We received our 12 E10 axle halves and 12 couplers from the machine shop. We received our 5 wheel hubs previously. We await completion of 15 tires and 25 more truck arches. We should have everything onsite in late July. We used two of the axles halves to complete the final axle assembly of the last truck of our California E10. We will get that truck reassembled accept for the wheels in July.
We were readying the Addison G12 observation car to head to body and paint as the Addison locomotive was set to return before the end of June and the ob car was up next. The Top and bottom cast plates both had sheared off bolts that we spent time removing – some more easily than others. We had a heck of a time getting two of the sheared bolts removed, but eventually succeeded. Update, the body shop guys that started on our Addison train are too busy with regular business and have returned it. They made some minor progress, but nothing major. It will be stored in the engine house until I can arrange to have the bodywork completed and paint work done by someone else.
|
|
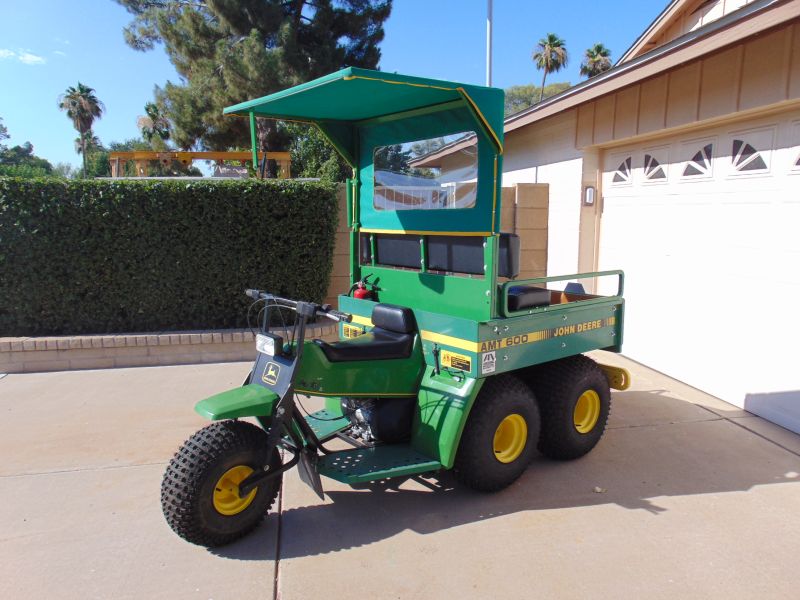
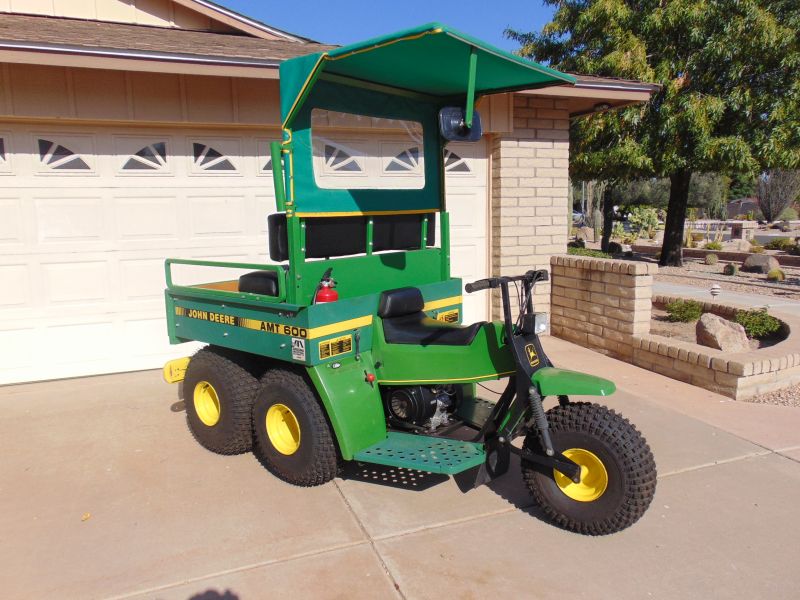
We got the 1986 AMT 600 of the F & MV Railroad running. We drained the old gas, rebuilt the carburetor, added a new battery and added fresh gas. A few adjustments later and she is running great.
|
|
We got the post-war G12 hoods adjusted and fitting like a glove and also installed the lower and upper bulkhead components.
|
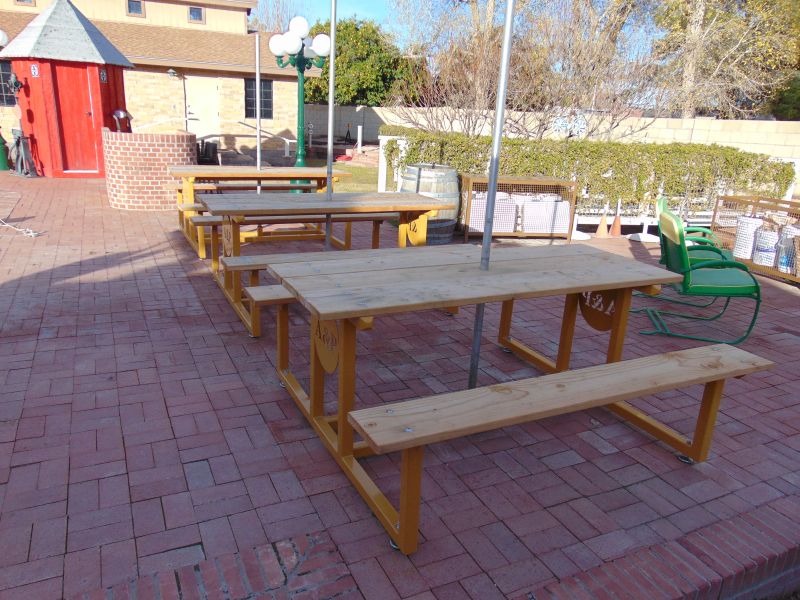
We finished the rebuild of our third and final picnic table. Mother nature is tough here, but all seven picnic tables should be in good shape for quite awhile.
|
We still need to get the Coconino running and hope to do so in July.
|
Work continues on our CA E10. Several more sheared off bolts were removed. We worked on the two hoods which were mangled in previous alterations. We fabricated an original looking hood latch mounting bracket and reconditioned an original latch assembly. We will remove a number of restomod changes to the instrument panel. We will fabricate a new cover for the front electrical panel; we will use the one on Locomotive no. 45 as the pattern.
We had a rear driveline cover fabricated for E10 no. 45. She is a long range project, but is very similar to our CA train so we have panels to use as patterns to create all the missing panels on no. 45. I am so glad we were fortunate enough to acquire both trains.
We’ve finalized the naming of our trestles and various locations and are finally ready to move forward with our lettering. Many of our locations have been named informally for years and a couple of others needed a formal name so we all call certain places by the same names. I’ll get the masks ordered in the next couple of weeks.
We have at least ¾ plus tank of quality gas in each of our power units and the appropriate amount of Stabil mix in their tanks. I’ll make another trip up north in the fall and bring back enough quality gas to get each gas tank ¾ plus full. Most of the tanks are twelve gallons.
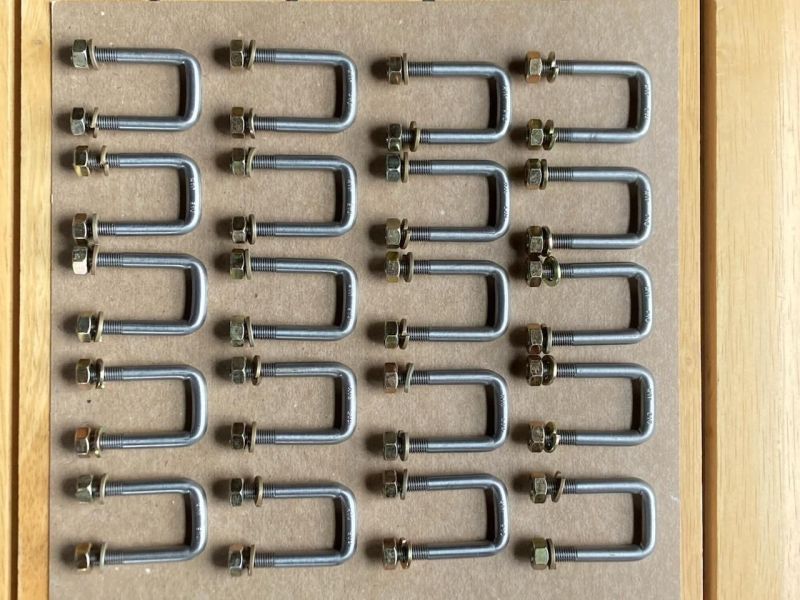
I was able to obtain a few more E10 leaf spring Ubolts this month and some very nice E10/G12 portholes. We don’t need them at the moment, but if another E10 becomes available you never know.
Dave and I have been measuring and completing early design drawings for three G16/S16 steaming bays that will access the turntable from the southeast. There may be a fourth bay that is G12/E10 dual gauge and set up for servicing that size equipment.
We are also designing a couple of stands that will allow an extra E10 car to be displayed in the engine house. I will provide plan photos of the steaming bays and stands as we get farther along in the design phase.
I have four gates on my property. One is a pedestrian gate, one is a RV gate and two are large rollback gates that allow trains to move between the front and back portions of the property. The weather here is unrelenting. Every four years I have been sanding, priming and repainting the wood in the gates and about every 10 years replacing the wood and starting over. This month I started replacing the wood with a colored wheat straw and recycled plastic product that they claim will retain its color and not crack in this environment for at least ten years. The RV gate and pedestrian gate are completed and I have the materials on site for the railroad gates. Dave and I need another couple of weekends to get everything cut, drilled and reassembled.
|
|

|
|
My neighbor George Fimbres and his son Tinker are working on the first of two groupings of 12 E10 seats and they will be completed early new month. We cut the ¾ inch thick plywood bases to size and the high density padding and material arrived a few days ago. Later this summer, they will complete the second grouping of 12 more seats.
|
|
Happy and safe railroading everybody.
|
06/30/23
Scheduling has been an ongoing issue, but we have a date set for onsite touch up on the red and white E10 train.
Although they are not yet on site, we have reason to believe that our 5 new E10 wheel hubs, 12 axle halves and several axle couplers have been completed and will be ready for pick up at the machine shop this week. Our 15 tires are still in process.
We are readying the Addison G12 observation car to head to body and paint as the Addison locomotive is set to return before the end of June and the ob car is up next. The Top and bottom cast plates both had sheared off bolts that we spent time removing – some were removed more easily than others.
We have the Phoenix running great. Like the others trains, we drained the gas tank and fuel lines and added fresh fuel. We also added a new battery, fuel pump and fuel filter and rebuilt the carburetor. We also worked on our transmission indicator light assembly and it is back in consistent working order.
|
We picked up a total of 24 truck arches from the powdercoater and got eighteen of them quickly installed on trucks. The first 4 went on the two E10 coach trucks that we’ve been working on the the next 14 went on G12 trucks. The truck arches are one of several parts that the E10s and G12s share in common.
We finished rebuilding the 7 brake vacuum canisters on the Tucson. It took about 3 more hours. Now she runs and stops great.
|
We have vacuum brake canisters on 5 of our 6 sixteen inch gauge trains. The other locomotive is gasoline/hydraulic and the hydraulic motors on the four locomotive axles provide the stopping ability. I hear some people complaining about the MTC vacuum brakes. I don’t really get it as they are easy to maintain and easy to adjust. The stopping ability is phenomenal and if slammed in full stop mode for an emergency, you may toss some folks over the seat in front of them. If you don’t properly maintain them or keep them properly adjusted, not surprisingly they won’t operate well…
MTC vacuum brakes are more susceptible to catastrophic failure than modern train brakes in which air pressure keeps the brakes from engaging and a catastrophic failure locks the brakes. Of course MTC trains weren’t 120 cars long and operating speeds weren’t 60 mph. I have never seen evidence of a catastrophic brake failure on a MTC train in which the brakes were maintained following the MTC service bulletins.
We also drained our old gas out of the G16 no. 582 and replaced it with new gas. We made a couple of carburetor adjustments and she ran great. Her battery had been on a trickle charger and it was in good shape.
We still need to get the Coconino and the Flagstaff and Middle Verde 1986 AMT running. The AMT was scrubbed up good and the five tires topped off with air. It should be running in late June and the Coconino likely in July.
We finished the rebuild of our second red picnic table and have the third and final table disassembled.
|
We cleaned and moved our E10 baggage car into the enginehouse where she will remain until she heads to body and paint.
|
We started cleaning up and repairing our CA E10. Several sheared off bolts were removed and we replaced several portholes that were missing. After restoration, we have several pristine portholes that will replace the ones on there now. The rear driveline cover had some awful looking brackets that were added by a prior owner that we cut off and cleaned up the mounting locations. The correct brackets will be attached in the coming weeks.
We also located the correct hood brackets and hood latchx2 in our parts department as well as four of the correct hood shoulder bolts. We hope to have the hoods assembled and mounted in July and this locomotive will also go into the engine house awaiting a trip to body and paint. The equipment in the enginehouse isn’t necessarily completed, but the grinding and welding work is done prior to relocation into the enginehouse. The cleaner assembly processes take place in there.
The donor hoods on our post-war G12 continue to receive attention. At some point in their lifespan it appears that something heavy was stored on them. The result was they were flattened somewhat and lost their original radius. The lack or original radius was an aesthetic issue, but also created a fitment issue. We explored several methodologies before Jerry Graves hit on the winning method. His technique got exactly the correct radius back into both hoods and they fit and operate smoothly in the locomotive body.
|
We were lucky enough to acquire a Lot of MTC rubber passenger car molding caps both left and right side. They are NOS and appear to be in great shape and still very supple. From the same source, we acquired a lot of misc. brake parts, spacers, axle nuts, etc. that are always good to have on our parts shelves.
We’ve finalized the naming of our trestles and various locations and are finally ready to move forward with our lettering. Many of our locations have been named informally for years and a couple of others needed a formal name so we all call certain places by the same names. I’ll get the masks ordered in the next couple of weeks.
I made it out to McCormick-Stillman Railroad Park one day mid-week this month when I needed to be in the east valley on business. It was a good crowd for a week day. I took a few photos and noticed what appeared to be another storage structure in the far end of the park. They’ve done a nice job depot-theming it. I took a few more photos and had to head to a meeting a couple of miles away.
|
|
Happy and safe railroading everyone.
05/09/23
Our E10 rail from southern California arrived this month. Carlos and Vanessa Gomez delivered our E10 rail and track panels on their flatbed trailer and helped offload onto the driveway early one morning. It was great to meet Carlos in person and to see Vanessa again; they’re great folks. There are 65 complete track panels, 15 partially disassembled, but with all the components and numerous sticks of straight and curved rail. Most of the rail is in great shape and has the track connectors in place. A few will need some work, but I am so happy to have it all here. We added this track to the existing E10 track on the rack that we built for the purpose. There are a few track panels that exceed the capacity of our large rack which as a friend pointed out is a great problem to have. In the future, we will be building a similar rack to store our G12 track which is currently scattered and stored in four locations in the back yard. For those of you that are unaware, aside from the different gauge, the E10 T rail is slightly smaller that G12 rail, is insulated from the ties in the track panels and utilizes very different rail connectors.
|
|
|
As many of you know, I have been disappointed with the pace with which our E10 and G12 projects have been getting through body and paint. I have six pieces of equipment back in three years. I have engaged a second shop that believes they can deliver a coach or locomotive every forty-five to sixty days. I started them with our pre-war Addison G12 locomotive. It was picked up on April 5 and is scheduled to return to the A & P in late May. It is a blue and white paint scheme. We’ll see how they do. They are off to a good start as a prior owner had performed some awful Bondo work where the front pilot meets the nose. This body and paint group cut the pilot off the nose, ground and sanded both clean and welded the pilot back in place. It looks so much better already! If the final product meets my expectations, the Addison observation car will follow and then the post war G12 locomotive and then its observation car. The four coaches will follow. We are hopeful to have six of the eight G12s pieces of equipment completed and a couple more orange and burgundy cars painted and back here by the end of the year.
|
|
We received 20 truck arches back from the machine shop and I got them to the powder coater. They should be ready for pick up early in May. We still have forty more truck arches to go to the machine shop, but I want them to fabricate our E10 wheel hubs, axles and tires first. We received the first 5 wheel hubs back from the machine shop and are awaiting 7 more. Several E10 coach axles and tires are being fabricated and we hope to have the wheel hubs and tires on site by the end of May.
Most of our equipment was inactive for three years as a result of the passing of our mother and the need to replace our ground contact ties as they had outlasted their useful lifespan after 25 years and our efforts to replace ties here and there was generally unsuccessful. Ultimately, our track was removed for our massive tie replacement project in which all ties with ground contact were replaced. As the result of their inactivity, our five gasoline powered S16s and G16 needed the old gasoline drained, carburetors rebuilt, the fuel cleaned and new batteries purchased and installed. The goal is to have all the equipment back up and running by our October 1 fall running season. We have acquired a 55 gallon metal drum for the old fuel and its safe and responsible disposal at our next city drop off event. I also acquired a 30 gallon plastic drum and a friend of mine who lives outside Maricopa County purchased fuel without ethanol and visited twice as these trains do so much better on old style gasoline than the newer fuel mix with all of the additives.
We got the old gasoline drained out of the Phoenix, Tucson, Coconino and Red River. The fuel in our G16 no. 582 and our 1986 AMT will be drained in May. We rebuilt the carburetors of the Tucson and Red River and purchased new conventional batteries for them as well as the Phoenix. The Tucson also needed a new ignition switch and new plug wires as varmints had apparently found the prior ones quite tasty. The Red River is running great. The brake canisters on the Tucson had all taken “a set” and were leaking badly. Rebuilding vacuum canisters isn’t rocket science, but it does take patience and sound planning and preparation. It takes about 35 minutes to remove each canister, rebuild and replace. The eight on the locomotive and one on the tender have been completed. We will finish the remaining seven on the tender in May. The motor sounds great running in neutral. In May, we will focus on the same activities on G16 no. 582 as she and the Coconino will get a new battery and the Coconino will get a magneto.
|
|
Amanda continued her work at the A & P this month by washing the Phoenix tender and polishing its brass. She is planning to wash the Mackey tank car and the ditcher. She is going to paint the lettering on our logo plates mounted on both sides of our turntable in May. I’m excited to get those logo plates back up there.
We started readying one of our engine display racks in the engine house for the return of our pre-war Addison G12 early next month. I’m really excited to get that locomotive back here.
|
We received the Ubolts and plates that I ordered for the spring pad assemblies of our E10 coach trucks. We completed assembly of two of the three coach trucks and just await the truck arches to get back from powder coat and need to add the wheels. We still have some cosmetic work and the wiring to complete on the two drive trucks and the wiring on the power pick up rear observation car truck.
|
|
Dave and I finally got the eight turnbuckles on the turntable sanded and painted.
|
We continue our work on the red topped picnic tables.
Happy and safe railroading everybody!
04/22/23
The college student daughter of one of my work colleagues was on spring break one week this month and worked four days of that week on the A & P. Amanda cleaned and dusted the engine house, polished the brass on the Sandusky and Phoenix, washed and detailed the Tucson and washed and detailed the Coconino. She also got started polishing the brass of the Red River. She did a great job and they all look amazing. She will work additional hours at the Arizona and Pacific as time permits the rest of the school year.
|
|
|

|
|
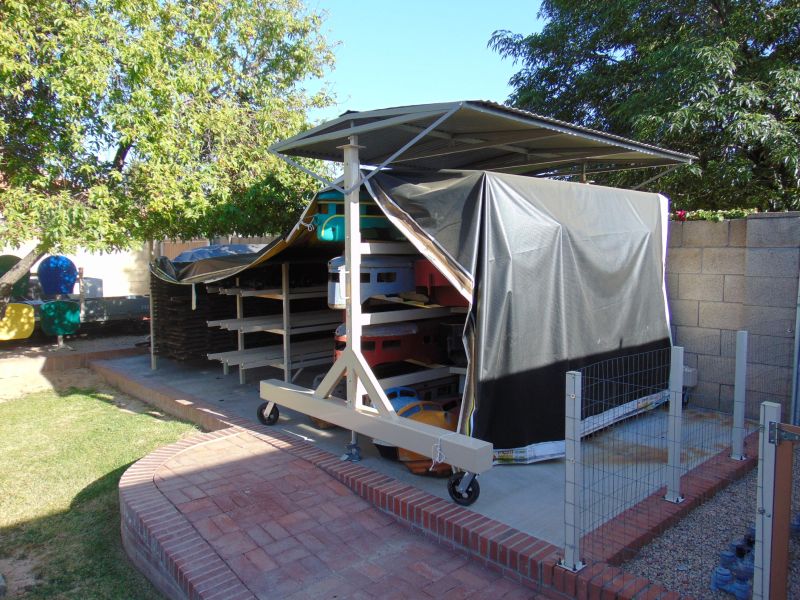
I had originally planned to have separate canvas curtains made to protect each side of the G12 Carvana structure as well as the G12 truck rack and the E10 rail rack. I had a change of plans and purchased a 10 x 30 foot billboard vinyl tarp. It covers and protects all three racks for weather, dirt and leaves that collect moisture. It isn’t quite as stylish, but is a lot less expensive and is practical. The thick vinyl has held up very well in other backyard applications here.
|
We worked several late nights this month on the conversion of the Sandusky from lead acid batteries to Lithium Ion ones. For a number of reasons not related to the Sandusky, we hadn’t had her on the tracks past the turntable in over three years. When I attempted to charge the batteries last week, not unexpectedly I found the batteries were shorted and dead. It took eight of the 6 volt lead acid batteries to complete our 48 volt system. Instead of replacing the eight batteries with new lead acid ones, I decided to utilize state of the art Tesla style Lithium Ion ones.
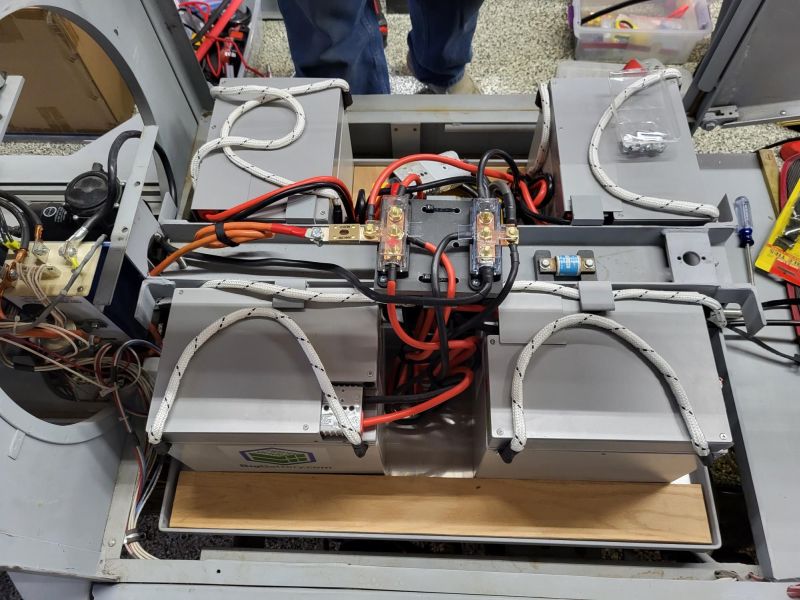
|
We vacillated between going with three or four of the Lithium Ion batteries. Each battery is 48 volts and with four we have 120 amp/hours. Dan Tack of Precision Railroad Products in Phoenix designed the electrical retrofit, sourced the components and completed the electrical installation. We had the electrical portion of the work completed in time for rides on the 18th and 19th, but we still needed to modify the battery tray for the new batteries which are much smaller than the original ones and add the charging port and a number of gauges. The system has a slick onboard charger, digital voltage read out on each battery and the ability to turn off individual batteries if the train will be out of use for an extended period of time. Another nice feature is the 10 year (non-prorated) warranty versus the three year pro-rated warranty of the lead acid batteries. The individual battery cost was about 4 times the lead acid cost, but I only need four batteries instead of eight and the warranty is 3+ times as long. I’m excited to see how they work out long term.
|
We made the modifications to the battery tray, installed the charging port, added a multi-display gauge (volts and amps) and made a few changes to the protective battery box to secure and protect the batteries the following weekend.
Big note to self: do not commit to give rides unless you are certain that you have equipment ready to run. We will be starting on each of our gasoline powered locomotives next month as each needs the old fuel drained, carburetors rebuilt, new fuel pumps and new batteries.
We had 6 passengers on 3-18 and 7 more on 3-19. We made about 30 laps.
|
|
|
We installed our re-chromed MTC emblem on the nose of locomotive 26 this month and I think it looks great on there.
|
The bearing retaining plates for our E10 coach trucks made their way back from the powder coater. I pressed in the seals and they are installed. The bearings have been pressed onto the axles and the axle assemblies have been completed. I ordered new ubolts for the E10 spring pad assemblies as the original ones were badly pitted and bent. The replacement ubolts will arrive in April and then we can get those trucks completed except for the wheels that are delayed at the machine shop. The wheel hubs and tires are both still delayed and it may be May or June before we have them here. Some of our E10 coach axle castings are very early TD-1 castings which is cool. Note the change to the final production casting with the change in location of the oil drain hole.
|
Our four new picnic tables have been completed except I am going to fabricate some steel corners to protect the seats from my puppy.
We replaced a table top board in one of our red tables and have some bolt replacement and repainting to be completed on two red tables that are in the other end of the yard from the new green ones. I ordered and we have the bolts and washers on site. They will all be in good shape by October.
|
Our G12 brake shoes are delayed at yet another vendor as is the next batch of G12 truck arches.
Dave cut out the seat bottoms for 17 additional E10 seat cushions. There are 4 different shapes; the end of car seats, the very early center car seats which had an uncomfortable straight across back, the later center seats which were ergonomically curved and the expanded engineer seats. As my neighbor gets the time, he will upholster them for us.
|
We still have an additional E10 coach and observation car that will need seats when they restored in the future; we will have those eight seats upholstered late this year or early next
I am having talks with a second body shop about painting our two G12 trains. Our pre-war Addison G12 locomotive and observation car will be the first two projects going to the new shop.
Happy and safe railroading everybody!
03/28/23
Our recent E10 acquisition in Indiana was originally scheduled to arrive here on January 31, but bad weather conditions in the Midwest delayed its pick up and pushed its arrival into early February. My recent experiences with trucking companies have been very disappointing with items being lost, badly damaged or delivery surcharges tripling the shipping costs. Hats off to ABF Trucking, they – got our train here, didn’t lose or damage anything, did it for the agreed upon price, had a delivery appointment and even arrived an hour early… They couldn’t have been more professional and courteous.
|
|
|
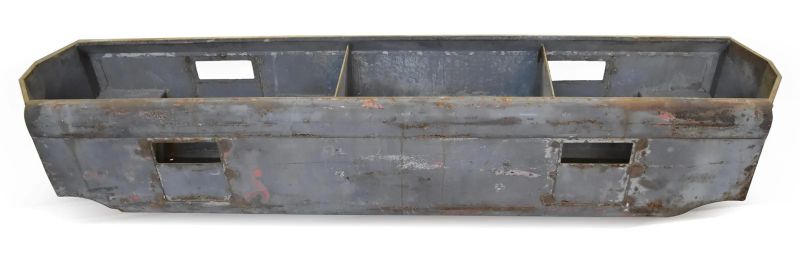
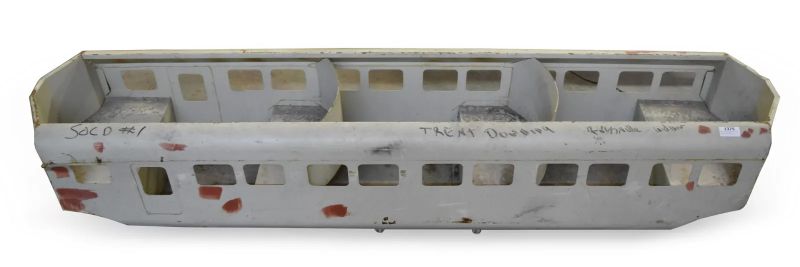
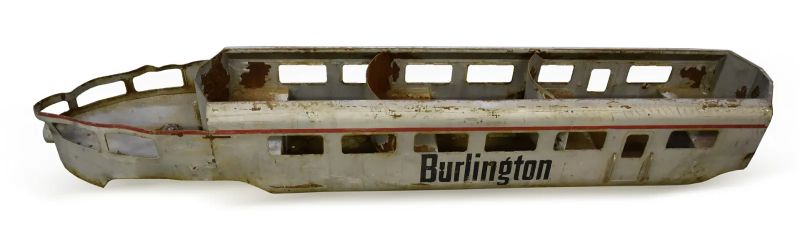
Our new E10 is no. 45. We acquired her in an auction a few miles from Rensselaer. The key acquisition in the lot is a rare E10 baggage car. I shared last month that I have only seen 2 and while I suspect a few more than that were built, I believe the number is less than 6. We also acquired a late style coach and an observation car in this transaction. They are bodies only. The observation car is missing its top casting and the locomotive is missing its two hoods and driveline cover. We can have the hoods and cover fabricated, but the top casting for the ob car is a tough find. We will also need to replace the front skirt of the locomotive. We are one drive truck short of having all of the trucks needed for these new acquisitions. If anyone knows of any E10 trucks, truck parts or wheels lying around anywhere, please contact me. I was able to locate a set of cab faux horns for no. 45 locomotive and also found a motor pan that is in very nice shape.
|
|
|
|
|
|
Dave and I completed the installation process of the first twenty G12 truck arches back from powder coating. We removed the leaf spring on one side of the trucks and added both arches and replaced the leaf spring. We added the U clamps and alignment bolts and added the wheels. We still have about 10 more G12 trucks to reassemble, but those twenty arches are still backlogged in machining. Once received, they will head to powder coating.
|
Our rack for G12 trucks has been powder coated and assembled. It will have canvas curtains on the east and west sides to protect the trucks once my neighbor has the time to cut and fit them. It will store and protect 30 G12 trucks at a time.
|
|
Our four new picnic tables have been completed. The tops are painted green and the seats are painted grey. Prior to final assembly, the seats were shortened by a couple of inches at both ends to make ingress and egress easier. We have repaired and mounted the 4 Sunbrella umbrellas from the 1950s.
|
We have some bolt replacement and repainting to be completed on two of our three red tables that are in the other end of the yard and a board to replace in the third red table. They will all be in good shape by operating season in October.
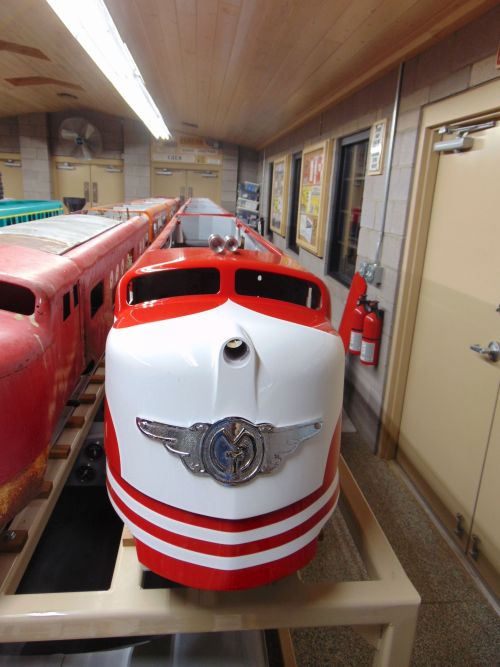
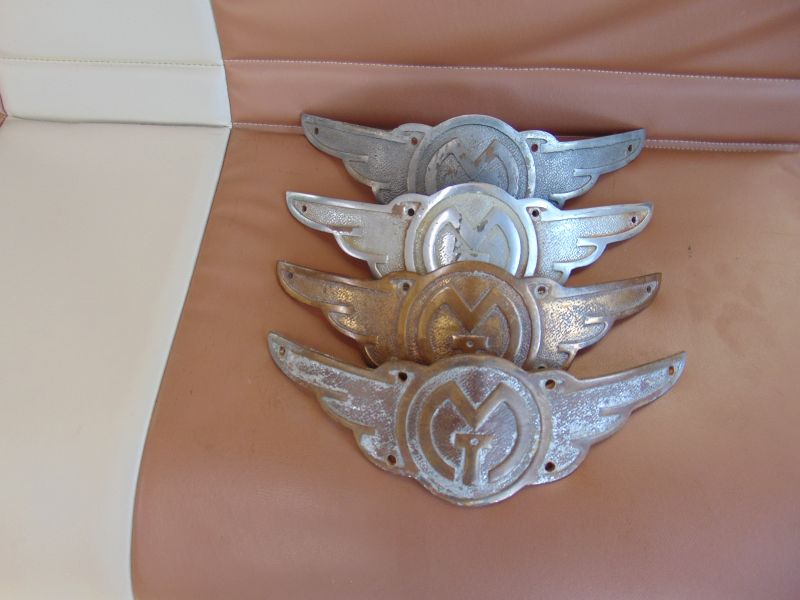
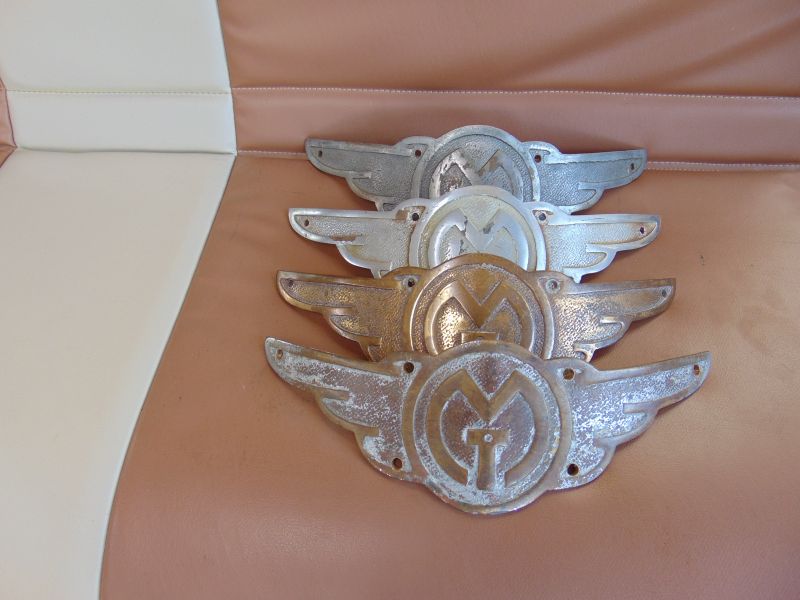
Our four MTC breast badges just arrived back from cleaning, polishing, de-chroming, re-chroming and re-polishing. They are brass that is chrome plated. They came out great, really great and look close to brand new. One goes on our red and white post-war E10, one goes on our post-war G12 and the other two go on other post-war projects. They really dress up the front end of the locomotives.
|
|
As the result of the extremely wet winter and our busy schedules, our E10 track is still in California. Realistically, it looks like April before it all gets over here.
Dave and I cut and fit several more handles for our train no. 20. It isn’t rocket science, but it is time consuming. Unlike the post-war G12s, there doesn’t seem to be a standardized template and the mounting holes vary in placement from car to car and side to side. The handles themselves vary in length randomly.
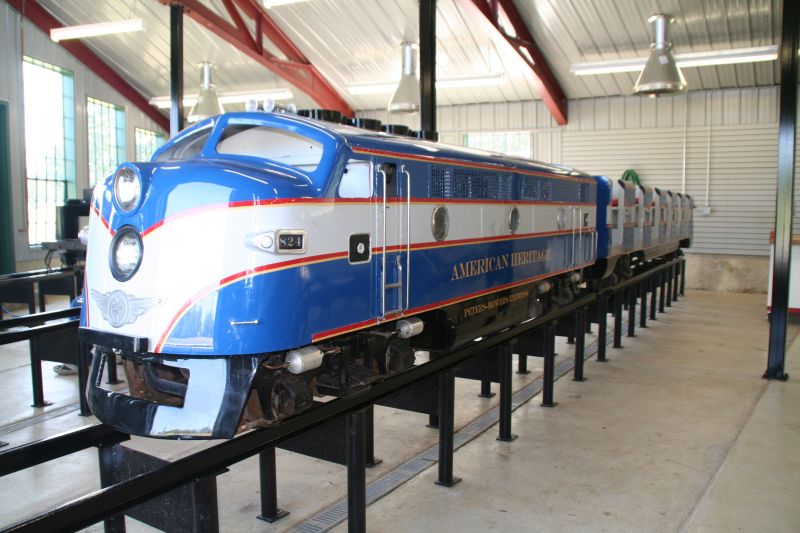
Derek Bennett, who is currently doing a beautiful job restoring MTC G16 train no. 580 (4) stopped by the A & P and we discussed plank bearings, MTC trucks and park trains in general. He is also an active member at the American Heritage Railroad in Greenville, IL near St. Louis. If things work out right, we may be able to visit the American Heritage Railroad and see their operation this summer. We first rode on its equipment back in 2007 when we attended the convention at the ATT & NW Railroad of John Woods in Steelville, MO.
|
We continue to work on our five California E10 trucks. All of the trucks have been completely disassembled and degreased. The two 2 power trucks have been rebuilt with new brass gears, seals and bearings. They await new hardware, painting, power truck arches, side frames, safety bars and wheels.
The coach trucks are all back from powder coating and if time permits, we’ll get the bearings pressed onto the axles and get the coach trucks reassembled in March. The wheel hubs and tires are still delayed and our powder coater is starting to get so busy that what was taking a week to get back is now taking three to four weeks. Coordinating when all the parts will be here and planning work sessions is getting increasingly difficult. Our 10 E10 wheel hubs and tires we ordered from our local machine shop are now on scheduled for delivery in late March or early April.
Our G12 brake shoes are delayed at yet another vendor.
Happy and safe railroading everybody!
02/28/23
We were lucky enough acquire another E10 locomotive variant body style this month and she is currently on her way out here. I will provide more information and photos once she arrives. She is no. 45. We also were lucky enough to acquire a rare E10 baggage car. I have only seen 2 and while I suspect a few more than that were built, I believe the number is less than 6. There are 4 passenger seats in the baggage car just like the coaches which also have 4 seats, but the seat back of the baggage car inner seats is straight across rather than curved like the coaches and likely not very comfortable. We also acquired a late style coach and an observation car in this transaction. They are bodies only. The observation car is missing its top casting and the locomotive is missing its two hoods. We can have the hoods fabricated, but the cast top for the ob car is a tougher find. I have a couple extras for G12 Ob cars, but of course they are a different size. We are one drive truck short of having all of the trucks needed for this new acquisition. If anyone knows of any E10 trucks, truck parts or wheels lying around anywhere, please call me.
Pat McCarthy an E10 owner from Pleasant Hills, MO and the Superintendent of the beautiful Big Spring & Southern Railroad (7.5 inch) was in town visiting family for a few days at the end of the year and stopped by the A & P to visit. We had the opportunity to discuss all things MTC as well as his awesome 7.5 inch projects. I also enjoyed visiting with his wife Ann and Hal the family rail dog. I am hoping to visit his railroad during his June meet this summer.
|
|
Peter Bryan from Taylor, Texas and a member of Maricopa Live Steamers was in town for the January meet and stopped by the A & P to check things out. We had a nice visit.
We continue to work on our 5 recently acquired from California E10 trucks. Two are power trucks, one is power pick up only and two are standard E10 trucks. All trucks have been completely disassembled and degreased. The 2 power trucks have been rebuilt with new brass gears, seals and bearings. We fabricated a spring pad assembly to replace one cobbled together in someone’s garage, rebuilt six leaf spring assemblies, built 4 safety bar assemblies for coach trucks and built four safety bar assemblies for power trucks to replace damaged ones. About half of the safety bars, spring pad assemblies, leaf springs, truck arches and axle housings are back from powder coating. The other half won’t be ready until mid-February.
|
I ordered 10 E10 wheel hubs and tires from our local machine shop and was originally told early February for delivery. They have been down two guys so now I am looking at mid-March.
I designed, and Jerry Graves improved, a rack to store 30 rebuilt G12 trucks that I will soon have completely refurbished and for sale. It is currently at powder coat, but should be ready for pick up early in February.
We finished the rough body work and assembly of our Addison G12 locomotive and she along with her matching observation car are ready to head to body and paint as soon as he has room in his shop.
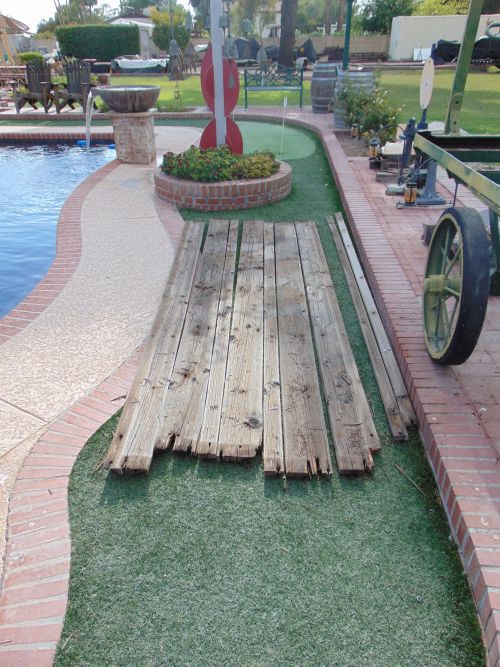
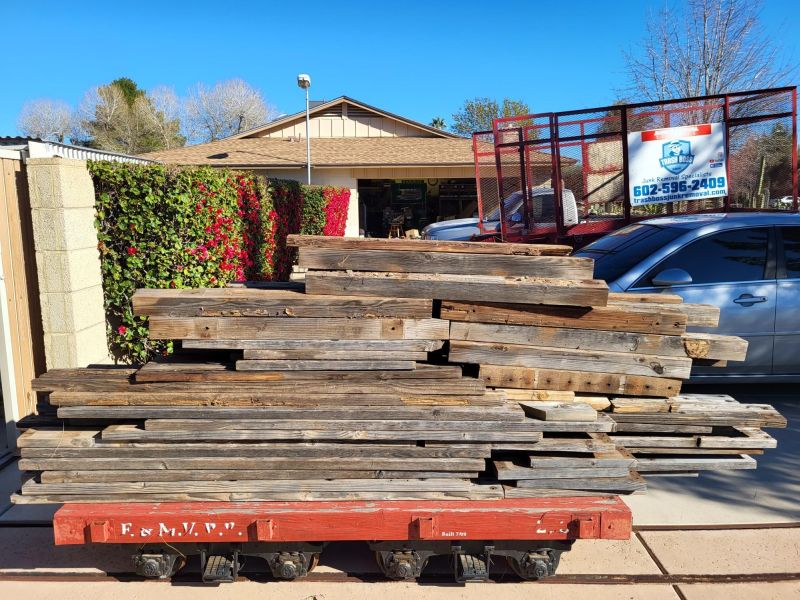
We finished our plank replacement work last month and my jack hammer work was completed a couple of months ago. We have had day after day of rain the last six weeks; I finally had a couple of dry days in a row and I commissioned a dump trailer that I filled with the piles of old wood planking and concrete chunks from Rock Creek. The concrete chunks were wheel barrowed to the trailer and I used our flatcar and loaded the planking on it to move that material to a few feet from the trailer. It’s nice to have that stuff out of here!
|
|
|
We mounted the decorative horns and handrails on locomotive no. 26. We still need to install the instrument panel and driveline cover, assemble the hood latch assembly and install the hood. We also have a bit of paint touch up work and assembly to complete on the locomotive and observation car before we start on the wiring of the locomotive and observation car, but progress is being made. We did got the drum head mounted and drilled and rtpped the observation car top casting.
The two coaches from our no. 20 train returned from body and paint. They are orange and burgundy and look pretty good. The holes for the handles were there, but the handles themselves were gone before we acquired these cars. Dave and I cut and fit polished stainless steel rod and replaced the handles. We also added the upholstered seats which had been completed several months ago. There are three more cars to this train that we hope to get into and out of body and paint this fall.
|
|
|
|
Dave and I started the installation process on the first twenty G12 truck arches back from powder coating. We removed the leaf spring on one side of the trucks and added both arches and replaced the leaf spring. We still need to add the U clamps and alignment bolt before we can mount the wheels. We still have sixty more arches either being machined or in powder coating that will return here in the next several weeks.
|
|
Our recent E10 acquisition in Indiana was originally scheduled to arrive here on January 31, but bad weather conditions pushed its arrival back into early February. I hope everything arrives in good shape. My recent experiences with trucking companies have been very disappointing so I have my fingers crossed.
Happy and safe railroading everybody!
01/14/23
We received locomotive 26 and its observation car back from paint and body the week before Christmas and they look outstanding. We still have plenty to do adding bolt on trim pieces windows and wiring. Two coaches from E10 train no. 20 are also ready to return from body and paint, but delivery challenges has pushed their return to mid-January. The locomotive from that train and observation car no. 20 will go to body and paint in January 2023 and we hope to have them back in April. We also hope to have our post-war G12 into and back from body and paint in 2023.
|
|
|
|
|
Our pre-war G12 and two cars of our newest E10 are 2024 projects and 2025 will conclude our E10 and G12 body and paint projects. Additional body and paint projects include our G16 AB, a S16 locomotive only and a S16 locomotive and tender to complete in the balance of 2025 and 2026. I am looking for a second shop that would complete the body work on our G16 and S16 projects while the current shop continues work on the E10 and G12 projects. It looks like I will be in corporate America 4 or 5 more years to have all these projects paid for before I retire.
Our recently acquired California E10 power trucks have been rebuilt mechanically. We removed all of the sheared off bolts in the castings. We rebuilt the mechanicals with new bronze gears, new axle bearings, new drive bearings and new axle and drive seals. We are still in the process of rebuilding the spring pads and safety bar assemblies. Seven of the wheels had much wider tires than the original specs and we turned them down on the lathe to the original specifications. Four of the wheels were in great shape didn’t need any work at all and nine we pressed apart and they will need new tires.
We completed rebuilding four spring sets and have started on rebuilding the spring pad assemblies. We have also gathered the parts for rebuilding several safety bar assemblies over the next few weeks.
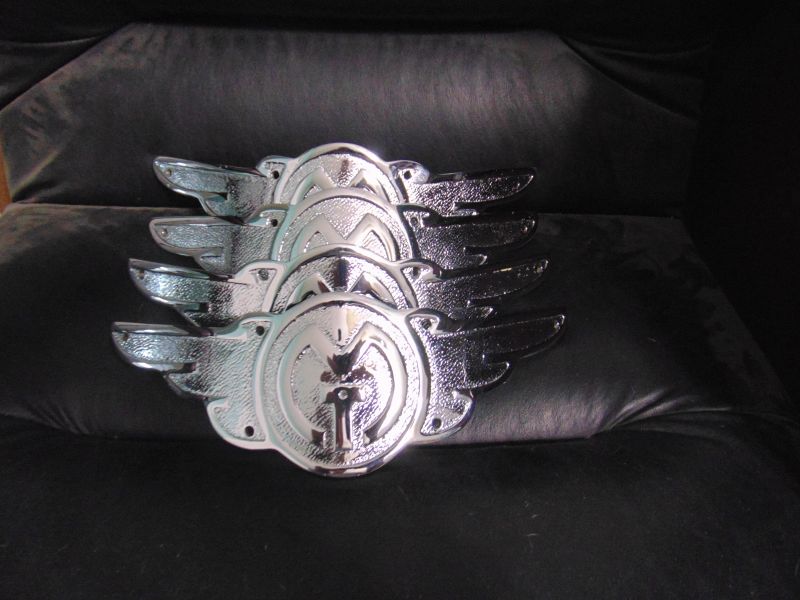
I have four of our MTC breast badges out for cleaning, polishing, re-chroming and re-polishing. It will be a few weeks before they are completed and ready for pick up. One goes on our red and white post-war E10, one goes on our post-war G12 and the other two go on other post-war projects. I am optimistic they will meet my quality expectations.
|
All of the wood has finally been cut, fit and mounted in our new picnic tables. The routing work on six boards comprising the tops of two tables still needs completed as does final sanding. The priming and painting work on two of the tables is just barely underway. The final work on the picnic tables has been delayed by our very wet winter out here. I had hoped to finish them over the holidays, but it was too wet to make that happen.
|
|
We completed the last of the plank work on trestle 5 and will start installing the trestle signage soon.
We have 41 truck arches at the powder coater and look forward to their return. Twenty-five more arches will return from the machine shop in January and will head to powder coat shortly thereafter. The last 15 of the castings will go to the machine shop in March. Once these 41 arches are on site, we can start final assembly of that number of G12 trucks. That entails adding the truck arch, mounting the second of two leaf springs and adding the four wheels. I am looking forward to seeing all of the G12 trucks completely assembled.
We made more progress on our Addison locomotive this month and she is almost ready for the skills of professional body and paint men to finish her sheet metal restoration. I am really excited to see how she is going to look once the professional body men get their hands on her. That raked and narrow pointed nose makes her look like she is racing down the track even when she is sitting still!
|
We have ordered the stencils for our track signage. Once received, we will complete and install the ones that attach to the trestle planking first and then start on the rest. The posts and bases are already complete and the signs just need lettering.
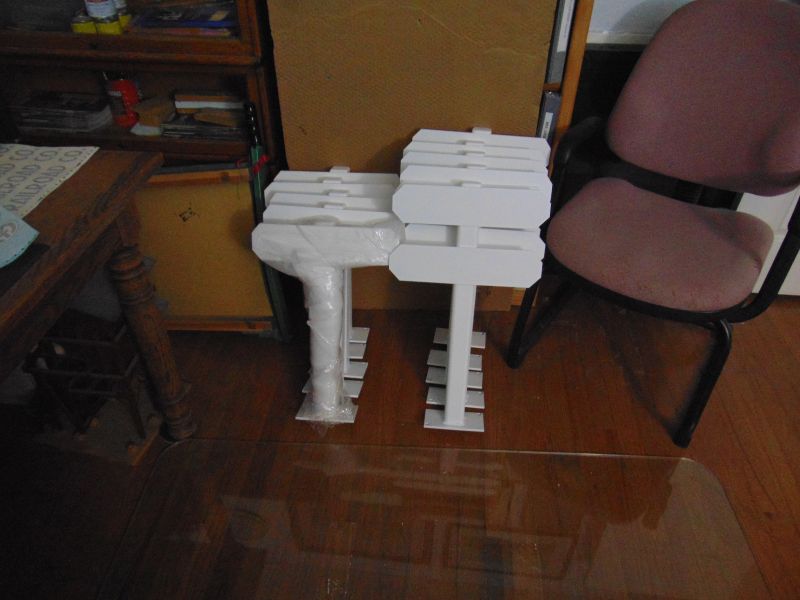
|
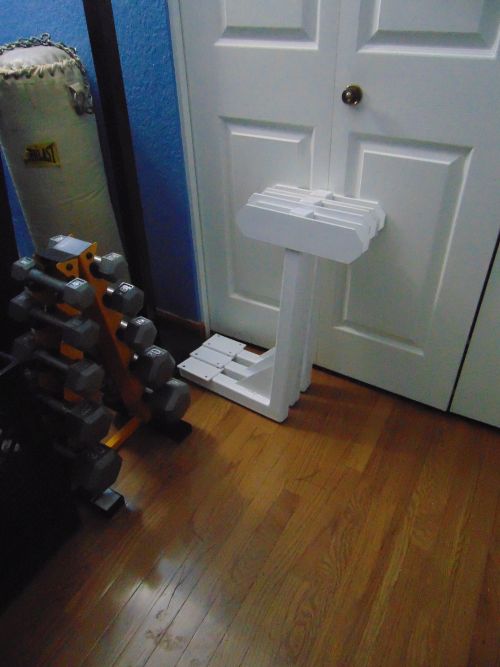
|
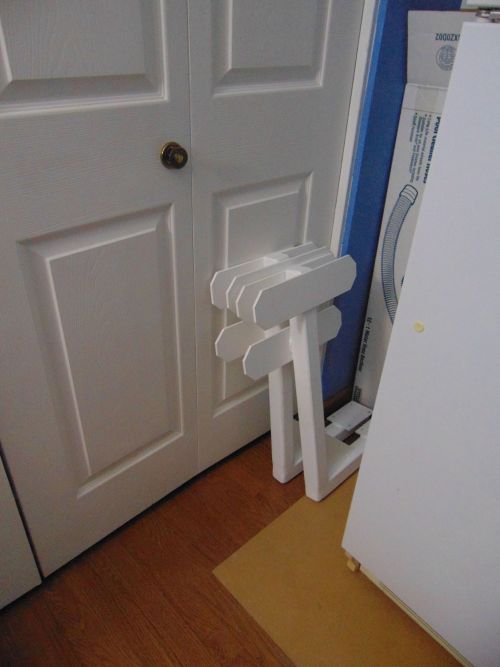
|
I know this is starting to sound repetitious, but we were lucky enough acquire another E10 locomotive variant body style this month and she is currently on her way out here to Arizona. I will provide more information and photos once she arrives. The only E10 variant we are still missing is the very, very early model (only 6 produced) and we continue in our efforts to locate one of them. We are also looking for a G10 if anyone knows of someone with either of these models sitting dusty in a barn somewhere please contact me.
Our E10 rail from our southern California purchase didn’t make it out here in December as everyone has been so busy. It’s early January arrival has been placed in jeopardy by heavy rain and the access issues that has caused. We hope to have it on its way soon.
Our agreement to acquire the surviving hand pump car from the Waterman and Western Railroad has fallen through and that piece of equipment will not be coming to the A & P.
We are in preliminary talks to electrify our two A & P speeders. The older gas engines in them (Briggs & Stratton and Tecumseh) have always been very difficult to pull start and that condition is magnified when they sit for prolonged periods of time without being started. It would be nice to just keep them charged and turn the key and play with them without all of the aggravation of the current engines. We may convert one and if happy with the outcome, convert the other later in the year.
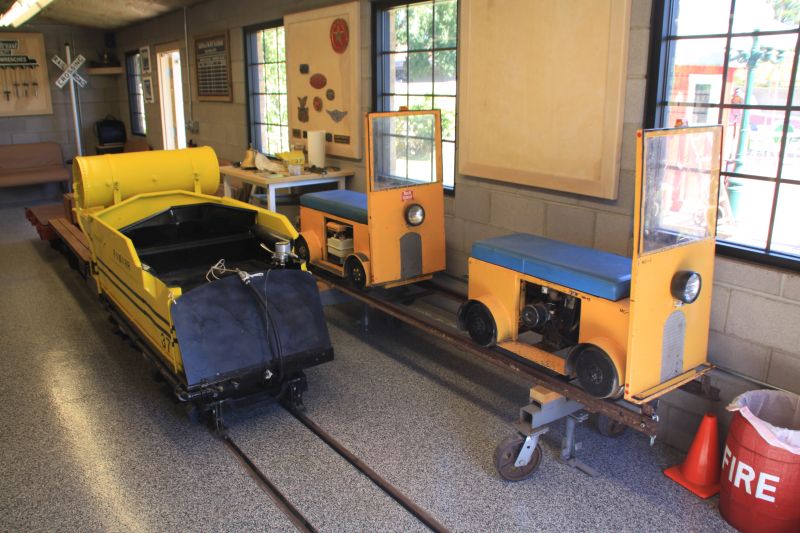
|
Happy and safe railroading everybody.
12/20/22
We added another E10 train to our collection of MTC equipment this month. This one is a unique body style of which only a few were produced. It is a beautiful blend of classic E10 features and those of the re-designed G12 that was released post WWII. I am very pleased that we were able to locate this train and secure it for the A & P Collection. We also acquired roughly 500 feet of E10 track and three E10 switches. I assumed they existed, but I had never seen any E10 switches before. It took two trips to load everything in California and get it to the Arizona and Pacific in Arizona. I made the first trip early in November and brought back the train itself and the switches. On my trip, the seller couldn’t be there because of my timing, but his wife and college age daughters met me and assisted in a major way in getting everything loaded. They could not have been kinder, sweeter or better people. I have been buying and dragging home MTC equipment from all over the country for 28+ years and never have I had a harder working group help with the loading – ever. Hats off to the Lopez ladies! The second trip will be made with a large flatbed trailer in early January by the gentleman I purchased the train and track from. Generally, it seems I find equipment for the collection that is in the Midwest or Florida although we have bought equipment in CA before.
|
|
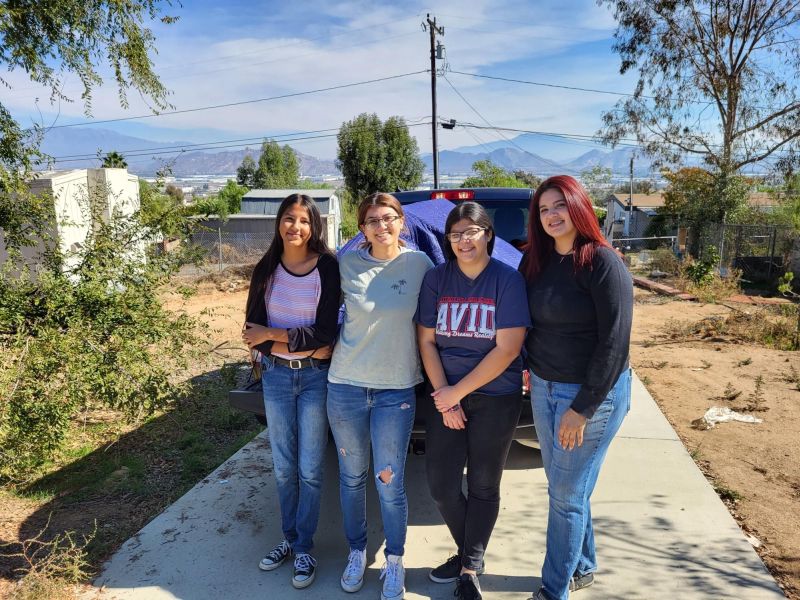
|
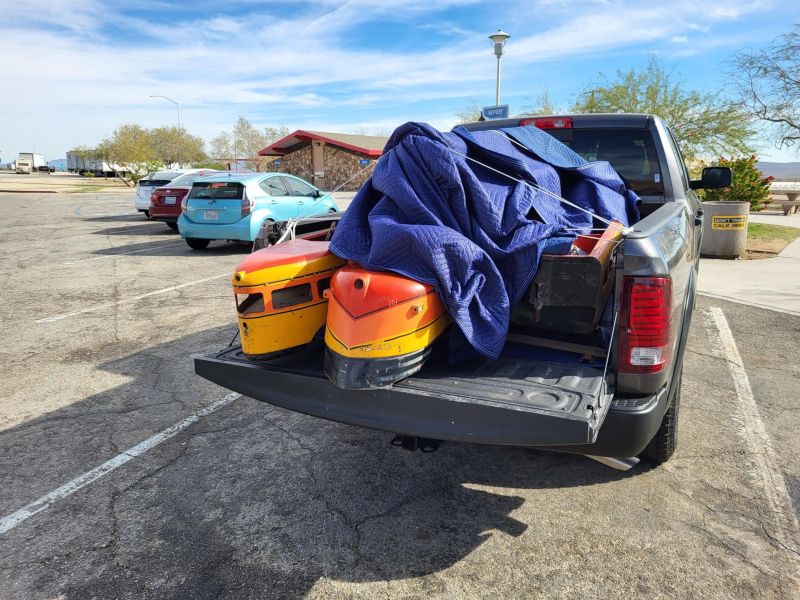
|
|
|
|
We have been searching for G12 and E10 variants for years with little success until the past three and a half years. This is the sixth train we have acquired in the past 42 months in our quest to have one of every different type train and accessory that MTC ever produced for our little museum. Two trains, an E10 and a G12 were acquired in May of 2019 and made their way west in August of that year. An E10 was located and acquired in IL in 2020. A G12 was acquired in Wisconsin in 2021. The Addison G12 train came from a collector in Michigan in late 2021 and the latest E10 was located in CA last August. There are still a couple of unique trains we have feelers out for and we are also looking for a rare MTC ballast car which we believe only a handful were ever produced. All of our MTC products are uniquely different and track the evolution of the company’s products from 1938 through 1956. It was an amazing two decades of development and production of the finest park trains produced to this day. Although the last MTC trains (G12 and G16) manufactured prior to the company’s acquisition by the Allan Herschell Company were produced nearly 70 years ago in November of 1956, hundreds remain in use or under restoration today and are still the gold standard. We are pleased to be able to secure and preserve this equipment for current fans and future generations.
We started disassembly of the five E10 trucks we just received. They are pretty much as expected for E10s and G12s that need restored. Two of the leaf springs are broken and two springs are G12 and not E10 springs. We are missing 2 safety bars (bumpers) and 2 others are in bad shape. There are multiple sheared off bolts in the cast axle housings. One of the arch bars has a broken toe. One of the drive trucks rolls freely and seems fine mechanically, the other is locked up tight and likely needs a new bronze gear and other drive components. We will fully disassemble all and replace the bearings and seals and anything else that requires it. Fortunately, we have been down this road before and we have many of the replacement parts already on hand. The wheel hubs all look good, but most of the 20 tires will need replaced. Everything will get powder coated and reassembled with new hardware.
|
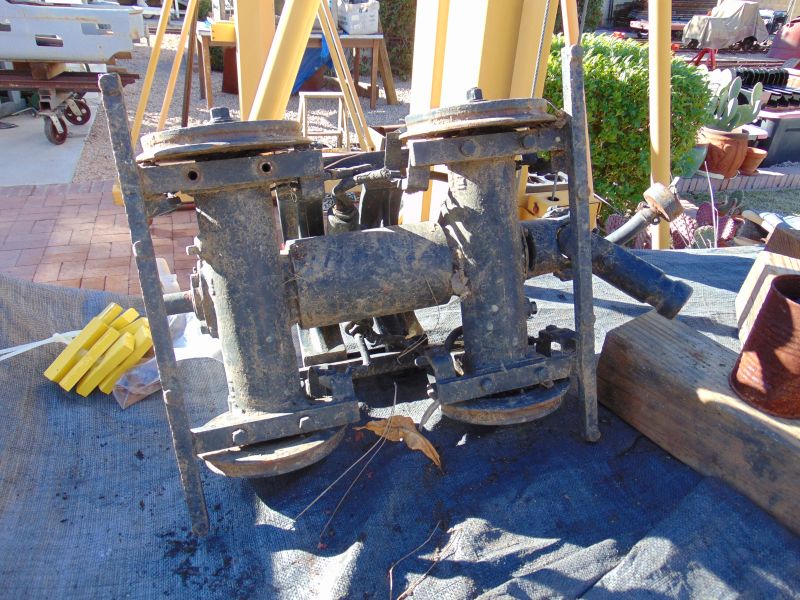
|
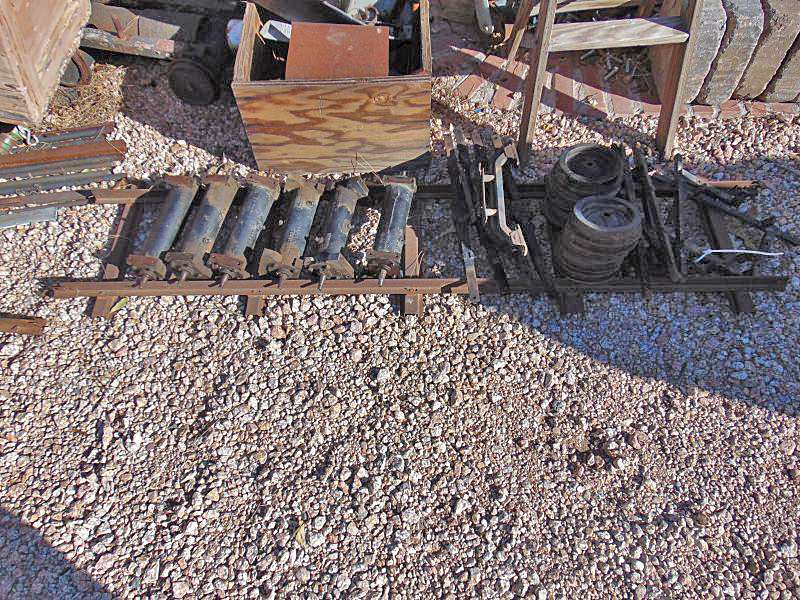
|
Observation car and locomotive no. 26 were scheduled for return from body and paint this month, but again are delayed… We are scheduled to receive that equipment plus receive two coaches from E10 train no. 20 back from body and paint in late December. The locomotive from that train, B unit no. 24 and observation car no. 20 will go to body and paint when the two coaches get here. We hope to have them back in late March.
We got two more track stops mounted in the west yard so we have three in place in the west yard and 2 in place in the east yard.
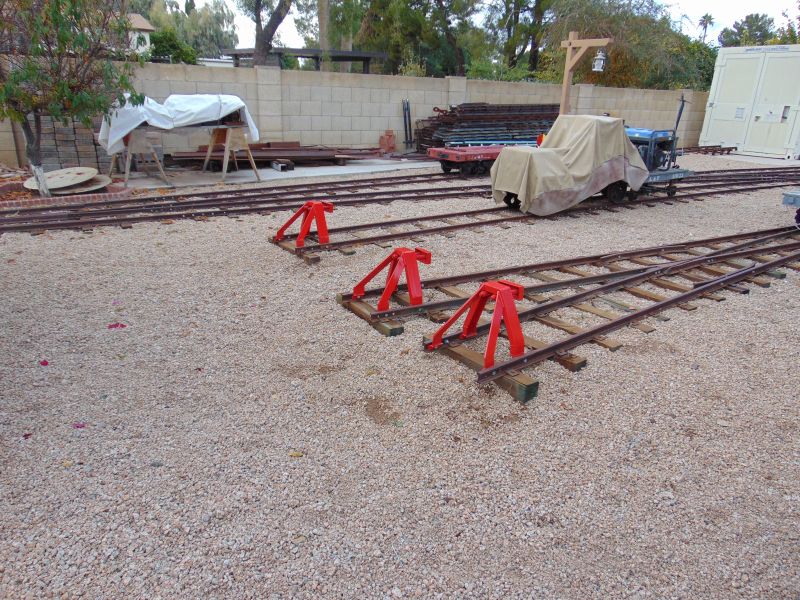
|
We received the first 21 of our 80 G12 truck arches back from the machine shop. We still have some minor finish work to complete, but they look pretty good. I hope to get them into powder coating in early December and have this batch back at the A & P before the end of the year.
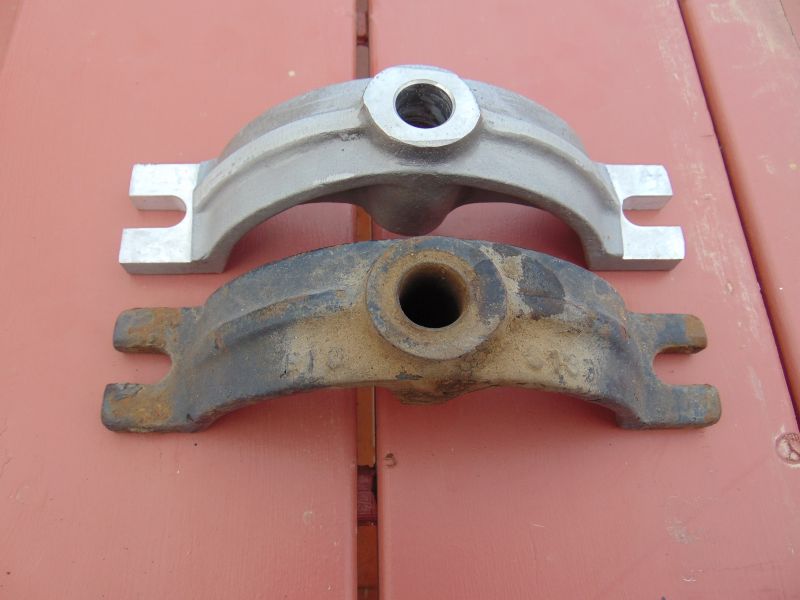
|
We got the electrical issue resolved with the track lights and got all of the holes I dug trying to locate the junction boxes all filled in… Dave did a great job trouble shooting and resolving this problem.
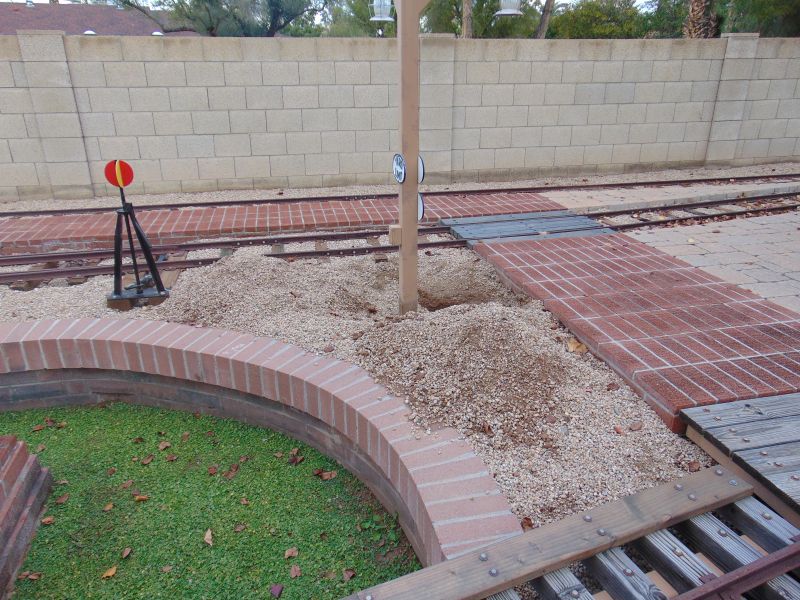
|
We extended three more of our track stop bumpers by 2 inches in height to match our others and to better match our MTC and Allan Herschell equipment. They will go to powder coat in December and will be used in the future for several planned steaming bays coming from the turntable.
We started work on the Addison G12 hoods this month and got quite a bit accomplished. We straightened and fit the hoods, replaced the hood stops and latches and replaced the shoulder bolts and backing plates. The front of the two hoods is in place and fits quite nicely. We still have some alignment work remaining on the rear hood and some finish work to complete on both. With some luck, we are only a few hours work away from having the Addison locomotive ready for body and paint.
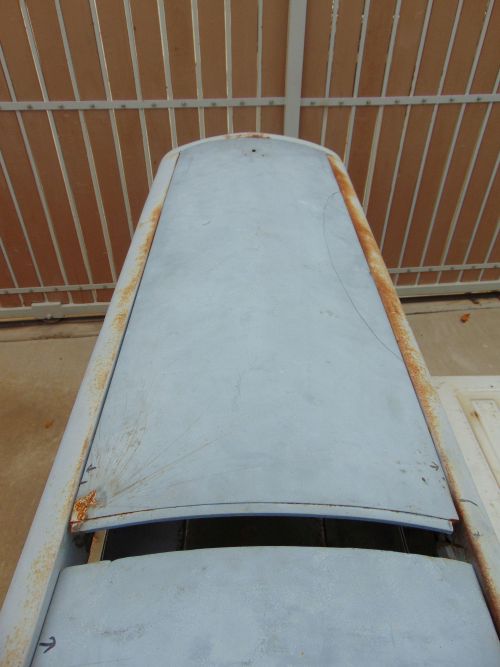
|
We made some progress on our A & P picnic tables this month disassembling the umbrella swivel rod on several of the umbrellas for repair. I also purchased the wood to complete the last table. A great deal of wood work including painting remains to be completed.
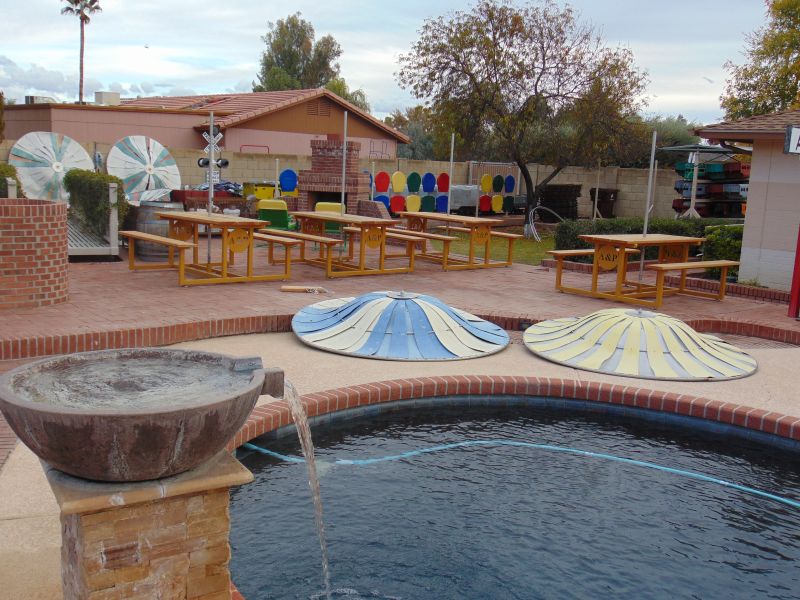
|
We continue our work on replacing the planking on our trestle no. 5. The south side is completed. We still have a few more weeks left replacing the north side planks.
For the first time in almost three years, we hosted some friends with rides on the A & P this month. Craig and Kelly Ashcroft and two of their children and two grandchildren stopped by to see progress on the rebuild of the Arizona and Pacific. The rides were just on the track inspection car, but we are only a few weeks away from having the MTC and AH equipment back on the track. I found a spot in the front yard where the track needs some corrective action and the trains each need fresh gas, carburetor rebuilds and new fuel pumps and batteries. I am looking forward to shining the rails with the big equipment!
There is a great deal going on out here and I looking forward to showing you guys some additional things soon.
Happy Holidays and safe railroading everybody.
12/12/22
We made some significant progress on our Addison G12 again this month. We started on the installation of the throttle and brake slides and the associated sheet metal work. As I shared previously, many years ago (pre-1971), the factory slides and sheet metal were cut out and replaced with solid panels and a different means of throttle and brake control were envisioned. It was important to me that we returned her to the original throttle and brake slides in this restoration project and to that end, I located donor slides and slide slots. We marked, cut and removed the solid sheet metal panels in all four locations. We installed both slides and roughed the panels back into place. This process was complicated by the fact that a previous owner had cut one of the original rods in half and welded one of the ends to the sheet metal body for unknown reasons. We also drilled out and cleaned up the mounting brackets for the control handles after the slides were in place. We still have some cosmetic finish work to complete like welding keystock in place below the handle slots and finish welding and grinding on the panels on the other end, but I am pretty happy with the way that the slides and the metal panels turned out. The next big project on the Addison will be the hoods.
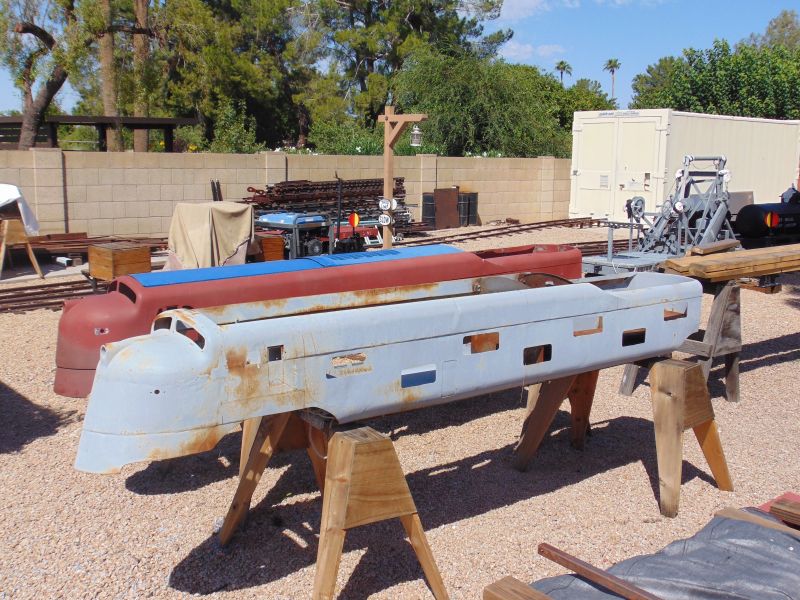
|

|
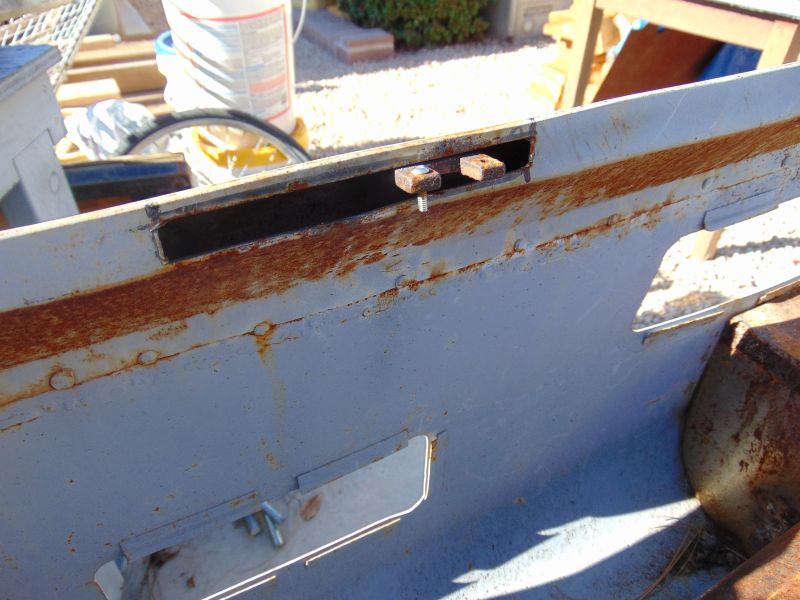
|
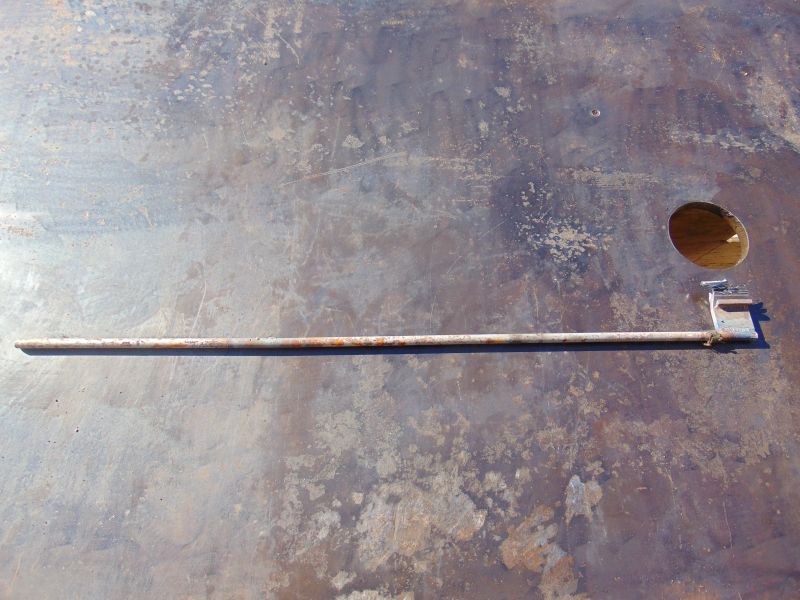
|
I am very happy with the way this Addison project is coming together. They built less than 30 trains in this early style and although there may be a few more remaining than the two others that I know of, there aren’t very many left. We know this was one of the earliest ones built in Addison for a few reasons that I will share once we get farther along. The coaches and observation car were sheet metal complete when I acquired them, but the locomotive was missing so many parts that several times I thought myself crazy for taking this project on. This has been a huge, multi-year project locating original parts and in some cases fabricating replacement parts. The restoration is really starting to come together. We hope to have the Addison G12 into and back from body and paint in late 2023. The postwar G12 will be a 2024 project along with our latest E10 acquisition.
Dave and I replanked the transfer table this month and started on trestle 5. The main portion of trestle 5 is curved and 62 feet long and after the switch it stretches another 21 feet; it will take us several weekends to complete the plank work.
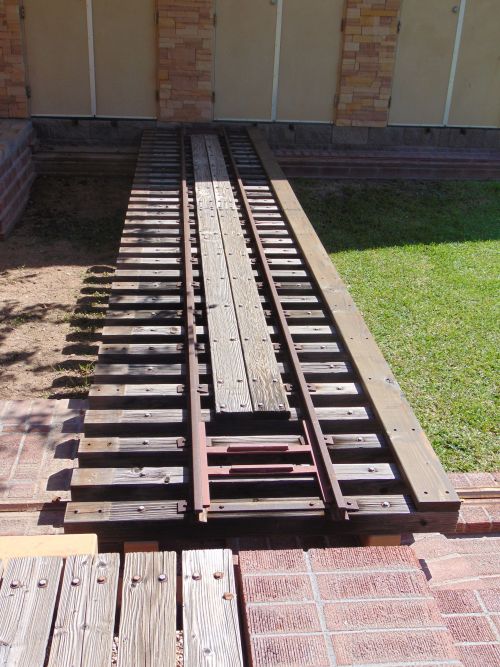
|
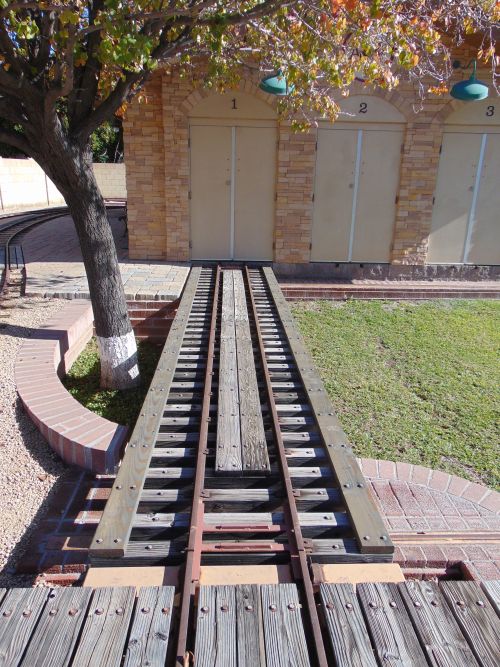
|
There were two distinctly different MTC G12 locomotive body styles (pre and post war) and several distinctly different E10 locomotive body styles. In our little MTC museum out here, we have an example of both G12 types and until now had examples of two of the E10 types. We just acquired an example of the third (and one of the rarer) E10 types and I will be traveling to pick her up next month. I’m excited to post photos, but want to get her on site here before I do that. I also acquired a few hundred feet of E10 track as part of this acquisition. The track reportedly includes a couple of E10 switches which I had never seen before and didn’t even know existed which is pretty cool. We are continuing our search for examples of the other body types and I am hopeful we will locate at least one more of them. I have been remarkably lucky finding MTC parts and equipment over the years so who knows. Fingers crossed.
|
|
|
|
We also have an early MTC G16 AB unit and five Allan Herschell S16s which were built with MTC mechanical parts by the MTC Division of Allan Herschell. In addition, we have a number of restored MTC block signals, crossing signals, switch stands, photographs and paper on display. If you’re a MTC fan and would like to visit, shoot us an email at sayrejohn@hotmail.com.
|
|
We spent a great deal of time this month trouble shooting an electrical short in the electrical system that runs our track lighting. We have methodically ruled out a number of things and are closing in on a final diagnosis and repair- we think. Dave is the mastermind figuring everything out on this project as electrical and electronics isn’t in my wheelhouse…
|
As I write this, the E10 observation car and locomotive of train no 26 are scheduled to return to the A & P from body and paint next week. If this takes place, the entire train will be here and we will add the trim handles, windows, seat, controls handles and wiring. The electric motors and drive lines will get added next year. No. 26 has a red and white paint scheme and no. 20 has an orange and burgundy paint scheme.
We are also hopeful to have the two coaches from E10 train no. 20 back from body and paint by the end of this year and the locomotive, B unit and observation car all back by the end of March. We have had numerous delays with our body and paint projects the past two years, but the pace is picking up and we are increasingly optimistic.
I had intended to personally get some final paint touch up work completed on the Wisconsin motor for the Addisson locomotive this month and get it mounted in its floor pan and get all of the brake linkage in place and adjusted. I didn’t get to the paint work and the G12 brake shoes aren’t here yet, so those will be projects for later this year. Yes, I realize I am running out of year – lol.
I should be hearing from the machine shop working on our first 21 G12 truck arches soon. I’m excited to see how they look and if expectations are met, get them powder coated and installed.
There is a great deal going on out here and I am looking forward to showing you guys some additional things soon.
Happy and safe railroading everybody.
11/16/22
We received our three track stops back from powder coating. Two of them will get installed next month. The third one is one of five for a long-term project I would like to build. We’ll see…
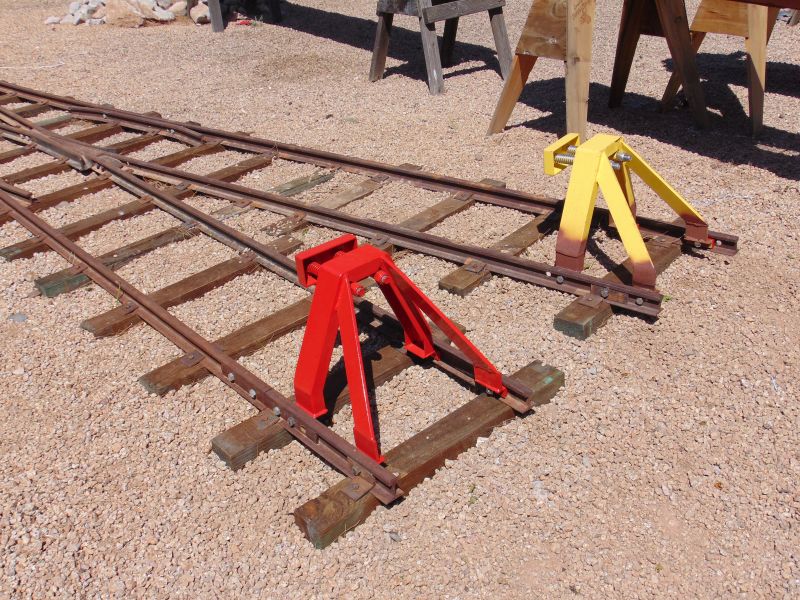
|
We have our first 20 G12 truck arches at the machine shop being machined – there is about a 45 day turnaround. I committed to having all 80 machined over the next 6 months, but it is pricey so I am doing 20 every other month. I need 60ish so there will be a few extras if anyone is interested.
|
We worked several hours on observation car no. 20 removing broken bolts, retapping threads and improving the fit of the ob end top casting. We probably have another eight to ten man-hours to have her ready for body and paint.
|
The E10 Observation car and locomotive of train no. 26 were scheduled to return to the A & P from body and paint by October 1, but again are delayed. Now we are looking at Thanksgiving… Once here, we will add the trim handles, windows, seat, controls handles and wiring. The electric motors and drive lines will get added next year. Train no. 26 has a red and white paint scheme and train no. 20 has an orange and burgundy paint scheme.
We are also hoping to have the two coaches from E10 train no. 20 back from body and paint by the end of this year.
We got the BKN brake rigging assembled for the Addison engine. There are 97 pieces in the brake rigging assembly and most of them are small springs, bushings, washers and cotter pins. It took us a couple of tries to get it right, but we finally got it. I have located a source for G12 brake shoes and ordered a few sets; they should arrive here sometime in November.
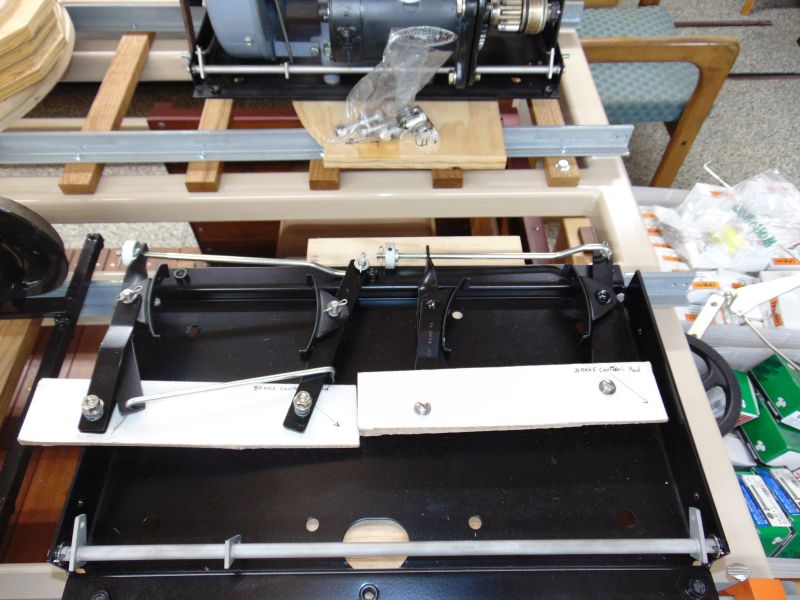
|
Our specialized rack arrived from powder coating. It’s designed in several pieces due to its weight as I don’t have a forklift here. It took four of us to unload the vertical components from the trailer and the roof is also brutally heavy. There isn’t a piece on this rack that is lightweight or light duty. We added the large casters and the brakes and got it assembled. With two people it moves pretty easily on the castors. We moved it into place and got it loaded with coaches and observation cars. All of the stored cars are waiting to head to body and paint. The specialized rack will have the capacity to store 12 cars and 20 G12 trucks once completed. I may name this rack G12 Carvana lol.
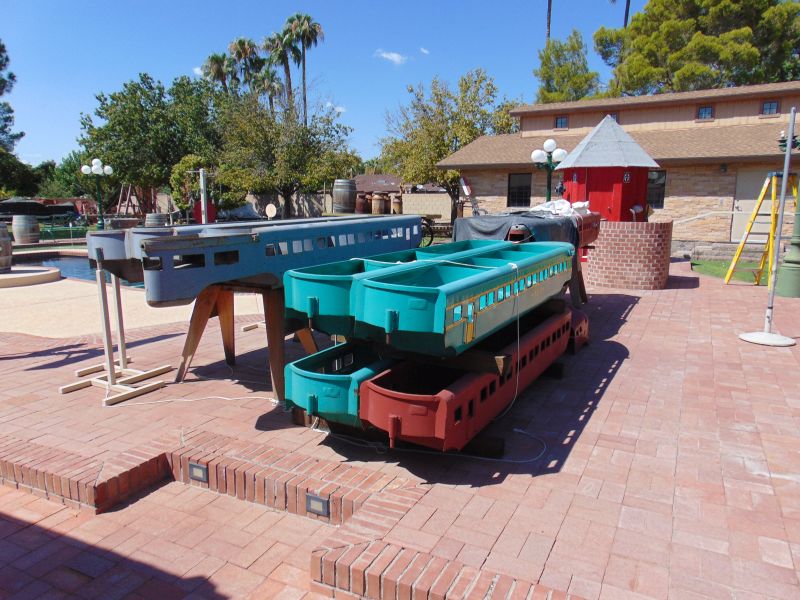
|
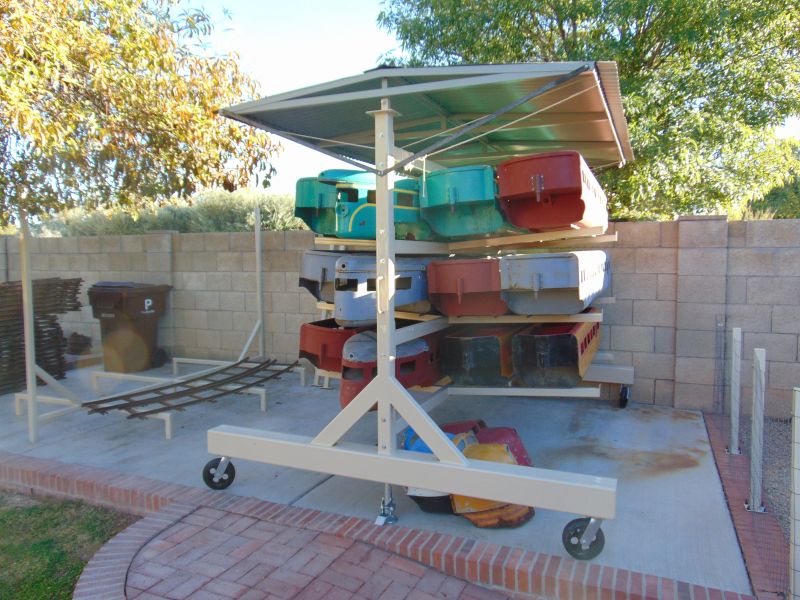
|
We designed and are building two more large racks. I will hold E10 curved track on one side and G12 curved track on the other side. The other rack will hold E10 straights on one side and G12 straights on the other. The curved track utilizes a different design than the straights thus all curves are on one rack and all straights on the other one. It will be late October when the rack for curved track is powder coated and back at the A & P ready for assembly. The second rail rack will be late November or early December when it arrives back at the A & P. Currently we have E10 and G12 rail stacked everywhere; we look forward to having it better organized.
Our tie and track work is pretty much complete. The ballast car is back on the MOW spur and just some final ballasting remains in a couple isolated spots and the final ballast dressing remains to be completed.
Dave and I replaced the trestle planks of trestle 1, 2 and 3 this month and trestle 4 was completed previously. Next month we will replank the transfer table and start on trestle 5. The main portion of trestle 5 is curved and 62 feet long and after the switch it stretches another 21 feet so that one will take a few weekends to complete. The pile of removed and replaced planking is getting pretty large; I will haul it away all at once after all that work is completed.
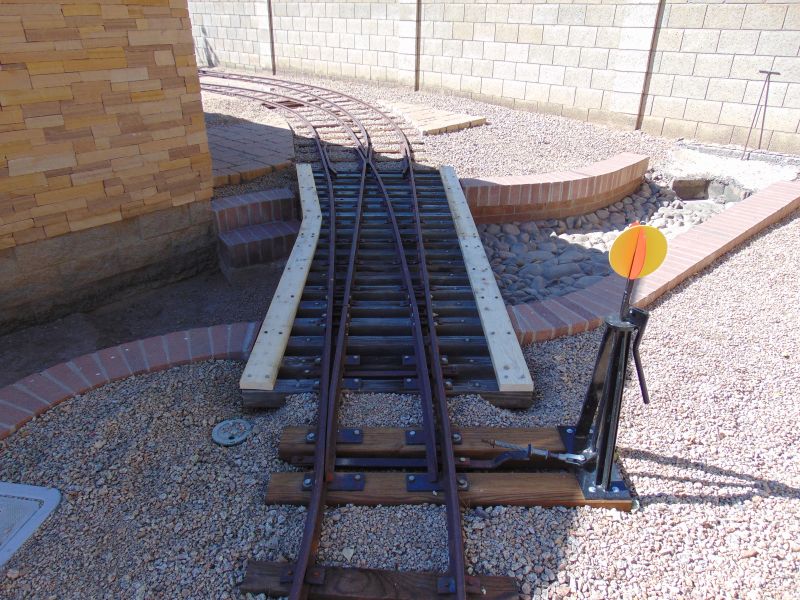
|
|
|
|

|
Our four new picnic table frames arrived from the powder coater this month. I think the A & P logo is a nice touch. We mounted the leveling feet on all four of them. We drilled and dry mounted the three 2 x 10 inch table top planks on one of them and the seat tops on two of them. The planks of the second table top with get drilled and mounted next month. Once all the planks of the first two tables are mounted, they will get routed, sanded, primed, painted and reinstalled. Then we’ll start working on the wood planks for the second set of tables. The mounting bolts are secured via tapped and treaded holes drilled into the framework. These tables are HEAVY and will not be blowing over and landing in the pool during high winds.
|
Then the holes will be drilled for the umbrella poles. The planks for the second two tables will get added a couple at a time as time permits as we have several projects currently underway. There was a color change at the last minute. Originally, the frames were going to be powder coated in a green color very much like Hunter green. Unfortunately, the distributer advised my powder coater that color powder is back ordered until at least December 1. I changed the color to mustard for the frames and the table and seat planks will be Hunter green.
Like many of our projects, I do the initial design in my head and then convert it crudely onto a sheet of paper and then others take that idea and improve upon it and the finished product benefits from the collaboration. Jerry Graves improved my rack designs on all three racks significantly and Nico improved my idea for the picnic tables. It’s great having these guys as part of the team here.
Happy and safe railroading everybody.
09/12/22
We continue to make progress on our track project investing several hours every Saturday and Sunday. We hope to have the ballast all in place, compressed and the right of way dressed by October 1.
Dave and I worked on our pedestrian walkway. We repaired two sections of three boards each that because their location within a switch were angled and were joined with biscuits and screws that had failed over the years. We replaced the biscuits and used longer screws. After the glue dried, we got them back in place. We also replaced the 6 northern most boards and the three supporting ties. This section of the walkway leads to the loading platform and is always in the sun. These boards were checked and badly deteriorated.
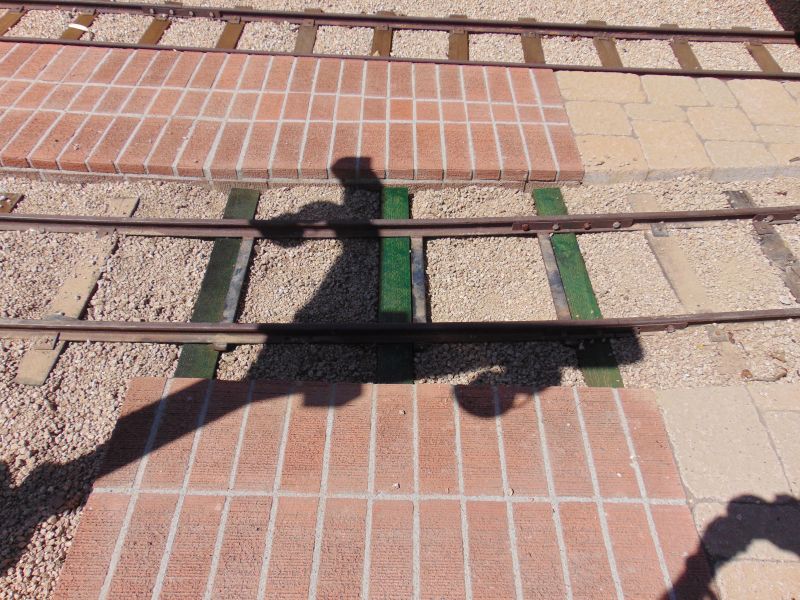
|
|
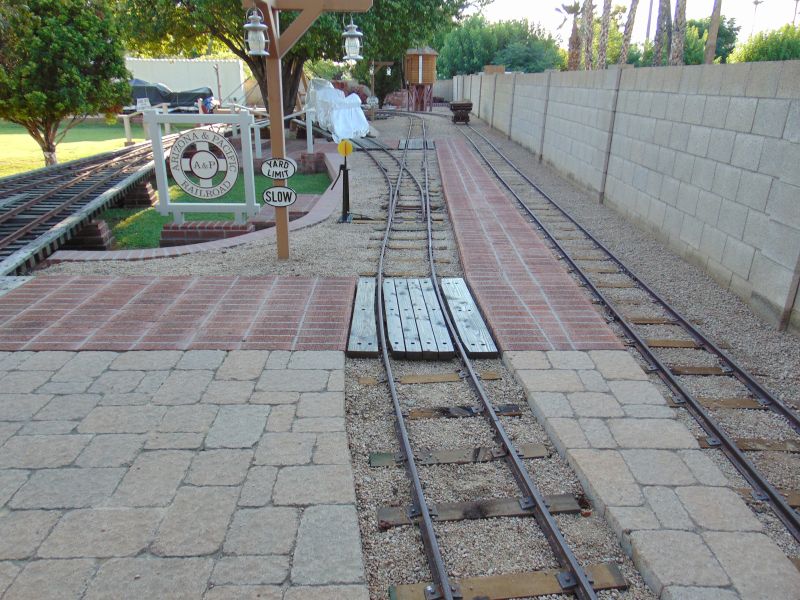
|
Four of our end of line stops were modified in the past few weeks to make them two inches taller and they were powder coated in red; we got three of them installed on the ends of three of our five spurs this month. We still have two more to modify and three more to get powder coated – two for immediate use and one for a future project.
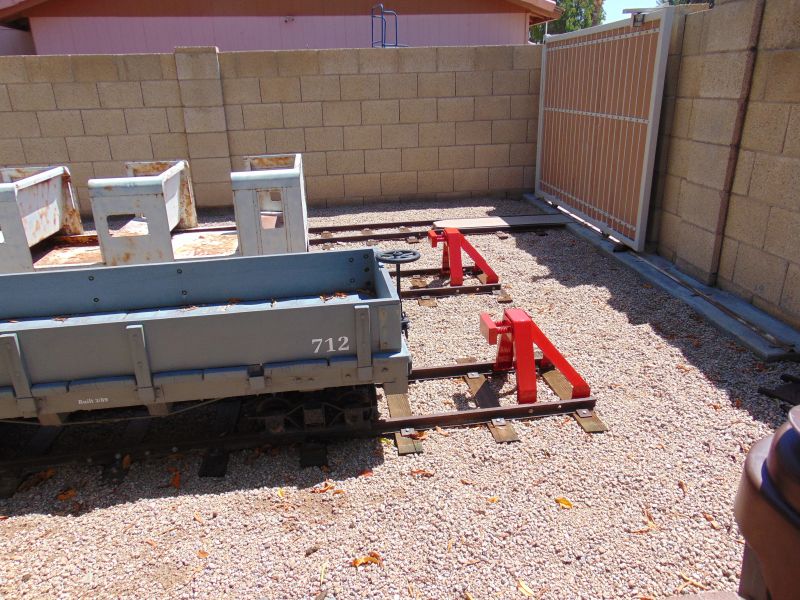
|
|
The touch up work on the two coaches of E10 train no. 26 is completed and they are back at the A & P and look really good. I’m excited to have them back. The Ob car is also being touched up and it and the locomotive are due back here the last week of September. The two coaches of train no. 20 are due back in early November and the Ob car, B unit and locomotive are due back in late December. We have had many delays with body and paint that are outside of our control, but hopefully this new schedule is met. We still have the windows, door handles, wiring, grills and trim to install once the trains are back here. Rebuilding the electric motors will be a 2023 project.
|
E10 locomotive no. 20 is ready to go to body and paint. I just have some disassembly the day before it leaves. Our B unit no. 24 and Ob car no. 20 are also being prepped to leave for body and paint. The B unit still needs the driveline cover fit and mounted, the truck pin re-riveted and some sheet metal repairs. The Ob car needs some sheared off bolts removed and that is always fun, needs it builders plate carefully removed, needs some work on the fit of the Ob end top plate and a large dent repaired in the bottom plate. It will be a few more weeks before they head to body and paint.
|
|
The carburetor for the BKN engine going into the Addison G12 got rebuilt and installed this month. Then we had to track down a 12V starter solenoid as the one on it was an original 6V version. The starter, the magneto and the Wisconsin engine itself were completely rebuilt in the past few weeks. Our friend Jerry Graves got the motor running in his shop and it sounds great. Next month it will get a few last minute paint touch ups and get mounted on the powder coated MTC engine pan. We were lucky enough to obtain a complete set of G12 brake rigging from our friend Gerry Warner in PA. It just arrived out here and we will get it all set up in September.
|
We were also able to locate two hood latches for the hoods of the Addison locomotive.
The G12 truck arches and 4 grilles arrived from the PA foundry a few days ago. There was some confusion about how many I wanted so I have plenty of extra arches. They still need machining and powder coating, but I’m glad they’re here. They arrived just a few days short of a year after I first ordered them. Delays and supply chains issues seem to have permeated almost every business that produces products in this country. The grilles are for the large 32V E10 drive motors. I will get bids from 2 or 3 shops on the work that remains and hopefully send the truck arches out for machining in October or November.
|
|
|
I shared a few weeks ago that we designed a storage rack for the G12 equipment that is waiting to go to body and paint. It stacks them vertically rather than having equipment stored all over the yard on saw horses. The rack is 10’6” long, 90 inches wide and 7’ 6” tall tall. It is on large c asters, has handles to assist in moving it around and it has a corrugated metal roof to protect the equipment from rain and hail. We contracted it out early last month and it is currently at the powder coater; we hope to have it here in mid-September. It will store a combination of 16 coaches, OB cars and locomotives. Once it arrives it will be put to immediate use. When my neighbor George Fimbres has time, he will make a cover that will protect the equipment from the sides.
Progress is also being made on the two of the four picnic tables that we are having built; the first two should be here late in September. We went with a little different design and a different color palette. The others are Desert Beige with a railroad themed red. The new ones are DOT Green with the seats and top boards painted light gray.
We will have an announcement to make about an addition to the A & P Railroad and its Miniature Train Company collection in late October or early November so make sure to check back over the next few weeks to find out what the latest addition is out here in Peoria, AZ.
Happy and safe railroading everybody!
08/22/22
We continued moving ballast this month. There just isn’t any way to get into most of our areas with mechanized equipment so it is all hand work. We have been using the Flagstaff and Middle Verde ballast car which is helpful, but still labor intensive. We invested 28 man hours on ballast this month.

|
Dave and I replaced one of our wood crossings over the track in the west yard. It is constantly in the sun and deteriorated over 28 years of direct sun. We acquired the special order wood to rebuild a second walkway in the north yard. The wood is full size 2 x 4s and 2 x 8s. We also acquired roughly a third of the wood to replace our trestle walking planks. We’ll get started on that project in late August.
|
Dave and I completed our wood replacement work on the two run bys at the turntable. The wood is new but stained to appear closer to the color of the other wood in that area that isn’t being replaced. These ties did not have ground contact, but after 27 years of the Arizona sun the wood was badly checked and deteriorated. These ties needed replaced. We also replaced 3 ties that lead out to trestle no. 4, seven more ties that are on that trestle and the plank boards as well. Again, these ties were in direct sun and the sun just tore them up over the last three decades.
|
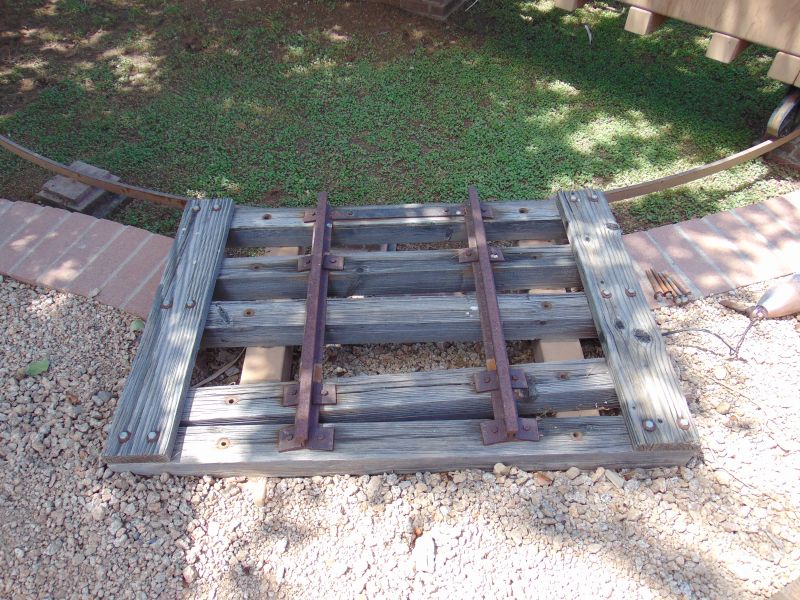
|
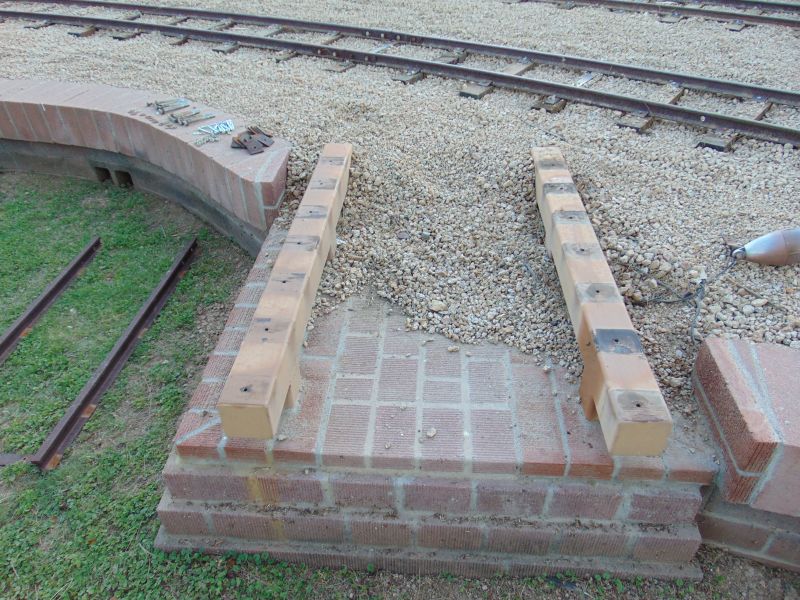
|
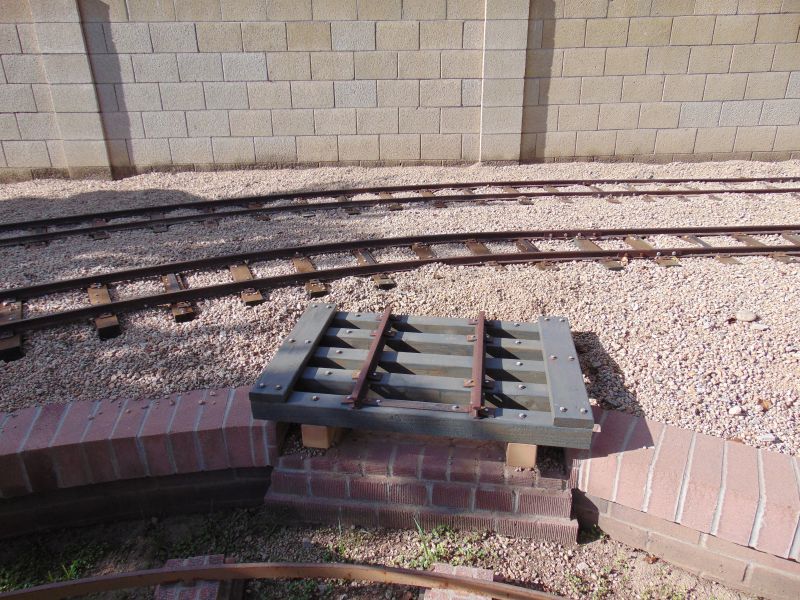
|
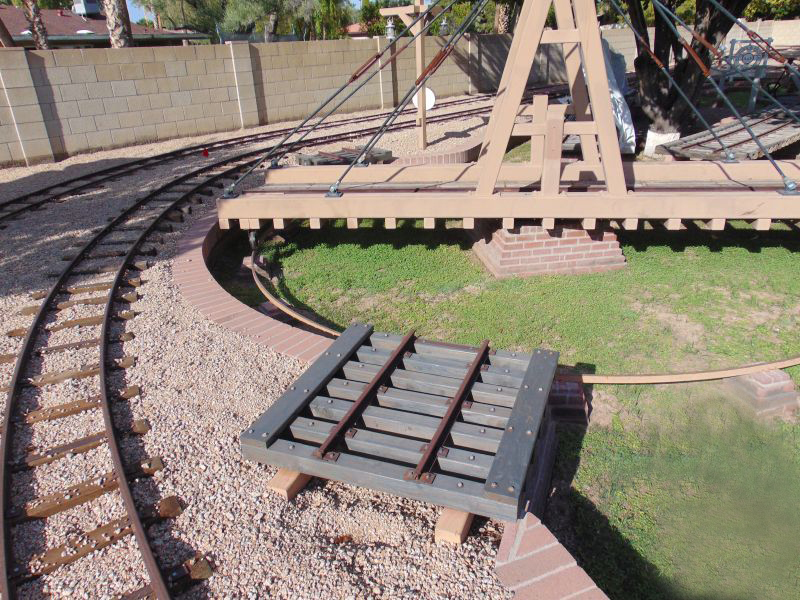
|
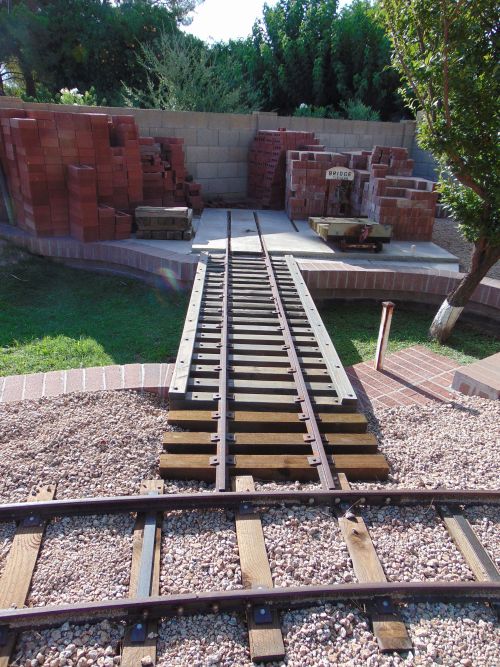
|
We jack hammered out about four feet of Rock Creek back to the bridge, it will be replaced with grass and will make walking to and from the steps much easier. After the jack hammering we poured 2 bags of concrete to reinforce the steps and to create a cleaner rock edge. We also cleared some of the gravel from upper rock creek and power washed all the silt that accumulates every year from the irrigation water. I hope to get the dirt and grass in place in September.
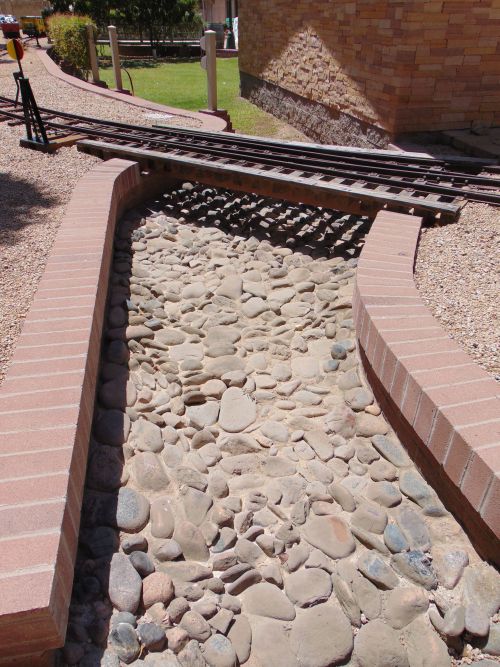
|
|
We designed and contracted to have built a large double sided rack to hold 12 of our G12 car bodies that are waiting to head to body and paint. The rack will hold 4 cars on each of three levels for a total of 12 cars. It has a small roof that is removable, stops on the end of each arm and larges casters making it movable. I am not sure what color it will be powder coated yet. Currently, the cars are scattered everywhere on wood horses and under tarps. Going vertical and organized is a better use of space and just a far better idea. The rack is scheduled to be back from powder coating next month. If will be assembled here, hopefully by Labor Day.
I also contracted to have 2 additional picnic tables constructed. They should be here in late September.
Four of our end of line stops were modified to make them two inches taller and they were powder coated in red; we will get them installed on the ends of our four spurs in August or September.
Our two G12 fluid clutches have been rebuilt and arrived here a few days ago. The BKN motor, generator, carburetor and magneto have also all been rebuilt. We hope to have it all assembled and running on the bench by late August.
|
Our G12 truck arches are due from the Pennsylvania foundry any day now, but as of this writing have not yet arrived. We have several G12 trucks that are only missing the truck arches to be placed back in service.
I picked several items up from powder coater this month including the 4 line stops mentioned earlier, six bolsters, twelve body rollers, two switch targets and some G12 truck parts.
We continued finalizing our work on E10 locomotives nos. 20 and 24. We fit and mounted the driveline tunnel that we fabricated for no. 20 and also mounted the instrument panel that we fabricated. The nose, hood and hood latch assembly have some work remaining, but we are getting close to being done.
|
The hood of no. 24 still need its shoulder bolts replaced, its hood latch rebuilt and its original instrument panel reinstalled.
We added to the A & P membership this month when Annie became a lifetime member.
|
Ten years ago (8-05-2012), the Flagstaff and Middle Verde Railroad made its last run. I spent a couple thousand hours over 20+ years working on expanding, rebuilding, restoring and operating the F & MV RR with my great friend Malcolm Mackey. We both enjoyed the railroad and what it meant to us and to so many others. It was such a joy running over that railroad and bringing smiles at so many of his “Open Houses” over the years.
|
|
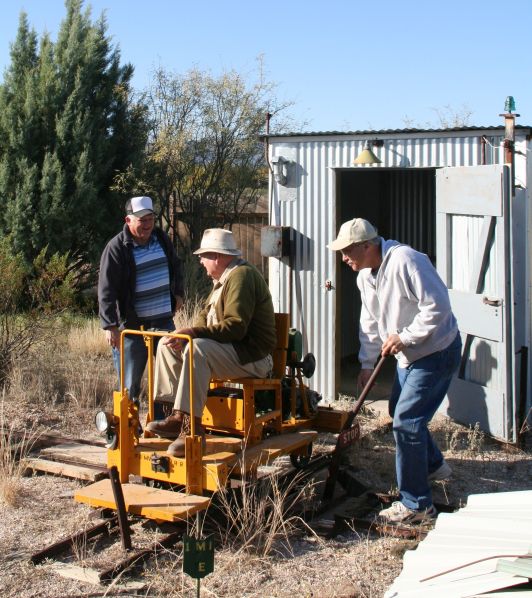
|
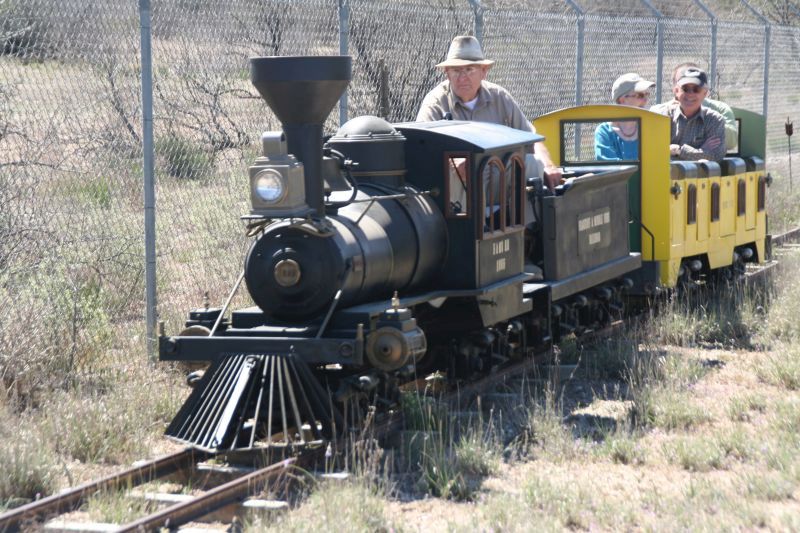
|
In the Spring of 2012, Malcolm’s health had started to fail and his family wanted to sell the property on which the F & MV Railroad ran in the Verde Valley. Malcolm had made arrangements that the railroad (but not the property) was to be transferred to the Arizona and Pacific Railroad, but it needed removed and relocated. Malcolm was too ill to attend, but I fired up his beloved locomotive the “Tucson” and Dave and I captured that last run on video on August 5, 2012. Last Run of the F&MV RR Video The next day, work started on removing the equipment, rail, ties, signs and associated parts and tooling. It was a sad time for many reasons.
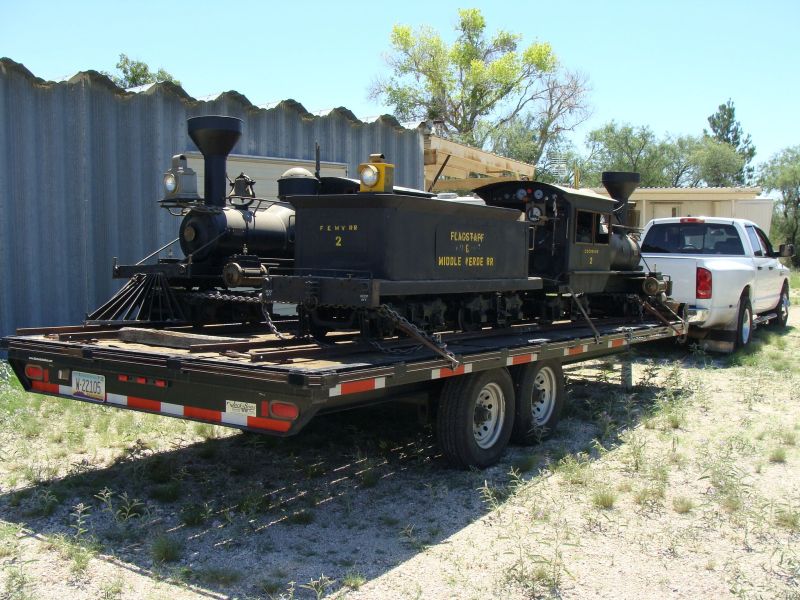
|
I had always thought that I would contact the current owners of the property and seek permission to do a “ten year later” piece on what remains at Gopher Gulch, the engine house, the turntable, inspection car building, Mud Cut and the old cemetery. The fact is that I am not ready to see what if any of it is left. After Malcolm died in October of 2014, I haven’t been back to the Verde Valley as my heart just isn’t in it. It would be too difficult for me, not seeing what is left, but knowing what is gone. I just can’t do it.
The F& MV equipment resides here at the Arizona and Pacific Railroad and is maintained and operated here with great pride as it was by Malcolm for all those years in Camp Verde. I like to think that Malcolm rides with us on his beloved “Tucson” on some of our fall run days and he’s still wearing his hat, has that wry smile of his and is telling me I could be smoother on the throttle…
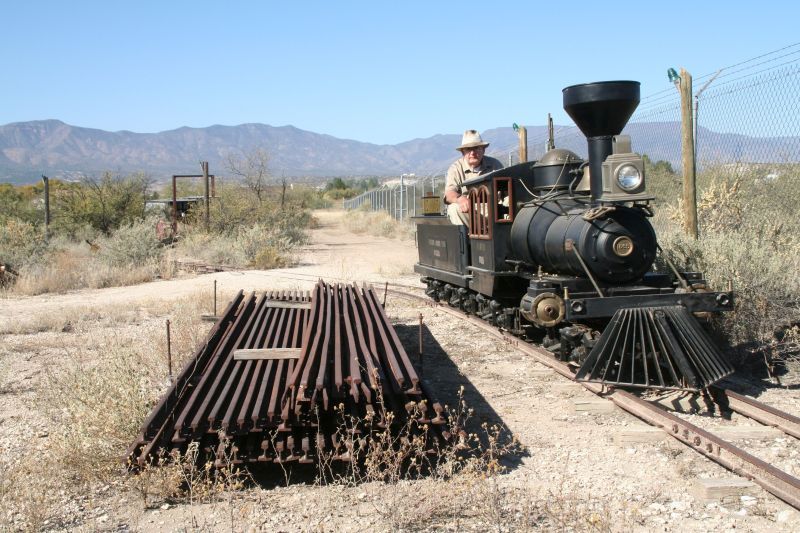
|
Happy and safe railroading everybody!
07/11/22
We spent quite a bit of time on the hoods of E10 nos. 20 and no 24 this month. Both hoods are from E10s, but neither is originally from that locomotive. In addition, they were bent, twisted and buckled. On no. 24, we straightened out the sheet metal, straightened and rebuilt the hood latch and rebuilt the wallowed out and stripped holes of the shoulder bolts that mount the hood. We also replaced hood stops that were missing when we acquired her. We also repaired the throttle side slide rod with parts salvaged from another locomotive. We replaced the entire slide rod assembly and brackets of the brake side. The controls are now back to the way they were originally. We removed the mounting brackets for the nose (this locomotive is being converted into a B unit) and welded the corners closed. We also riveted a truck arch pin in place as one of the two was missing.
The hoods for E10s were three different sizes and shapes over its years of production. The E10 hood I found for no. 20 needed extended by six inches. We obtained several original G12 hood ribs with a parts cache that we purchased a few years ago. We shorted one of the ribs and removed a bit of the curvature to match the E10 hoods. We fabricated the new sheet metal to match the original exactly and had the butt joint on top of the added rib. We moved the latch and lengthened the latch release rod. The shoulder bolts holes were stripped and needed the same work as that of no. 24. The hood of no. 20 is a nice fit now and looks pretty good. The final work will take place in body and paint. We still have a bit of work to finish on the hood of number 24 next month.
Both no. 20 and no. 24 needed a great deal of straightening around the lower mounting brackets that held them firmly in place in their original shipping crates. We spent a great deal of time getting the brackets straightened and aligned even though few will ever see those areas. Both locomotives look pretty good and are just a few weeks away from heading to body and paint.
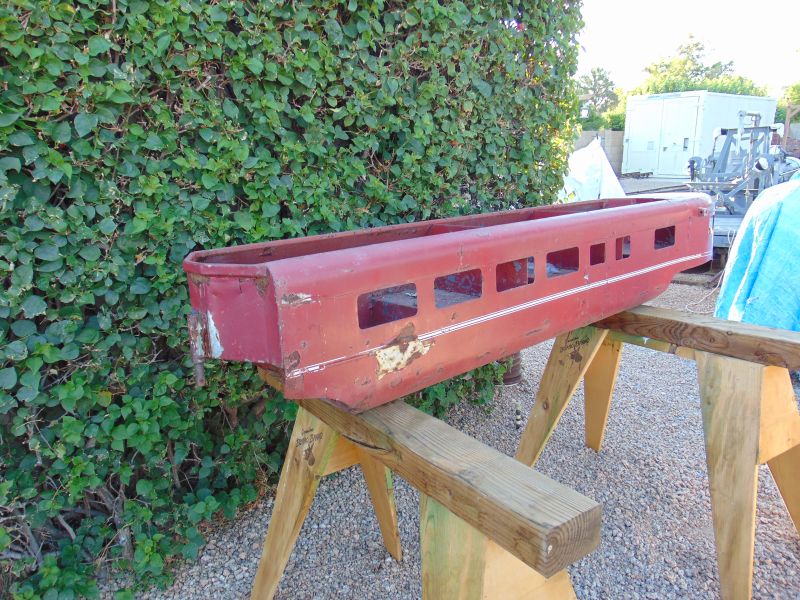
|
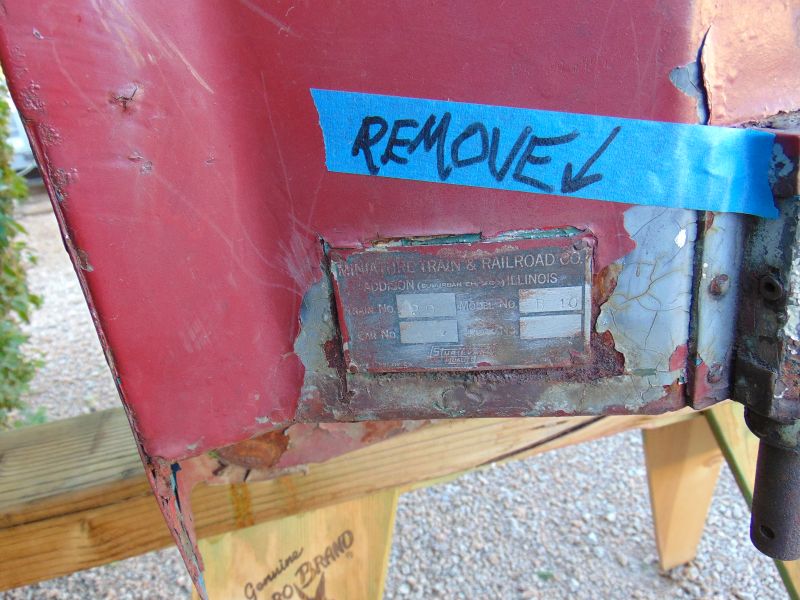
|
We also prepped observation car no. 20 for body and paint by removing sheared off bolts, re-tapping several threaded mounting holes and removing the transformer and electrical components from the observation end.
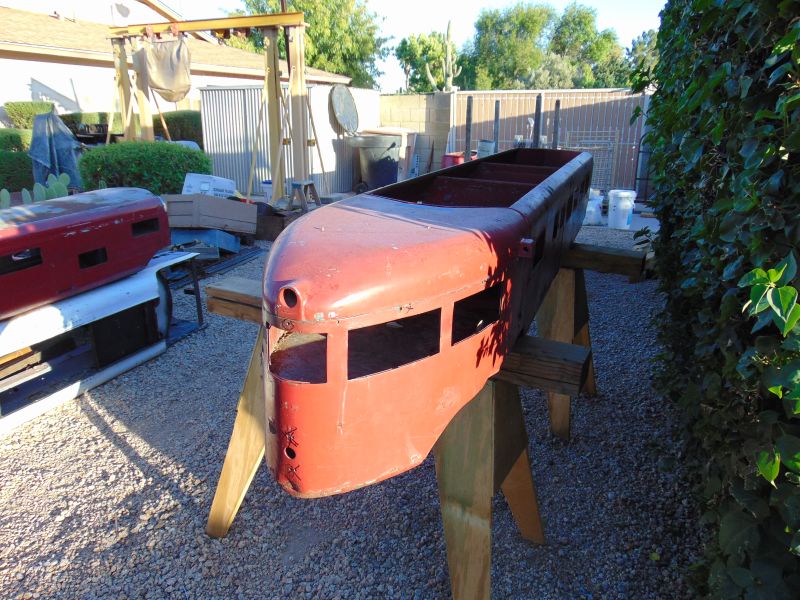
|
Work on the BKN rebuild for the Addison is ongoing. The original starter was sent out to be rebuilt and we just got her back a few days ago and she looks brand new. We only received half of the original MTC alternator mounting bracket with this BKN, but had both halves of the bracket on our first BKN so that bracket has been sent out to be fabricated. The magneto has been rebuilt and is back and now works great. We await 2 rebuilt fluid clutches that I acquired in PA that should be here soon. We obtained a mini alternator that will match the one on our other G12.
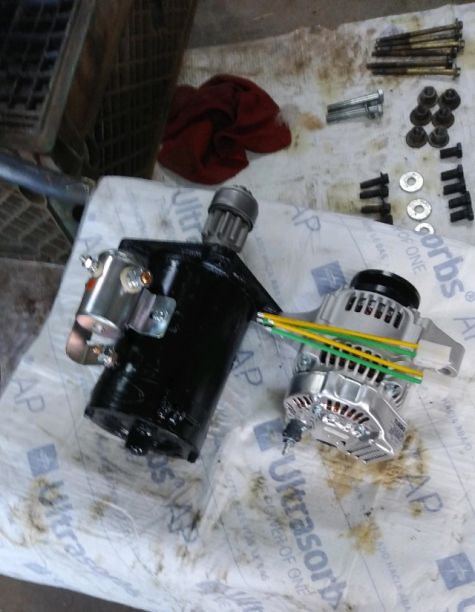
|
We have about a fourth of the brake and throttle linkage so will be fabricating some of that as well. The brake shoes will be another challenge I will discuss in the next couple months. We hope to have the second BKN engine together and running on the bench this Fall.
Our G12 truck arches have been cast, we just await the last few to return from the grinding room for them to be shipped to us. These will all need machined once they arrive back at the A & P. They also cast the electric motor grilles for us that we need for our second E10 electric motor. There will be some cleanup and finish work performed out here, but the grilles look good.
The switch stands were attached to the rail switches, the linkage reinstalled, lubricated and adjusted and the ceramic coated targets reattached this month. The targets turned out to be a much bigger challenge than anticipated, but they are done and look awesome. The switches all move very easily and really look great! The switch numbers, instead of being on the targets, will be on a separate plate applied to the base of the switch stands soon.

|
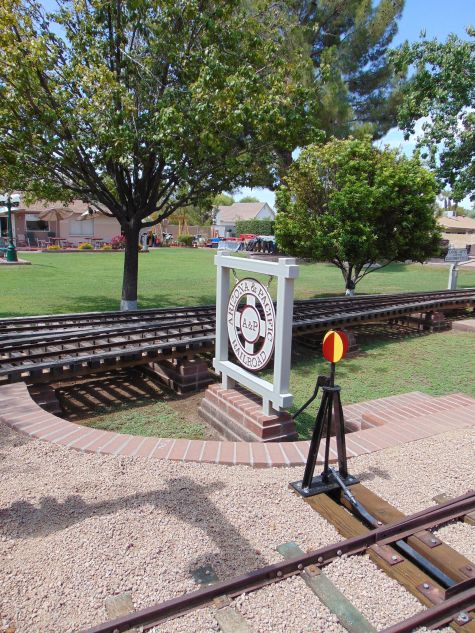
|
We replaced the badly deteriorated center board of one of our A & P picnic table and assembled our third picnic table with shade umbrella. It was really rough when we acquired it a few months ago, but it will provide us with a comfortable and shady place to sit for many years to come. I am declaring the rehab a success.
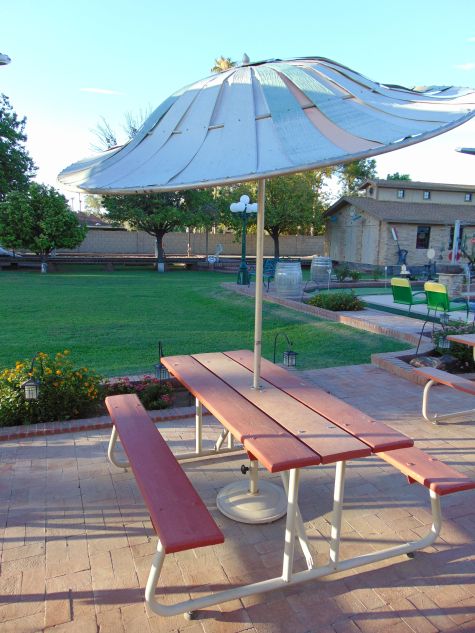
|
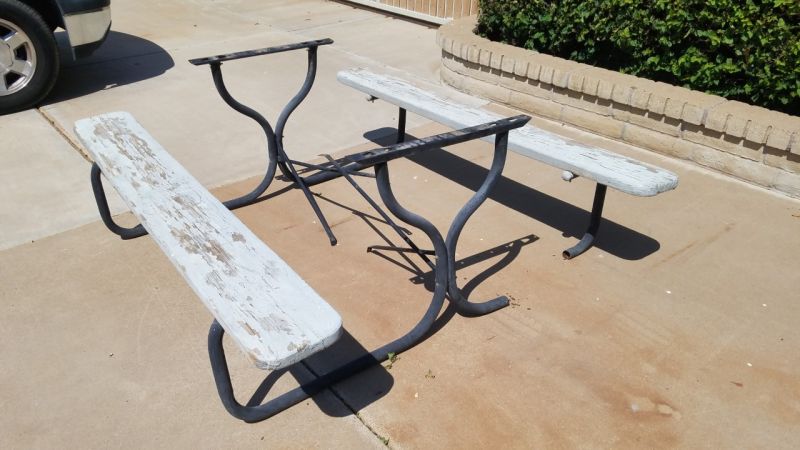
|
|
|
We had 33 man hours this month of moving gravel ballast. It has already gotten hot out here and moving gravel in 115 degree heat is energy and hydration draining. We still have a great deal of ballast to move, compact, top off and dress; we are making weekly progress. This just seems to take so much longer than I had hoped. We hope to have that part of the project done in late August.
|
Dave and I started on the turntable run by rebuild project. These ties are 48 inches long and mounted on top of thick wall 4x4 steel tubing. They are mounted by 3/8 bolts threaded into the tubing. We removed the 12 ties, the walking boards and the two lights mounted underneath that illuminate the water tank. Next month we will acquire the wood for the ties, cut it to length and drill the mounting holes. I will stain it and seal it and we will re-tap and lubricate the mounting holes. The rail will be removed and replaced on the new 4x4s. We hope to get them reassembled in July.
|
|
|
|
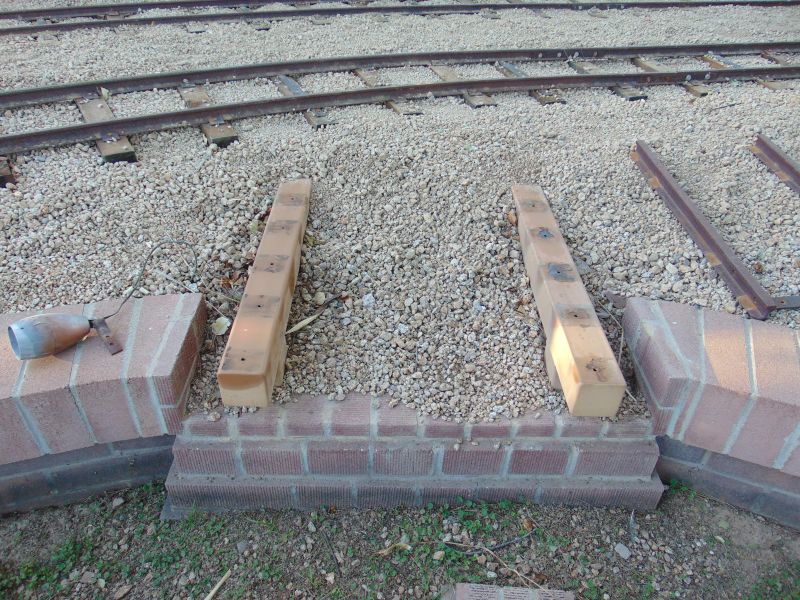
|
We have so many projects going on out here guys. I took six bolsters to powder coat that are set up for MTC trucks. We have ideas for three more cars to run with the S16s in the future
Happy and safe railroading everybody!
06/15/22
We finished replacing the ties in the last of our switches. We also dug out and replaced the 18 switch stand ties and the last 66 of the standard 30 inch ties
in the east yard. In all, we replaced 961 ties of different sizes and dimensions since January 1 of this year. All of the rail is gauged and fastened in place.
I am so glad that our massive tie replacement project is finished. Well at least digging out and replacing the ties is finished and gauging and fastening the
rail in place is complete. We still have many tons of ballast to get back in place and some final track alignment, track leveling and ballast compacting to
complete. We hope to have that part of the project done in early July. There are still some walking planks to replace and some to add. We still have 22 four
foot ties to replace in the turntable run bys and speeder trestle, but they are all above ground and are a later this summer project.
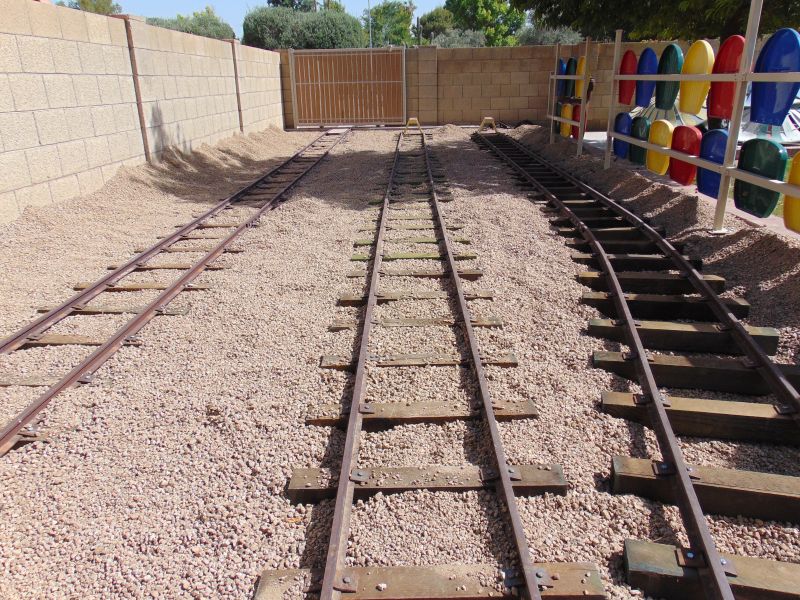
|
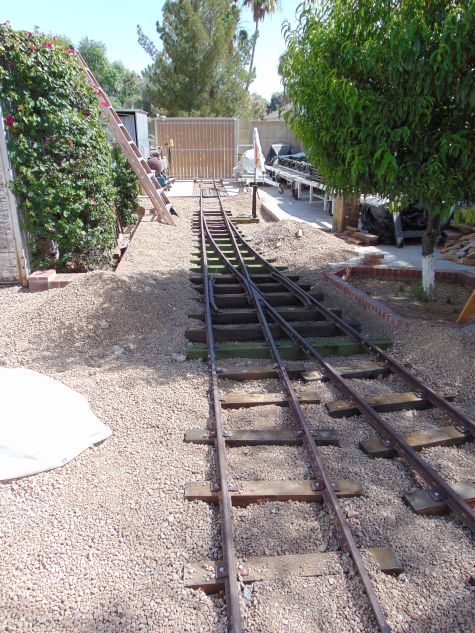
|
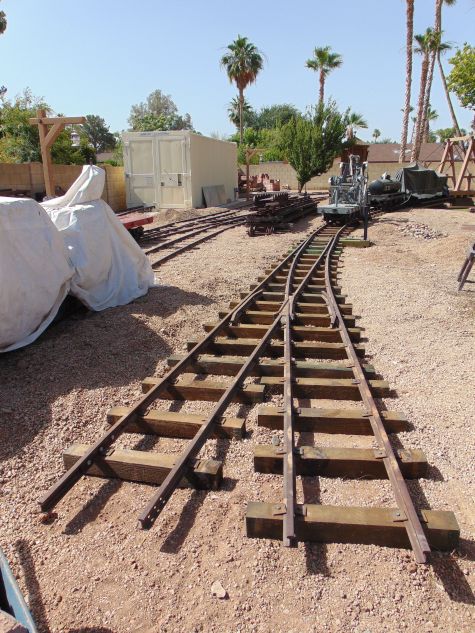
|
I arranged to have a 15 yard trailer of a debris removal company delivered here on May 28 and it remained here over the Memorial Day weekend. It sat in the driveway adjacent to the A & P tracks. One of our flatcars of the F & MV was placed into service and over the three days 5 very full flatcar loads of ties were moved into the driveway, off-loaded and stacked in the trailer. I also got rid of eight pallets that the ties arrived from Oregon on and a few other pallets that had accumulated here from the powder coater and other sources over the years. That trailer was packed as full as it could possibly get; I’m glad to have all of the old deteriorated ties out of here.
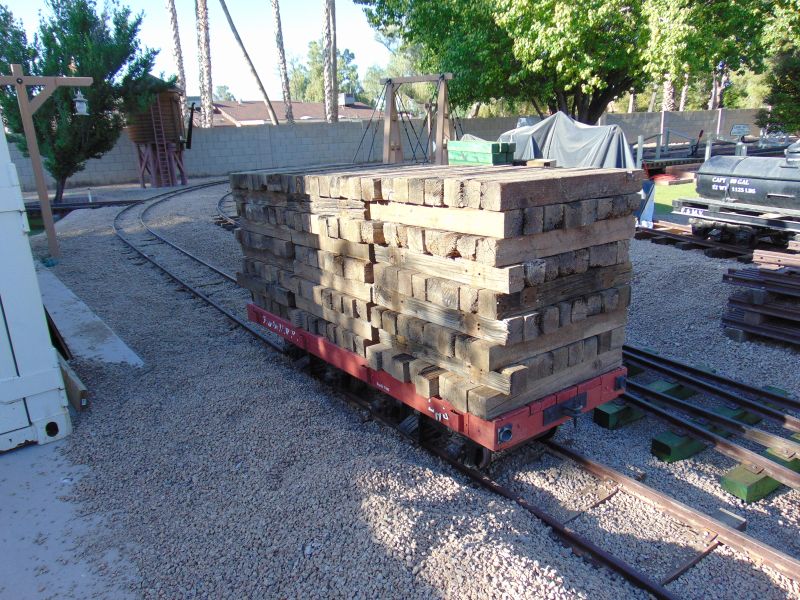
|
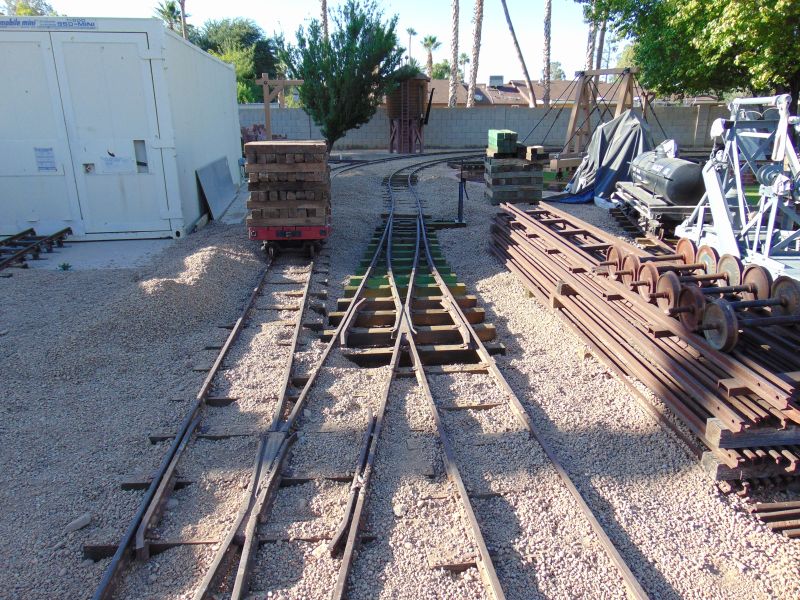
|
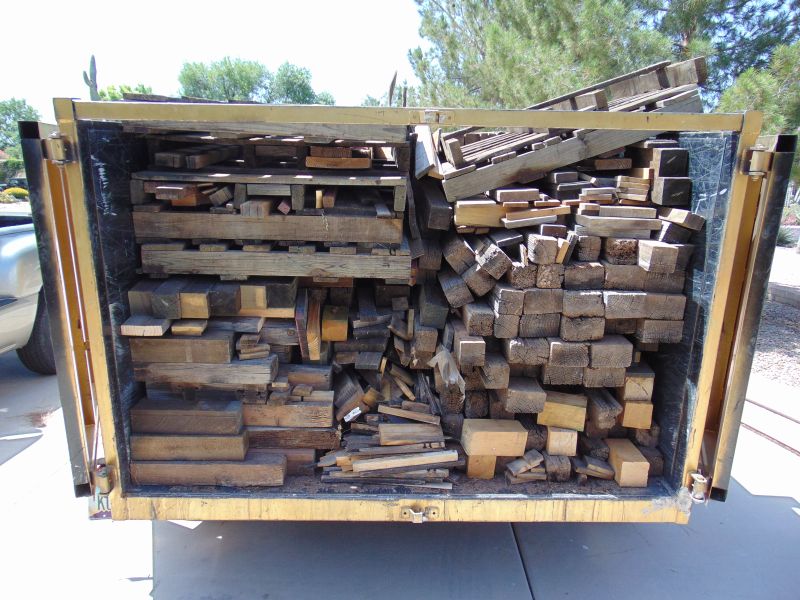
|
We rebuilt the switch stands with new grade 8 button head bolts instead of the original rivet lever pins, re-welded some lever heads and added zerk fittings to lubricate the lower post collars. I had the switch stands and the targets re-powder coated so they should not only be in good operating shape, but should look good for many years to come. We also had the switch stand targets professionally coated with a ceramic finish to further extend their bright finish. All nine of the switch stands and ties were assembled and we slid them each into place as an assembly. Three of them were far more difficult than others as a result of confined areas, but all are in place. The switch stands will be attached to the switches, the linkage reinstalled and adjusted and the targets attached in June.
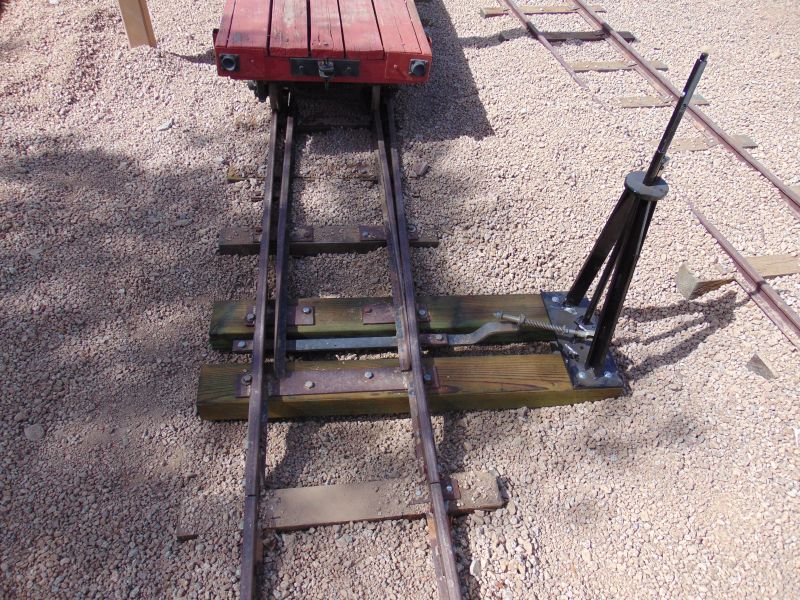
|
|
We redesigned the way the switch stands are attached to the switch stand ties. Originally they were attached with four 3/8 x 2 1/2 lag bolts. As they ties degraded over the years, the original lag bolts were replaced with 3 inch and then 3 ½ long lag bolts. Now we have 2 flat iron straps 1 ½” wide x ¼ inch thick that we pre-drilled and that have 5/16 nuts welded in place on the bottom. These straps are under the ties and hold the switch stands and the switch ties securely in alignment. This design eliminates torque on the wood as the switch is thrown and as the wood shrinks over the years, we will simply tighten the 5/16 bolts from the top side. I wish I had used this method 27 years ago!
|
Our post-war E10 locomotive no. 26 was scheduled to return from body and paint in February, then March, then on April 14, then April 21 and then was further delayed until May27. Now she is scheduled to return on July 9. Two of our red and white coaches from train no. 26 are back at body and paint for final touch up and will be returning here on June 17. The observation car from train no. 26 will return to body and paint for final touch up on June 25 and the observation car from train no. 20 will join her at body and paint that day. On July 9, the observation car and locomotive no. 26 are scheduled to return to the A & P. On July 9, locomotive no 20 and 24 will go to body and paint and the two coaches from train no, 20 return home. We hope to have both of our E10 trains back from body and paint in their entirety by the end of the year. We still have the final assembly of the windows, trim, wiring, drive lines and the motor to rebuild and install, but all of that will take place in house.
We have converted locomotive no. 24 into a B Unit carrying the batteries that actually power our two E 10 trains. Before these two locomotives leave for body and paint we had quite a bit of work to complete modifying and finish fitting hoods, rebuilding, repairing and replacing slide rods, removing electrical components, removing sheared off bolts and straightening and squaring up sheet metal.
|
|
Once these three cars are completed, we will have our two E10s trains back and body and paint will start on the G12s. The first of the G12s to head to body and paint will be our post war locomotive and observation car, then the pre-war locomotive and observation car and then the passenger coaches.
Work is progressing on the rebuild of our BKN engine that will go in our Addison locomotive. Actually, it is a mash up combination of the best parts of the two BKNs that we sent over there being rebuilt as one motor plus the correct carburetor that I was able to locate. Originally our Addison train would have been powered by a Wisconsin AKN motor, but once the BKN was produced with 8 HP instead of the 6 HP AKN model, many of the trains were upgraded to the newer motor which meant another coach could be added to the train.

|
Our solid steel logos mounted on the turntable had faded badly over the years and I also sent them off to the powder coater to be freshened up. After I repaint the lettering, we will also have them professionally ceramic coated.
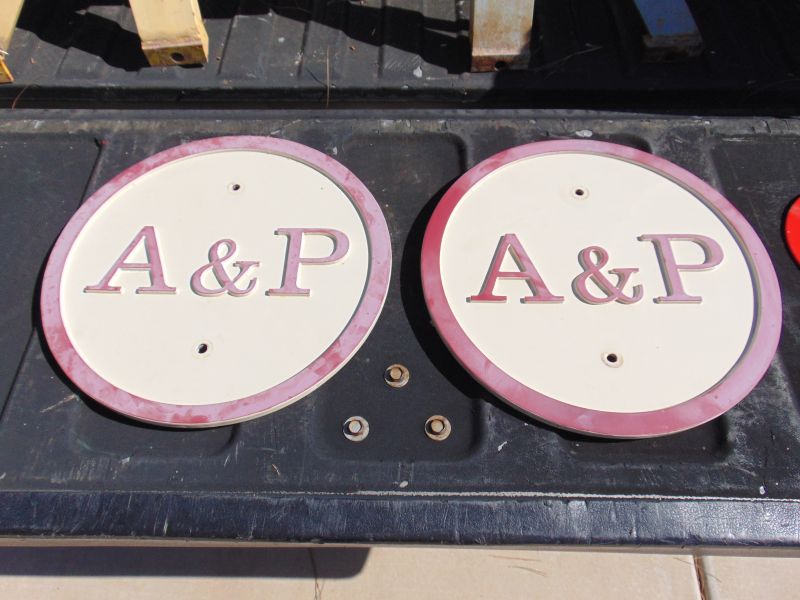
|
Our 2 G12 gas tanks that are being fabricated remain a work in progress, our E10/G12 truck arches are being cast a few at a time and our short sleeve shorts are back ordered.
Happy and safe railroading everybody!
05/18/22
We dug out and replaced the last 26 of the ground contact ties in the north yard and replaced 13 in the east yard. We still have 66 similar ties to replace in the east yard which will utilize our last cube of ties. This will be the last section of the tie replacement project to be completed. We replaced the switch ties of one of our mainline switches in the north yard that sits primarily on the Rock Creek trestle. Those five ties are the only ties of that switch that make ground contact. The bright green ties are the ones that I dried and hand-treated with chemical preservative here in Peoria, AZ and are in place of the much deeper green ones that were professionally pressure treated in Eugene, OR and more than half of them were then lost by the shipper. Each of our switches will have a combination of the two colors. The ones treated in Oregon have near 100 percent saturation, the ones treated here are closer to 20 percent. It isn’t ideal, but is a deterrent for a while.
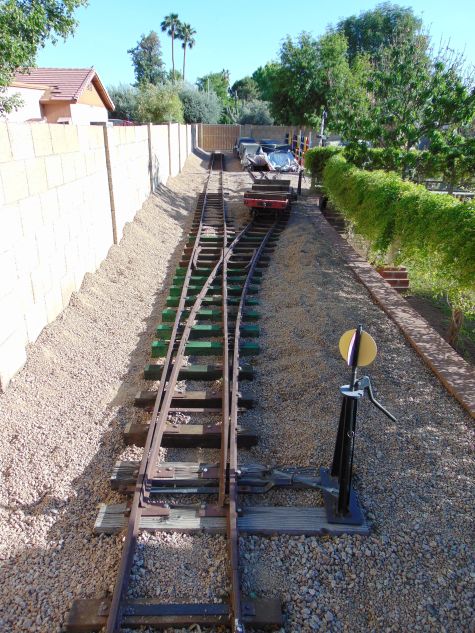
|
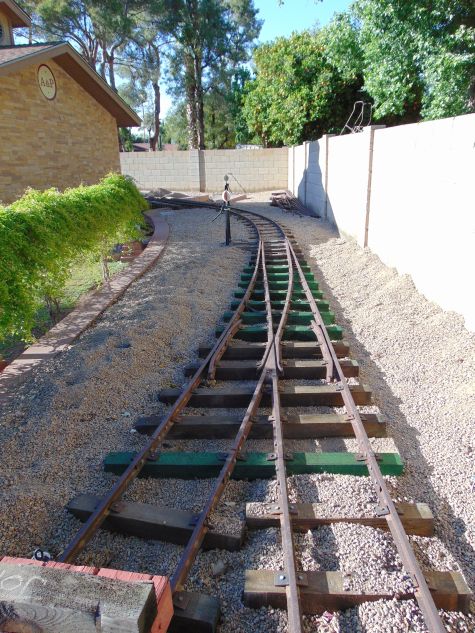
|
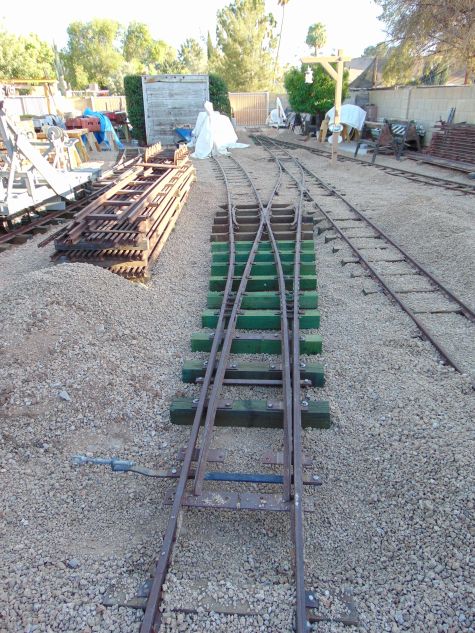
|
Another difference in the ties is the ones from Northern California were originally a saw blade thickness under a full 4x4 when ripped and they shrunk as they dried to 3 ¾ x 3 ¾. I couldn’t find a source for that finished size. I did find a source for rough sawn, fully dried 4x4s that are a full 4x4. I ordered those so they are ¼ inch bigger in both directions than the others, but that is just the way it is going to be on our switches. After all of the switch ties are replaced, we will replace the switch stand ties. Digging out the much longer switch ties in the confined areas is a bit difficult and much more time-consuming than the shorter standard ties.
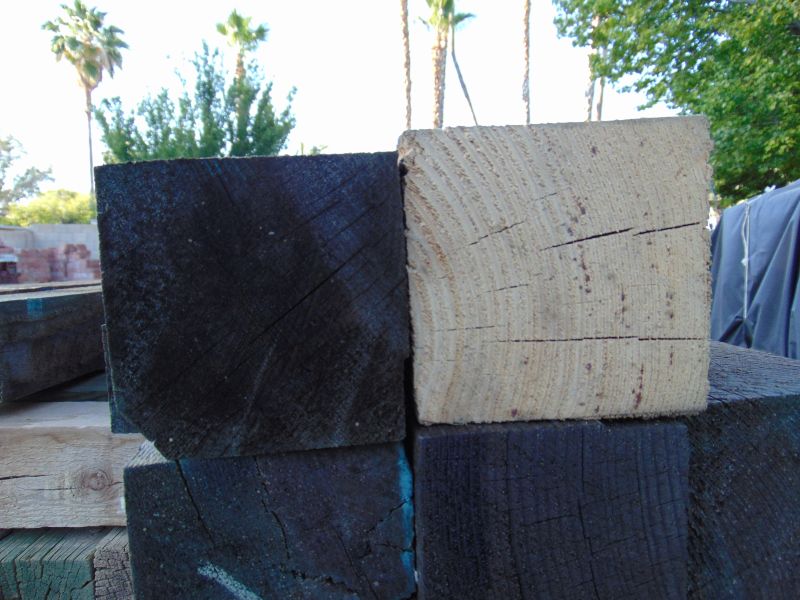
|
We have a total of nine switches that will have the ties replaced. We have dug out and replaced the ties in four of them and the rail is gauged and secured. We have dug out the ties and roughed in the new ties under 2 more switches. I have removed the tie plates and lag screws in the remaining three, but the ties still need dug out. The ties are cut and stacked for all three, but a few still need chemically treated. OMG, what a huge job it was replacing 15 ties in each of those switches with each of the longer ties having 8 tie plates and gauging and securing the rails. In some cases we had less than 6 inches to work outside the end of each tie. There are 45 more switch ties and 18 switch stand ties remaining to be dug out and replaced.
Next month, we are going to be rebuilding the switch stands and adding zerk fittings and replacing the lever pins. I am also having the switch stands and the targets re-powdercoated so they should be in good shape for many years to come. We also re-ballasted and tamped several areas in the west and north yard. We hope to have all the switch ties, east yard ties, switch stand ties and ballast replaced by the Fourth of July so that we can primarily focus on less strenuous work like replacing the walking planks on the trestles when it is 119 degrees here.
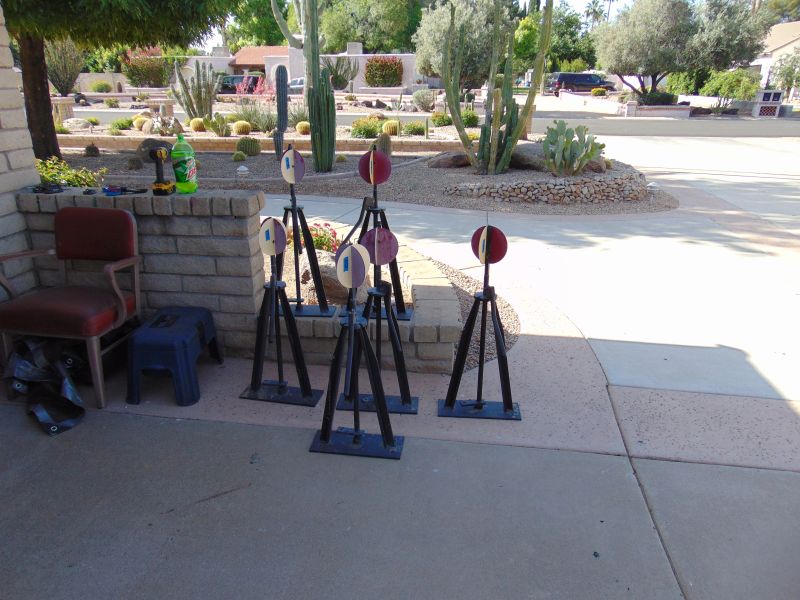
|
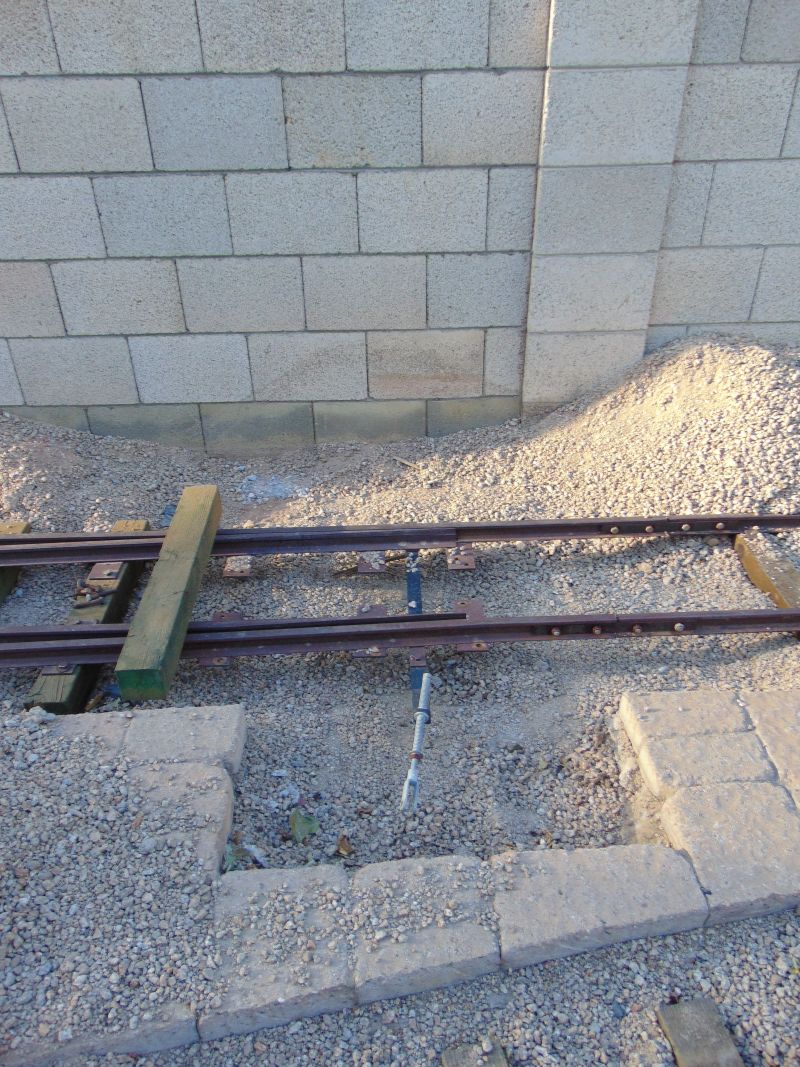
|
We received good news about the BKN motor for our Addison G12 that went to the rebuild shop last month. I was concerned as it wasn’t free spinning, but I knew it had been sitting in a garage since at least 1971. Our engine expert said it is rebuildable. He will also repaint it while it is apart. Like everyone else right now, he is running a few weeks behind so it will likely be mid to late June before the motor finds its way back to the A & P. We will mount in on its powder coated pan and add all the brake components once it gets back here. I have a lead on two rebuilt clutches that I am attempting to chase down as well as the alternator and alternator bracket.
As I shared several weeks ago, the first two prototype G12 truck arch castings I received from the foundry just weren’t quite what I wanted. We discussed my concerns and they modified the patterns. I received the prototype castings 2.0 this month and I am very pleased. They will expand the patterns by ¼ inch on each end for the 3.0 version. I gave them the go ahead to cast forty of them over the coming weeks. They are also making a right and a left electric motor grill for one of our E10 motors. The grills were missing off of one of our motors, but present on another one. The finish machining on the truck arches will take place after they arrive in Arizona in late May or early June.
|
The salvaged G12 hood panels arrived from the east coast this month and I couldn’t be happier. They are in much better shape than they looked in the photos. There is surface rust, but no structural issues. They need straightened, twists removed, a split and a tear repaired and some TLC in general, but we are far ahead of starting from scratch! The first step is to clean them up; unfortunately, they are about 5 inches too long to fit in my bead blasting cabinet. So I dropped them off to be bead blasted and powder coated with a layer of thick primer that I will use as a base for the repairs. Even the bead blaster is having delays, he said two to three weeks. In the past, if I dropped off on Saturday, I could pick up the following Saturday.
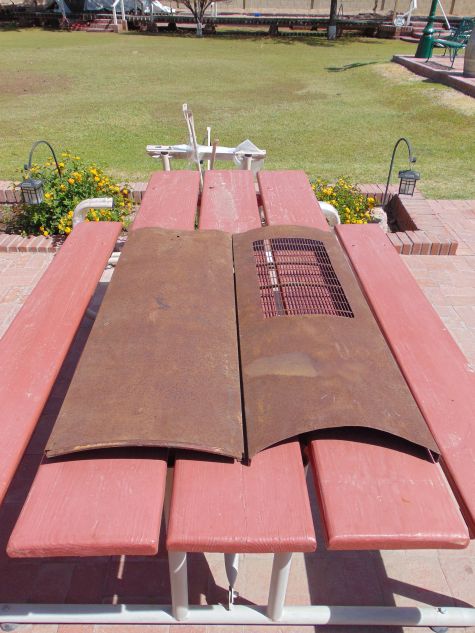
|
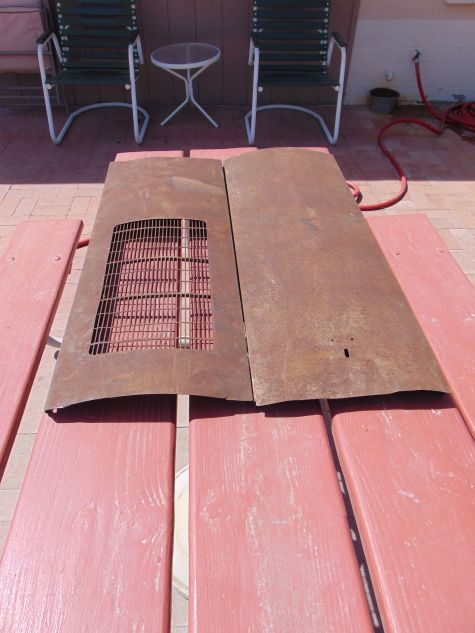
|
We have several ongoing projects out here, but excitement is mounting as some of these huge projects are finally coming together.
|
Happy and safe railroading everybody!
04/15/22
I had a dental appointment across town in Chandler this month on a Thursday. Afterward, I stopped by Desert Breeze Park to see if their train was running and found out it only runs Friday through Sunday so I missed out on catching a train ride out there. Note to self, have my teeth cleaned on a Friday next time.
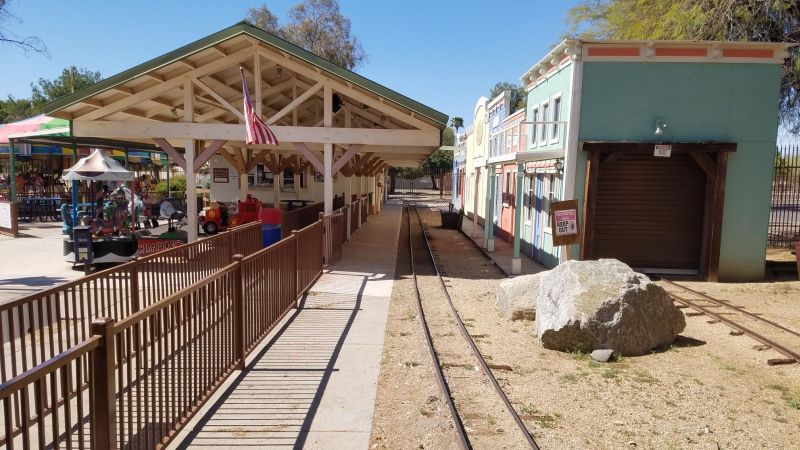
|
Dave and I keep plugging away on the tie replacement project and that is where the majority of our A & P time went again this month. We have dug out and replaced 595 of the 700 standard size ties that make ground contact here. The mainline ties that aren’t on a trestle or part of a switch have all been replaced. All of the non-switch and non-trestle ties in the west yard have been replaced. We still have 26 ties to replace in the north yard and 79 ties to replace in the east yard. The cubes of new ties are getting smaller and smaller and the cubes of old ties that I will have hauled away are getting larger by the weekend.
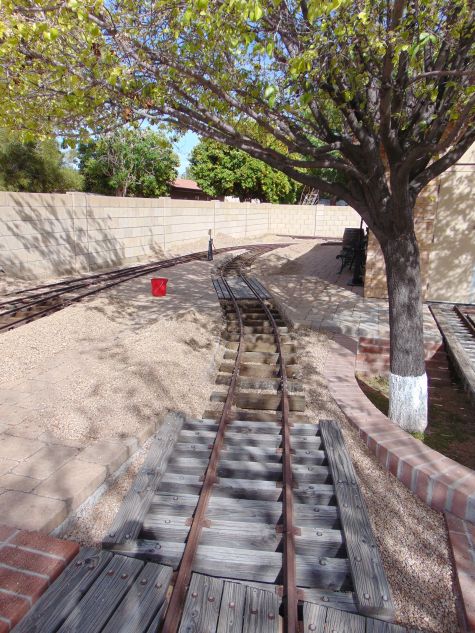
|
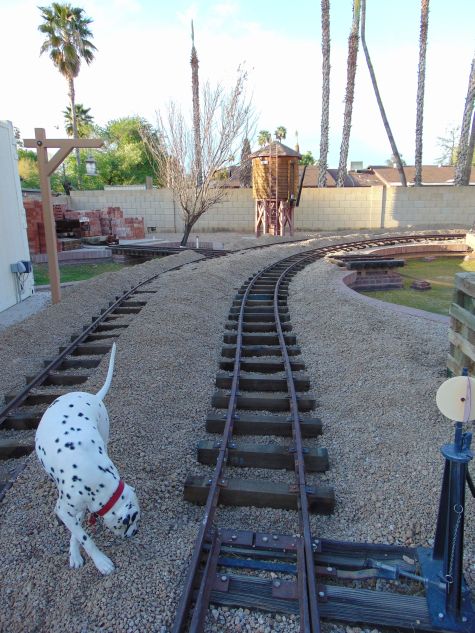
|
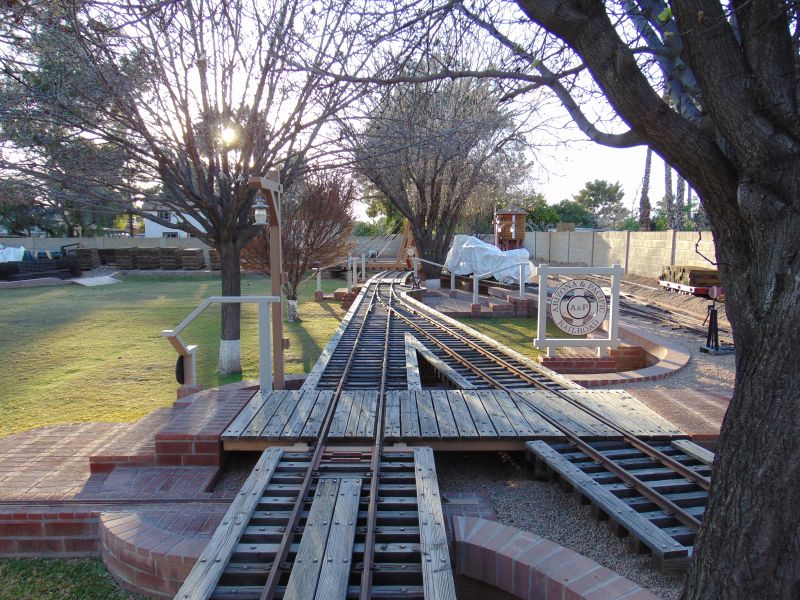
|
We also fabricated a steel transition platform for the five foot concrete pad that sits in front of our second engine house. Previously, we had four 4x6s ripped to the varying dimensions as the rail climbed and leveled off for entry to the engine house. Friend of the A & P, Jerry Graves, took my design idea and improved upon it several fold. This new platform is strong, compact and won’t be a target of termites. I had thought about powder coating it, but I’m not going to powder coat the rail it supports and I made the decision to leave it alone and allow it to develop surface patina to match the rail.
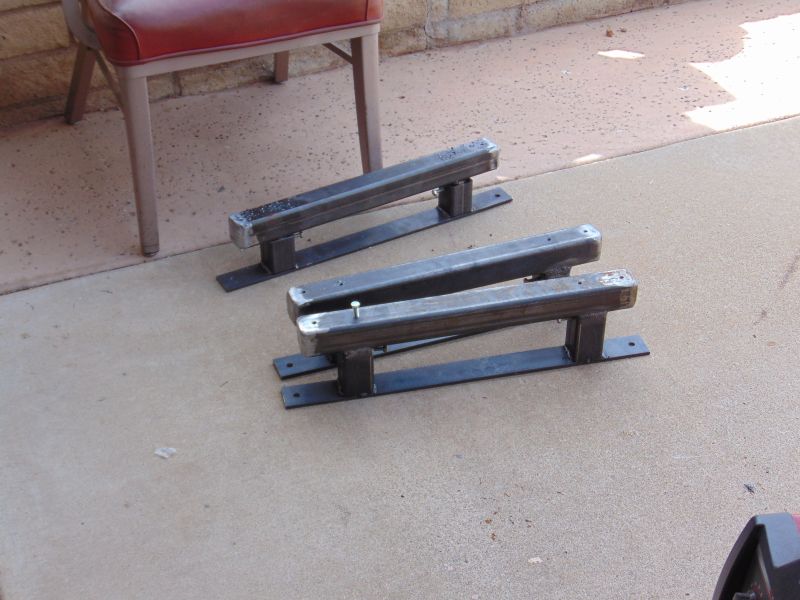
|
|
|
|
In April, we hope to finish replacing the ties in the north and east yard and start the final leveling of the track, tamping of ballast throughout the railroad and the final dressing of the ballast. That work will be completed in May. We have 10 switches total and will be replacing the ties in 8 ½ of them. The other 1.5 switches are on trestles and don’t have any ground contact. In addition to the 700 ties mentioned earlier, there will be 93 switch ties and 18 switch stand ties that will be replaced. The switch and switch stand ties will be replaced last. Digging out the much longer switch ties in the confined areas will be a difficult and time-consuming process. We hope to replace the switch ties and adjust and rebuild one switch and switch stand a weekend throughout May and June. We also have some trestle walking planks and over-run ties to replace in July, August and September. This is a huge project that we hope to have completed by October 1.
|
|
We made some significant progress on our Addison G12 this month. We added the five reinforcement ribs to the floor panels, added the rear seat reinforcement panels, added the second set of “fingers” that hold the rear of the driveline tunnel in place and mounted the driveline tunnel.
|
|
We will start on the installation of the throttle and brake slides and the associated sheet metal work on the Addison G12 next month. Many years ago, the factory slides and sheet metal were cut out and replaced with solid panels and a different means of throttle and brake control were envisioned. It was important to me that we returned her to the original throttle and brake slides in this restoration project and to that end, I located donor slides and slide slots. We will mark, cut and remove the solid sheet metal panels in all four locations. We will install both slides and rough the panels back into place. We will also drill out and clean up the mounting brackets for the control handles after the slides are in place. Once the slides are done, next up will be the work on the hoods. I am starting to get really excited by all the progress on this project.
Our post-war E10 locomotive is scheduled to return from body and paint on April 21. Hopefully, the final touch up on the 2 coaches and the observation car will take place that day as well. There is an outside chance that the two coaches of our pre-war E10 will also return to the Arizona & Pacific from body and paint that day. Once those two coaches return to the A & P, the pre-war E10 ob car, locomotive and B unit will travel to body and paint. We’ll see. After the paint work is completed, we still have the final assembly of the windows, trim, wiring, drive lines and the motor to rebuild and install on the 2 E10 trains.
On the 18th, I attended the Maricopa Live Steamers Spring meet at Adobe Mountain. I visited with Steve Easlon of Creston, CA, Phillip Nilsson of Durango, CO and Bob Clark of Farmington, NM. I rode in style on Steve’s passenger equipment for a 30 minute ride late in the afternoon and then a spectacular two hour night time ride under the stars on Bob’s equipment. There is something magical about night rides out in the middle of nowhere in complete silence except railroad sounds!
|
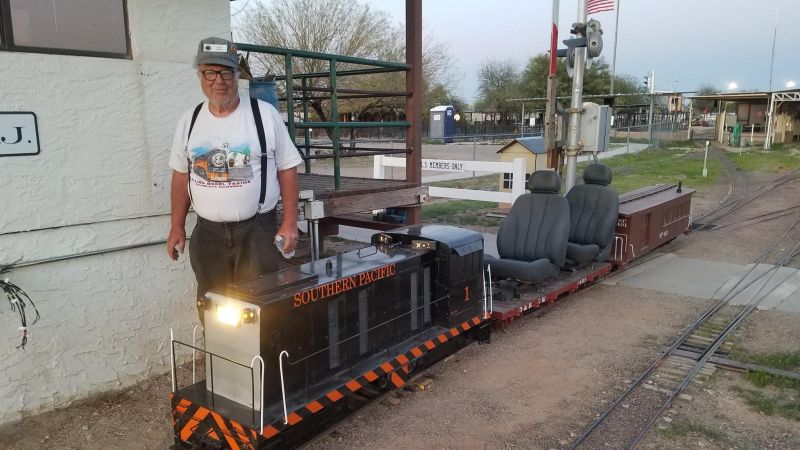
|
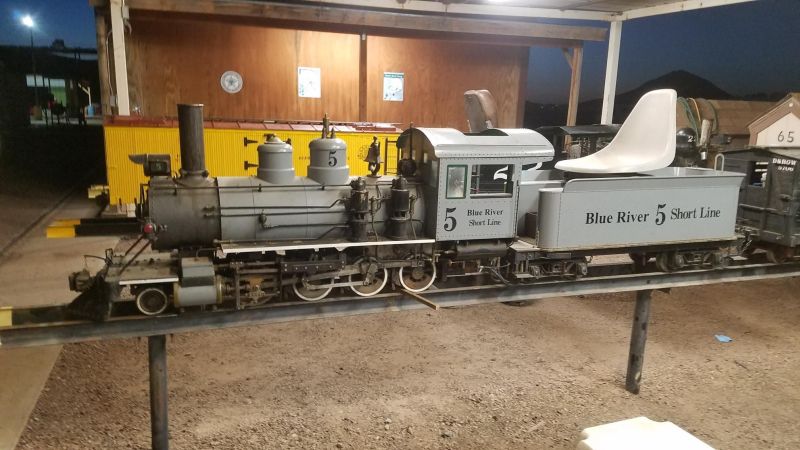
|
The BKN motor for our Addison G12 went to the rebuild shop this month. I sent a “parts” BKN with it hoping that we have or can find everything we need to get her running dependably. After rebuild, the BKN will get cleaned up and painted. We will mount in on its powder coated pan and add all the brake components once it gets back here. I have a lead on two rebuilt clutches that I am attempting to chase down as well as the alternator and alternator bracket.
We have a lot going on out here, but excitement is mounting as some of these huge projects are really coming together.
Happy and safe railroading everybody!
03/15/22
Dave and I keep plugging away on the tie replacement project and that is where almost all of our A & P time went this month. The mainline in the front yard, east and north yard is completed except for the switches. We have 5 switches on the mainline and five more on sidings and spurs. We have dug out and replaced 318 of the 700 standard size ties that make ground contact. Much of the ballast work remains to be completed. There will also be 110 switch ties and 20 switch stand ties that will be replaced. The switch and switch stand ties will be replaced last.
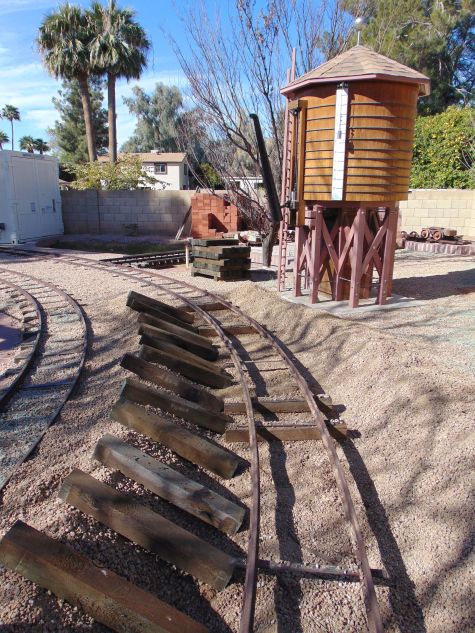
|
One of the reasons we will be handling the switch ties last is because our shipper USF Reddaway lost a pallet of mine with half of our switch ties on it somewhere between Eugene, OR and Phoenix, AZ. Then, despite the fact that I had insured the shipment, they refused to pay me for the product that they lost. They are a clown show. Clown was my second word choice, you can figure it out. I would recommend using any other shipper before you choose them. I am sourcing to get 60 more ties ripped, cut to length and treated for delivery here.
There is such limited space in many areas along the right-of-way that digging out the original ties is difficult and time-consuming. We will have a little bit more room to work with on the western section of the mainline. The sidings and spurs are a mixed bag with some being really tight work areas and others being pretty roomy. The challenge with the sidings and sidetracks is moving all of the equipment around such that it is not in the way as we move from one area to another.
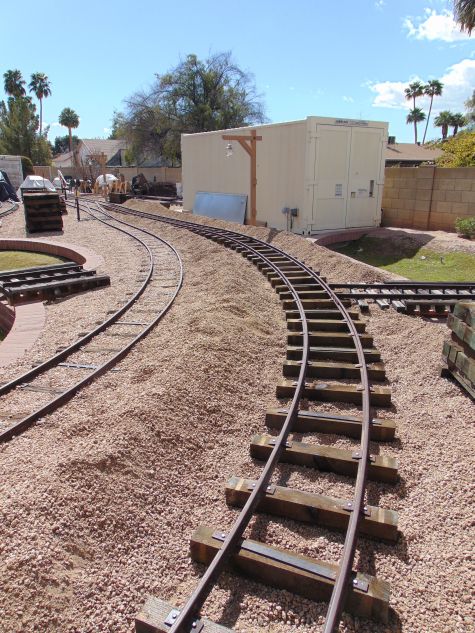
|
|
|
We did not make any progress to speak of on our Addison G12 this month. We will be adding the reinforcement ribs to the floor pans in March. The ribs are all fabricated and ready to install. We will also be adding the under seat ribs and lower seat fingers to stabilize the drive line tunnel. There are also reinforcement brackets under the corners of the seat and the electrical mounting bracket that we will installed next month.
Last month, I shared that I had located a roached-out G12 in a bone yard in Connecticut that is the donor of its two hood panels and its throttle and brakes slide rods. There are also some brackets, clips and other odds and ends that it is donating. The throttle and brake rods have arrived. Finding the appropriate shipping box for the hoods isn’t an easy task. Some of the parts will need a little bit of work, but I am so happy that they are coming our way. Over the years, I have been fortunate enough to make a number of MTC friends in different parts of the country that assist with my parts hunts and their assistance is priceless. This month, I was able to assist one of them with a significant G16 part for which he had been searching for a long period of time. It is great having a whole group of us assisting each other tracking parts for our various MTC restoration projects.
|
Our post-war E10 observation car returned from paint and body this month. In addition to the delivery of the observation car, what started as some minor touch up work took place on the two coaches that were already here. It turned out to be a workday that ended just after midnight. We still have some color sand and buff and interior work yet to complete. Once the paint work is completed, we still have the final assembly of the windows, trim, wiring, drive lines and the motor to rebuild and install. The locomotive’s return is delayed until the end of March. We are looking forward to having our entire post-war E10 back from body and paint soon. The two coaches from our second E10 train are scheduled for delivery in April and May. We hope to have our second E10 train and a G12 locomotive and observation car back from body and paint by the end of this year.
|
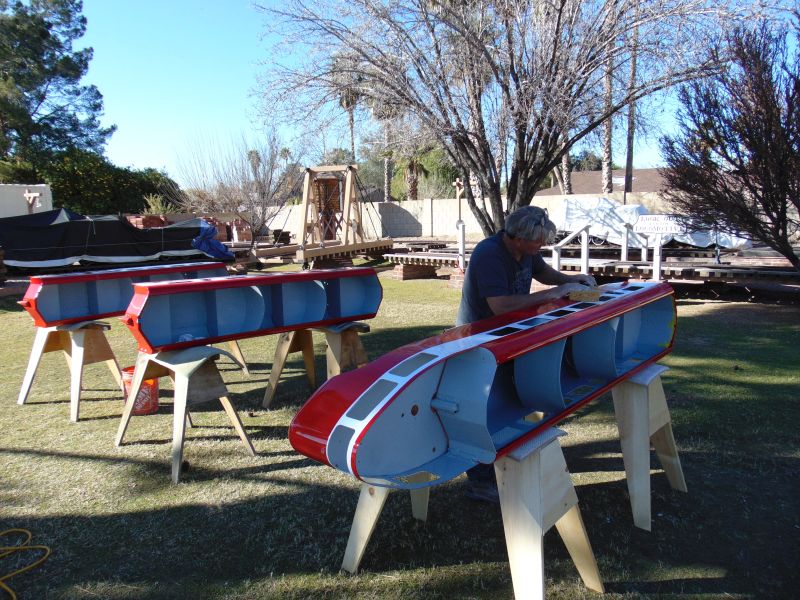
|
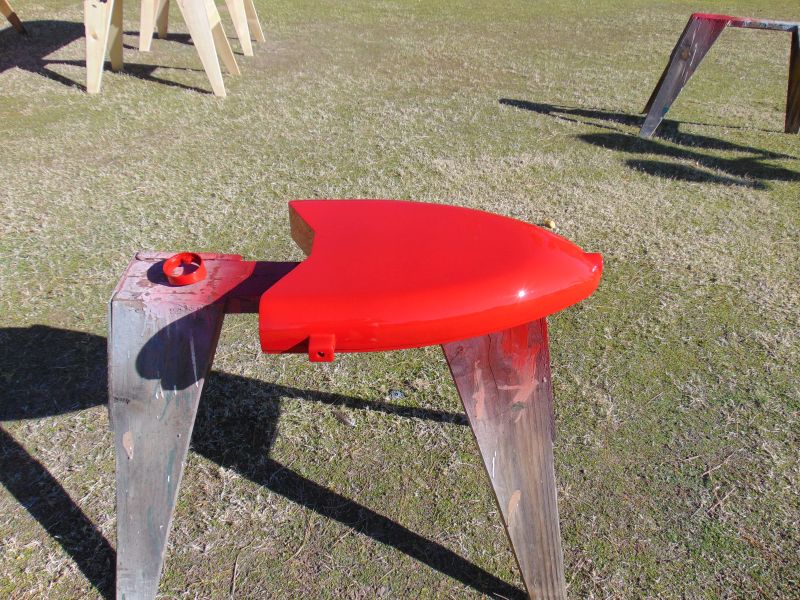
|
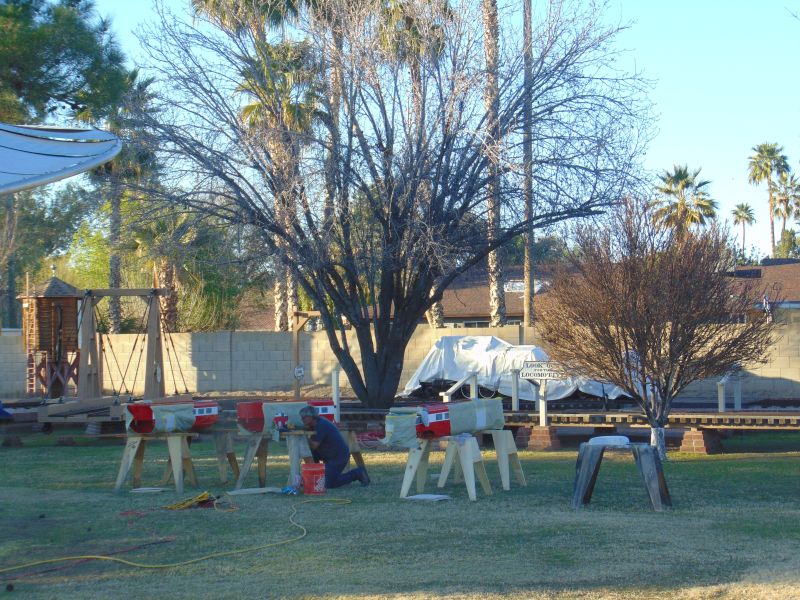
|
|
We continue making progress on our signs project. All eighteen of the signs are back from powder coat and look good. I had three additional signs cut that will be mounted on existing posts. We have some final decisions to make regarding a couple of the names and then I will order the stencils and once received will start the lettering. We hope to start placement and mounting this fall.
Our 2 G12 gas tanks are still in the queue at the fabricator; they are now scheduled to be completed in March. These are taking longer than was hoped like pretty much everything is with today’s supply chain issues and employee shortages.
I was in touch with our foundry this month and we should have two of our second generation G12 truck arch castings from the foundry in March. You may remember when I received the first two rough G12 truck arch castings from the foundry few weeks ago, there were a couple of things that I wasn’t completely happy with. They made some changes to the pattern and will re-pour a couple for delivery next month.
I shared last month that for weeks I thought we had secured an original Stromberg L26A carburetor for our BKN motor that will go in our Addison G12. Apparently, the seller changed his mind as it hasn’t arrived and my calls and texts are no longer being answered. So, we went back to looking. I was very fortunate and found a NOS Stromberg L26A carburetor in Rhode Island. It arrived last week and it’s beautiful. Sometimes it is good to be persistent, but most of all lucky.
|
|
Now that we have the carburetor that we needed, the BKN motor will go to the rebuild shop in March. I have a lead on two rebuilt clutches that I am attempting to chase down as well as the alternator and alternator bracket. After rebuild, the BKN will get cleaned up and painted. We will mount in on its powder coated pan and add all the brake components once it gets back here.
|
We have a lot going on out here, but it is really exciting seeing some of these things coming together.
Happy and safe railroading everybody!
02/17/22
Our engine house has always been well-lit during the day time with all of the windows at both levels and the two large banks of fluorescent lights. After dark, the lighting in there was not ideal. Also on cold winter days, it took a few minutes for the lights to warm up and give off much light. This month we converted the fluorescent fixtures into ones for LED lighting. The original 8 foot fluorescent bulbs were 75 watt, 3500k and 6420 lumens. The new LED bulbs are 90 watt, 5000k and 10,000 lumens. It is an amazing difference. Dave handled rewiring the eight light fixtures to bypass the ballasts. We should have done this well before now!
|
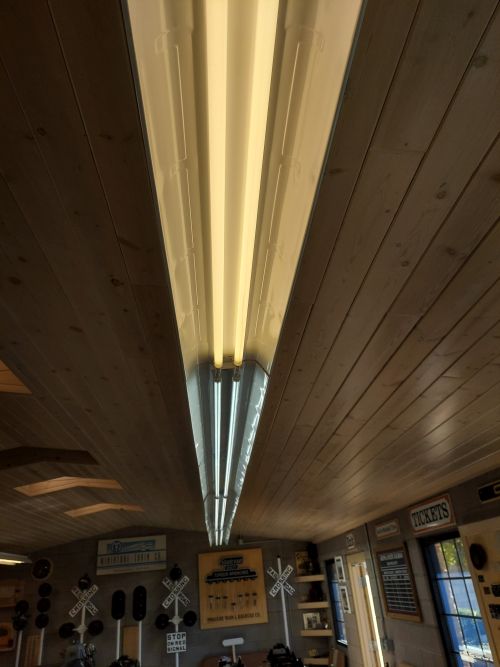
|
We made significant progress on our Addison G12 this month. The basic floor pans were bolted into place a few weeks ago. Now we are adding the reinforcement ribs to the floor pans. The ribs are all fabricated and ready to install next month. We added the under seat ribs and lower seat fingers to stabilize the drive line tunnel. We fabricated the electrical mounting bracket and will install it next month. I located a roached out G12 in a bone yard that will be the donor of its two hood panels and its throttle and brakes slide rods. They will need some TLC, but we are way ahead of starting from scratch.
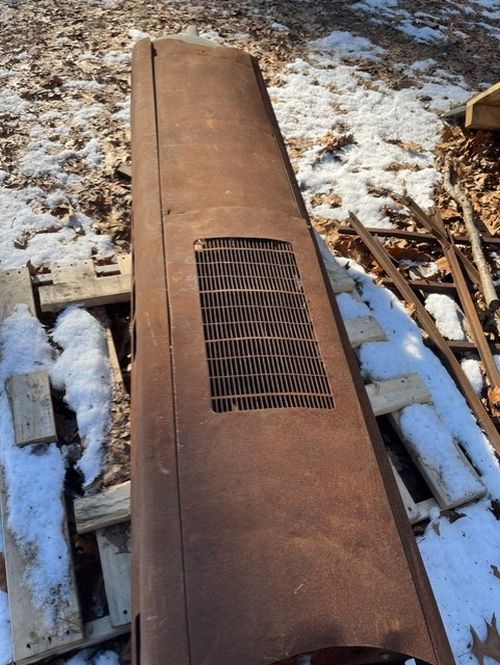
|
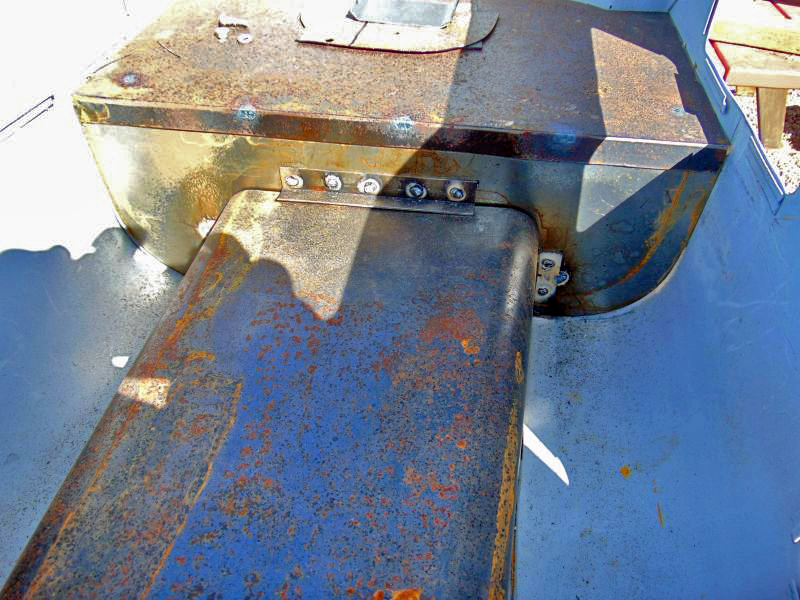
|
Our first E10 locomotive and observation car are now scheduled for delivery on February 26. In addition to the delivery of the locomotive and observation car, some minor touch up will take place on the two coaches that are already here. We still have the windows, trim, wiring, drive lines and the motor to install, but we are looking forward to having our post war E10 back from body and paint.
Dave and I completed the tie replacement work in the front yard. All 132 ties in the front yard have been dug out and replaced with new ties. The final ballast work and track grooming has been started, but remains to be completed out front. This was considerably easier when we did this the first time 26 years ago for 2 reasons. After the track was all in place, I landscaped around it with retaining walls and vegetation that limit the amount of room that we have to work and secondly, instead of approaching 30 and 40 years of age, this time Dave and I are approaching 60 and 70.
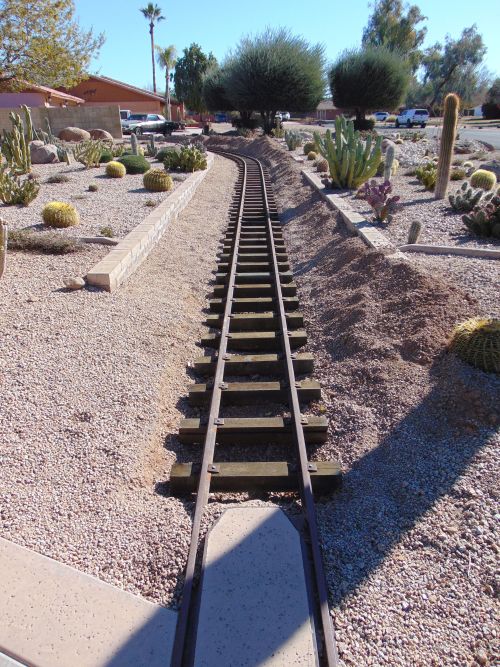
|
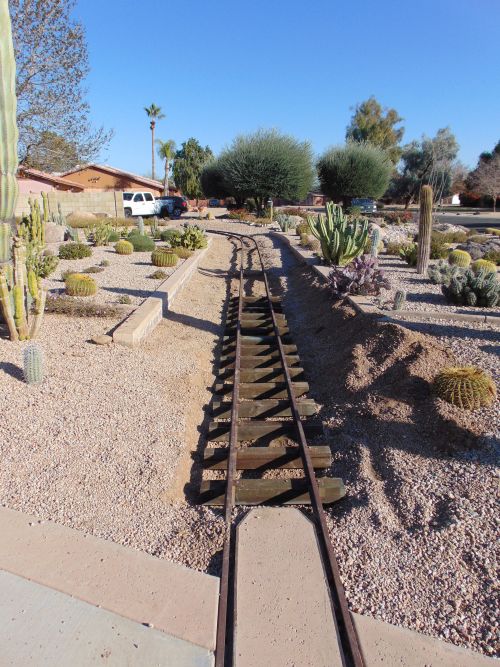
|
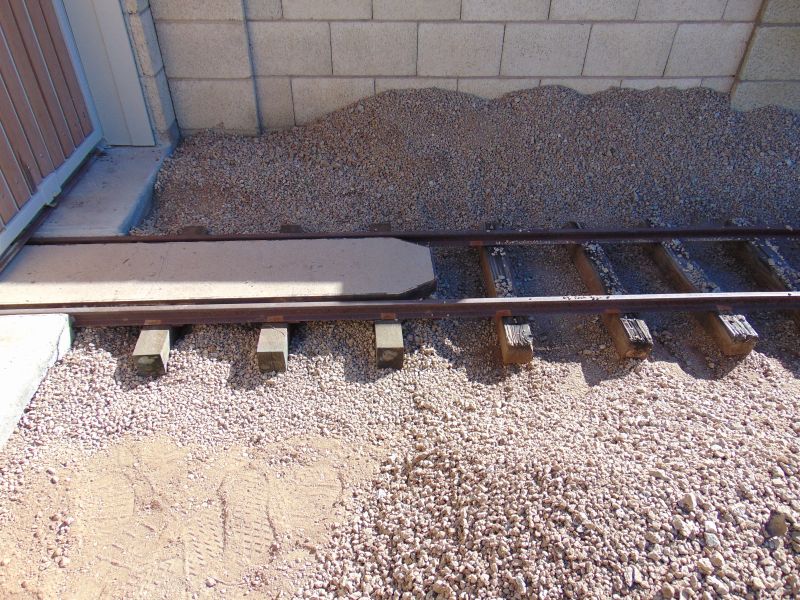
|
The original ties were in even worse shape than we had realized; termites, dry rot, wet rot from sprinklers and checking over 26+ years had deteriorated them beyond continued use. The new ties are not only a little larger with 5/16 more meat in both directions, but the preservative penetration is at 90%. These should be rock solid for another 26 years. I thought I might be able to repurpose the original ties, but with a few exceptions they are in rough shape.
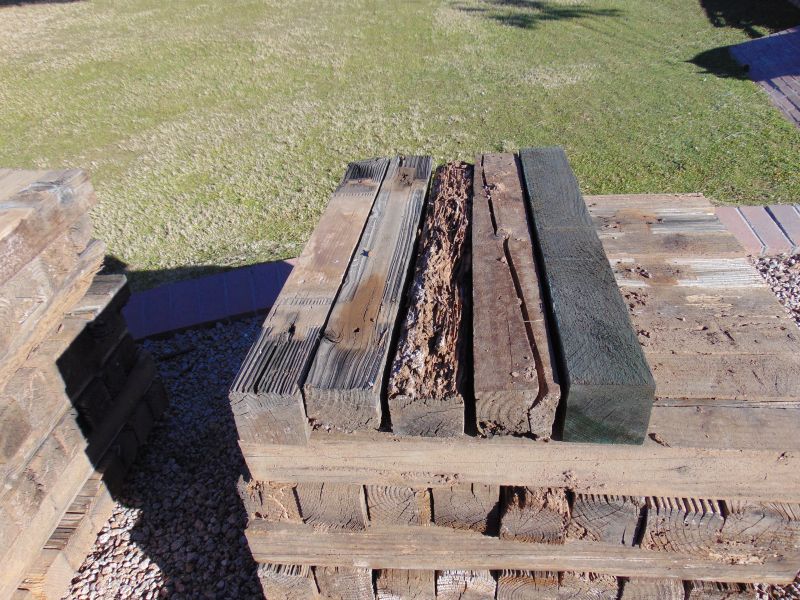
|
We continued working on our signs project. We welded up the framework for five sign posts that will be mounted on our trestles and added signs to a number of the posts. We also pre-drilled the trestles so that once all the lettering is in place, we just need to bolt them to the trestles. They will go to powdercoating next month. Five of the sign assemblies are back from powdercoat and eight will be ready for pick up at the powdercoater next month. We also cut three additional signs that we will letter and mount on existing posts. Once they are all back, the lettering will start and then the placement and mounting will begin.
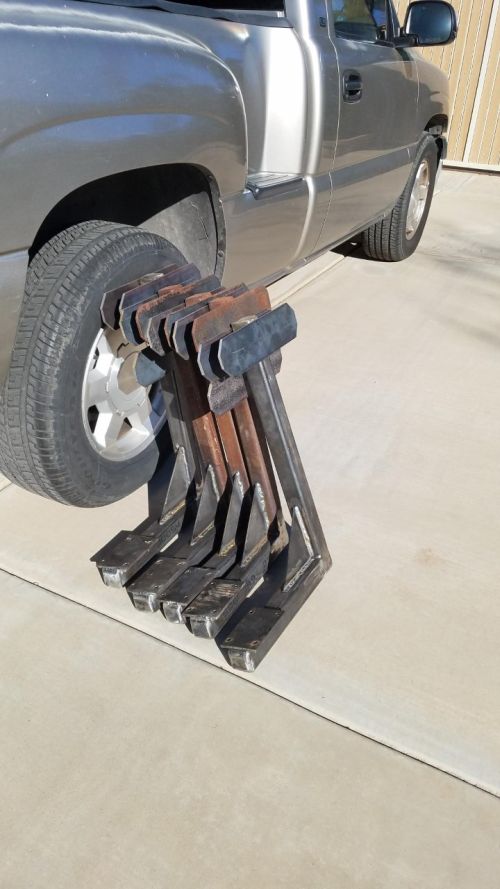
|
We made 4 more wheel stops and had them powdercoated for displays in the enginehouse.
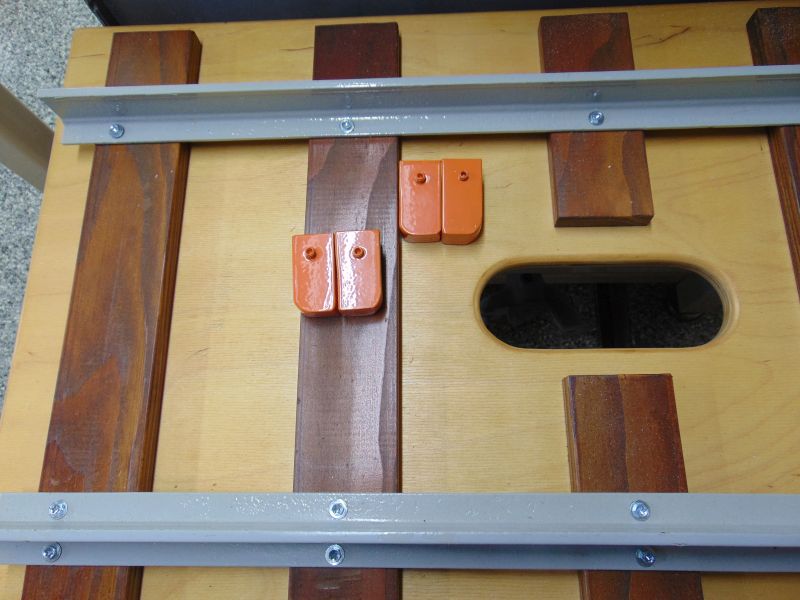
|
Pete and Char Robinson of the Waterman and Western Railroad in Waterman, Illinois and Jerry Stinebring of the P B & S Railroad in Dwight, Illinois visited the A & P Railroad this month. It was great to have them visit again after a couple year Covid hiatus.
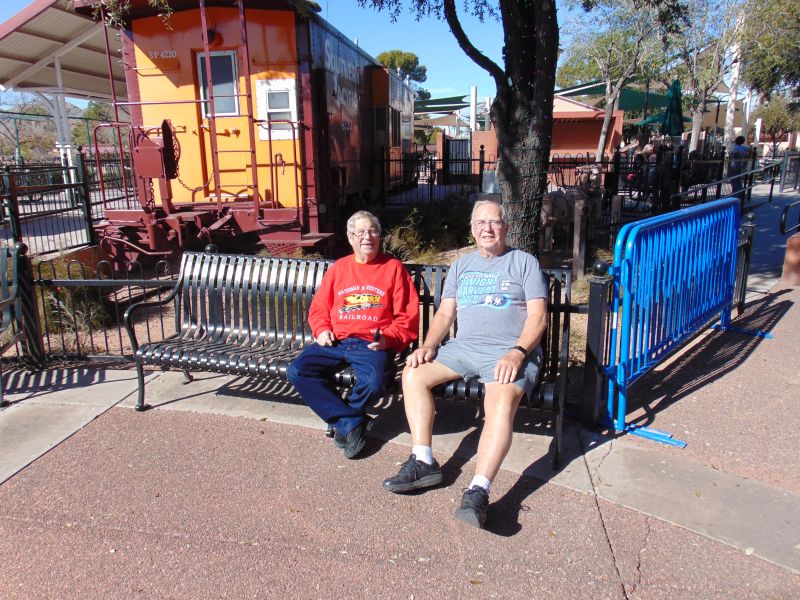
|
Pete, Jerry and I also had a chance to visit the McCormick-Stillman Railroad Park last month on a nice and dry Saturday! The steamers weren’t running, but it was still a big crowd on a beautiful winter day with plenty of blowing and drifting sunshine. Of course, we hopped on the Paradise and Pacific and enjoyed our lap around the park. Tom and Frank do a tremendous job maintaining that beautiful equipment and the track.
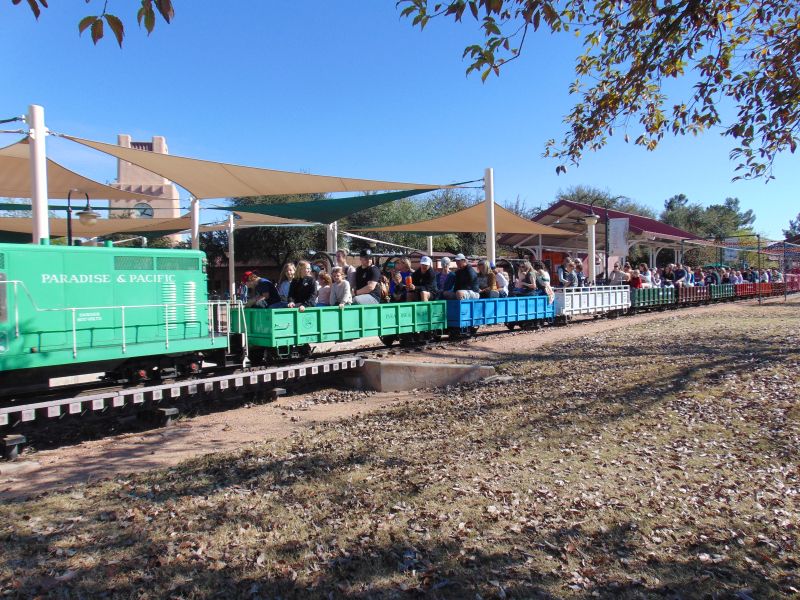
|
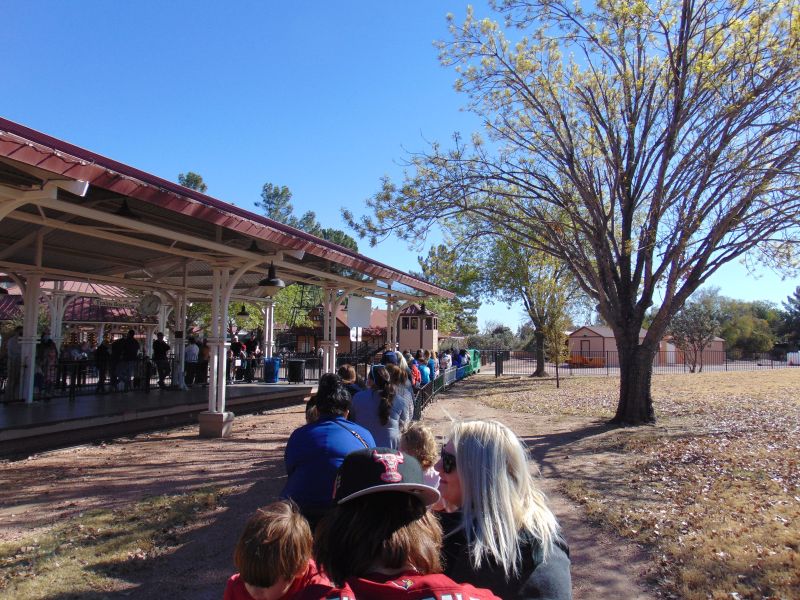
|
Our 2 G12 gas tanks are still in the queue at the fabricator; they are now scheduled to be completed in March. These are taking longer than was hoped like pretty much everything is with today’s supply chain issues and employee shortages.
I received the first two rough G12 truck arch castings from the foundry; there were a couple of things that I wasn’t completely happy with. They are making some changes to the pattern and will re-pour a couple more next month.
We replaced the original bulkhead panel on our post war G12 with a new one we fabricated. The original one had been badly mauled by a driveline at some point that was about to fly apart. Previously, we had cut out the damaged area and welded in a new piece, but it had other issues too. We used the original one as a pattern for the replacement panel.
I thought we had secured an original Stromberg L26A carburetor for our BKN motor that will go in our Addition G12, but it hasn’t arrived and my calls and texts are no longer being answered. So, we are back to looking for the carburetor mentioned above for that restoration project. If any of you have one or know or one that is available and I won’t need to take out a second mortgage please give me a shout out.
Happy and safe railroading everybody!
01/11/22
We had a very wet December out here which slowed our progress on several fronts. I finally received the backordered two-thirds of the galvanized lag screws that I ordered for the ties in the front yard and we got started on rehabbing the track. We started in the west section and worked toward the east. I staged the G16 railroad ties in the backyard relatively close to where they will be used. For the first section of ties to be replaced in the front yard, I loaded a flatcar with ties and we worked from the driveway east. Dave and I got our first 50 ties of the tie replacement initiative replaced. We would like to have made more progress than that, but we only had one dry weekend the entire month.
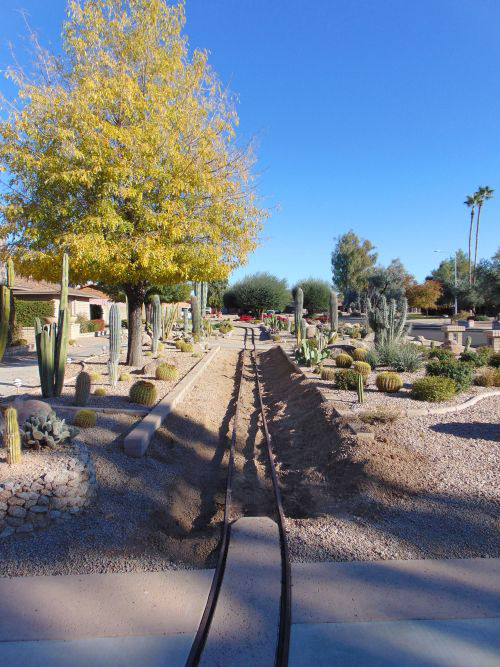
|
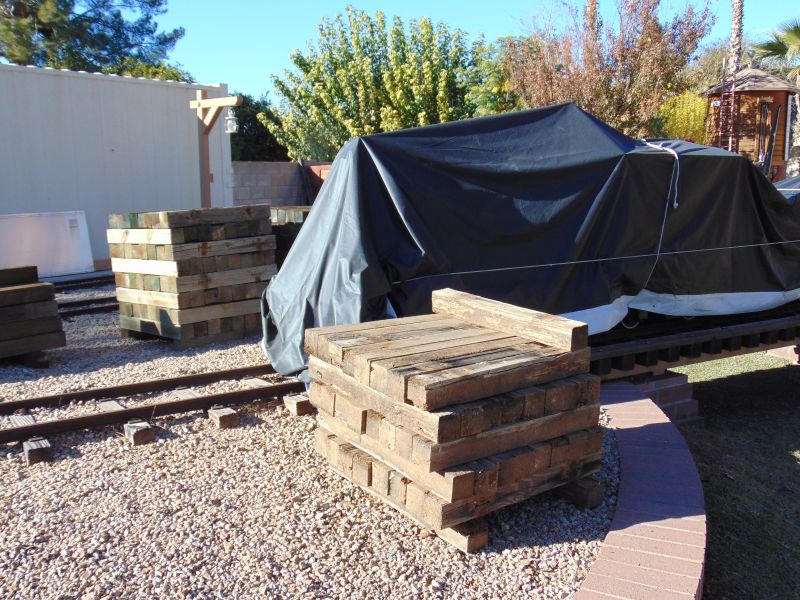
|
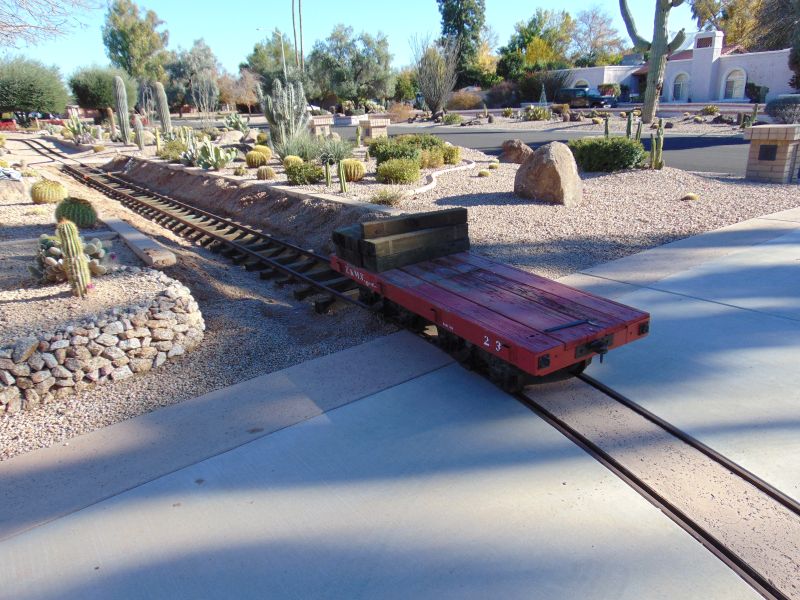
|
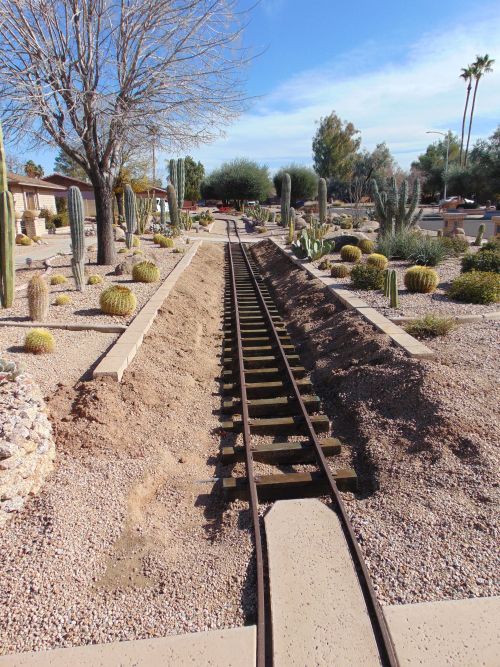
|
Admittedly, the going is much slower than it was almost thirty years ago when we initially laid the ties and rail as instead of sneaking up on 30 and 40 years old respectively, we are approaching 60 and 70 years of age. As Dave said, we're either going to be in much better shape by the time the tie replacement is done or beyond beat up. We do hope it is a bit dryer next month so that significant progress can be made. The plan is to have the mainline and switches replaced by October 1st to resume operations. The spurs in the east and west yard will be replaced after that and as time permits...
In the limited dry time, we got a few brackets welded into place on our Addison train, but again didn't make nearly as much progress as had been hoped as it was sloppy wet on all but 2 work days.
I had tickets for the McCormick Stillman Holiday festival lights on December 9, but it was a downpour that night and we got rained out. I have been going out there for forty years for various events and had never been rained out before.
We tracked down and acquired the twelve wheels and fourteen bearing retainer plates we needed to complete our current G12 projects. The bearing retainer plates will need a little bit of work, but are in reasonably good shape. The wheels will go to bead blasting and powder coating next month. All that we are lacking for the completion of the trucks are the truck arches that are being cast in Pennsylvania. Test pours were done and the casting should begin in earnest the first week of February. We are having 40 cast and the finish machining will take place out here once they arrive.
We had hoped to receive a one-person pump car this month that we are excited about, but its arrival has been delayed by at least 60 days. The Waterman and Western Railroad was one of the railroads that Dave and I visited on our cross country trip in August of 2019. Owned by Pete and Char Robinson, it operated in a beautiful park in Waterman, IL. It may have been best known for its fabulous Christmas light displays when the train rides were free so everyone could afford to ride. Our addition is a pump car from the W&W. We will re-gauge the car from 15 inch to 16 inch, reupholster the seat, powder coat the frame and clean and polish the other components. It will be lettered for the Waterman and Western Railroad where it was built and used for many years. Unfortunately, the W&W burned to the ground a few months after our visit and this pump car is one of the few pieces of equipment that survived the fire. We will be very pleased to have it as part of the A&P Railroad here in Arizona.
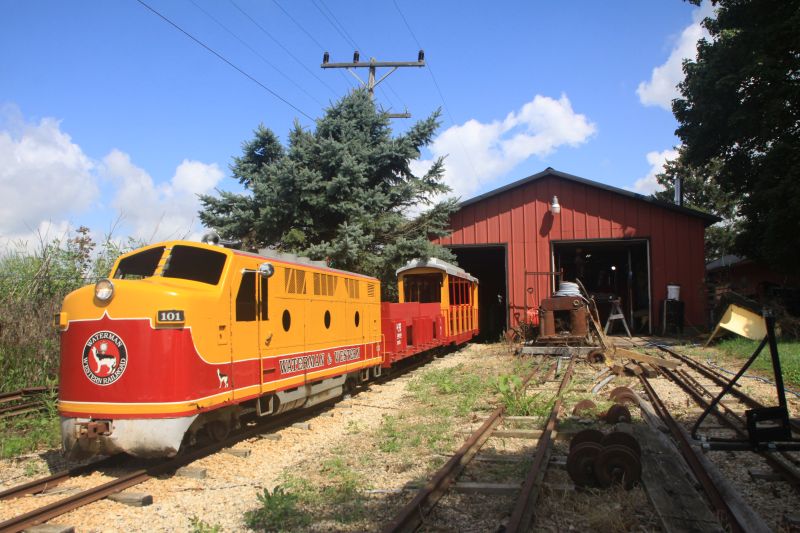
|
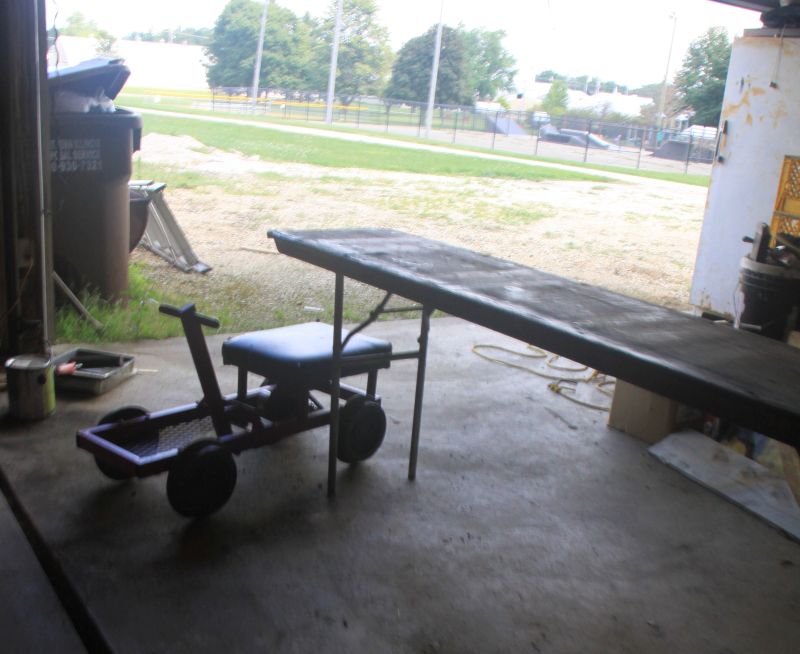
|
We made some progress on our A&P signs. As I shared last month, we started this project twenty years ago. The bases and the signs will be white and the lettering will be black. We have more than a dozen locations to name. Several of the original signs will be modified to have an upper and lower sign, some signs will be double sided and three will have mounting arms fabricated for mounting to the trestles. The free-standing posts will be mounted to large paving blocks that will be buried trackside in key locations. We drilled several more of the paving blocks and bases this month. Dave and I did an initial mockup of what we envisioned for the signs that will be mounted to the trestles out of wood scrap. The following weekend, he showed up with a very professionally done mock up with the correct dimensions that incorporated all the changes we had discussed the week before.
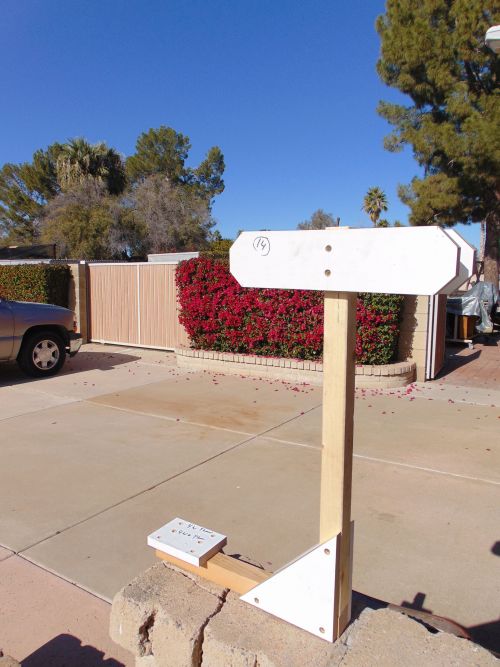
|
The posts are 2x2 tube steel in 0.188 thickness. The actual sign flat bar is 3 1/2" by 1/4". Apparently in the 20 years since we started this project, this is no longer a standard size. The standard sizes now are 2, 3, 4 and 5 inch widths. It can be special ordered by my distributor with a several hundred feet minimum order... I finally found a place in Kentucky that had it in stock and was willing to ship it. I purchased 30 feet; the shipping wasn't cheap, but I wanted every sign to match and look like it was done at the same time. Work continues on this project.
Our 2022 A&P long sleeve shirts arrived this month. The short sleeve versions will be here in March. I had some short sleeve shirts done in pink as Christmas gifts for a couple of the younger supporters of the railroad.
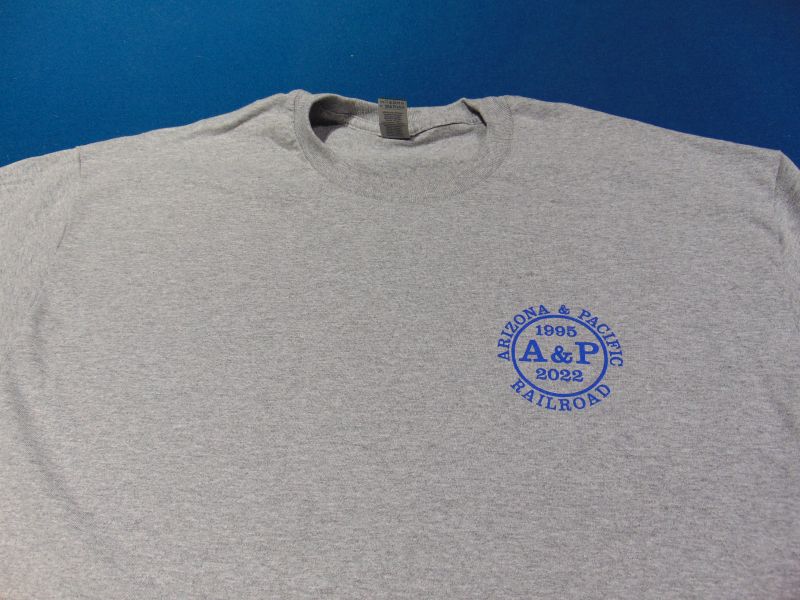
|
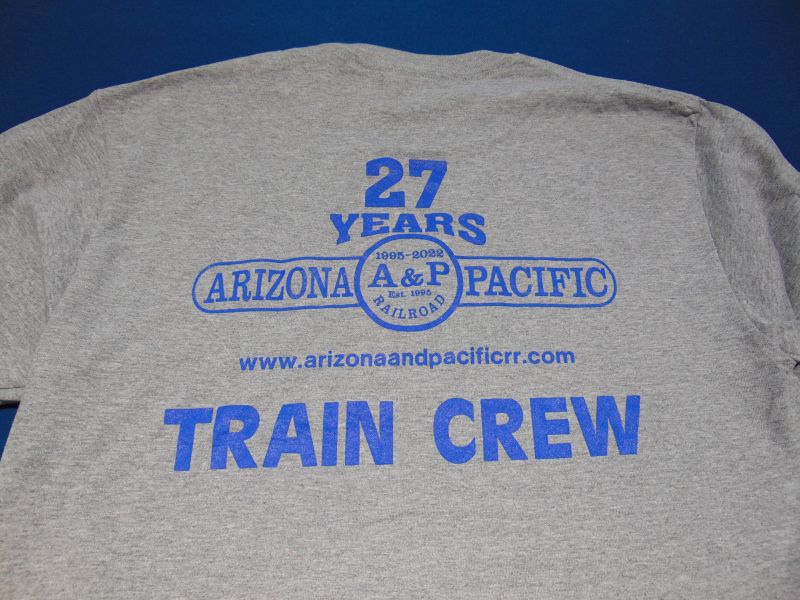
|
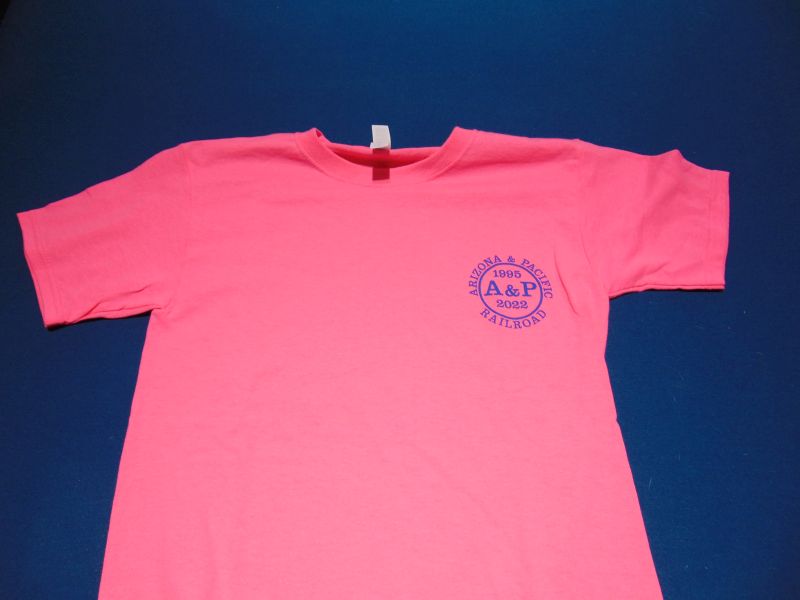
|
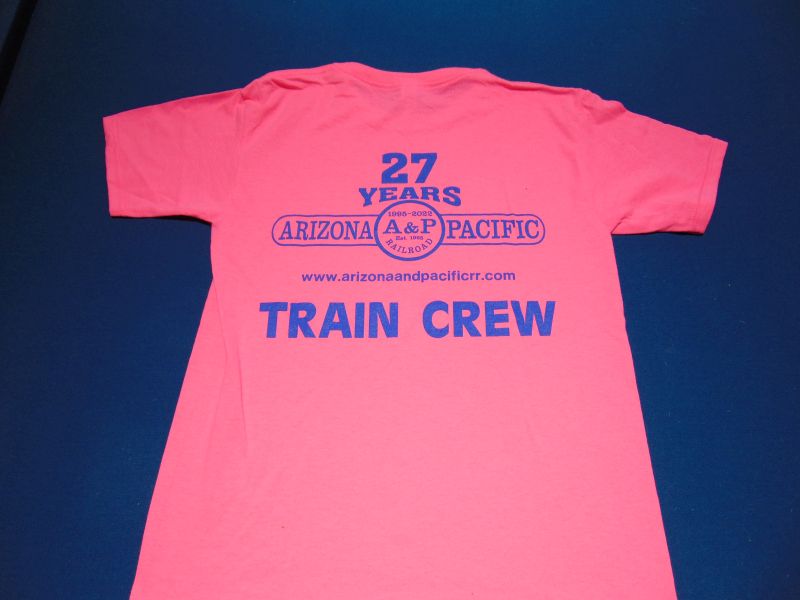
|
Our E10 locomotive and observation car were scheduled to return from body and paint and arrive here this month, but one delay after another now have them scheduled to arrive in late January.
Our A&P Annual Report should be posted in late January.
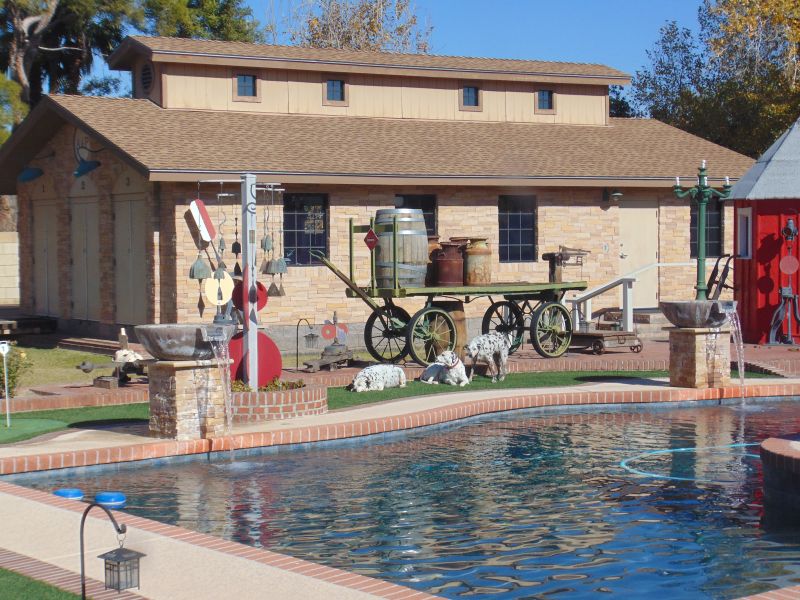
|
Happy and safe railroading everybody!
12/09/21
We started work in earnest on our Addison locomotive this month. The engineer’s seat had been cut out and floor panels, instrument panel, engine pan, hoods and front bulkhead were all missing when we acquired her. As a result of most of the support structures missing, the unibody was badly out of square and plumb. We pulled, pushed, twisted and squared everything into place. We fit the seat and rear bulkhead and they fit great after some fine-tuning. The instrument panel and the front bulkhead are both a nice fit, but we need to fabricate the final mounting brackets next month. We also fabricated and installed the floor panels. In the post war model they were welded in place; in the pre war model they were bolted in place.

|
We fabricated the battery tray and driveline tunnel previously and the gas tank is being fabricated by an outside vendor currently. The next big sheet metal challenge will be fabricating the two hood assemblies. We do have a half crate of the original MTC hood ribs so we have the three needed for each hood panel. The hoods will likely be a January project.

|
The biggest challenge before us will be locating, recutting and cleaning the brake rod slide channel and the same with the throttle rod channel. At some point many years ago, someone cut off the slide rods and welded the slide channel slots closed. We also have multiple sub-standard repairs made with large quantities of Bondo that need repaired correctly and then just a skim coat of Bondo applied. I’m glad this Addison locomotive found its way here as not many others are crazy enough to put in the time and money to properly restore her to 1938 condition. The coaches are all in much better shape than the locomotive. We have already rebuilt the coach and power trucks and the parts we need to complete the Wisconsin engine that will power her were located recently in Michigan. Realistically, we are probably a year and a half away from her being completed, but our excitement is growing.
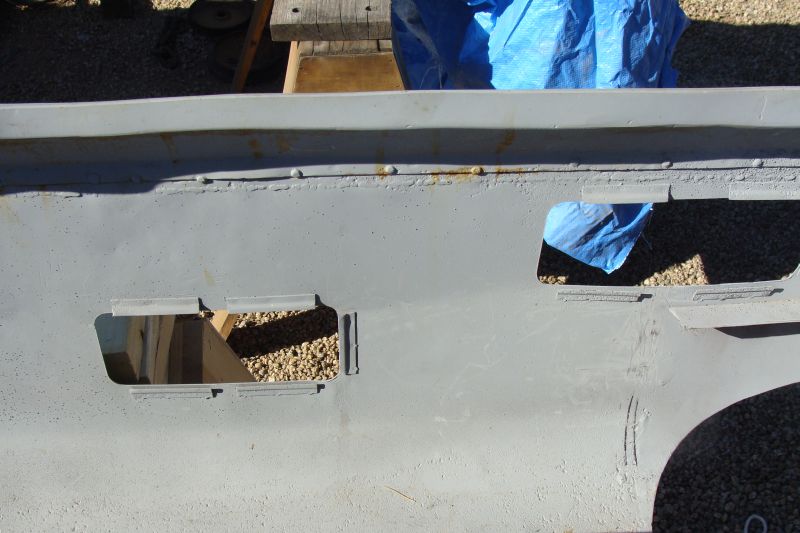
|
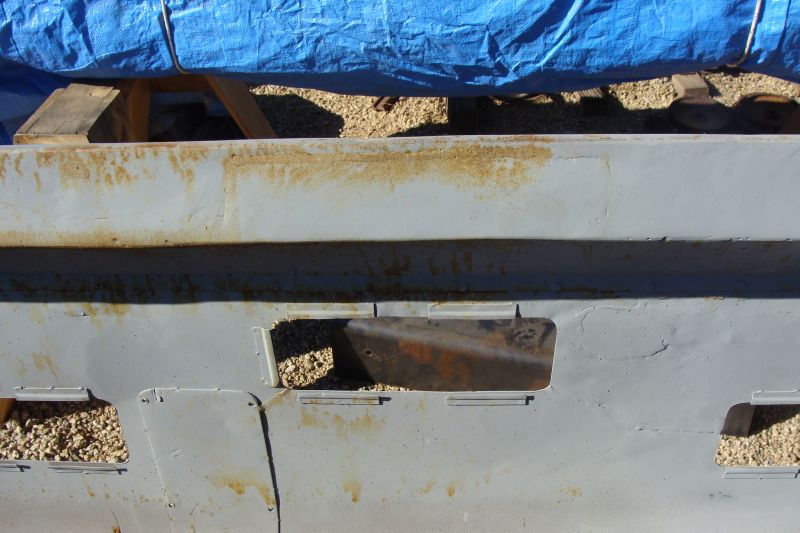
|
Dave and I finally finished shearing the Lexan windows for the E10s and the pre-war G12. The post war observation car end also has Lexan windows and we finished those as well. We have been lucky enough to acquire the rare Pullman shade windows for our post war G12 coaches.

|
|
I staged the G16 railroad ties relatively close to where they will be used. We are planning to rehab the track in the front yard first and then move to the east side of the yard. The 10 switches will be completed as a separate project. I received a third of the galvanized lag screws that I ordered for the front yard where the sprinklers frequently hit the ties if it is windy. The balance of the order is backordered.
|
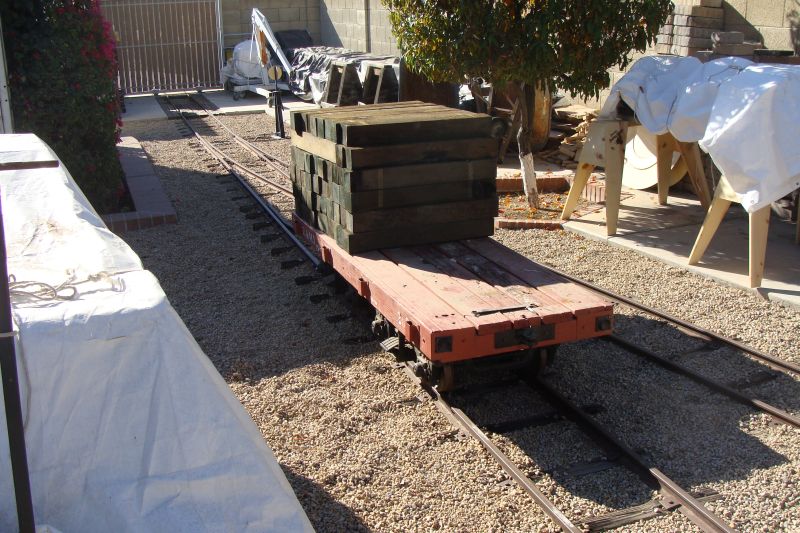
|
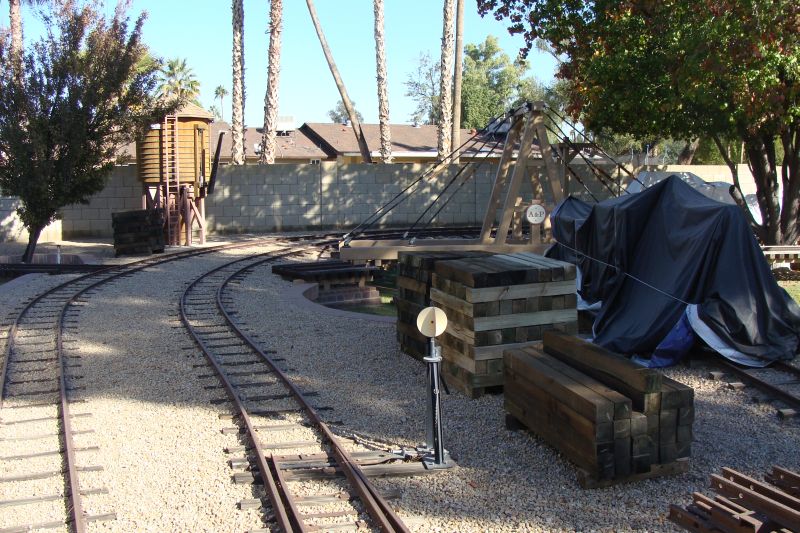
|
Close to twenty years ago, I started a project to identify various locations along the railroad with signs. I got busy with other things and the steel sign frames have been stored in various places collecting dust and surface patina for all those years. Frankly, I had forgotten about them. After my visit to Adobe Mountain RR last month where everything is identified with a sign, I got motivated to complete a two decade old project here. The bases and the signs will be white and the lettering will be black. We have more than a dozen locations to name. Several of the original signs will be modified to have an upper and lower sign, some signs will be double sided and a couple will have mounting arms fabricated for mounting to the trestles. The free-standing posts will be mounted to large paving blocks that will be buried trackside in key locations.
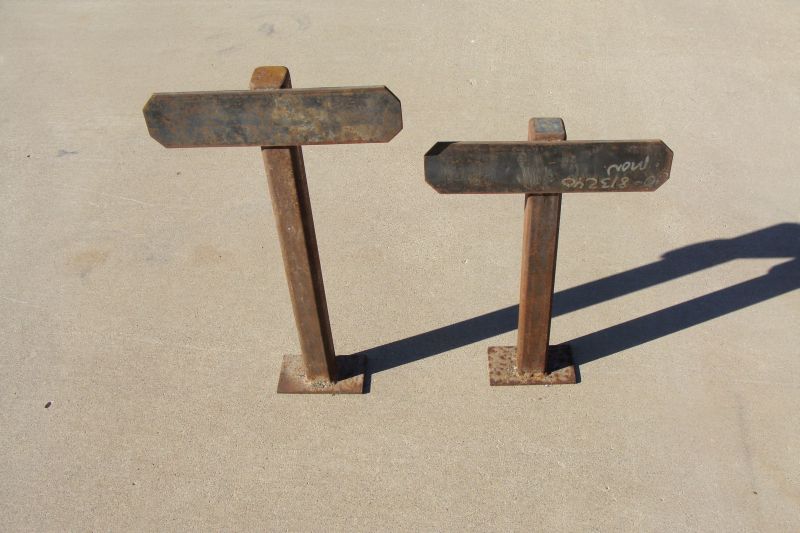
|
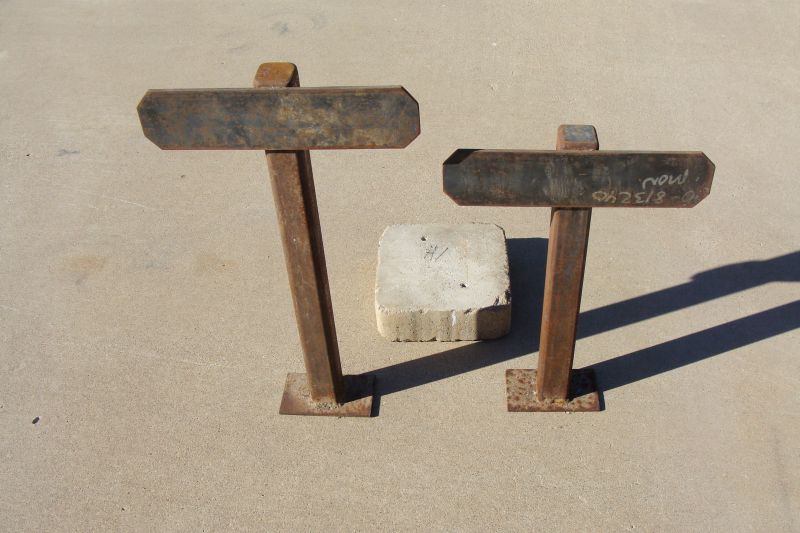
|
My good friend and next door neighbor George Fimbres completed upholstering all of the seats for both of our G12s. They all look great and I look forward to being able to set them in place once those trains return from body and paint.
Our foundry in PA is putting the finishing touches on our pattern for the G12 truck arch. The pattern will be completed the first week of December and they will begin pouring the following week.
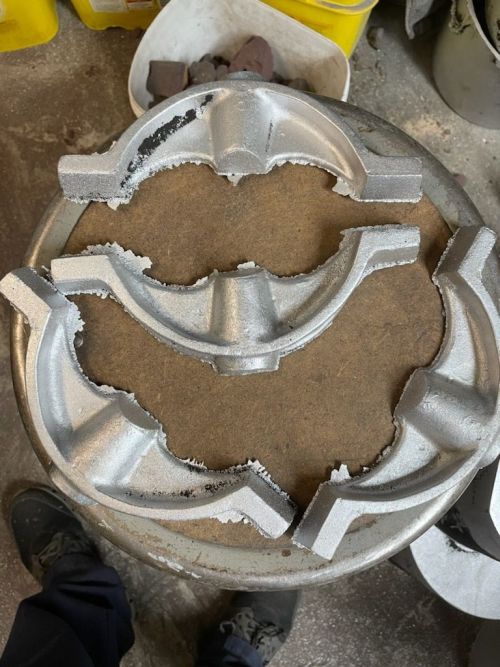
|
We received the 10 G12 half axles that I commissioned several weeks ago. We got bearings pressed onto the axles and then pressed the axles into the axle housings. We still need the bearing retainer plates for several axle assemblies and the arches that are being cast and then final assembly can begin. Hopefully, we can start the final assembly in December.
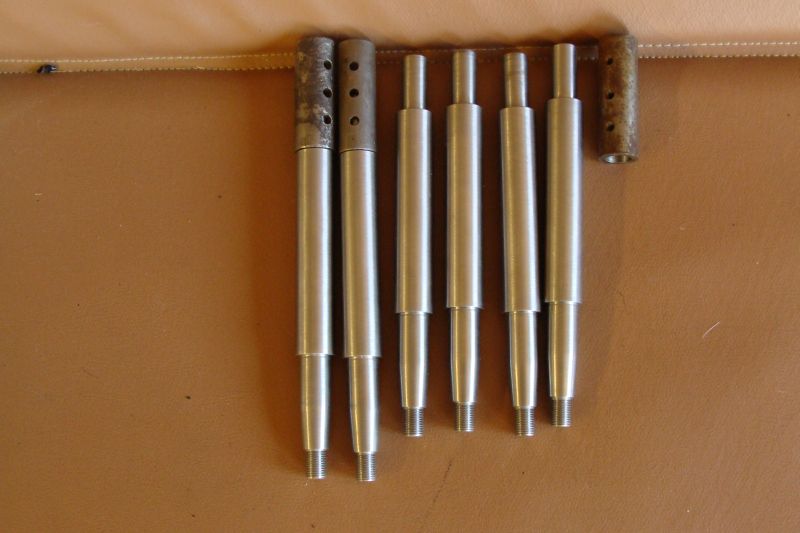
|
This month, we received the second of the two front skirts that I ordered and it is a perfect reproduction of the original that I sent along as a pattern.
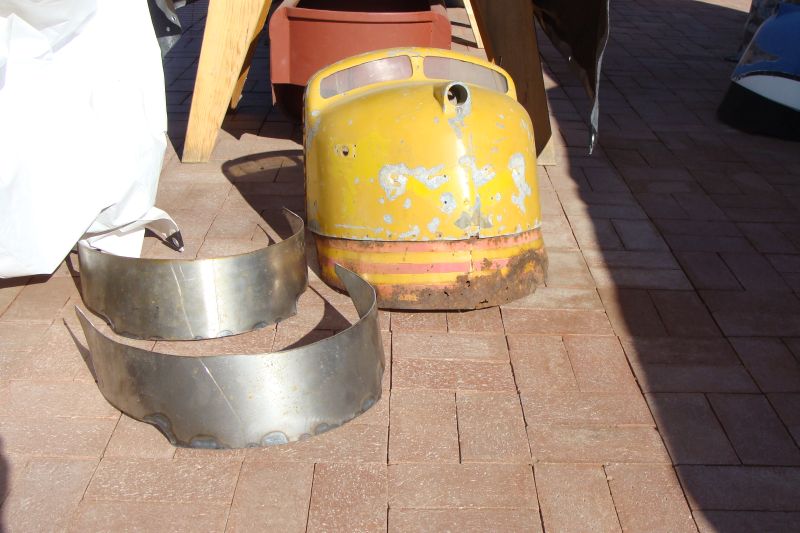
|
We fabricated 5 more G12 safety bar assemblies this month. They will go to powder coating in December.
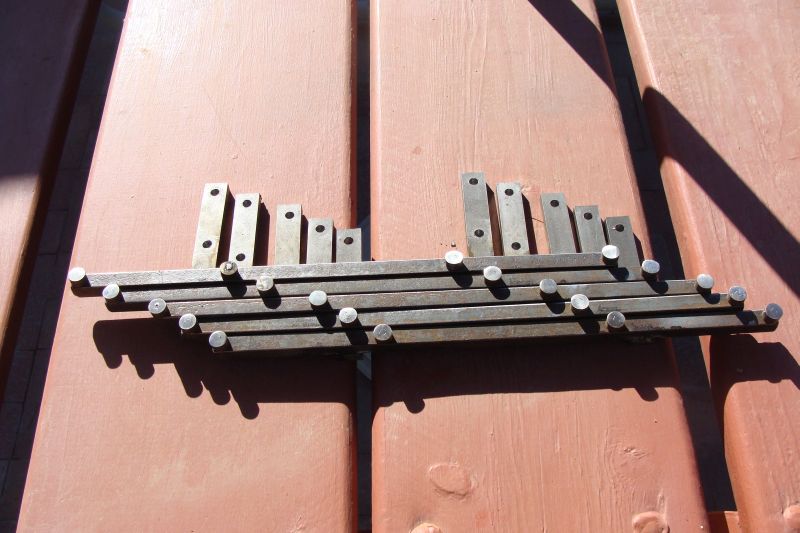
|
Dave and I began final assembly of the 16 G12 coach trucks that we are rebuilding. We completed one truck and the other 15 are awaiting their arches so we could only properly assemble the leaf spring assembly on one side and temporarily attach the leaf spring assembly on the other side. That leaf spring assembly will be removed when the arches arrive and then be permanently mounted. We also made temporary bearing retainer plates for 10 axle housings while we await the real deal next month.
|
|
I ordered our A & P shirts for 2022. They will arrive either late this year or early next year.
Our friend Rick Nairn donated a Miniature Train Division of Allan Herschell Company crossing signal relay to our MTC museum this month; we will clean and proudly display it in the enginehouse. We very much appreciate Rick’s generosity.
|
Our post war E10 locomotive and observation car are leaving the body shop and scheduled for delivery to the A & P on December 18. We are starting to get excited about having our first full train back from body and paint.
Merry Christmas and happy and safe railroading in the New Year everybody.

|
11/09/21
My neighbor and friend George Fimbres upholstered 21 more E10 seats for us this month which will complete both of our E10 trains. He has completed 2 of our G12 seats and has purchased the high density padding and material for the G12 seats for both of our G12 trains. He will upholster a few seats at a time in between his other projects.
|
Dave and I continue to shear Lexan windows for our four trains. We are finished with shearing the 72 coach windows and 12 door windows for the two E10 trains and are done with the E10 windows except for the windows in the two observation car ends. We have completed those patterns, but haven’t had time to shear the windows. We have also completed shearing the 96 coach windows and 6 door windows for our pre-war G12. We have completed the patterns, but still need to shear the 5 observation car windows. We will also need 5 observation car windows for the post WWII G12 observation end. We just finished those patterns and only shearing the Lexan to match the pattern remains.
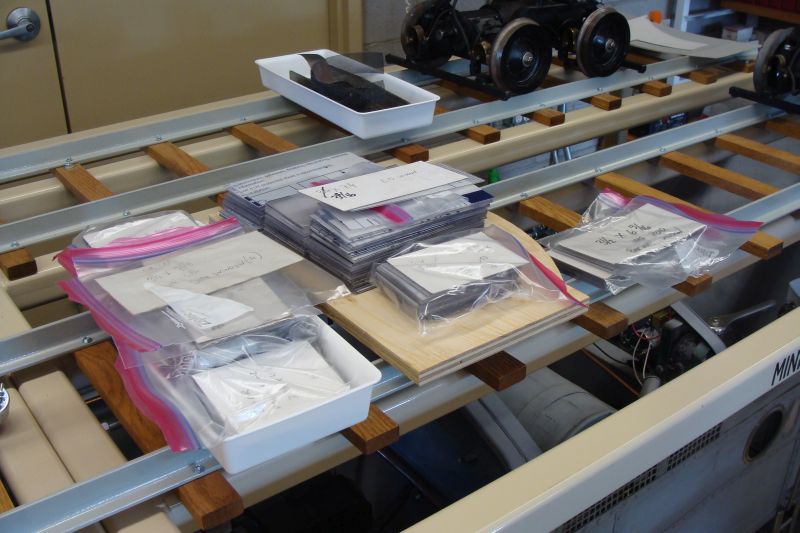
|
We had a new front skirt fabricated for the nose of G12 no. 495. We will get it riveted in place in the next several weeks. We are also having a second one fabricated.

|
Most of our 932 replacement ties arrived from Oregon this month. It has been a lengthy process. The huge ponderosa pine tree was cut down in Northern California in the summer of 2020, ripped into 3 ¾ x 3 ¾ x roughly 12 foot lengths in the fall of 2020, the ties were cut to final length in the Spring of 2021 and allowed to dry out until late September 2021 when they were transported to the plant in Eugene, OR to be pressure infused with the chemical preservative. Currently, 866 of the 932 ties have arrived at the A & P. The 9th pallet, which was switch ties, has not arrived and is being traced.
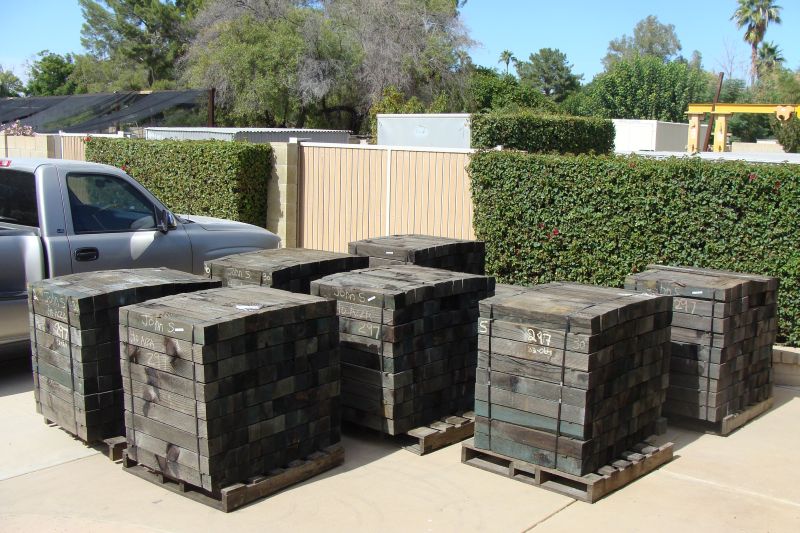
|
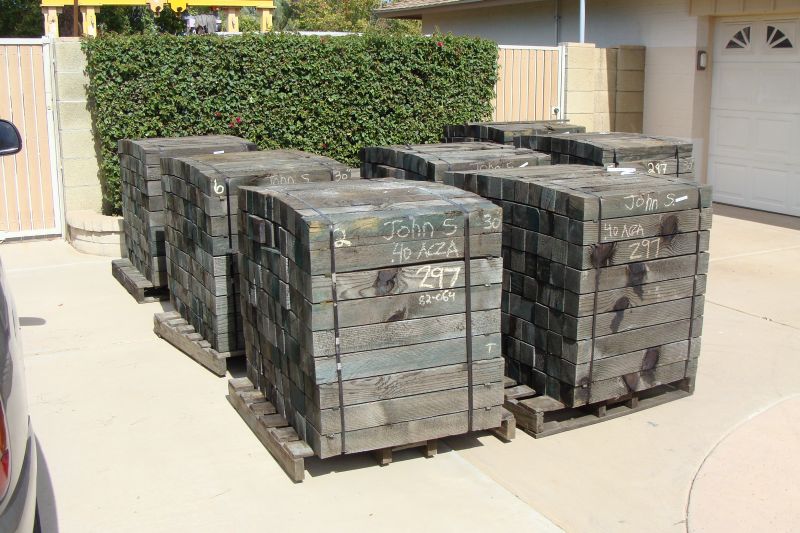
|
Our G12 arch pattern is undergoing some fine tuning at the foundry in Pennsylvania. They will start pouring our arches next month. There will be some minor machining when they arrive in Arizona.
Our gas tanks for our two G12 are being fabricated by an outside vendor and are not yet ready.
Our friend Steve Kaufman in Michigan found the parts and more that we needed for the BKN motor (magneto and carburetor) that will go in the Addison G12 through a local Facebook ad in his hometown. He will be crating up the parts and shipping them next month.
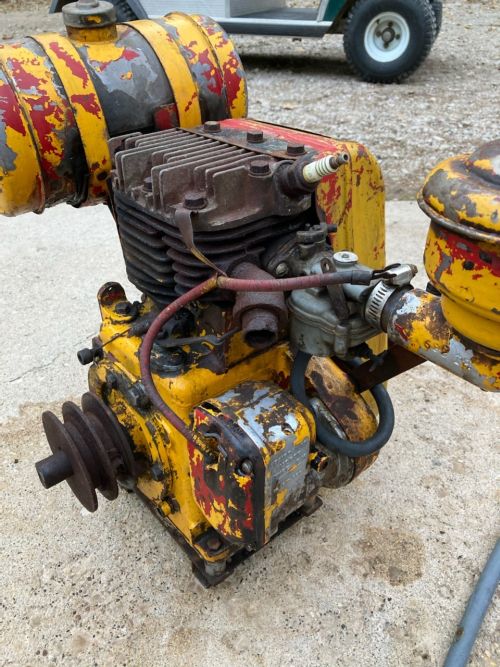
|
We have three G12 cars where the original truck pin rivets had been replaced by bolts. We took the time to replace the bolts with original specification rounded headed steel rivets. It is just a much more period correct look.
We fabricated 5 more G12 safety bar assemblies, 4 more leaf springs assemblies and 4 more spring pad assemblies and had each powder coated. We also powder coated 16 more wheels. We mounted the spring pad assemblies to the leaf springs and those completed assemblies are ready to mount. We attached one of the safety bars; for various reasons the other four, although ready for mounting, cannot be mounted at this time.
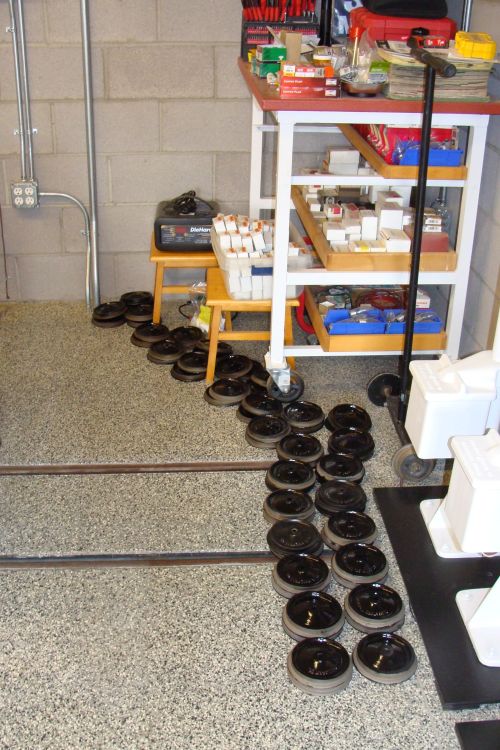
|
We pressed bearings into place on six more axle castings and got the axles pressed into place. We also got several more seals pressed into bearing retainer plates and those plates bolted into place. We also chased the threads on several more axles.
I placed an order for 10 more of the G12 ½ axles, but they are not yet ready for pickup.
We repaired one and replaced one of the hood latches to the rear hood of our post war G12.
I am still looking for a good source of E10/G12 bearing retainer plates.
Steve Eason from Creston, CA and Tim Parks of Colorado Springs visited the A & P on different days this month; it’s great to host visitors once again.
The first Saturday of the month, I attended Railfair at McCormick Railroad Park. It was a nice turnout and it was great seeing people’s faces again. I visited with Frank in the engine house and watched the crew double head off and on during the day. It was great to see some old friends and catch up on what everyone has been up to.
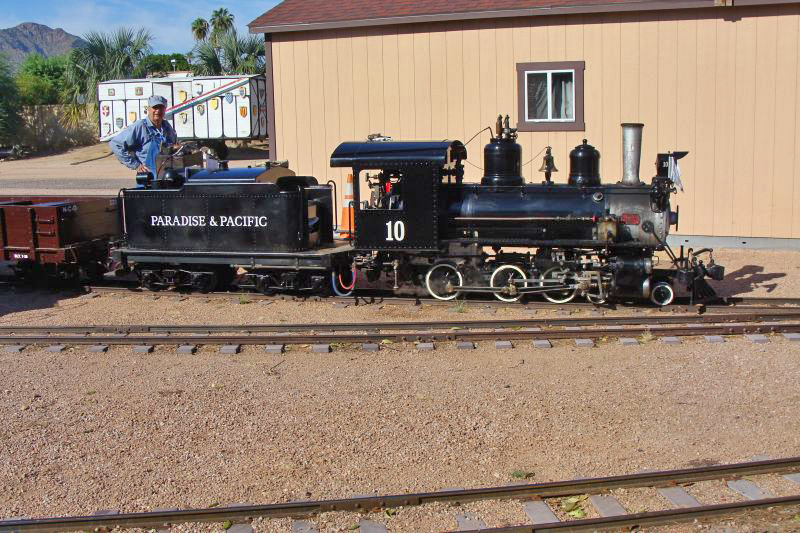
|
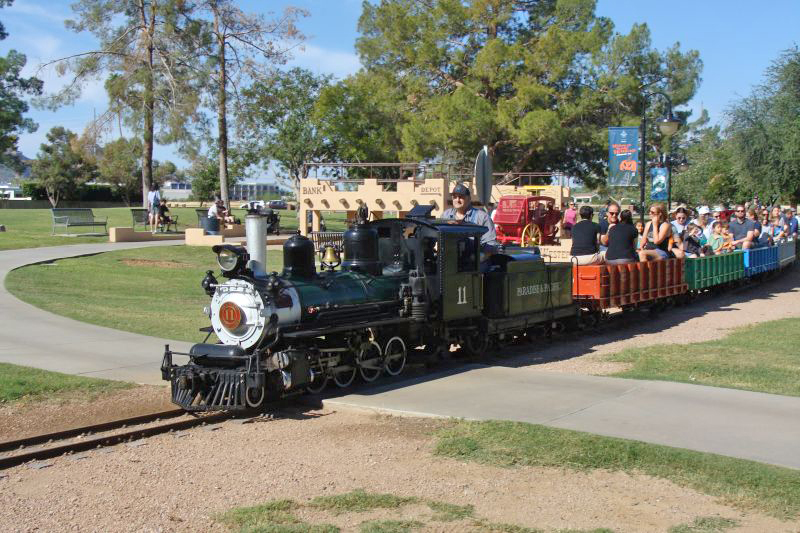
|
The last Saturday of the month, I attended the Maricopa Live Steamers Fall meet at Adobe Mountain. I visited with Steve Eason of Creston, CA, Phillip Nilsson of Durango, CO and Bob Clark of Farmington, NM. I rode in style on Phillip’s passenger equipment for a 30 minute ride late in the afternoon and a spectacular hour and forty five minute nighttime ride under the stars. I have been on night rides before, but this one was beyond cool!
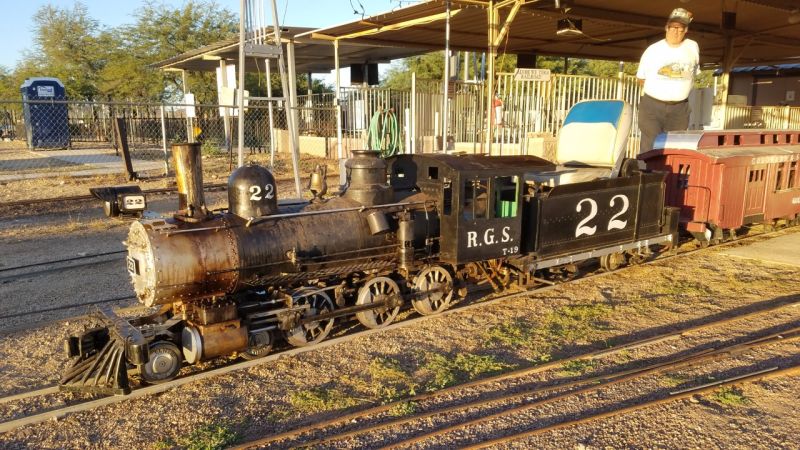
|
We have started planning our work on the Addison locomotive and will start that process in earnest next month. We need to locate and clean the brake rod slide channel, locate and clean the throttle rod channel, locate the site of the instrument panel mounting brackets and the bulkhead mounting brackets, fabricate the seat bottom, clean up multiple sub-standard repairs made with Bondo and build replacement hoods. It will be a big job.
Happy and safe railroading everybody.
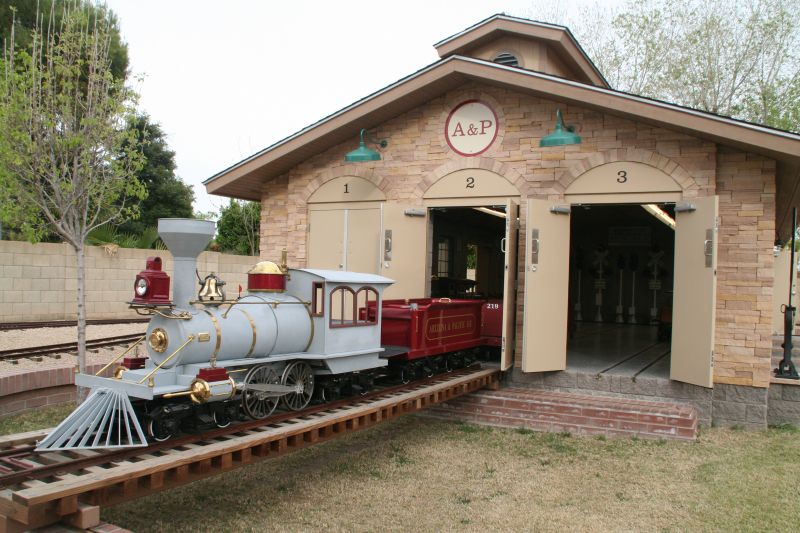
|
10/19/21
We are still working on the last of the G12 coach trucks that we are rebuilding. We will have a total of 29 G12 coach trucks once they are all completed including a very early one that will be on display. They are in various stages of completion. Some are awaiting new CNC axles while others are awaiting truck arches that are being cast while others are just waiting for parts to return from powder coating.
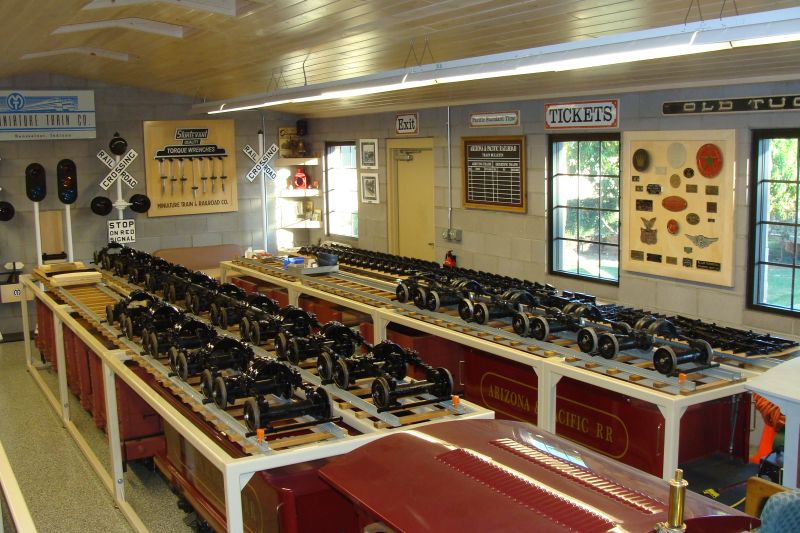
|
We added lettering to the far end of rack no. 1 and a MTC logo to one of the displays in the engine house.
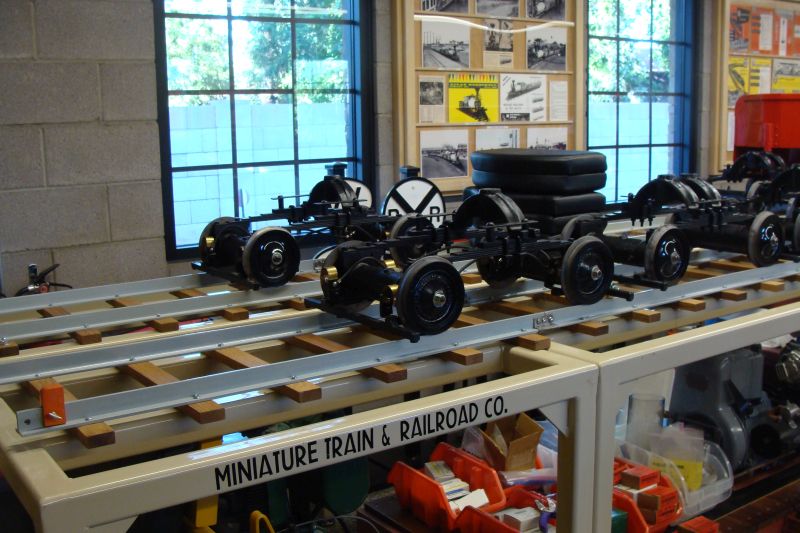
|
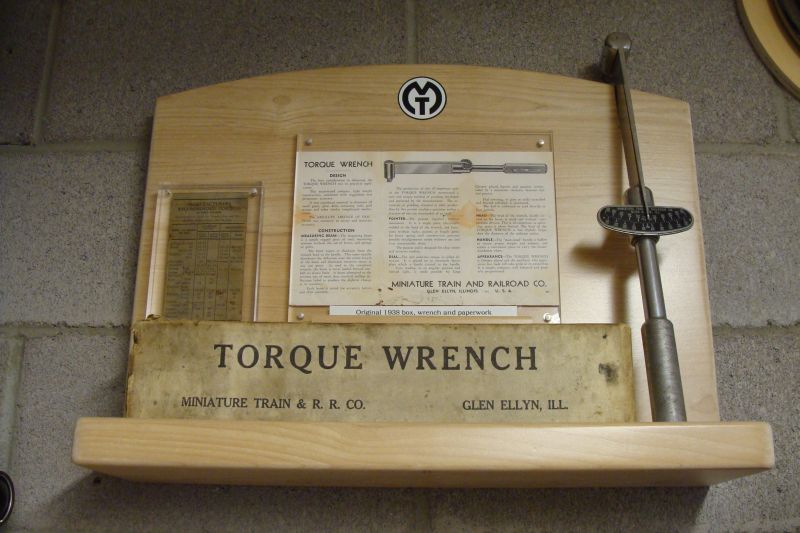
|
Dave polished the truck pin port on 14 more truck arches
We are close to having one of our E10 locomotives, no. 26, and its observation car back from body and paint. They should be back in late October.
The new ties for our 16 gauge layout were transported from northern California to Eugene, Oregon this month and will be pressure treated with preservative chemical and then transported to Arizona late in October. There are currently forest fires all over northern California and our thoughts and prayers are with several of our friends who live in the beautiful mountains up there as the direction of those fires can change in an instant.
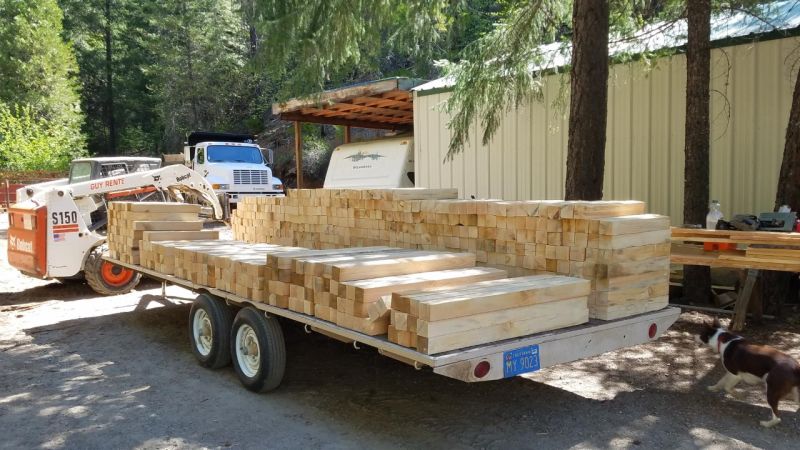
|
We fabricated 10 more safety bar assemblies, 10 more spring pad assemblies and 10 more spring assemblies. Each involved several processes and several hours before they were completed and went off to powder coating.
Now that we have cars on display on top of the track racks, we need stops at the end of the rails. We have changed our minds on the design multiple times. Dave initially had the idea of using window stops with thumb screws. The problem is they were too low to contact the safety bar and the wheels could roll over them. The thumb screws were a great idea though as we need to be able to remove, move and replace these at various times. We ended up with a small vertical rectangle with a vertical slit for the rail and thumb screws on each side. They evolved considerably from the proto-type to the final version.
|
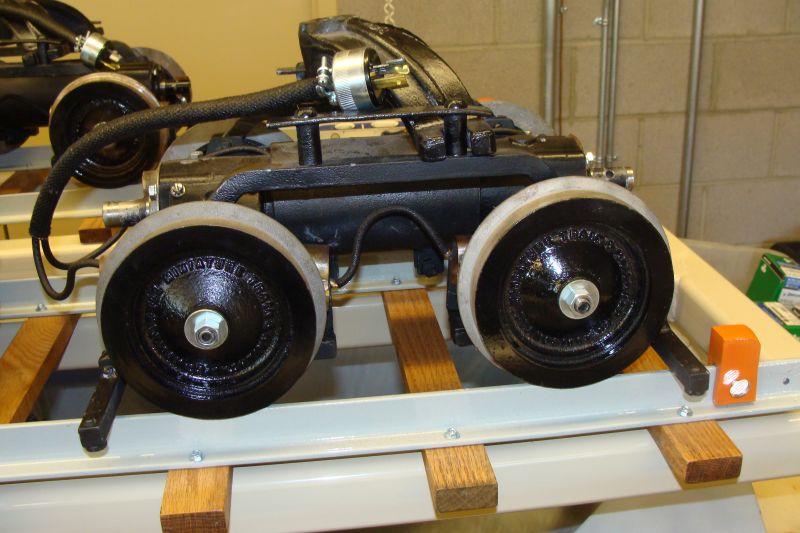
|
We were gifted another picnic table for use on the A & P. It was pretty rough. We planed and sanded the table top boards which were red wood and filled the holes, knots and checking with epoxy. We replaced the seat planks which were too far gone to save. We replaced some rusted brackets, cut out and replaced several sections of rusted support frame where it made ground contact. We will get it powder coated, add levelers and get it reassembled next month and it will give us another shaded spot for visitors and us.
|
|
|
|
I found and acquired the three stands I want to support the 2 G12 noses and the E10 nose displays. They have a bit of a 1940s art deco look which is what I wanted and I think will work well for our purpose. They looked a bit rough when they got here, but I had them each bead blasted and powder coated in black and they look pretty good and have the period look that I wanted.
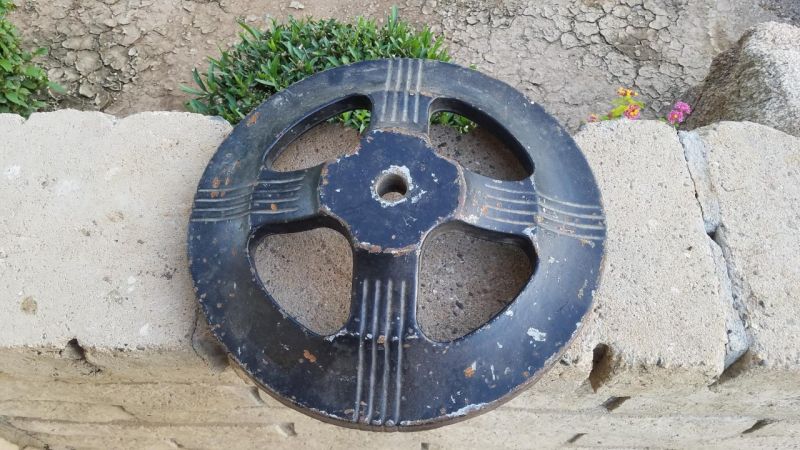
|
We received our 40 half axles from our CNC supplier and twenty center couplers from another source. We pressed the bearings onto the axles and pressed them into the axle housings. We received 27 bearing retainer plates back from powder coat and I used the arbor press to install the axle seals. I am looking for a source of several more bearing retainer plates.
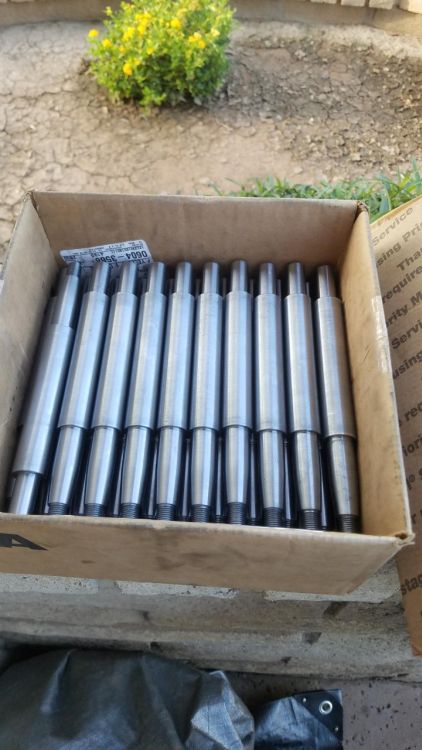
|
We received the drive line cover for our Addison train (I had two made as you never know when something new will show up here) and also received the instrument panel that we had another source fabricate for us for the Addison train. The battery tray was completed last month, but picked up early this month along with the instrument panel.
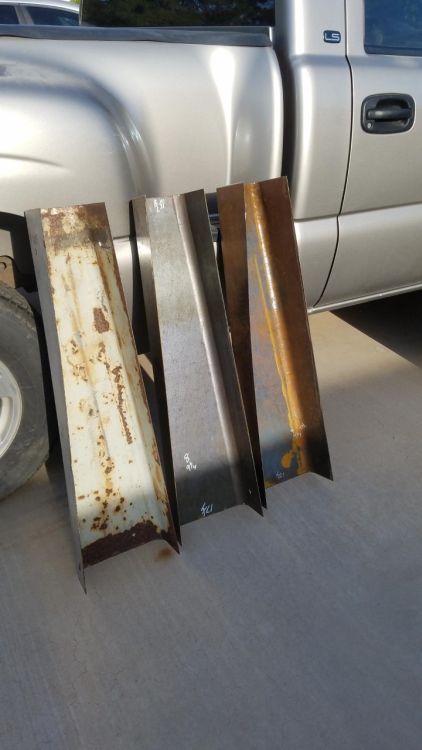
|
We powder coated 16 more coach truck castings. This is the last of the coach trucks that we will build at this time. We still have an inventory of 27 unused coach truck castings and 15 unused power truck castings. I could build several more coach trucks if there is any interest, but the racks in the engine house will be maxed out with the ones I am finishing now. They all have numerous powder coated parts including the axle housing castings, leaf springs and spring assembly pads, truck arches, bearing cover plates and wheels. The wheels are all in great shape and the bearings and seals are new. They look great and should be problem free for a long time.
Including the very early display version, we will soon have rebuilt a total of 29 G12 coach trucks, 4 G12 power trucks, 5 E10 power trucks and 10 E10 coach trucks since returning from Pennsylvania just over 2 years ago.
We are still having some challenges finding a source to build us two new gas tanks for the G12s. I have the original tanks, but there are so many pin holes and rust in the bottoms, that it just makes more sense to start over and recreate the tanks. Anyone can use a metal break and create the tanks with 90 degree corners, but I am looking for someone with the fixtures to recreate the radius corners of the original tanks. The search continues.
Dave and I are using Lexan .060 for the E10 and pre-war G12 windows. We built four templates for the E10 windows and then went to work with the shear cutting the Lexan to size. After trial fitting several, we started cutting them in earnest. We completed cutting all the windows for the E10s except for the observation end of one car. We hope to get those special sized windows cut next month along with all of the pre-war Addison train coach windows. The windows will receive their final install after the final paint touch up on each train.
I have seen a couple of photos of the sheet metal side of the MTC shop in Addison and the one in Rensselaer, but have never seen photos of the mechanical side of either facility. I have to imagine they looked something like our engine house currently looks with completed trucks waiting to be matched with freshly painted coach bodies, partially completed trucks and truck parts in rows awaiting assembly.
It was another crazy busy month in the shops of the Arizona and Pacific Railroad.
Happy and safe railroading everybody!
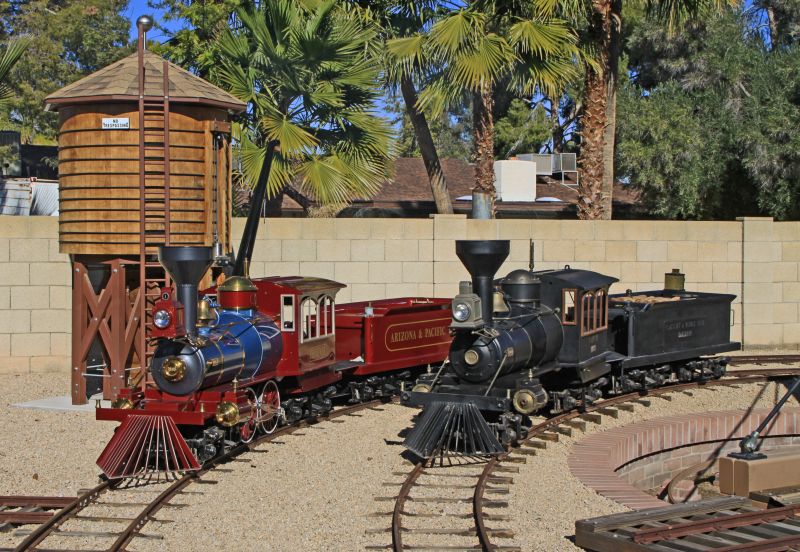
|
09/07/21
On August 9, it was two years ago that Dave and I flew to Philadelphia and started our cross-country sojourn picking up one of our E10s, one of our G12s and crate after crate of MTC parts, tooling and assemblies. Most of the mechanical work has been completed on this equipment and the first two E10 coach bodies are back from body and paint. We still have some ground to cover, but are targeting 3Q 2023 for completion of the four trains we are currently restoring.
|
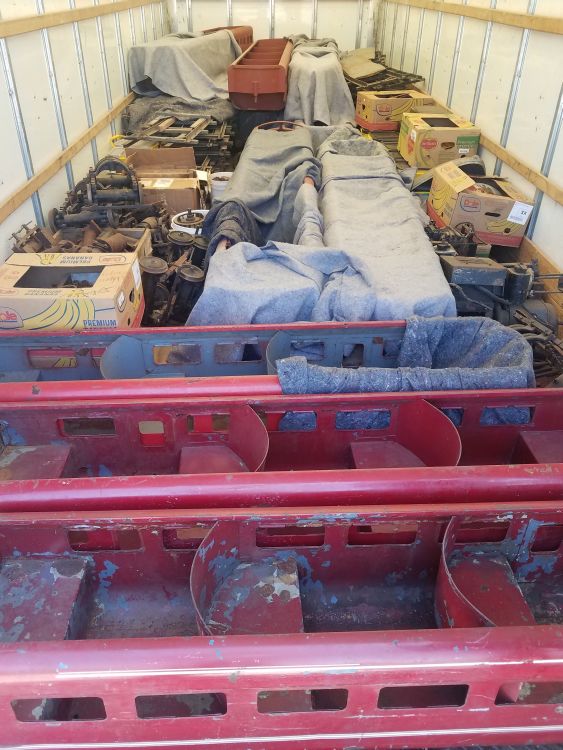
|
We fabricated grab irons for the two post war E10 coaches that we have back from body and paint. Dave designed a jig that allows us to hold the polished stainless rod while we cut it to length and it works great. The grab irons are a little thing, but really dress the coaches up. Next month we will start fabrication of the grab irons for our post war G12 train that hasn’t been to body and paint yet. The pre-war equipment had a different style one piece grab iron. We have the original grab irons for our Addison train and will fabricate reproduction grab irons for the early E10 if we aren’t able to find original ones. The search is on.
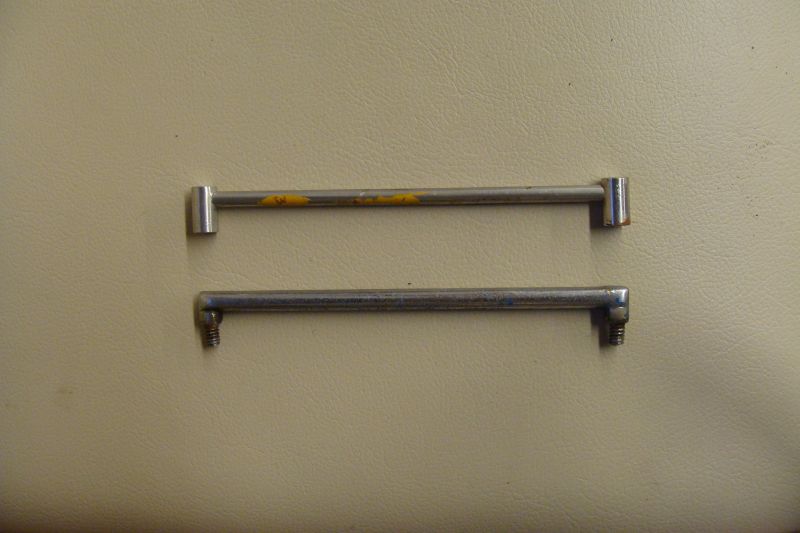
|
Our friend Rick Nairn donated a G12 nose to our MTC/Allan Herschell Museum. This is not the first time Rick has donated MTC artifacts to our little museum and we very much appreciate his generosity. The nose is off of train no. 495 and needs a new skirt and some minor repairs, but it has good bones and we are very excited to have it. In addition to the pre-war and post war E10s and the pre-war and post war G12s, we have this and another G12 nose and an early E10 nose that we will paint in period colors and will be displayed in our engine house next to the other equipment.

|
We chased the axle threads on 16 axle sets. We also tapped the castings ¼ 20 threads for mounting the safety bars and the leaf springs. I had all of the casting holes plugged when they were powder coated, but some of them still needed some attention after they were power coated.
We had a battery tray fabricated for our Addison train. The battery trays in the pre-war and post- war versions were the same. We are having a drive line tunnel fabricated for the Addison train and are slowly starting to cross items off of the needed list for that train.

|
I would like to give a shout out to Adolfo and his team at Independent Coatings who powder coated our display racks and display rails and have been powder coating E10 and G12 parts for us every week for about six months. They do a great job and have been very patient with some of the small parts I’ve brought in; they have gone above and beyond for us. They are located at 3816 E. Pioneer St. in Phoenix, AZ 85040 and at 602-760-9488.
My neighbor George Fimbres is working on upholstering 6 E10 center seats and two more end car seats for me that will complete the two coaches that are back from body & paint now as well as the locomotive and observation car that are scheduled to be back in October and will complete that train. We will still need several more seats upholstered for the two G12s and the second E10, two coaches of which are scheduled to be back from body and paint on December 1. George is squeezing me in a couple of seats at a time between his big customers.
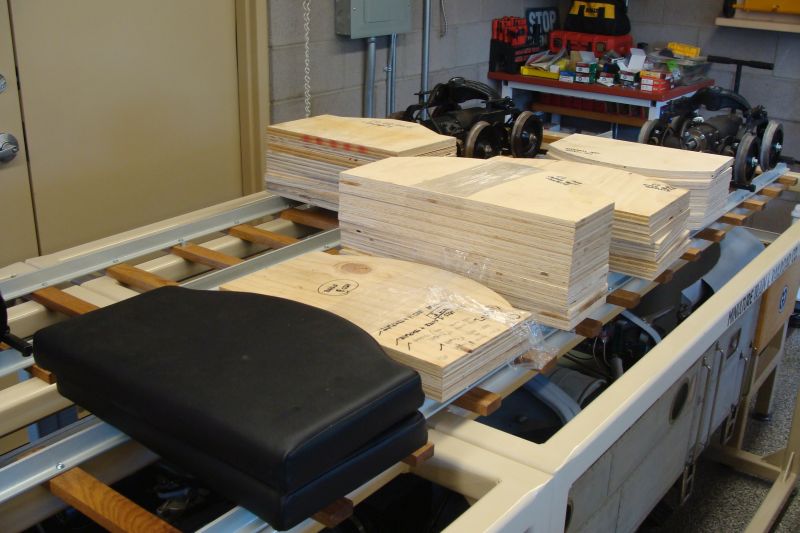
|
We bolted 11 safety bars to completed trucks that were missing them and the others to new coach trucks that we are building.
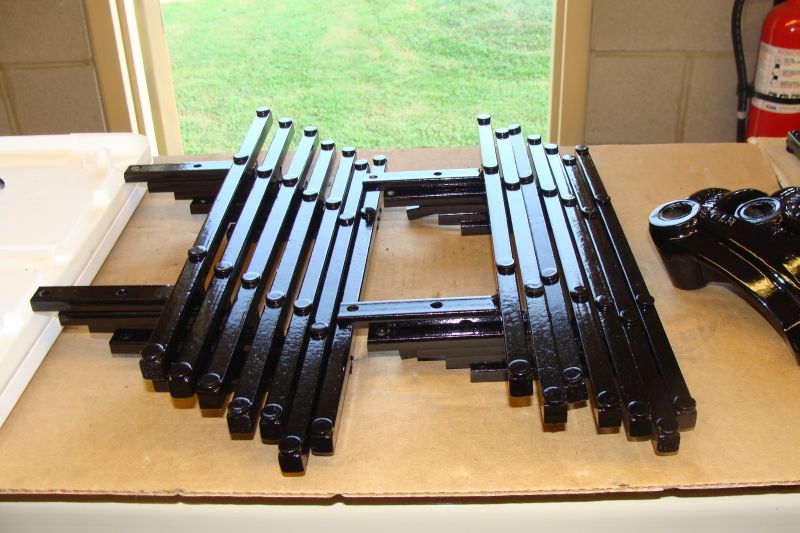
|
We got 10 more coach truck spring assemblies back from powder coating as well as 7 more coach truck castings. Floor space is really starting to disappear; I need to get some of this stuff assembled soon.
We fabricated another 14 G12 safety bars and reworked 3 E10 safety bars.
We started assembling axle assemblies from the components scattered all over the floor in the engine house. The bearings have been pressed into place and the axles are in place on 17 of the axle assemblies. They still need gaskets, seals and the bearing retainer plates. Once completed, we will move on to the truck assembly process which includes the safety bars, leaf springs, truck arches and wheels. I am really looking forward to having all of the coach trucks assembled and having that that floor space open again; it will make the engine house seem so much bigger.
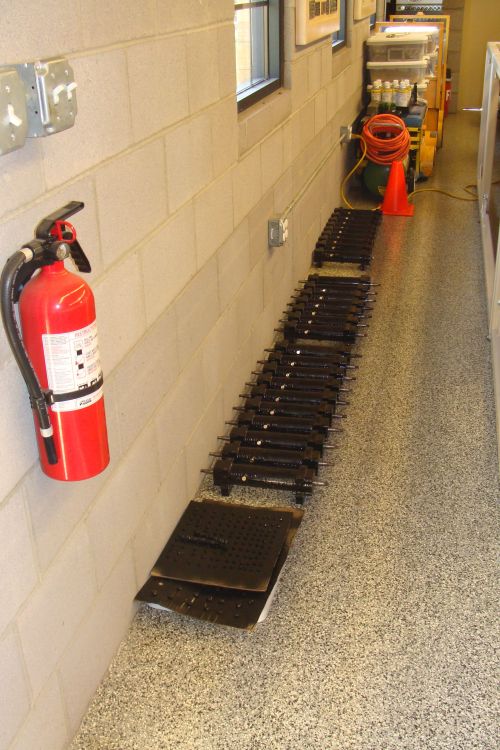
|
We got another 18 wheels back from powder coating along with another G12 locomotive engine tray and the previously mentioned coach truck castings and coach truck spring assemblies. We also got back the 14 G12 safety bar assemblies that we fabricated this month.
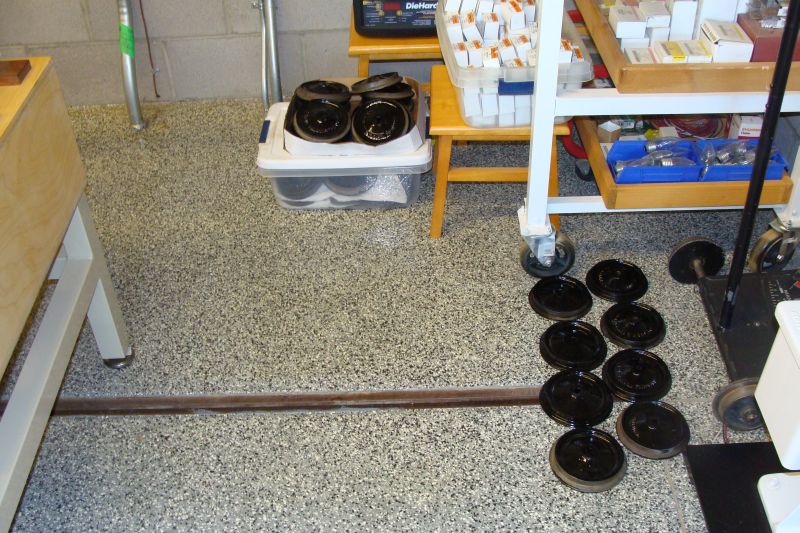
|
Dave came up with the best method to clean rust, pitting, dried grease and other debris from the truck arch openings for the car pins. He used a Dremel tool with a miniature round sanding wheel from the top and then from the bottom of the arches to polish the inner surfaces baby bottom smooth. We also polished the outside surface of the body pins with emery cloth. We applied just a little white lithium grease and they were ready for use. Later that day, we got the 2 E10 coaches up on their permanent trucks and on the E10 display rack. This rack is 3+ inches higher than the other two, but there still aren’t any issues seeing over the coaches which I was a little worried about.
I have a pattern maker working on a truck arch pattern and once completed will have 30 truck arches cast.
I am having 40 half axles CNC’d.
It was another crazy busy month in the shops of the Arizona and Pacific Railroad.
Happy and safe railroading everybody!
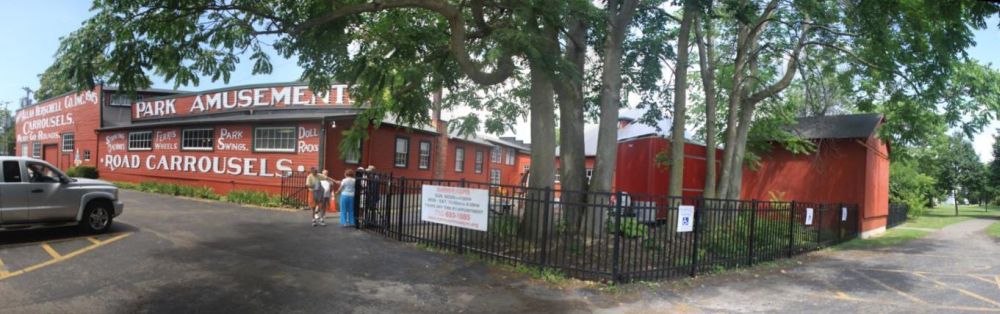
|
|

|

|
08/10/21
After several delays, we got our first two coaches back from body and paint at the end of the month and they look great. They were chemically stripped and then powder coated in light gray throughout as a base coat. After being chemically stripped you could see every factory spot weld and ding that all the layers of paint had hid. Norm did a great job straightening and blocking the coaches multiple times to make sure they were just right. There is a layer of grey powdercoat, a layer of catalyzed primer, then a layer of catalyzed sealer, three layers of red, then the white stripes and then three layers of clear coat with wet sanding between each layer. Paint technology has come a long way in the past 80 years; but the process is still labor intensive and much the same.
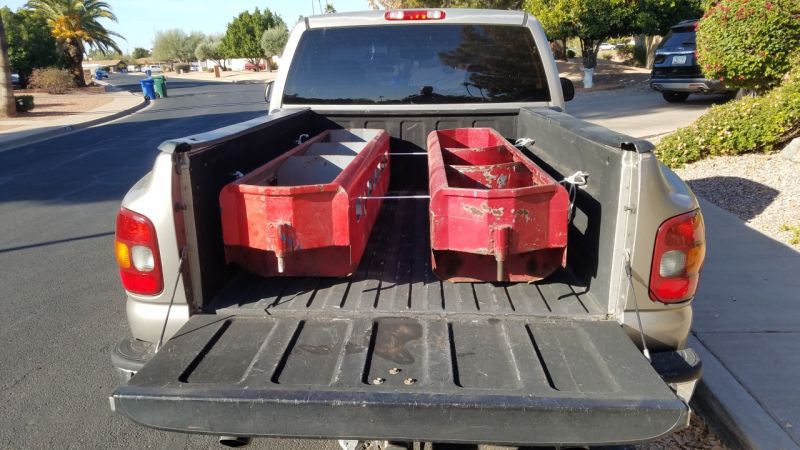
|
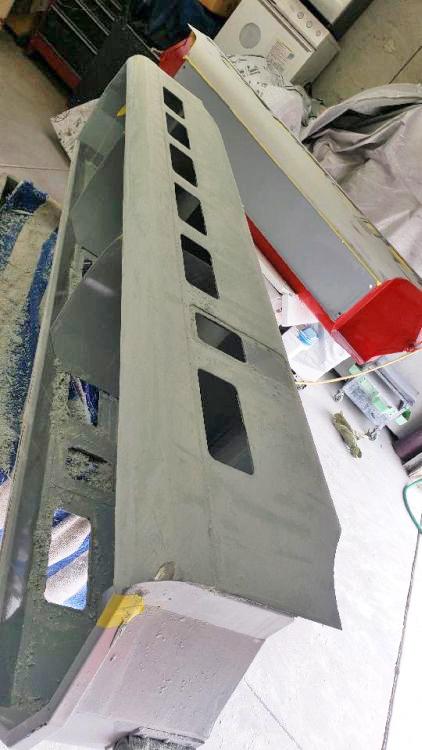
|
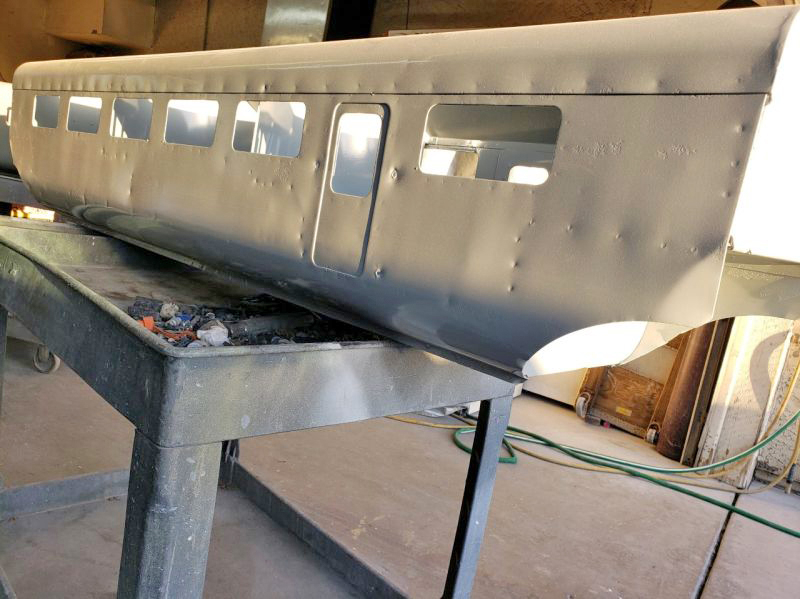
|
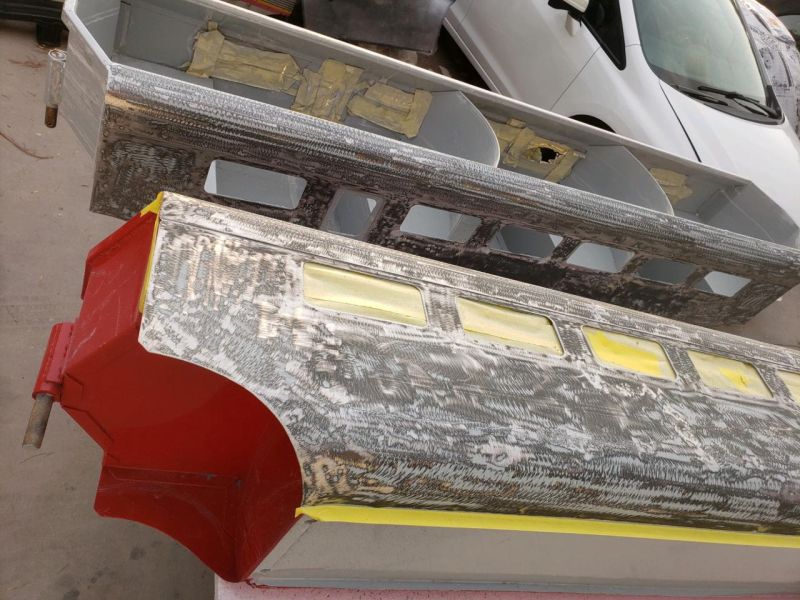
|

|
The coaches each have a mirror-like finish; I hope the original MTC team would be pleased with what we are doing with their trains. We still need to add the stainless steel grab irons, padded seat bottoms, floor mats and the windows, we hope to complete those tasks in September-October. I’ll post better photos next month after they are on their permanent trucks.
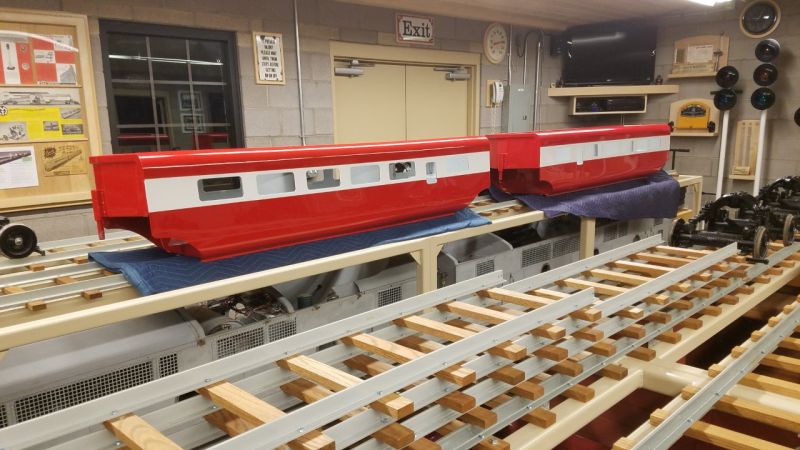
|
The paint scheme we selected is from a color post card that our friend Jeff Waltermeyer gifted us of an E10 running in Titche’s Department Store in Dallas, Texas in the early 1960s. I’ll post some better photos next month once they are on their permanent trucks and have the grab irons in place.
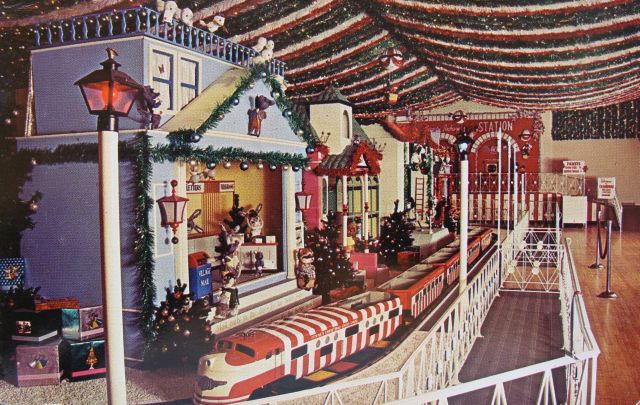
|
We have 16 more pieces of E10 and G12 equipment that we are sending through paint and body in the next few months, it is exciting to start getting them back. We have four pieces of equipment (2 E10 coaches, locomotive and observation car) currently in body and paint. The locomotive and observation car are scheduled back on October 1 and at that point we will have a full E10 train in place. The two coaches are scheduled back on December 1.
We were set to assemble an additional ten foot E10 track panel, but got rained out that day. Once completed we will have 27 feet of additional E10 track panels and enough drilled and powder coated rail to expand that by 3 additional feet. I have some ideas on where these track panels may be used, but they need additional thought.
We completed rebuilding our two Addison G12 power trucks and 3 coach trucks. They will get some final paint touch up in the fall. We also completed rebuilding 3 Rensselaer coach trucks and are in the process of reworking 14 additional G12 coach trucks. Eleven of the ones currently being reworked carry Rensselaer castings and three carry Addison castings. Some will receive rebuilt safety bars, others upgraded wheels, arches or springs. All either had or received new bearings and seals. About two-thirds of the castings, leaf springs, arches, safety bars and wheels are back from powder coating. I bead blasted and painted the bearing retaining plates and u-brackets. All the axle components have been hot tanked and the axle nut threads chased. They will go back together in August and September.
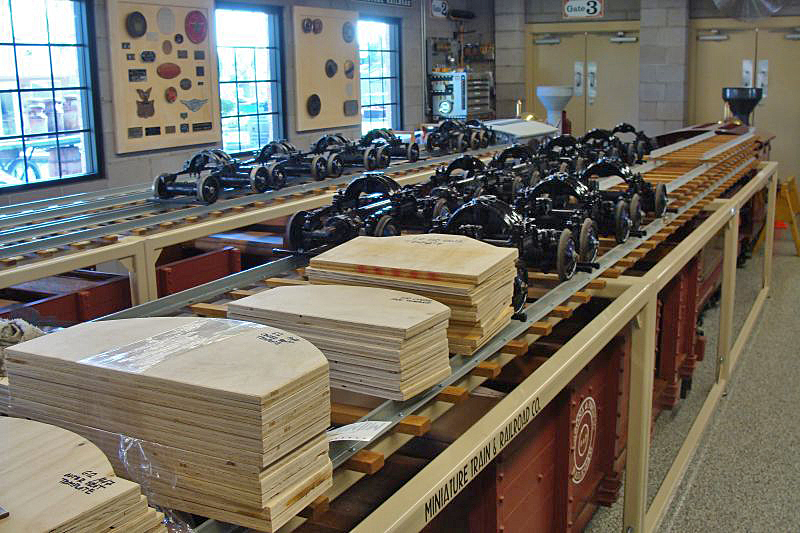
|
All of the trucks that arrived with train No. 138 were in really rough shape when they arrived. We aren’t rebuilding those power trucks at this time as they are missing many parts and we don’t have a current need so we will spend the time and money elsewhere. We are rebuilding the No. 138 coach trucks and a few other coach trucks that we have obtained over the years. The No. 138 trucks all carry the later Addison castings.
I repainted the F & MV inspection car seat structure as I had to cut the top board and the metal frame to lower it by 2 inches to fit under the extension of our rack no.1. My neighbor and friend George Fimbres finished the modifications on the back cushion and it fits perfectly and looks great.
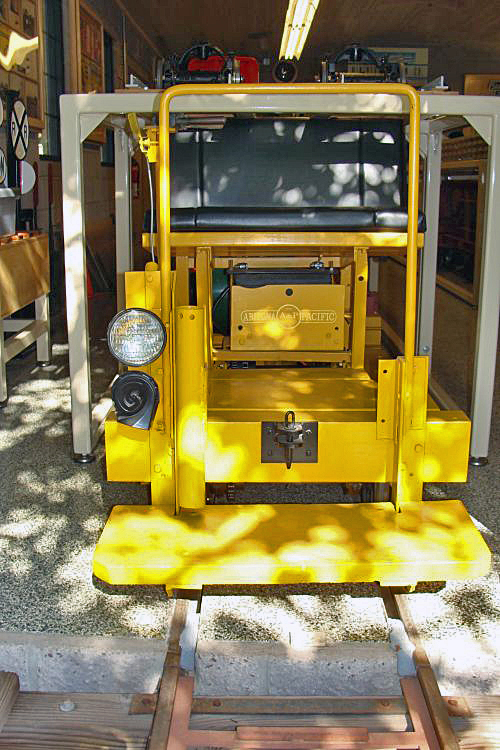
|
We will need to build fourteen more safety bars as many of the trucks that have arrived here were missing one or both. We have plenty of NOS horizontal beams from our Rensselaer parts cache and will cut, drill and weld new material to reproduce the mounting arms.
We also rebuilt 24 G12 leaf spring assemblies. Some had broken springs, some had broken brackets, some were badly pitted, others were missing a Ubolt and some needed the spring pad assemblies rebuilt. We will need to rework four more of these next month as things go back together.
We rebuilt a total of 10 spring pad assemblies by drilling out the rivets, cleaning and straightening the top bar, cleaning the bottom bar, replacing the rivets and spacers with new ones and then welding the rivets in place and grinding the bottom plate smooth. It was a little over an hour a piece; you can do the math. All these little projects are time-consuming. Again depending on a number of factors, we may fabricate a few more of these too.
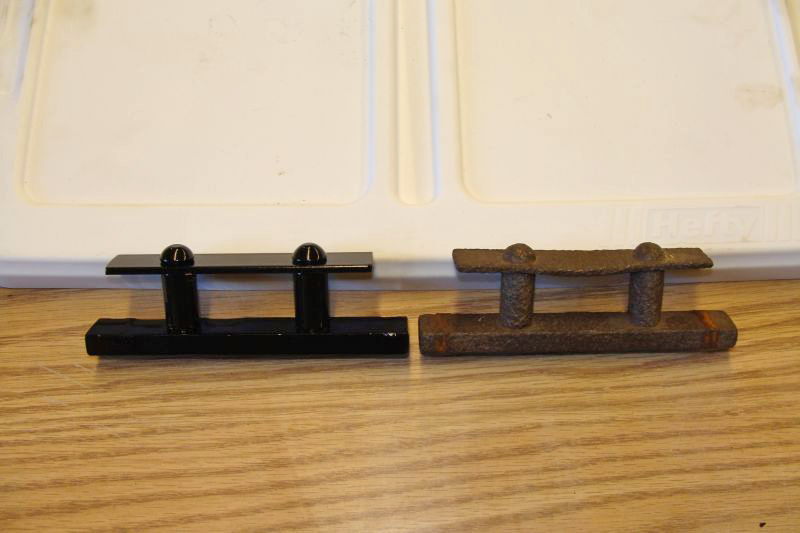
|
We also bead blasted and powder coated 15 arches for the coach trucks. I will need to have a few of these arches cast in the future as many of trucks arrived here without arches.
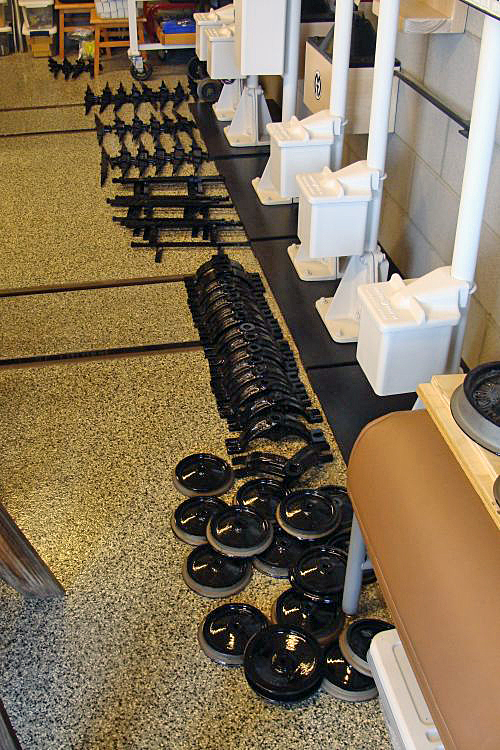
|
Twenty –one of the axle castings (6 Addison and 15 Rensselaer) also got powder coated. We also replaced numerous drain plugs that were missing or damaged. We reused the original axles, but used all new seals, bearings, gaskets and hardware.
Next month we’ll fabricate a battery tray for the Addison train. It is identical to the one in the post war model and also fabricate the drive line tunnel.
We were lucky enough to obtain the parts needed to rebuild the hood latches on our post war G12 and also obtained the correct shoulder bolts in stainless steel. Next month we’ll get them in place and re-rivet the arch pins in place. We are getting close to having this one ready for body and paint.
It was another very busy month on the Arizona and Pacific RR.
Happy and safe railroading everybody!
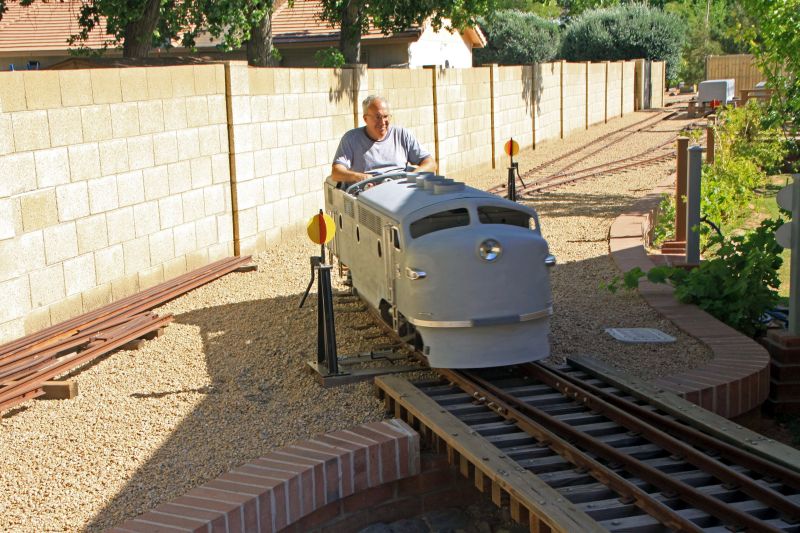
|
07/17/21
I delivered an E10 locomotive, ob car and two coaches in the rain to body and paint this month. We hope to have two of these four pieces of equipment back from paint and body by October 1 and the other two by December 1.
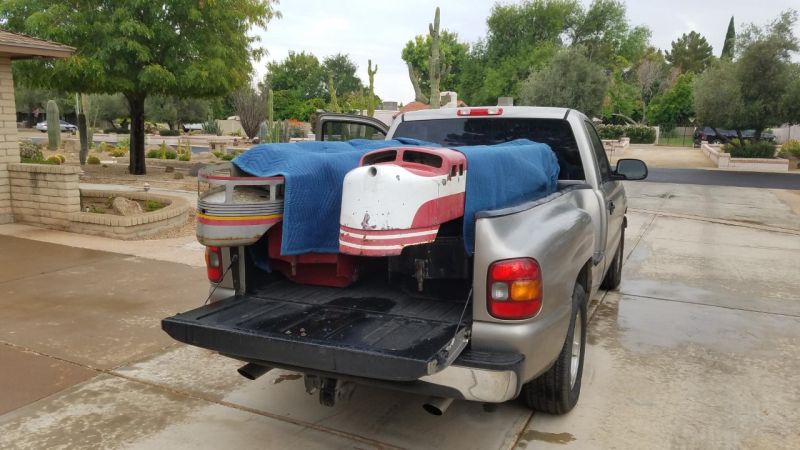
|
I spent a couple hours at a local paint supplier this month going through paint cards to make the final paint selections on our second E10 train and our first G12 train to be painted. There are hundreds of choices in each color so it can be a bit overwhelming. At a future point, I will make the selections on the second G12, but have looked at enough color cards for awhile. I had some pretty solid ideas on what I wanted for the first three trains, but I am less committed on the fourth one. If you have any great ideas for our second G12 paint colors, let us know.
|
Our new MT & RR Co. acquisition arrived this month after many delays, not the fault of the prior owner; he was really great to work with. The trucking company didn’t do us any favors as it destroyed the crates our train arrived in. Fortunately, all of the contents survived the rough treatment. It is a pre-War “Addison Train” (later known as a G12) that we believe dates to 1939. The “Addison Trains” had many of the design features of the pre-war E10s that were also made in Addison; the steeply sloped nose of the 12 gauge model is a show-stopper and a streamlined look. The locomotive has a cast iron nose and the characteristic E10 side panel grilles. The coaches had only 4 seats rather than the 5 seats of the post war model (a few post war coaches also had 4 seats), the windows slid into place instead of the pressed aluminum frames and retaining springs of the post war version and there are many more subtle differences. The power truck and the coach castings are the very early style and pretty cool to a diehard MTC fan like me.

|
|
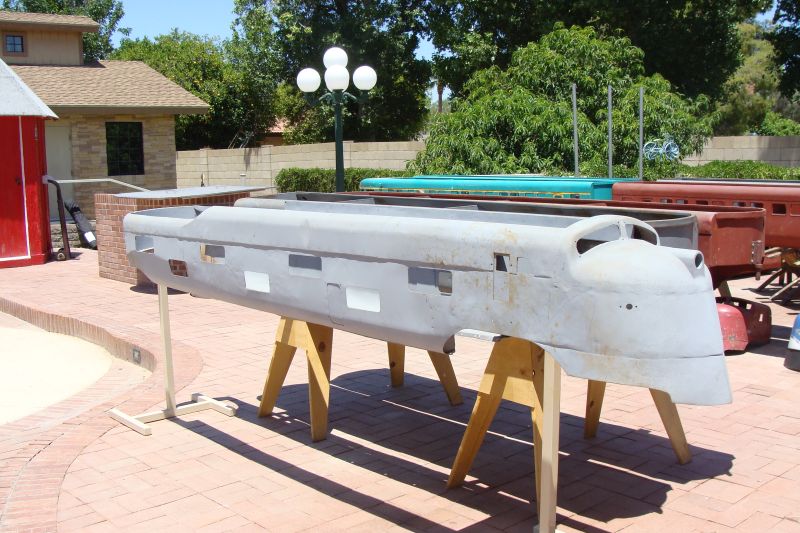
|
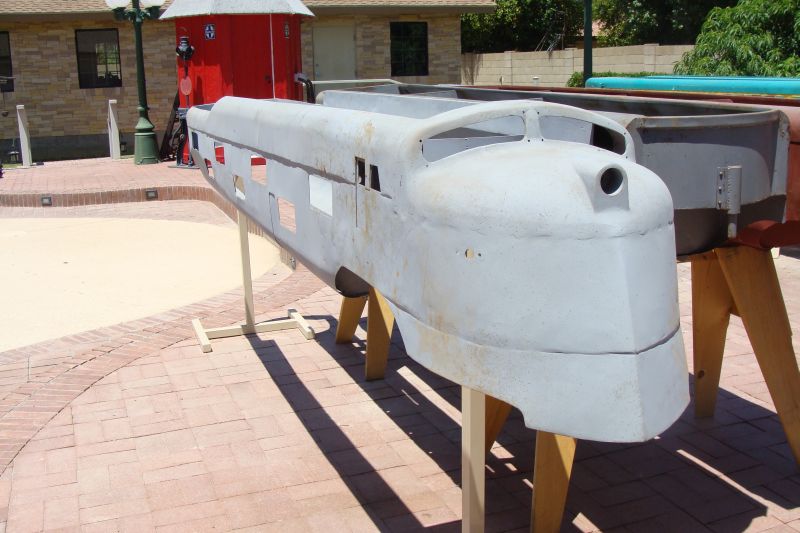
|
It is believed that less than 50 of this early version were built and only a handful of those remain in existence today. It needs some TLC, but it found the right home. We can’t wait to get started on it. When both E10s and both G12s are back from body and paint and on display in the engine house, there will be a pre-war G12, post war G12, pre-war E10 and post war E10 on display out there. There is another early MTC “unicorn” out there somewhere that we are still trying to locate and acquire to complete our collection of pre-war Miniature Train and Railroad Company equipment. That search goes on.
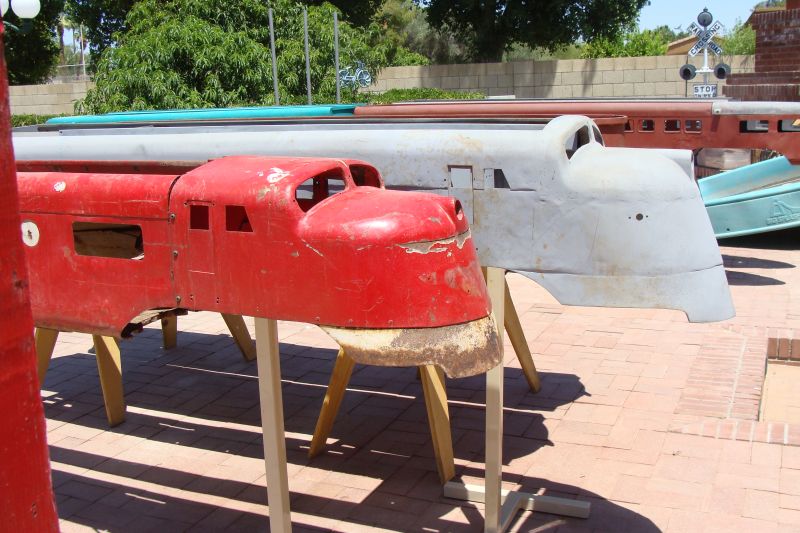
|
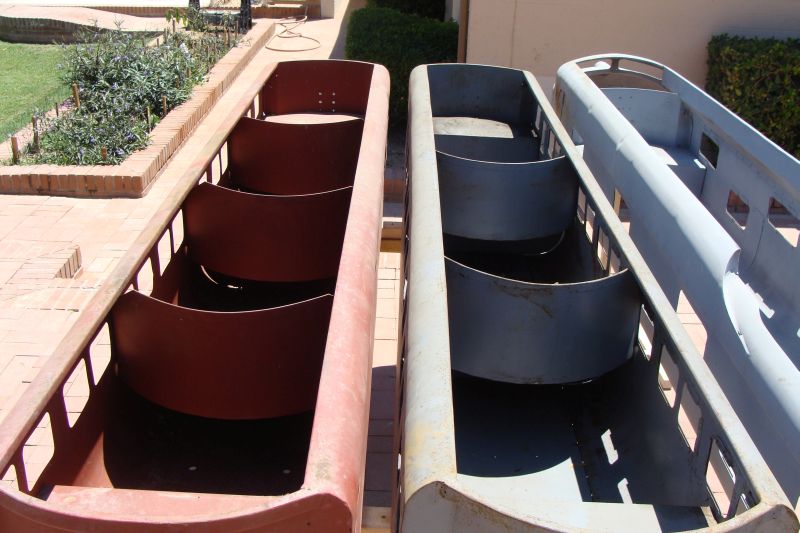
|
Ron Moses who has a long family history with the Miniature Train Company going back to 1939 in Addison, IL, 1948 in Rensselaer, IN and 1957 in North Tonawanda, NY visited the A & P this month. Ron’s father George Moses served in several capacities at MTC over the years and his titles included Pilot, Shop Foreman, Service Manager, Sales and Service Manager, Assistant General Manager and Director. George was one of three or four men that kept everything at MTC operating smoothly over the years. Ron worked with his dad in his teenage years installing trains, delivering parts and rebuilding E10s and other MTC and Allan Herschell trains. It was great having Ron and his son Michael visit our little Miniature Train Company/Allan Herschell Museum look at artifacts and photos together and share stories.
|
We were gifted a Swope Railways Co. commemorative solid brass ruler by Ron Moses that is now on display in the engine house. Swope Railways (Sam Bernstein) owned and operated MTC G16s nos. 501, 507 and 510 that ran at Griffith Park in Los Angeles, the Cleveland Zoo and at Balboa Park in San Diego. It is a rare piece and we appreciate Ron’s generosity.
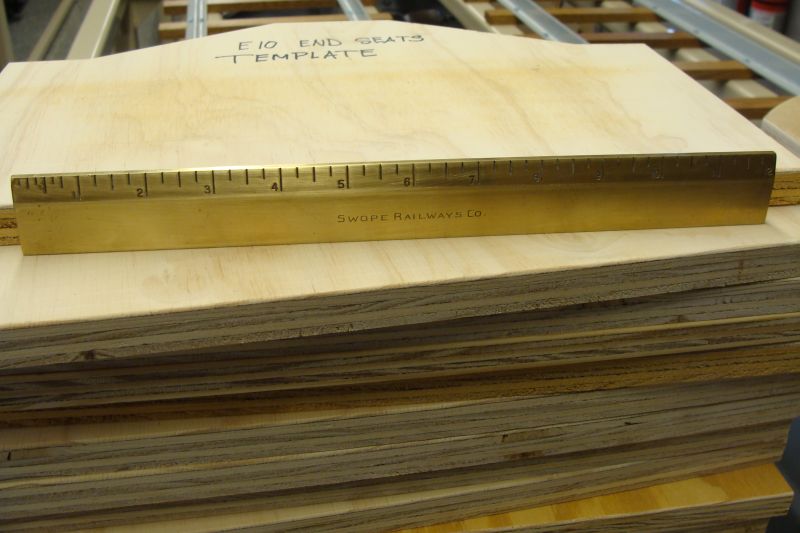
|
We have 4 G12 power trucks in various stages of rebuild and 19 G12 coach trucks undergoing the same process. Two of the power trucks are the very old style and go with the Addison Train and the other two are Rensselaer products from 1948.
We completely disassembled the two Addison power trucks and found about what we expected, the bronze gears were shot, axle key slots were worn and the worm gear was badly worn in one and missing completely in the other. We have the needed parts including new bearings and seals. We will rebuild both of the power trucks over a couple of weekends next month. Some work was previously performed on the coach trucks. They already had new bearings and seals, but have sheared off bolts in the castings that we will remove. The trucks have a hodgepodge of hardware instead of the correct hardware, some of the wheels are worn out and the safety bars are badly bent. These issues will be rectified in July.
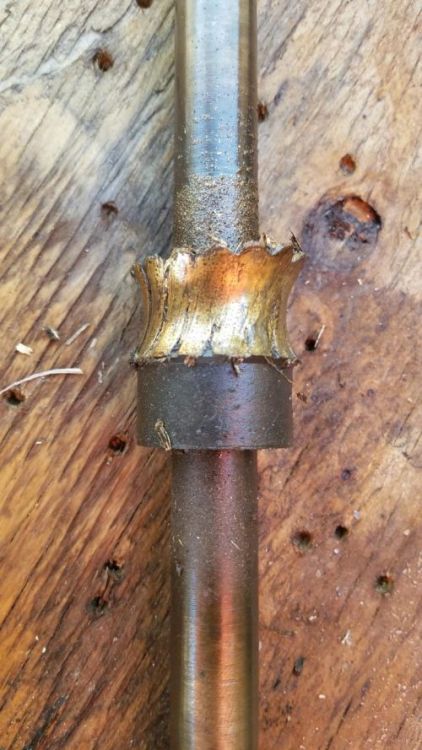
|
We have a new to us early Wisconsin BKN and a later Wisconsin BKN motor as well, we are missing a couple of key parts but hope to rebuild one of the two. We are searching for a Stromberg L26A carburetor for our newest BKN engine. If you come across one that is complete and reasonable, please contact me.
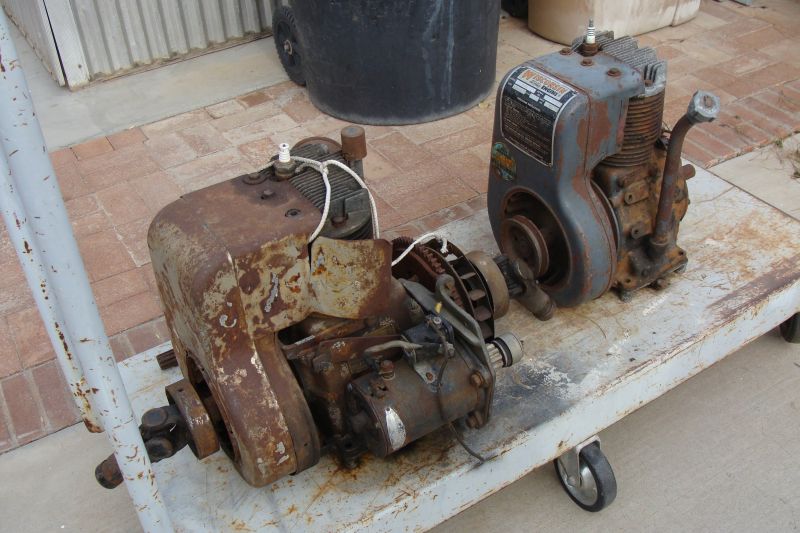
|
We will rebuild 20 G12 bumper/safety bar assemblies that are badly bent, mangled or have severe rust pitting. We still have some NOS front safety bars that we will utilize with the original mounting brackets to rebuild the safety bar assemblies.
We finally got one of our “STOP, LOOK, LISTEN” signs repainted and remounted near the pedestrian walkway. I took it down several months ago to repaint it and other things kept coming up and it just never got done and remounted until this month.
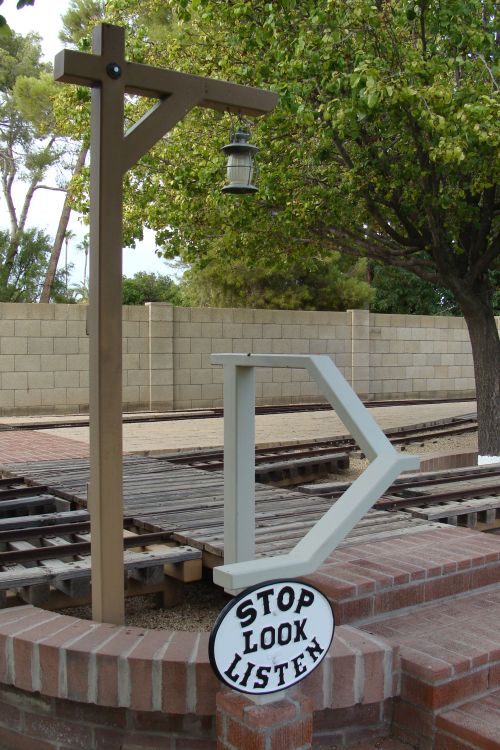
|
We cut out 14 seat bottoms for our middle E10s seats and 9 seat bottoms for our middle G12 seats. We will still need a few more seat bottoms once the price of plywood gets a bit more reasonable.
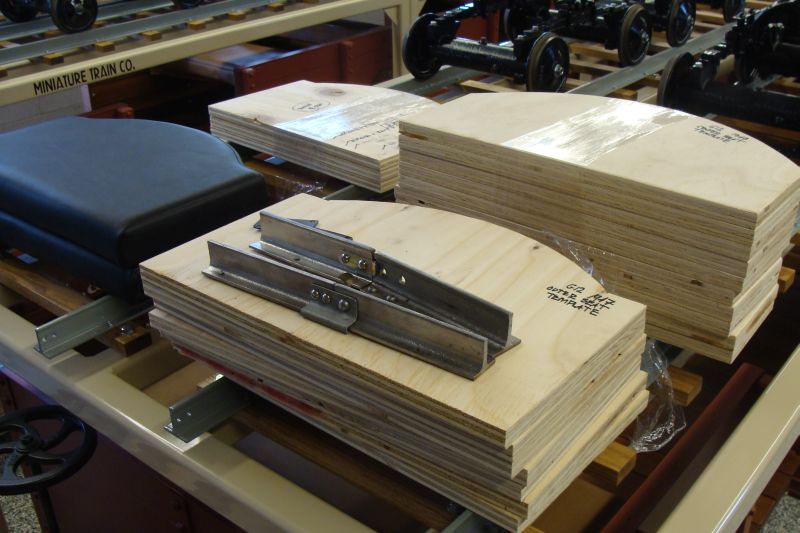
|
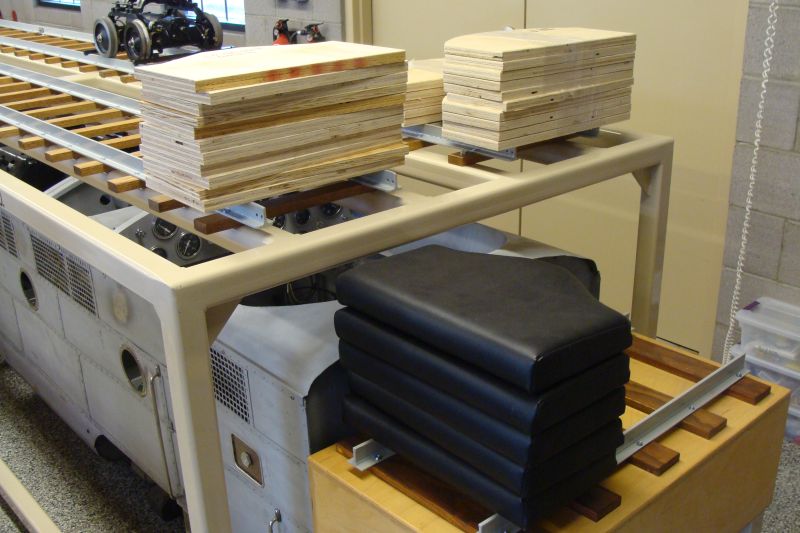
|
Happy and safe railroading everybody!
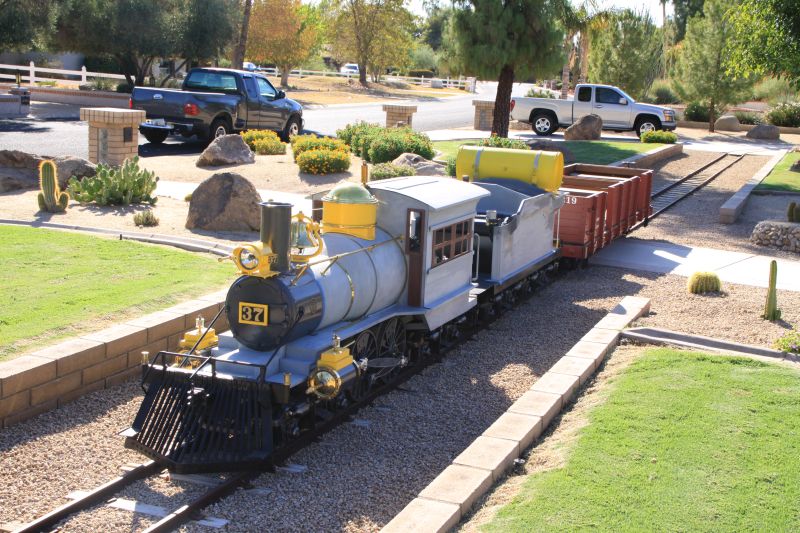
|
06/08/21
I was in Trinity Alps, CA for parts of 5 days in May with my great friends Russ, Suzie and Paizley Rose Robinson. They are the owners and creative genius behind the private Trinity Alps Railroad. This spectacular 15 inch gauge railroad winds its way among the sugar pine and yellow pine trees as it climbs 101 vertical feet from the lower level to the upper level of the railroad. The mainline and sidetracks are approximately 1.3 miles in length. Russ has dreamed, designed and built every piece of this railroad with his imagination, ingenuity and hard work. It features three curved trestles, a bridge, two tunnels, a snowshed, a water tank, 2 car barns, an engine house, an amazing chapel and scenery that you only see in special places.
|
His locomotive and cars are all hand built with love and tremendous attention to detail. I had the opportunity to see his new to me caboose and track inspection car, ride in the incredible No. 75 parlor car, sit in his pioneer chapel which overlooks the mainline and see his new car barn under construction. Russ has the concrete floor, main structure, roof and walls of his new carbarn all in place. His new carbarn will have elevated tracks above the concrete floor and comfortably hold six cars. This carbarn will be reached by a short trestle and then a three way stub switch. How awesome is that? Russ is starting to frame out the windows and doors. Another wedding will be taking place in the chapel later this year. Russ built the altar, the pews and every leaded glass window in addition to the structure itself. Paizley Rose is the family Border Collie and oversees all railroad and construction activities closely, sometimes very closely and is a sweetheart. Sometimes I have to pinch myself for being so lucky to experience things like this and having such great friends.
|
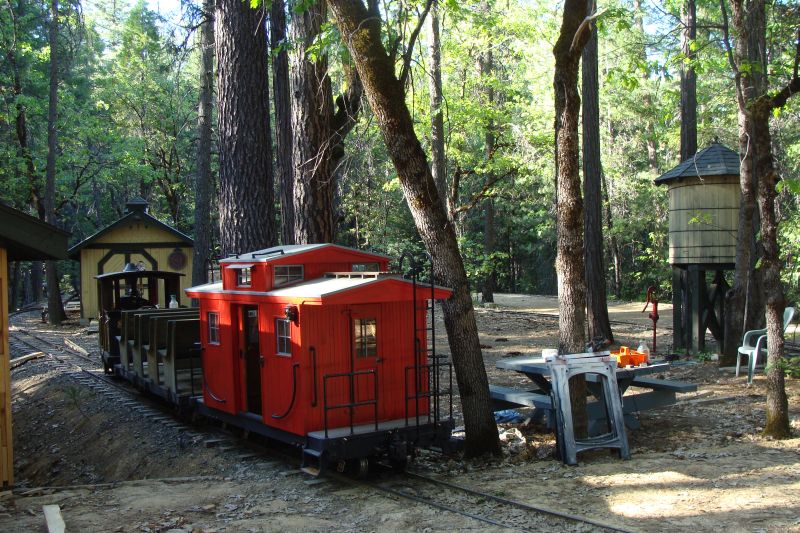
|
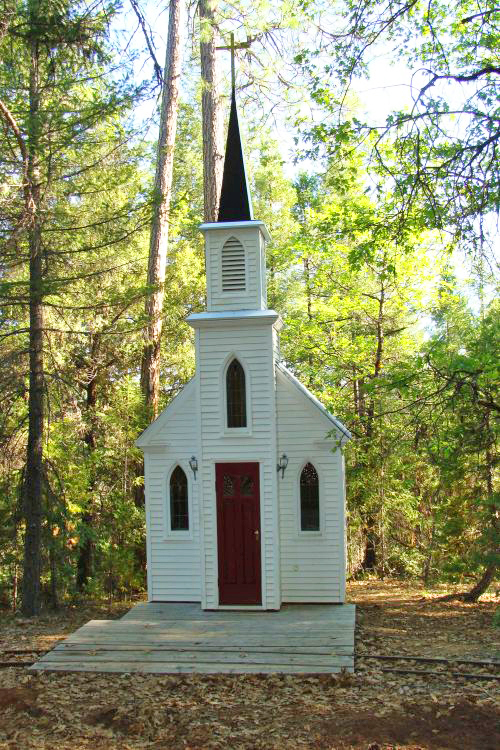
|
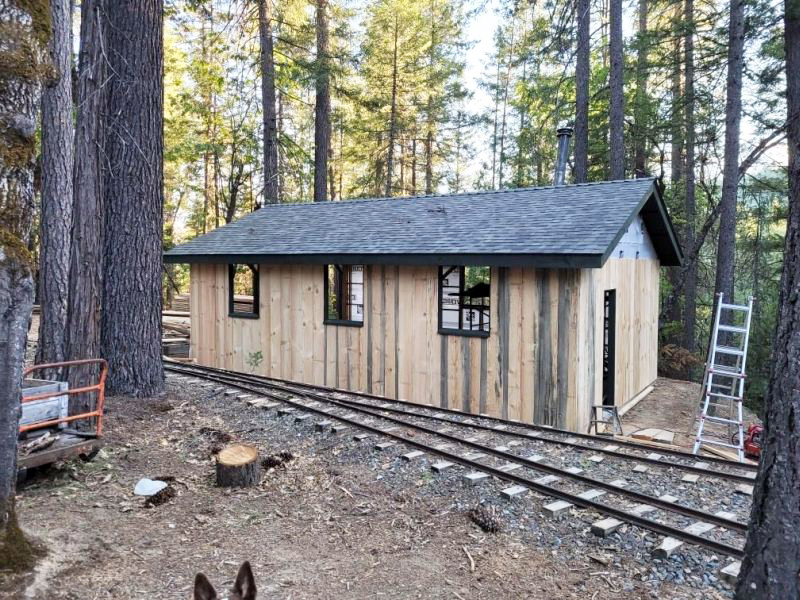
|
As I have written previously, all of the ties that have ground contact on the Arizona and Pacific Railroad will be replaced early next year. In early January of this year, Russ Robinson received 3 large pine trees that were cut down a few miles from his property. He began ripping the full size yellow pines (Ponderosa Pine) at his sawmill into 3 ¾ x 3 ¾ inch timber roughly 12 1/2 feet in length. During my visit, we cut enough timber to length for seven hundred 30 inch ties and 120 switch ties. We also banded and palletized them into groups of 99 with spacer sticks at all levels to facilitate drying. The 820 ties will continue to dry out on site in northern California until September when they will go to Oregon to be pressure treated with preservative chemical. They are scheduled to be shipped to Arizona in early October.
|
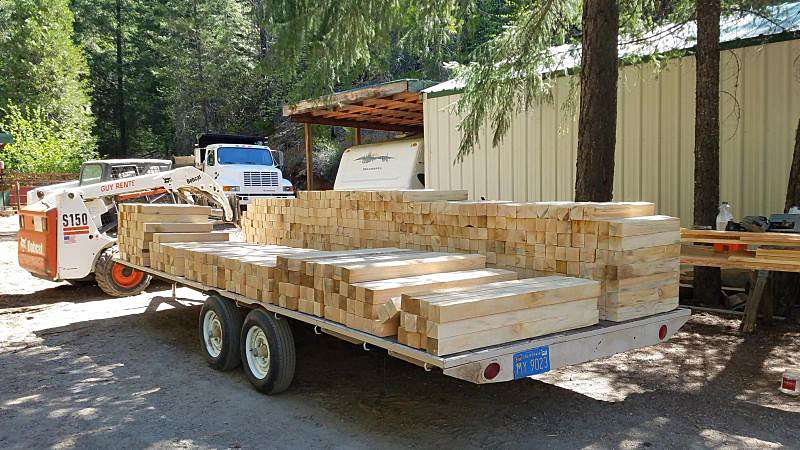
|
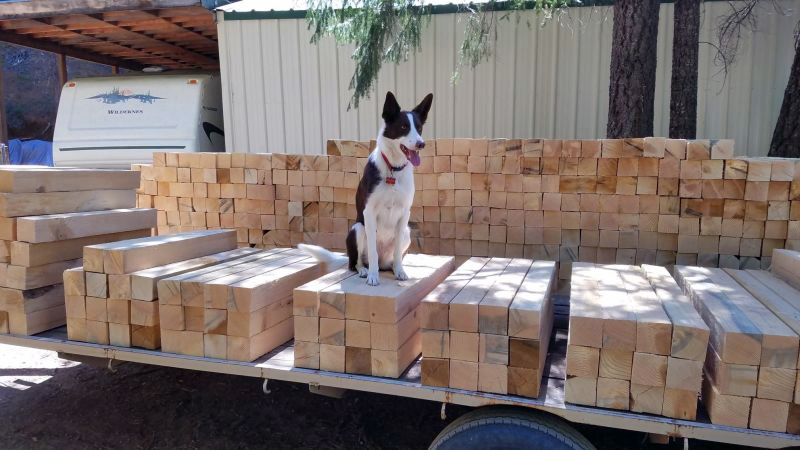
|
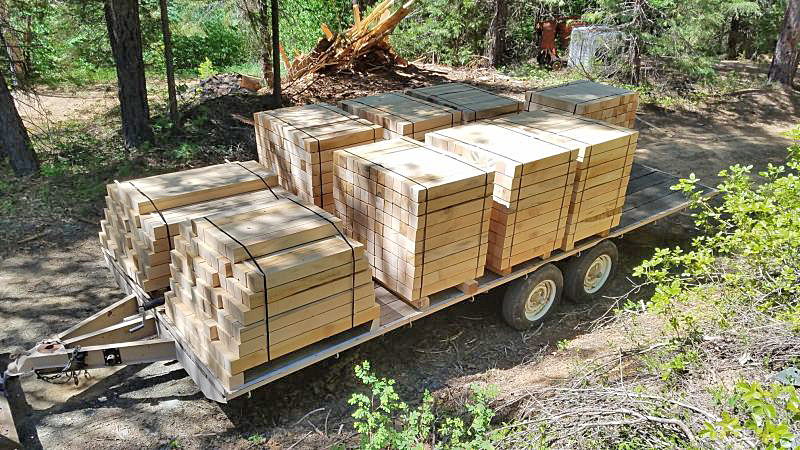
|
We cut out the plywood seat bottoms for 15 E10 seats and 12 G12 seats. The E10s have two different seat shapes as the end car seats are one shape and the two inner car seats are another shape We still need to cut out 12 more inner seat bottoms; we have made the pattern. We also need 17 more G12 seat bottoms. Once all are cut out and sanded, my neighbor and good friend George Fimbres will start covering the seats for me a few at a time between his other projects.
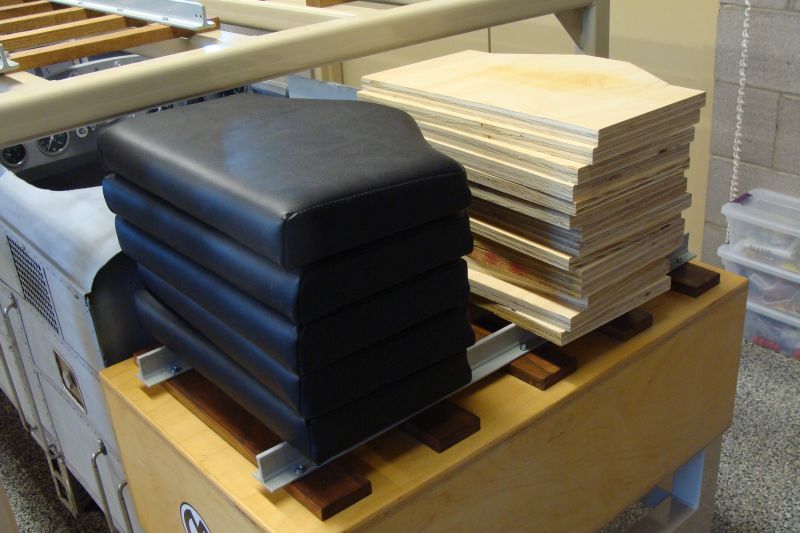
|
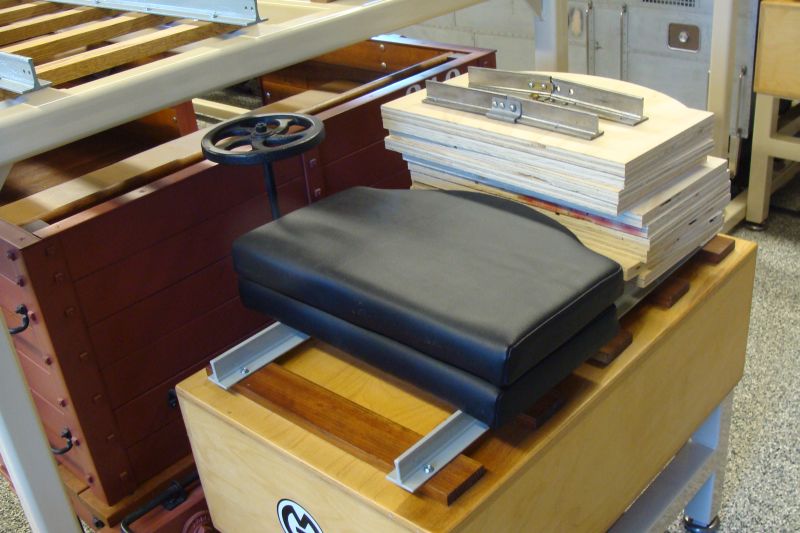
|
We have plans for a cut away display of a MTC crossing signal box and are working with our friend Rick Nairn on this display.
It was less expensive to buy the ring rail wheels new as a unit than to purchase and replace the bearings separately so we replaced our ring rail wheels. The mechanical part of our turntable refurbishment is now complete and she spins freely and with little effort. The painting and cosmetic touches will take place in the fall.
We got both of our 3 foot rack extensions (racks 1 and rack 3) back from fabrication and powder coating at the end of the month and got the leveling feet mounted. We drilled the mounting holes, leveled the modules and five hours later got the new panels bolted onto the existing 17 and 27 foot racks. We now have a 30 foot E10 rack, a 20 foot G12 rack and a 20 foot dual gauge rack. I completed sanding, staining and polying enough G12 ties for two more dual gauge track panels to sit atop the just completed rack no. 3 (dual gauge). Dave completed drilling all the additional holes we needed and I got the six rails powder coated. Dave and I built the second two dual gauge track panels. After the 3 foot extension was bolted in place, we mounted the new track panels. The length is just about right and they look pretty good.
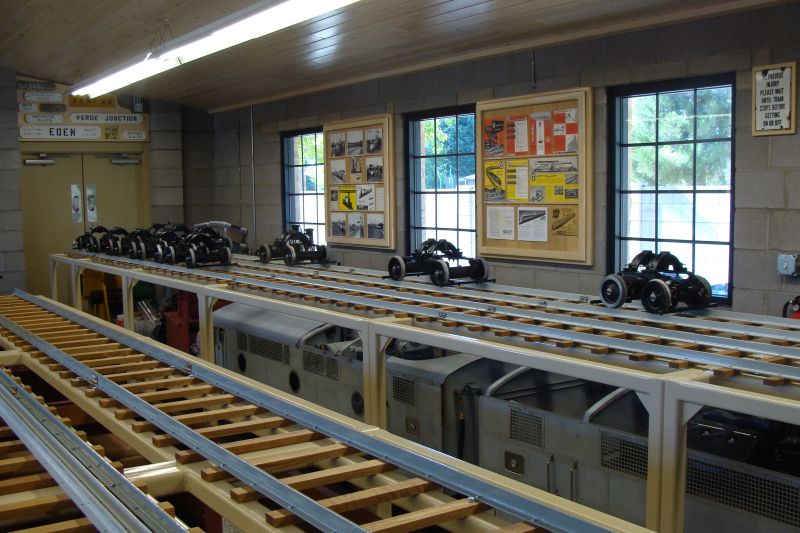
|
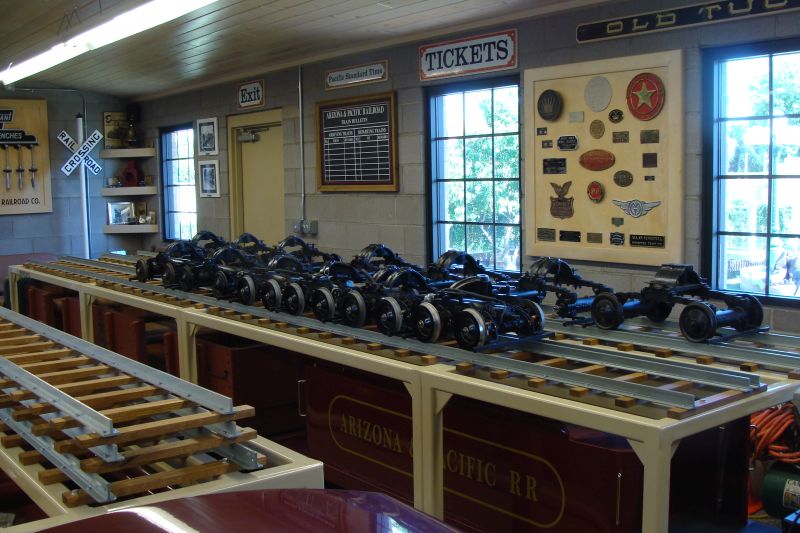
|
I also sanded, stained and polyed the ties for 2 three foot E10 track panels and a 10 foot E10 track panel. Dave and I finished the two three foot panels and they are bolted in place atop rack no. 1. Assembling the remaining 10 foot E10 panel is a June project.
As the existing 3 racks are completed with track panels, I took the opportunity to have our belated spring cleaning in there. We had worked hard to catch the sawdust and metal chips from the drilling involved in bolting the panels together and mounting the track panels to the racks, but it was impossible to catch all of it. We moved each of the 6 engines and cars outside as well as the track inspection car and the short flatcar. We dusted the racks, cleaned the floor rail pockets, swept the floor and mopped the floor. I cleaned each car as it sat outside before it got moved back inside. I cleaned the inside and outside of the windows and dusted the displays. I also moved the majority of the G12 trucks that have been sitting in our gon 218 for quite some time to the top of the dual track rack. These trucks all need some work whether mechanical or cosmetic, but they are up out of the way for now. I have 10 more G12 trucks stored elsewhere.
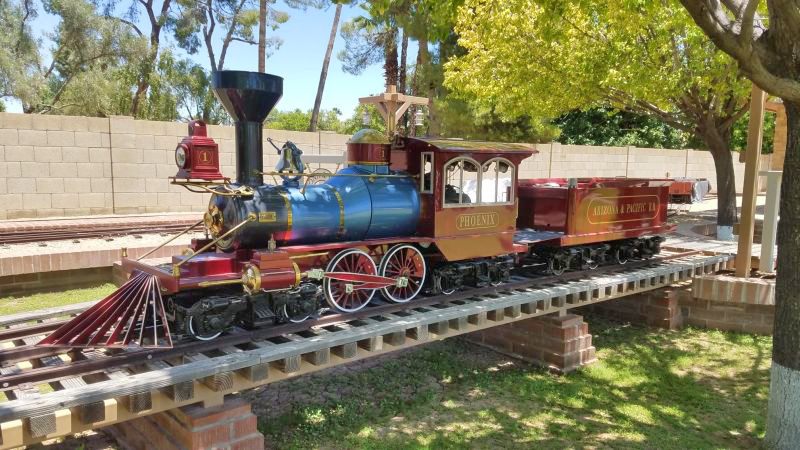
|
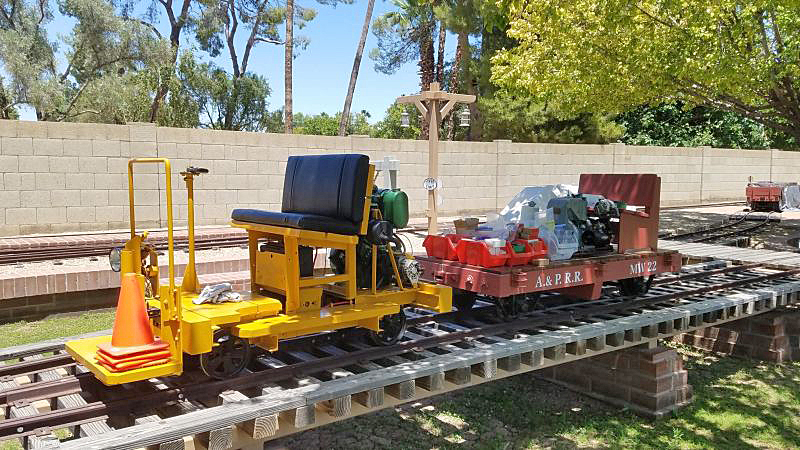
|
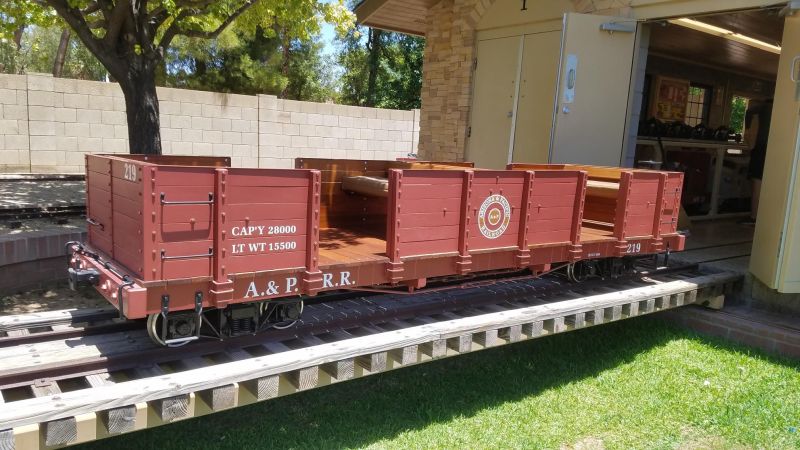
|
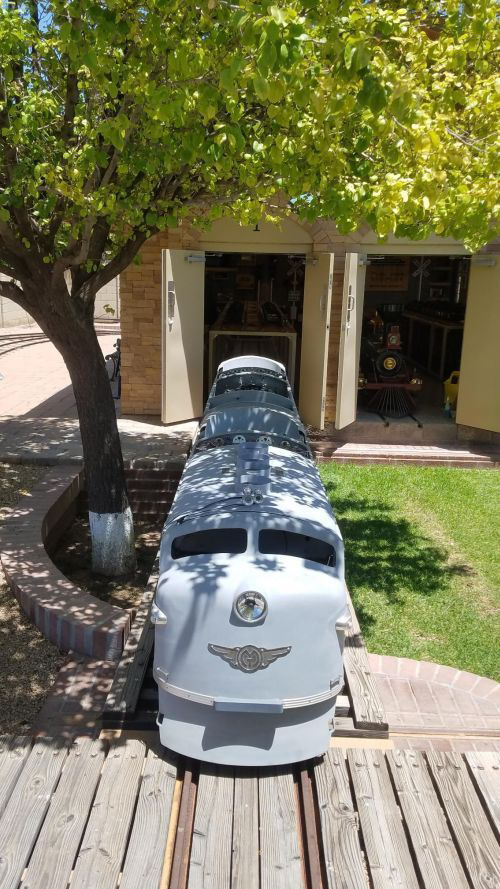
|
We now have 63 E10 wheels painted. I have 3 more to sand, prime and paint. We have misplaced 2 E10 wheels. I have our powder coater, our machinist and myself trying to locate the two missing wheels. We have 8 coach trucks assembled and up on the display racks along with 2 power/non-drive trucks. The five power/drive trucks await final assembly in June.
Our first 2 E10 coaches are now scheduled to leave body and paint and return to the A & P on June 9. Four other pieces of E10 equipment will head to body and paint at the same time.
A new acquisition is now scheduled to arrive in 4 massive crates to the Arizona and Pacific on June 4.
Things are pretty busy out here on the A & P. Stop by next month for some announcements and photos of some newly restored equipment as well as some newly acquired equipment.
Happy and safe railroading everybody!
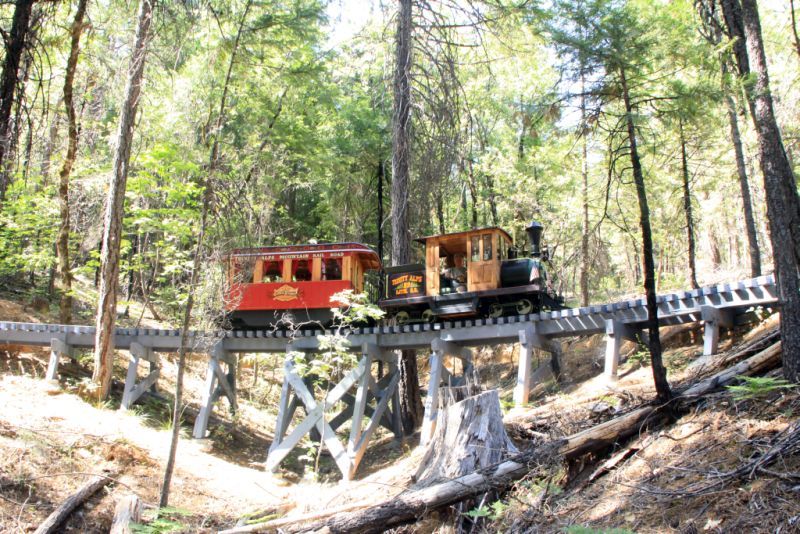
|
05/03/21
I’ve been working on a bit of an unusual project for quite a while in the little bit of free time I have and when I want just a bit of a break from the railroad or my 8-5. I have about the next five years of projects under tarp in my rear side yard. I could have built some additional posts and added welded wire and Catsclaw like I did in the rear of the side yard and it is quite pretty and looks very traditional. Those of you that know me and have been out here, know I can be a little eccentric at times… Over the years, I have acquired 7 original Sundrella umbrellas from the late 1950s and have also acquired 16 shell back chairs like everyone’s back yard and motels used to have on the patio or by the pool back in the day. The problem with the shell back chairs has always been the thin-walled round tube frame always rusts where it contacts the ground and eventually the frames are compromised and the chairs are thrown away.
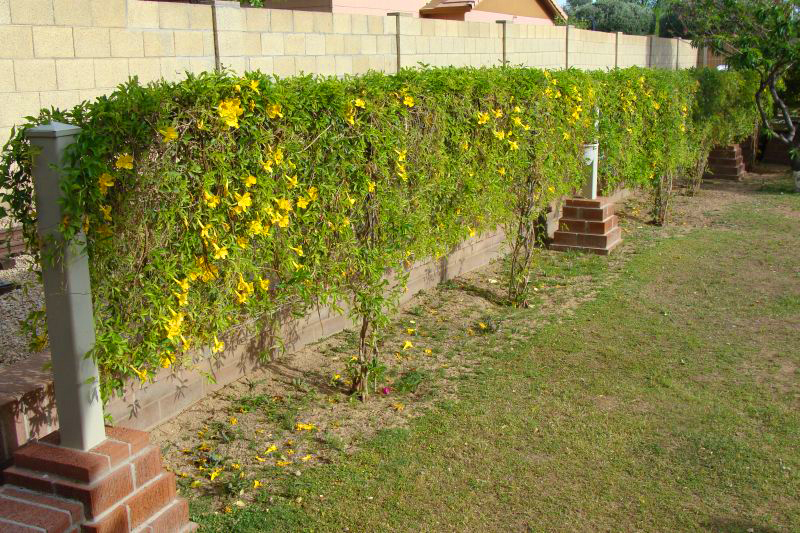
|
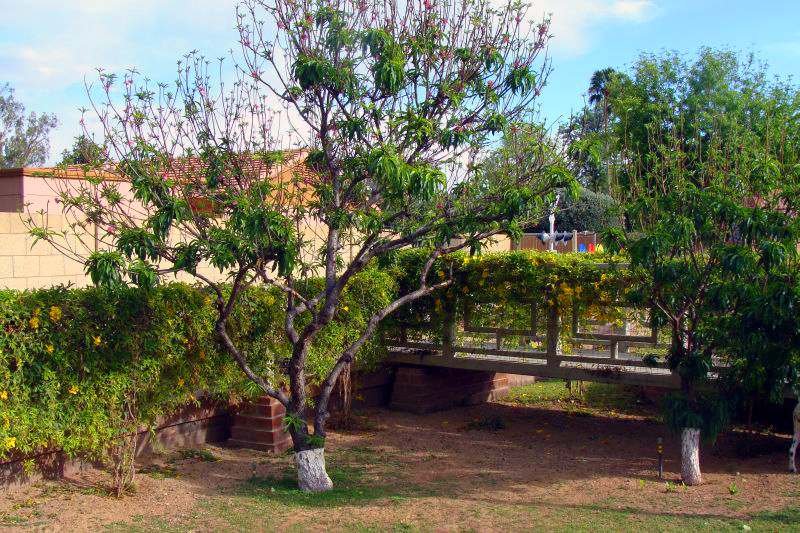
|
My little project has been to save the bottoms and backs of those chairs and build a five foot tall privacy wall in the side yard that will partially block, in a cool way, the view of several future MTC projects that are under tarp over there. I had some help from some friends; we poured the concrete, welded the posts, built the hangars, cut, fit and attached the horizontal supports and got started mounting the freshly powder coated bottoms and backs. There is still work to do, but you get the feel of what it will look like. It isn’t for everybody, but I think it looks pretty cool and adds to the 50s and 60s vibe which is pretty prevalent in the back yard and out in the shop. I’m not sure if it will get it finished before it gets really hot so it may not get finished until the fall, we’ll see.
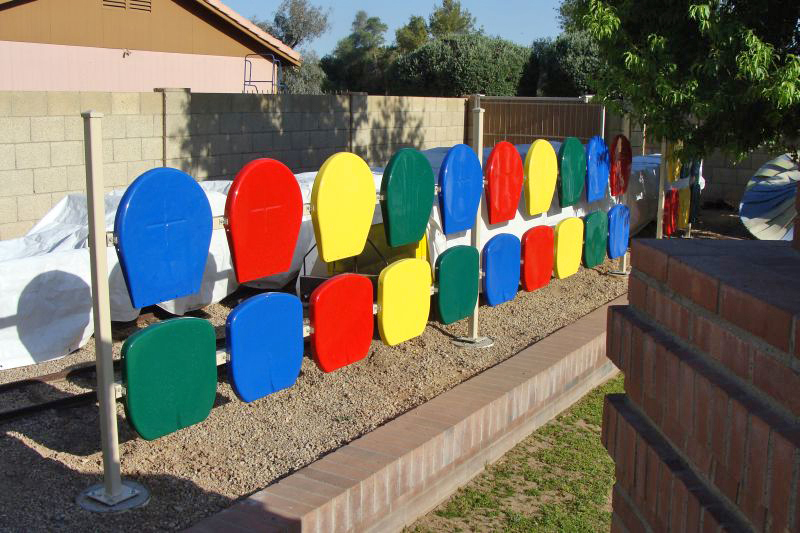
|
We continue the mechanical overhaul of our turntable. When we built our turntable in 2005 it spun quite easily. We kept it balanced by adjusting the turnbuckles a couple of times a year and we greased the center bearing and ring rail wheel bearings every year. It worked great for about 12 years, then, despite the fact that we had applied plenty of grease on the one inch threaded rods and turnbuckles, the turnbuckles seized in place. Despite WD40, heat and a massive crescent wrench, they refused to break free. Balancing the turntable became impossible. This month we cut off the turnbuckles, chased the right and left hand threads, smathered the threads with anti-seize compound, installed new turnbuckles and then reassembled and re- balanced the turntable. We also jacked up the four corners to access the center bearing and made the decision to replace it. We greased the replacement bearing and got it in place. Next month we will be replacing the bearings in the ring rail wheels and mechanically that should put us in good shape for some time. There will be some repainting of the turntable that takes place in the fall.
|
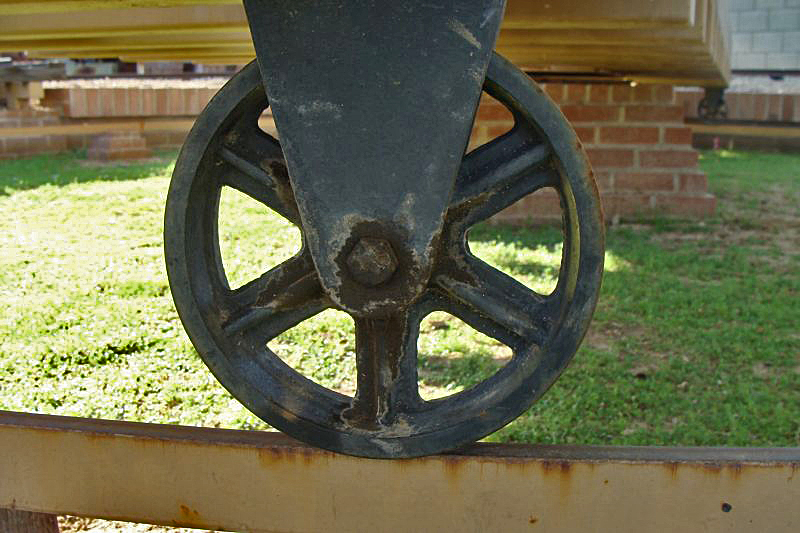
|
We cut 12 inches from the length of one of our engine house bench seats to allow more room as you enter the engine house. My neighbor and good friend George Fimbres modified the cover and made it look great. As time permits, I am going to have him modify the cover of the second bench seat out there just so they look the same.
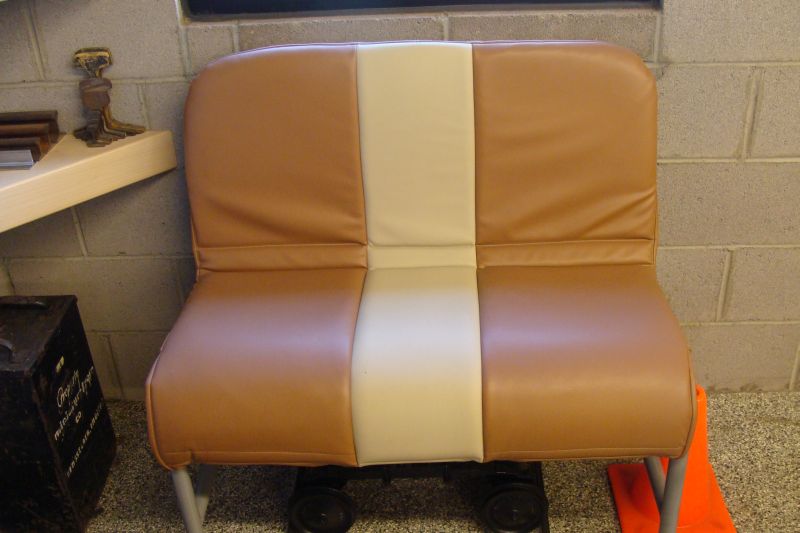
|
We attached the levelers and got our two five-foot extensions bolted together and bolted to rack no 1. We also got the 10 foot rail panels in place. This rack is being extended by an additional three feet and we will build two additional three foot long track panels. It will be 30 feet long when completed.
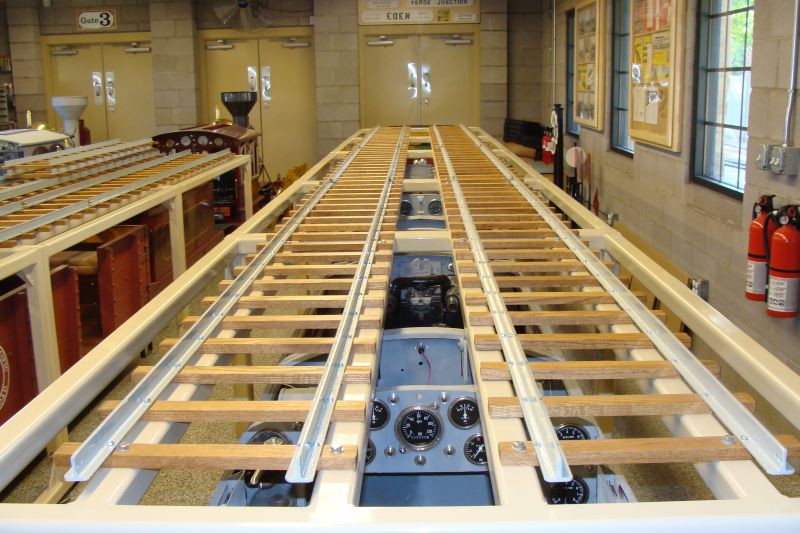
|
We got another 25 E10 wheels painted (40 completed) and have 28 more to go. We started installing wheels on E10 trucks
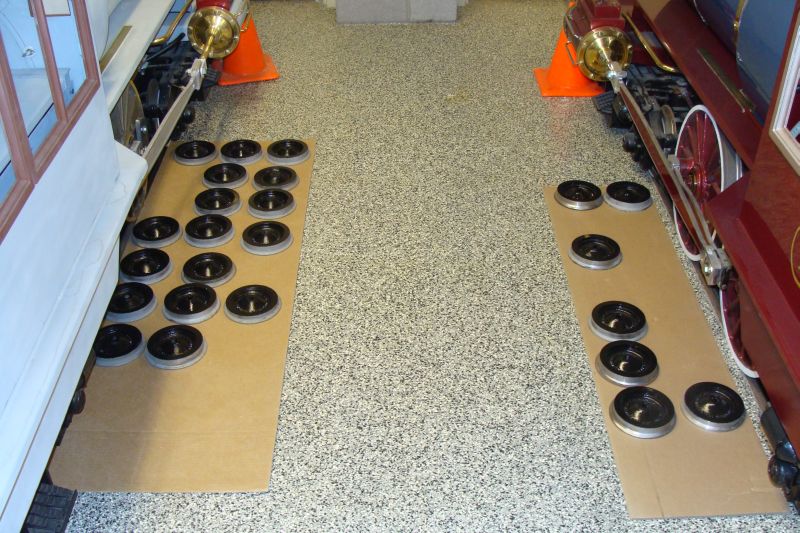
|
We were scheduled to get our first two coaches back from paint and body this month, but they got bumped again – this time to May 15. An E10 locomotive, observation car and 2 additional coaches are going to body and paint when the two coaches are picked up; we hope to have these four pieces of equipment back by September 1.
|
I completed sanding, staining and polying enough G12 ties for two more track panels, Dave completed drilling all the additional holes we needed and I got the six rails powdercoated. Dave and I assembled the two track panels that are 10 feet long that we have outfitted with three rails each to accommodate both E10 and G12 equipment. We also got these two panels mounted to our rack. We will be assembling 2 more of these dual gauge track panels in the next few weeks as we await a 3 foot rack extension to extend this rack (no. 3) from 17 feet to 20 feet. In this regard, we have drilled the new holes in four of the six rails we will be utilizing and I have sanded, stained and polyed the additional G12 ties. We need to drill the 2 remaining rails and get them powdercoated and can then assemble the next two panels.
|
|
We are still pushing to complete 2 more dual gauge track panels, another 10 foot E10 track panel and 2 E10 track panels that are 3 feet long before the June heat gets here. More on that 10 foot E10 panel later. This summer we will be assembling E10 trucks and G12 trucks and positioning them on the racks now that we know where each piece of equipment will sit. We’ll also be continuing to ready equipment to head to paint and body, hunting for missing parts and researching and fabricating panels for our new acquisitions (more on that next month).
|
We will be completing three E10 trucks shortly by adding freshly painted wheels. The two completed coach trucks and a rear power truck will be on E10 display rack no. 1 and track 1 in the engine house with the two coaches due back from body and paint on May 15 sitting on them. We can’t wait to see how a couple of complete E10 trains look up there, one pre-war and one just post war.
We are starting to prep the next E10 observation car no. 20, locomotive no. 20 and B unit no. 24 to head to body and paint in early September.
Happy and safe railroading everybody!
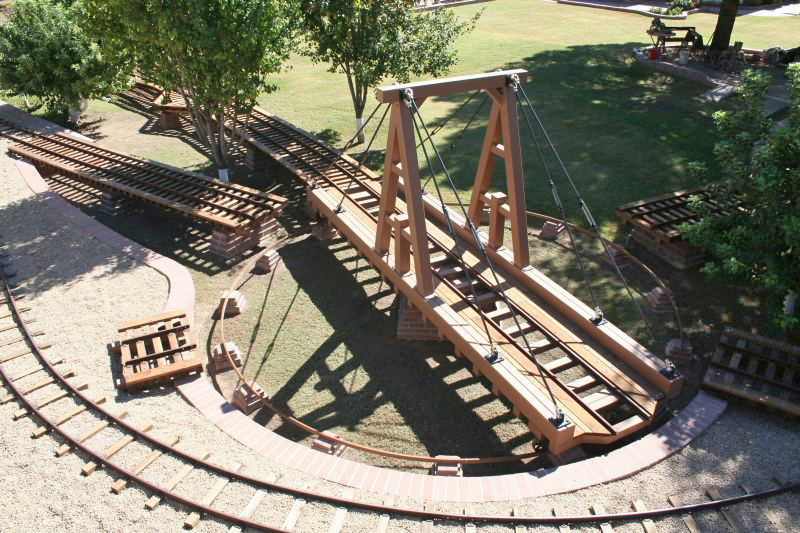
|
04/19/21
We started painting E10 wheels; 15 are done and 53 remain to be painted. They are time-consuming as only the hub gets painted and everything else gets taped off. I had tried painting the hub separately and then pressing them into place, but with the equipment I have I kept messing up the paint job and having to start over.
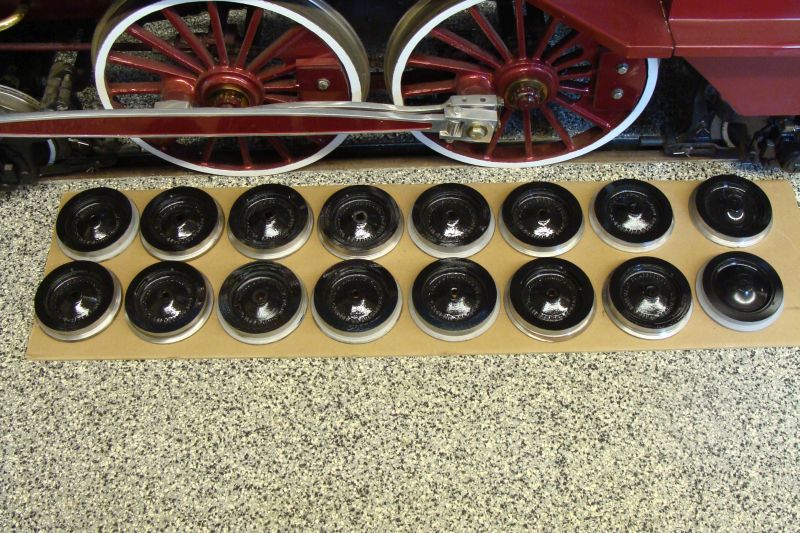
|
We borrowed a shear from one of my friends and will be utilizing it next month shearing engine grilles and lexan windows for our E10s.
After several delays, the first two E10 coaches will be back from body and paint on April 24. Our E10 engine No. 26 and observation car will be the next equipment to travel to body and paint. We hope to have them back at the A & P. on or before July 1. We had planned to send our G12 to body and paint once E10 No. 26 and the E10 observation car were back, but we have changed directions on that. Instead we will be sending the other five pieces of E10 equipment to body and paint first. Two more coaches will go to body and paint around July 1st and three more early in October. They should all be back by the end of this year. I had hoped to have all the equipment (E10 and G12) back from body and paint by the end of this year, but now we are looking at April or May of next year before we have all the restored G12 equipment back at the Arizona and Pacific Railroad. They just can’t squeeze our equipment in as quickly as I was hoping they could.
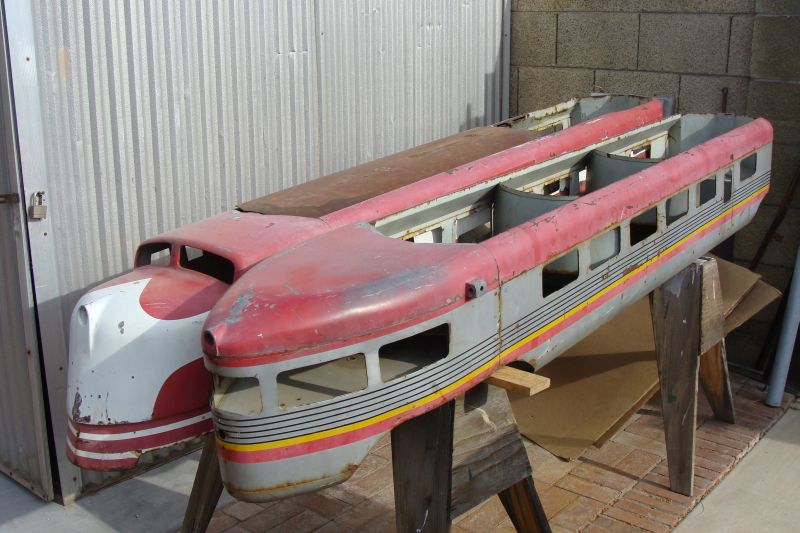
|
We were missing the hood hooks for our G12. Our friend Rick Nairn worked with us to obtain one and we are trying to track down one more.
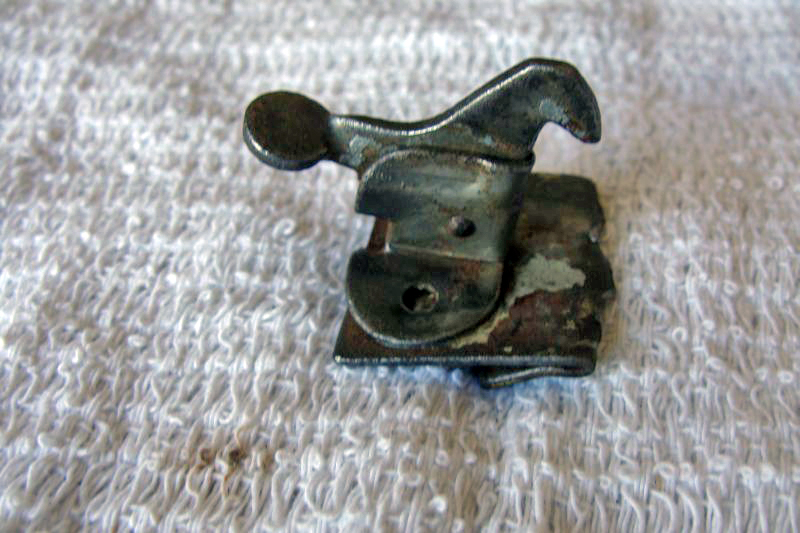
|
We acquired the additional stainless steel rod that we need to make all of the missing grab irons for our E10 and G12 equipment. We will start on that project in the next month or so.
We commissioned two more display cases in the engine house. Both of these cases will match the two already in place and be for paper items; one will contain G16 catalogs, literature and photos and the other will display E10 catalogs, literature and photos. The two currently in place are dedicated to MTC G12 photos and literature and the other to Allan Herschell S16 items.
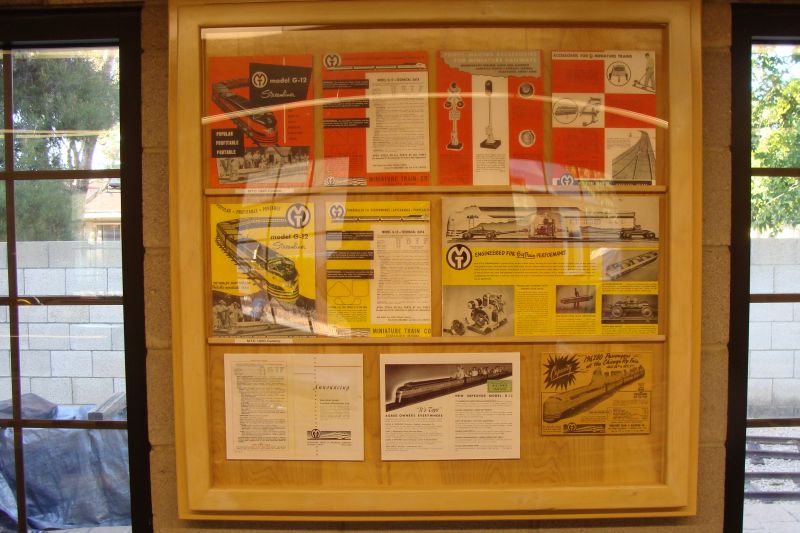
|
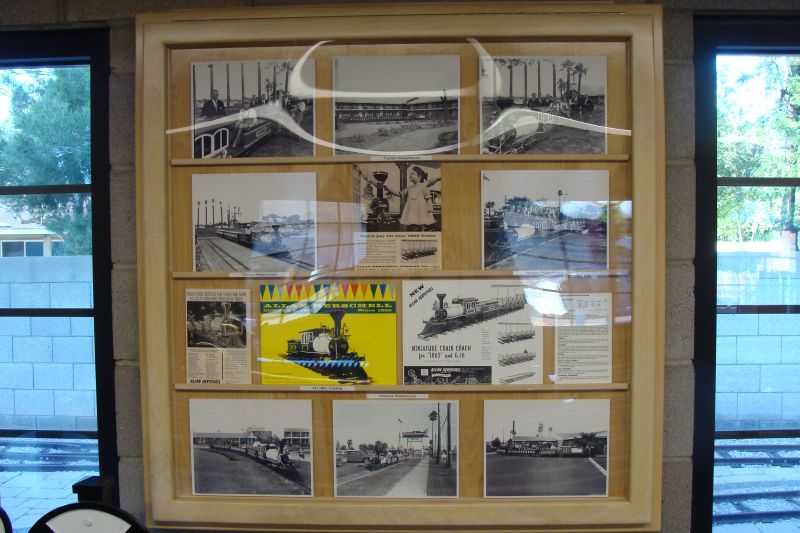
|
Dave and I layed out the G12 track and the E10 track in the backyard and determined where they will be located on the occasions they are set up. The G12 track will run north and south and is approximately 30 feet by 55 feet. The E10 layout will run east and west and is roughly 18 feet x 80 feet. Both trains cannot be run at the same time as the available space is insufficient.
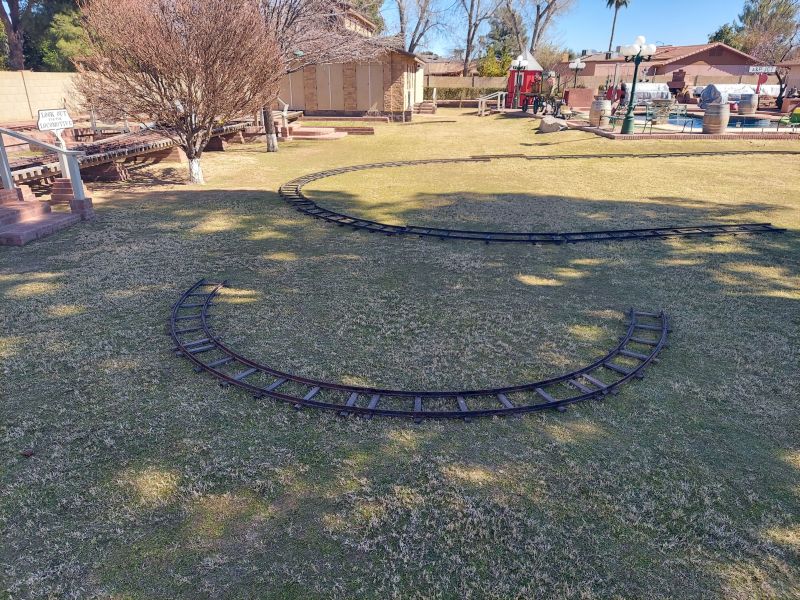
|

|
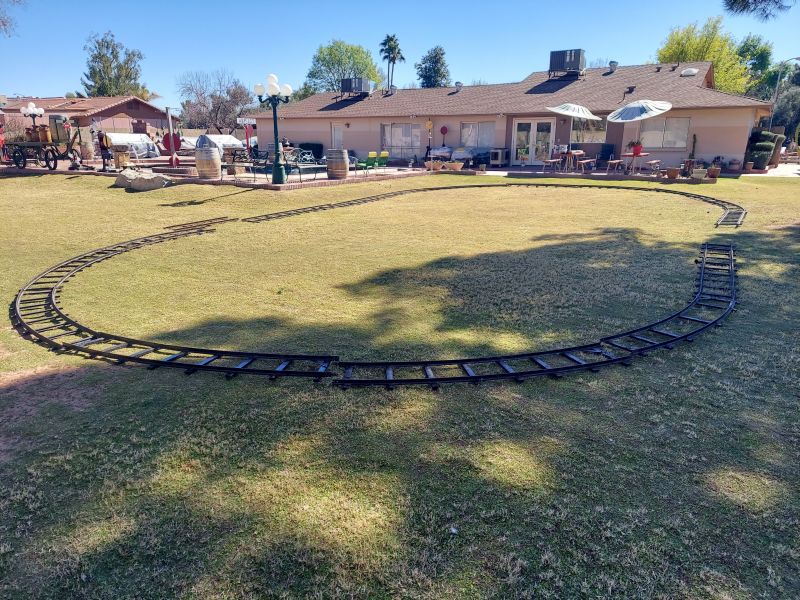
|
The two five foot rack extensions for inside the engine house that were scheduled for powder coating in early April and delivery to the A & P the middle of that month arrived early! They were delivered the last week of March. We need to get the levelers attached and the rack components all bolted together. Once bolted together, this E10 rack will be comprised of five separate rack modules totaling 27 feet in length. We have made the decision to add another three foot extension to this rack. We will have room for 60 track feet of E10 equipment once finished. We hope to have racks assembled and the additional E10 track panels in place in April.
We also received the four stands back from powder coating that I designed for holding E10 and G12 equipment at a comfortable working height after their return from body and paint as windows, grab irons, wiring, seats and other components are installed. We tried them with an E10 coach that hasn’t been to body and paint yet and it looks like they will work out okay for us. I may still make a modification, we’ll see after we use them a bit.
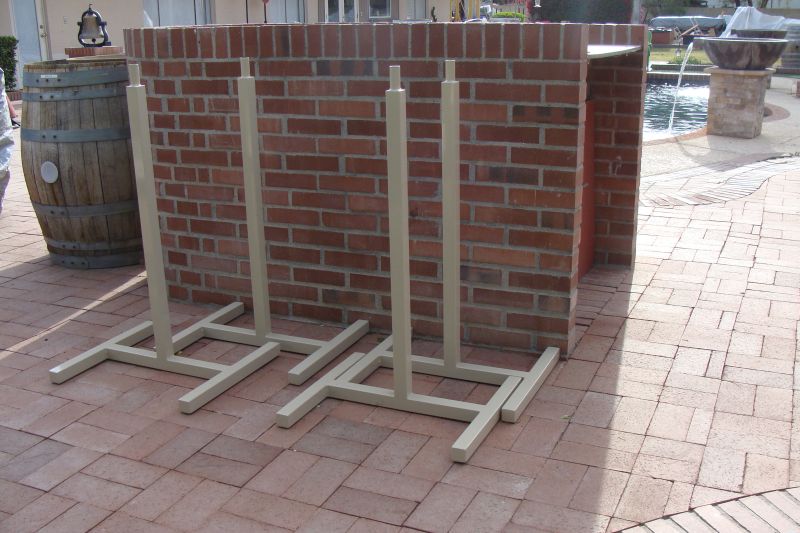
|
One of our other racks is also being lengthened by 3 feet; it will be 20 feet long once completed. Both sides of that rack will be triple railed to accommodate E10 or G12 equipment. Once everything is finished, we will have a total of 60 feet of E10 display track, 40 feet of G12 display track and 40 feet of display track that can accommodate both gauges. We have disassembled six original G12 track panels as that rail will be used in the dual gauge panels and the adjacent G12 panels. We still have numerous new holes to drill; each rail receives 18 new holes (6 ¼ inches apart and 9 per side) which is midway between the original tie hole spacing of 12 ½ inches. Then they are off to bead blasting, powder coating and then attached to the G12 ties. The new G12 ties just arrived from my friend’s wood shop the last week of March, but I just haven’t had time to sand, stain and poly them yet. Hopefully, I’ll get that completed in April. We have 2 extra E10 panels that are 7 feet in length that I will discuss in a couple of months.
The E10 track panels for the 10 foot extension of rack no. 1 were originally installed on rack no. 3 and are being transferred to rack no. 1. Our E10 rail in our displays is all powder coated in gunmetal gray.
We will utilize our track jig again and set it up for the G12 track panels that we are building. It does a great job holding everything in place while all the ties are spaced and drilled and the rail is screwed in place.
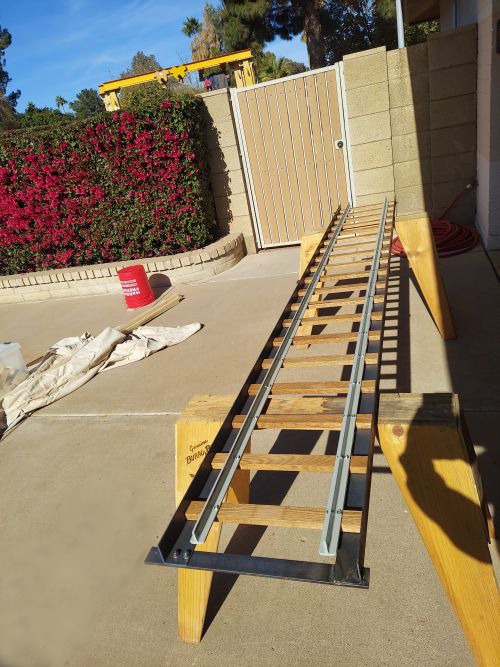
|
I recently acquired some additional MT & RR Co. equipment that I have wanted for quite a long time and just recently had the opportunity to add to our collection. This equipment is the reason for some of the last minute changes to the way our racks in the engine house are laid out. The new equipment isn’t here yet, but is in route. I will have an announcement and photos in the next few weeks.
Happy and safe railroading everybody!
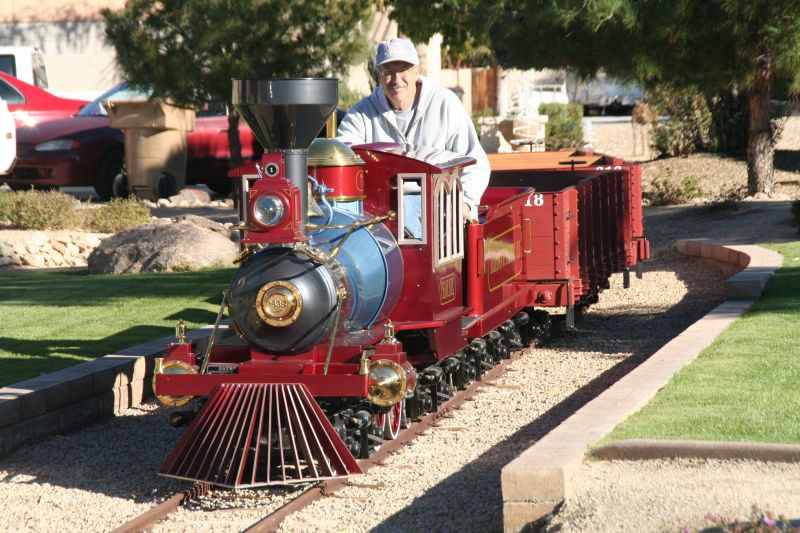
|
03/09/21
Mark Blumhagen, a fellow S16 owner from Spokane, was in town on business and we made time to get together and talk all things S16, MTC and AH.
We had hoped to have the first 2 E10 coaches back from paint and body this month, but we are now targeting mid-March for their return. We are close to having one of our E10 locomotives and an observation car ready to head to paint and body as soon as the first two coaches are ready to return to the Arizona and Pacific. Once back at the A & P, the stainless steel grab irons will be installed as will the lexan windows in the two coaches.
We made progress on several engine house displays this month. Two of the three displays for early trucks were completed including adding the MTC logos. One needed modifications to the box so that it would tuck in about two inches closer to our gon no. 219 and the other needed modifications to its steel frame so that it would tuck in closer to MTC B unit no. 506. We touched up the stain, re-polyed the wood bodies and attached the legs to the bodies. We also attached the rail. Later this spring, some very early MTC trucks will be on display.
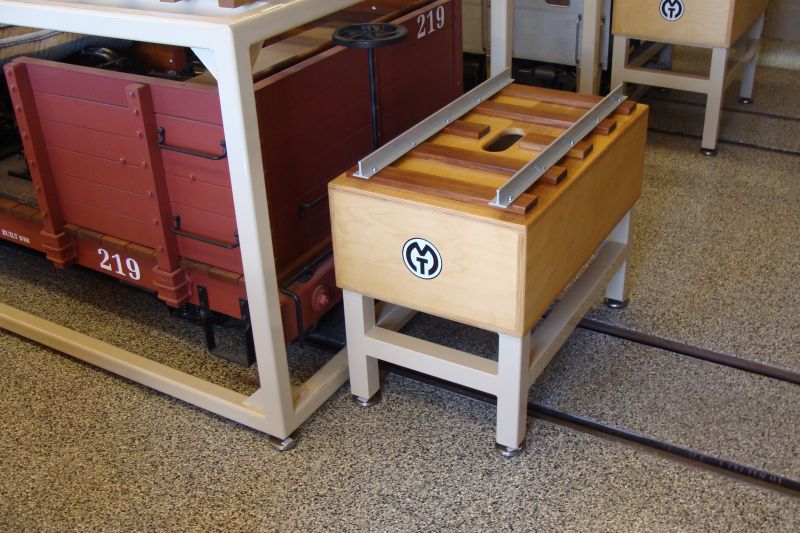
|
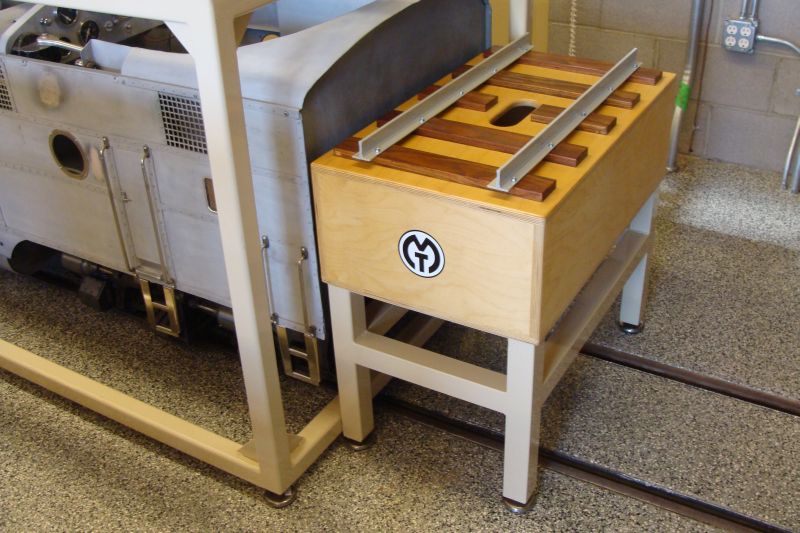
|
We finally have the long-awaited display for our MT & RR Co. torque wrench, original box and literature (thank you Rick) mounted on the east wall of our MTC display. We also mounted a MTC wheel gauge display and a TBD MTC display this month. I have a bit of additional work to complete on one display, but it is on the wall. We are out of room for MTC displays on the east end of the engine house. We are developing some large MTC displays for the north wall and also the west end of the engine house that I am excited about.
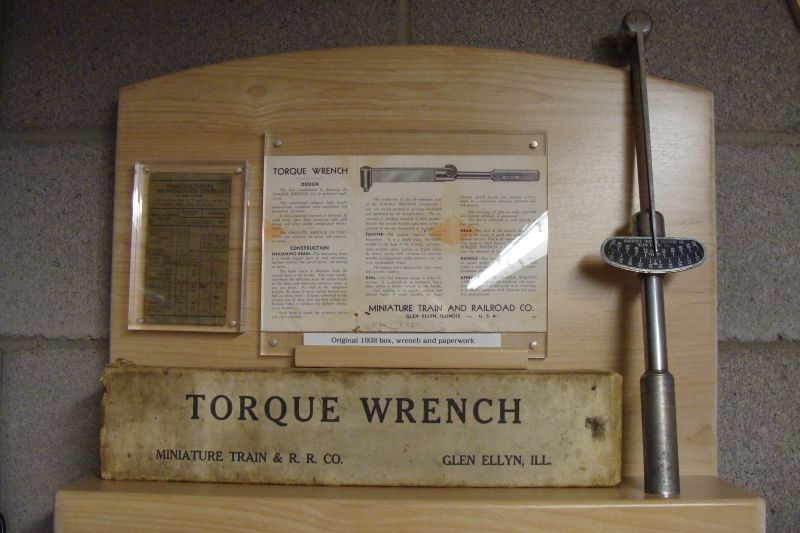
|
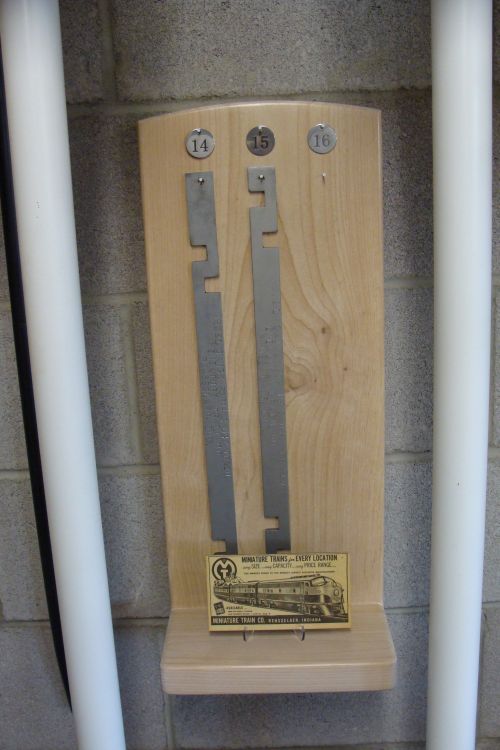
|
We continue work on our G12 locomotive and G12 observation car and hope to have both ready to head to the body shop in early May after the first E10 is fully restored. There is still a great deal of work to be completed, but they are starting to come together.
The snow in northern California cleared enough that the balance of our 3 ¾ x 3 ¾ timber for ties was cut from logs last week before more snow arrived. They will be cut to our length of 30 inches whenever Mother Nature cooperates and will be stacked and banded in 64 tie bundles with stickers between layers to dry all summer. They will get saturated with chemical preservative in November before heading to the A & P late in the year. Tie replacement is scheduled to start in earnest here in January of 2022. We will have several work days, anyone interested in volunteering for our tie replacement project, please get in touch with us.
We built a new and improved combination welding and work table for A & P shop that is already getting a great deal of use. It is about 6 inches higher than my work horses. I built a 6 inch tall platform for my vertically-challenged friends so they can still be comfortable working at the A & P.
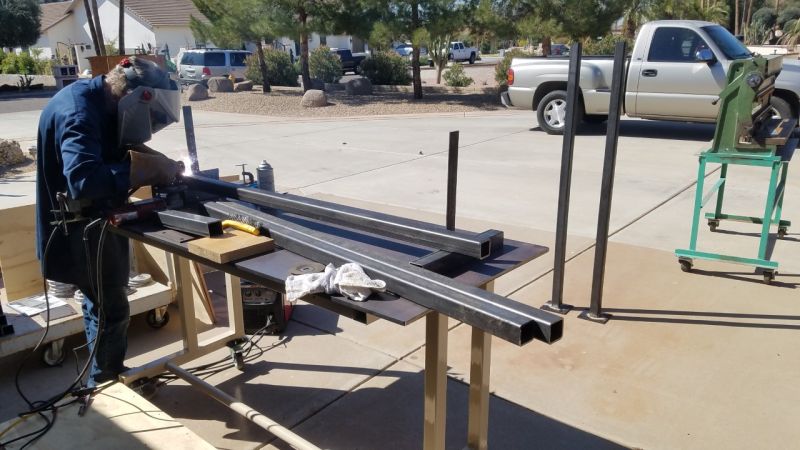
|
I purchased another G12 as a parts train this month. This one is no. 168 and was built in Addison by the Miniature Train and Railroad Company. It was completed by MT & RR Co. in early June 1947 and shipped on June 14, 1947. We received the locomotive, two coaches and an observation car, two power trucks and three coach trucks; all are numbers matching. We also received a complete set of track. No, we won’t be keeping two complete G12s. After we get our restored G12 back from body and paint, the remaining equipment will be for sale or trade.
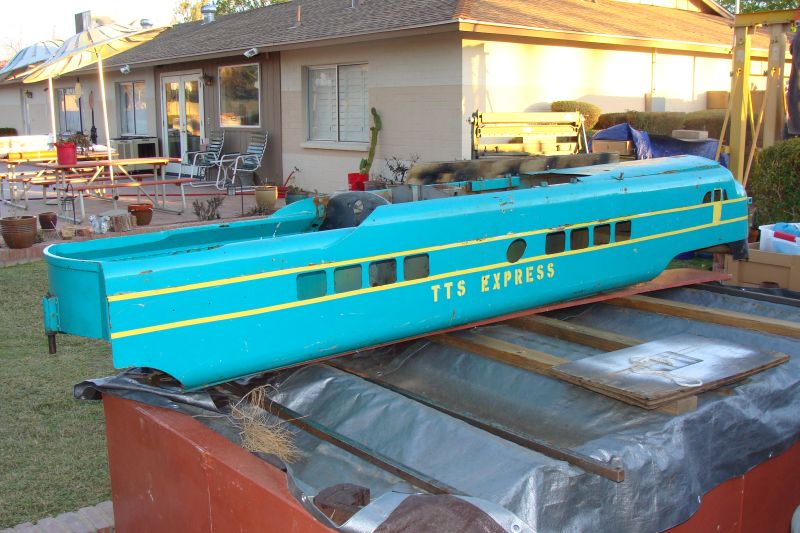
|
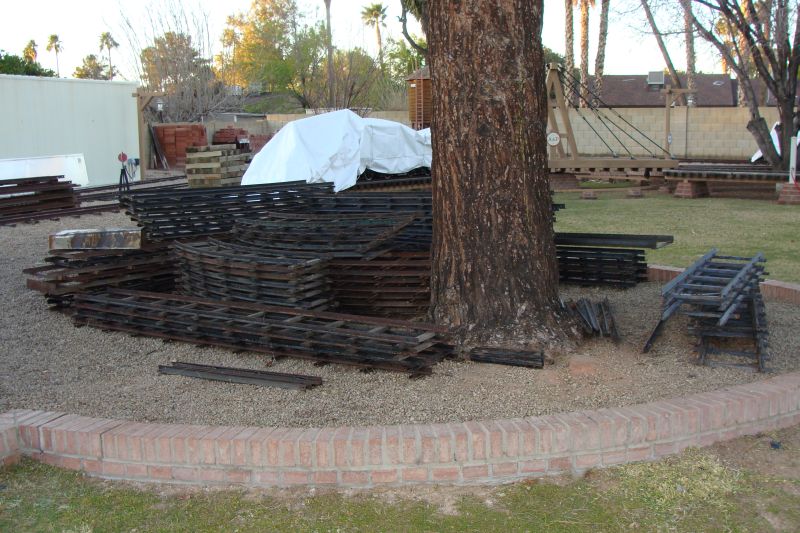
|
No. 168 arrived here on Super Bowl weekend and we immediately started disassembly and we now have most of the bolt together parts removed, bagged and tagged.
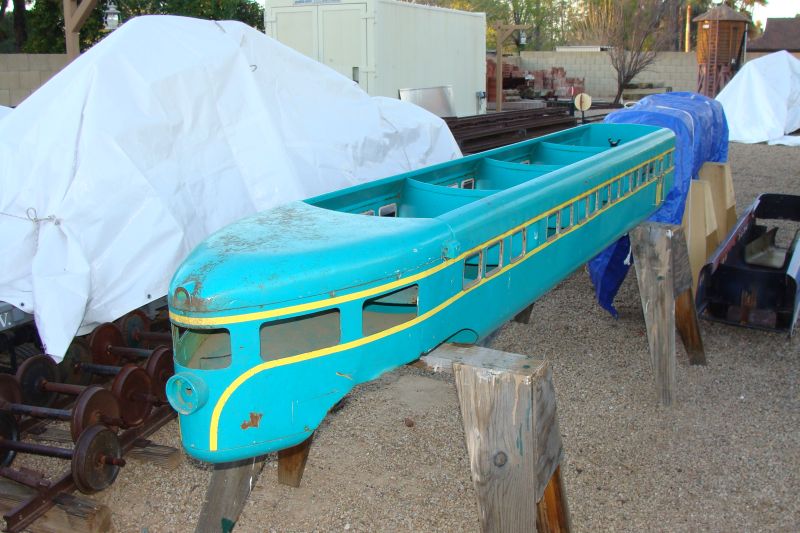
|
Our G12 locomotive is comprised of parts and panels from nos. 377, 495, 168 and two G12s of unknown serial numbers. Portions have been sectioned and we have utilized the best of all. It’s become like restoring an old car and having several parts cars available. None of these G12s were perfect, but by using the best parts of each our final product will be pretty nice.
A few weeks ago we fabricated a prototype E10 driveline tunnel and it came out great. We sent it out to be duplicated in 14 gauge metal. The driveline tunnels that we had fabricated for E10 nos. 20 and 26 arrived this month and look good and fit really well. We didn’t receive a tunnel with any of the three E10s that we own. We will have another tunnel fabricated at a later date.
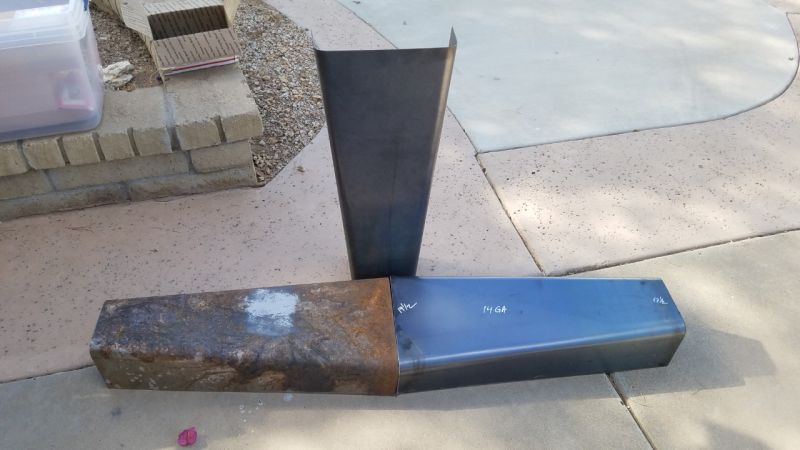
|
Our lettering on the racks and equipment in the engine house moved forward this month. Thank you to Pete Robinson for the excellent work on the lettering and logos for us.
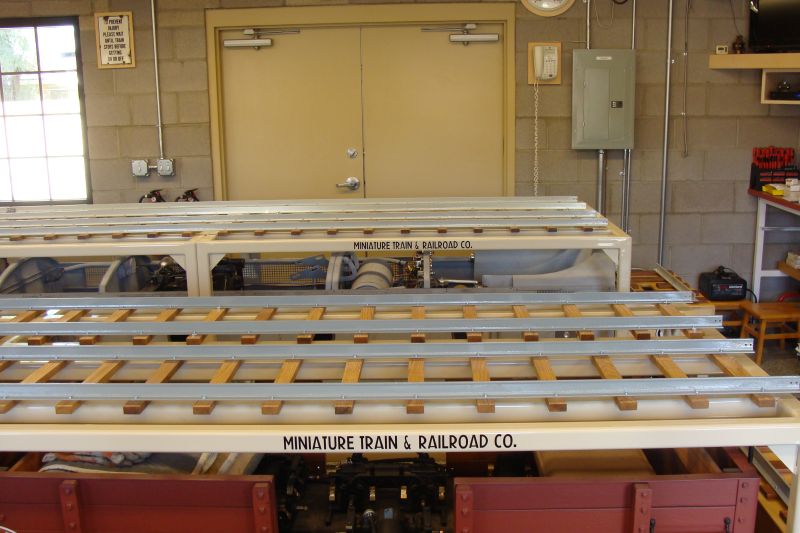
|
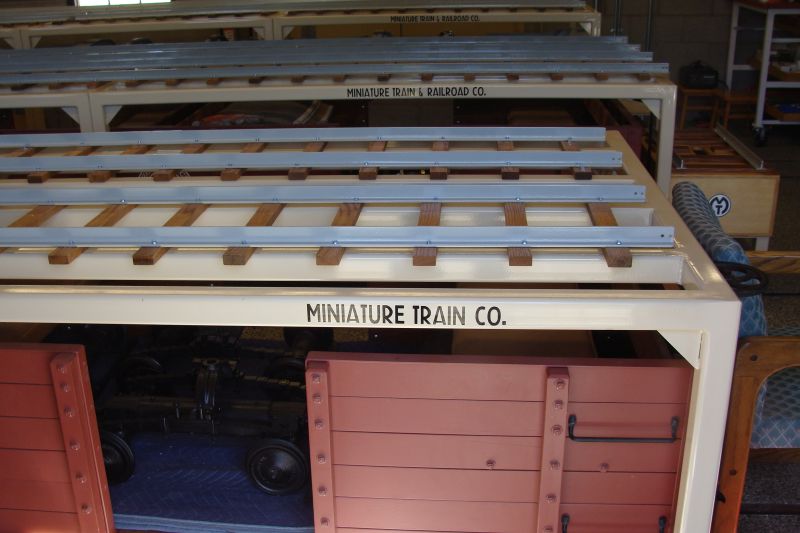
|
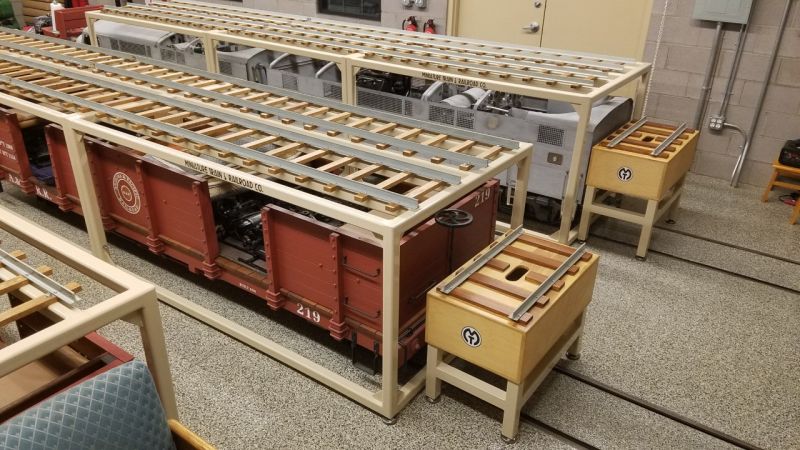
|
I met with our rack fabricator and we will be extending one of our E10 racks by 10 feet to accommodate additional E10 equipment that may be acquired in the future. We will be able to display an additional E10 locomotive and observation car or two additional coaches. We have some nice G12 equipment in terms of coaches, an ob car, power trucks and a few coach trucks for trade for E10 equipment if anyone out there is interested in getting some equipment that is a couple inches wider.
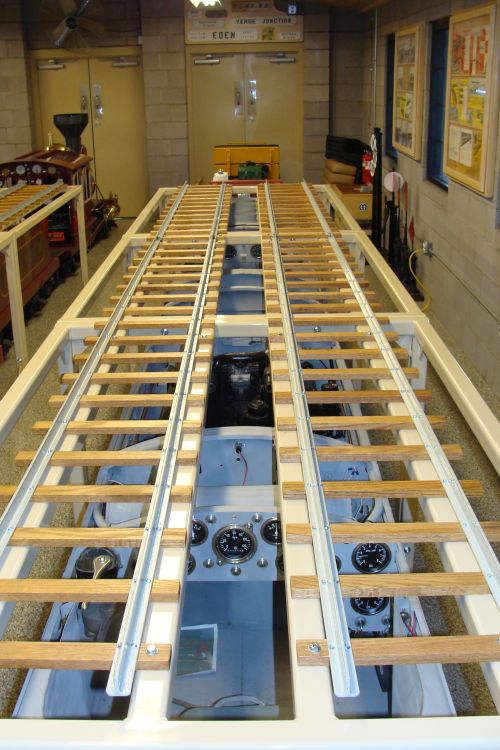
|
I designed two stands for these E10 and G12 cars for after they return from body and paint. These free-standing stands will utilize the truck pin as its point of attachment. We will have a stand on each end of the car which will provide a solid base while we mount windows, attach grab irons and in some cases add electrical components and wiring. Once that work is done they will move to the top of our large display racks. It will be about a month before these stands are back from the fabricator; if the design of the stands meets our needs, I’ll have a total of four fabricated. It will be about eight weeks before the big racks are delivered.
Happy and safe railroading everybody!
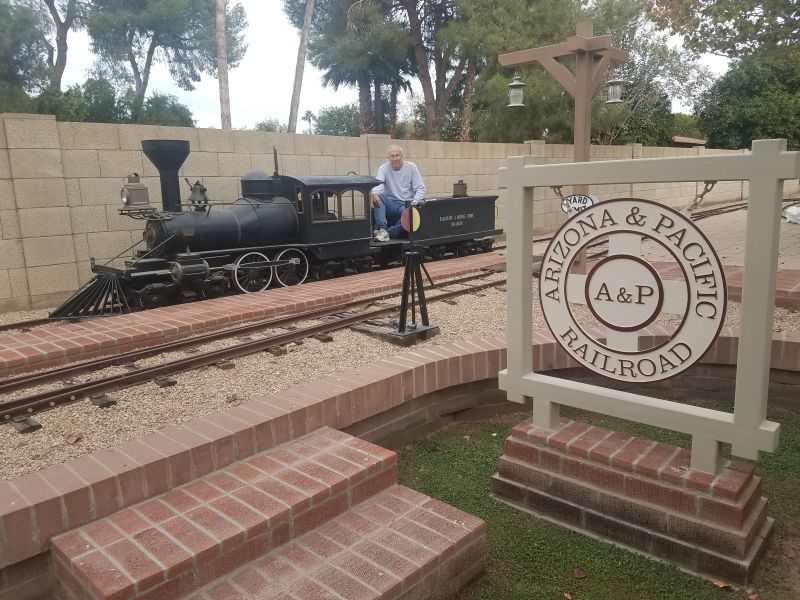
|
02/12/21
I had hoped to finish work on the display for our two MTC wheel gauges which indicate minimum and maximum distance between wheel flanges, but that didn’t happen as I focused on getting equipment ready to send to body and paint. The wheel gauges are for the G16 equipment when set up for 14 gauge and the second one for 15 gauge. We did not receive the one when set for 16 gauge. They are nicely marked for MTC in Rensselaer, Indiana. I think they will they look pretty good once they are mounted among the other Miniature Train Company items.
The support stands for three displays to showcase vintage MTC trucks were delivered from the powder coater this month. One display is perfect. On one I need to modify the box so that it will tuck in about two inches closer to our gon no. 219 and the third one needs significant modifications to its steel frame so that it will tuck in closer to MTC B unit no. 506. It will likely be February before those modifications are completed As soon as those modifications are made, I will re-poly the wood bodies, attach the legs to the bodies and attach the rail. Later this spring, some very early MTC trucks will be on display.
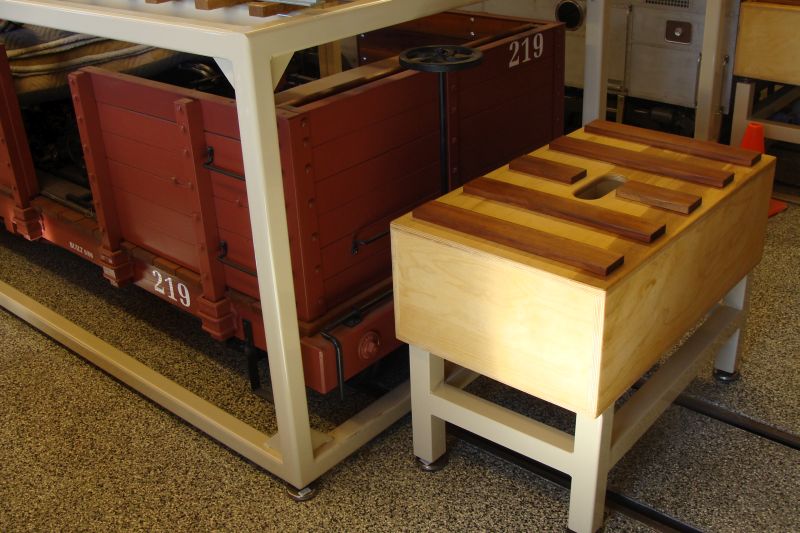
|
The first two MTC E10 coaches went off to the body shop this month. I will start painting wheels and have the correct trucks ready for when these cars return in a few weeks. The plan for their return is the end of February, but so many of these things take longer than expected so I am thinking mid March. The windows and door grab irons will be installed once they return as well. I knew rebuilding the G12, rebuilding the two E10s, building display racks and building the lift would be significant undertakings when we acquired these old girls in late 2017. Initially, there were delays in getting the equipment out here to the Arizona and Pacific Railroad, but we got them home in August of 2018 and have made steady progress since then. We are 17 months into what I projected as a 36 month project. We still have a long way to go, but are right about on schedule at this point.
|
|
We are also working on our E10 locomotive no. 26 and an E10 observation car getting them ready to head to body and paint. These two pieces of equipment will head to the body shop as soon as the first two E10 coaches are completed in late February or early to mid March. We photographed, removed and bagged all of the electrical components of both cars. There were numerous sheared bolts and broken brackets that were removed – some cooperated more so than others. We are fabricating the driveline tunnel as it was missing when we acquired this locomotive.
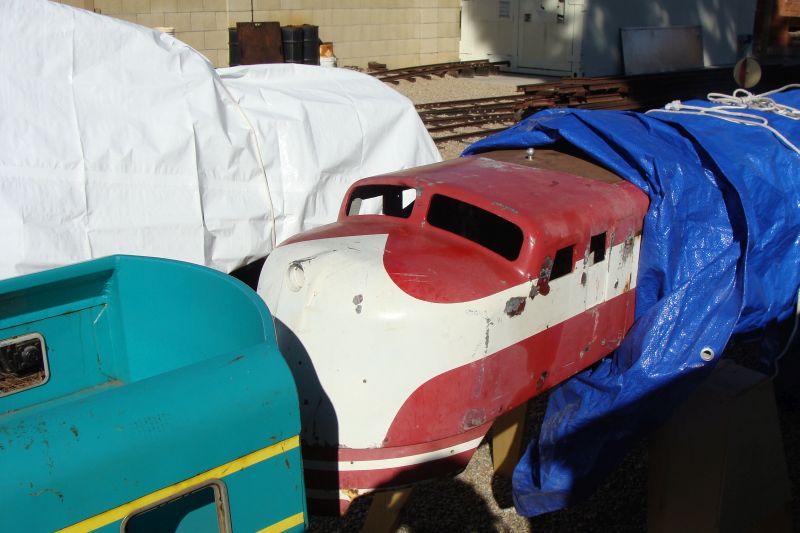
|
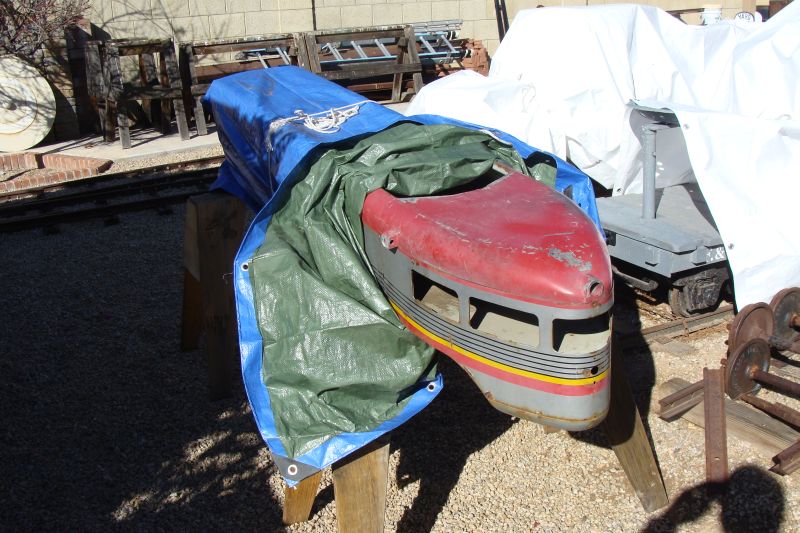
|
We continue work on our G12 locomotive and G12 observation car and hope to have both ready to head to the body shop in late April/early May after the first E10 is fully restored. We fabricated a new seat for the engineer and also one for under the gas tank as both originals have numerous rust pin holes. We also fabricated a new instrument panel as both of ours are a bit rough. We are looking for two hood latches in good shape or if we can at least obtain a complete one, we will fabricate duplicates. We are also missing a frame bulkhead and will fabricate one if we can get detailed dimensions, but I am still looking for an original one. We are missing a tunnel bracket and a couple of other smaller pieces, but it is really starting to come together.
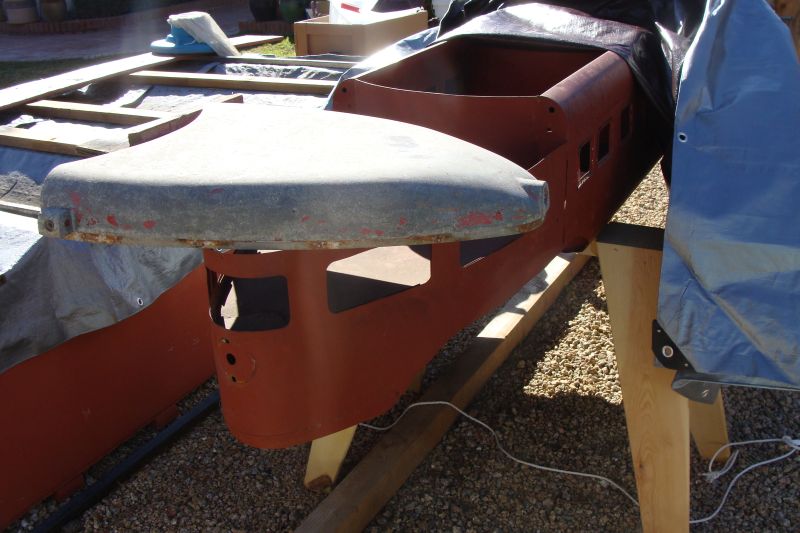
|
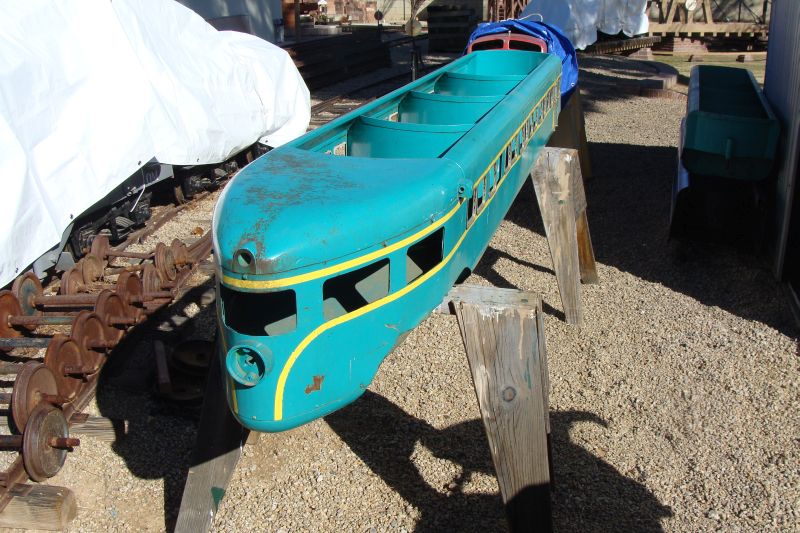
|
We had hoped to have the display for our MT & RR Co. torque wrench, original box and literature mounted in December and again in January, but that didn’t happen. We have been pushing on a couple of other projects and just haven’t had the time to get it mounted. I also have two other wall mounted displays that should also be ready for display soon. It will likely be February before the three of these are displayed on the wall.
Dave and I finished mounting the track panels to the second E10 rack and to the G12 rack. Each rack has 24 bolts (5/16s) that tighten through the red oak ties and into tapped holes in the 3/16 thickness wall of the square tubing. There was some flex in the rail so we clamped everything in place while we drilled the holes. A handful of challenges arose, but we worked through them and I think the finished product looks pretty good. I am looking forward to seeing some freshly painted E10 and G12 equipment sitting up there. As I shared last month, the stops will be installed after the equipment returns from paint and body so I get them exactly where they need to be. There is 34 feet of track on each E10 rack and 40 feet of track on the G12 rack.
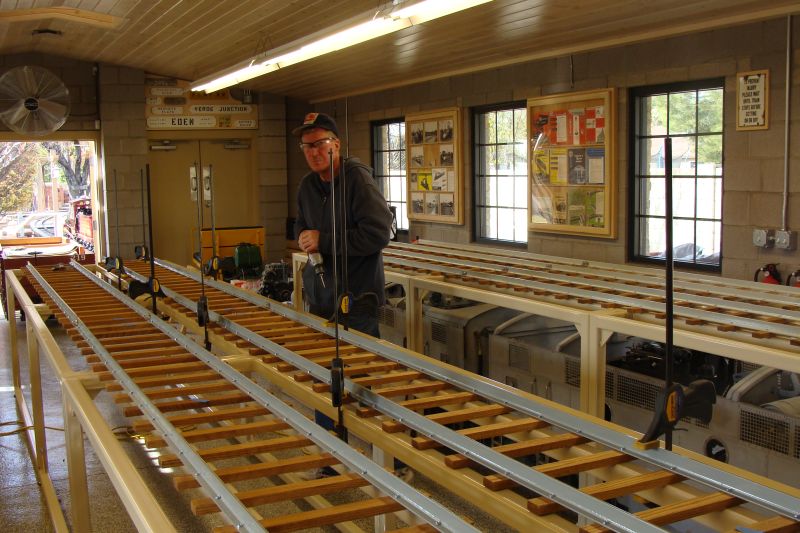
|
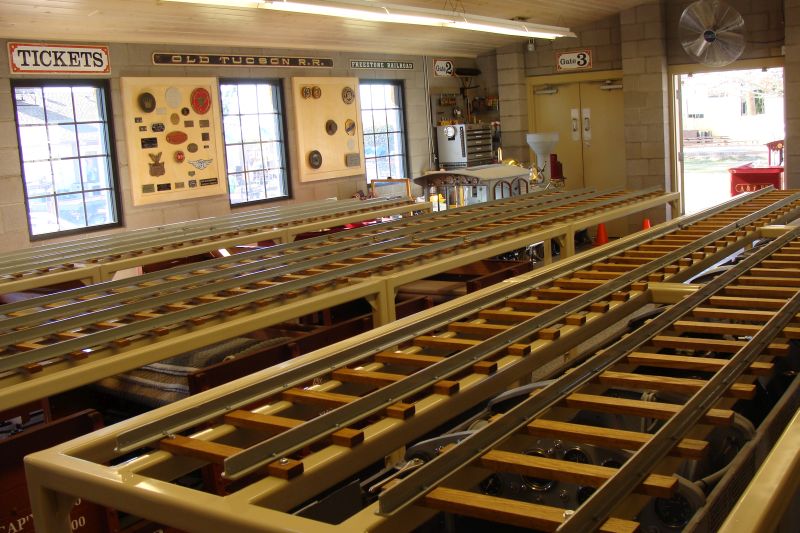
|
We got started on the application of the MTC logo on a couple of displays in the engine house. We plan to add Miniature Train & Railroad Company and Miniature Train Co. lettering to appropriate displays in the engine house next month. Even though I have the MTC sign on the wall and most of the items have a MTC tag or Miniature Train and Railroad Company or Miniature Train Company in the casting, I still get a number of questions about the displays. This should help minimize that – I think. I hope you guys enjoy seeing the MTC items that we currently have on display in our engine house museum. Several more MTC items will go on display later this year in the other end of the engine house and due to the lack of space, the displays will be rotated periodically.
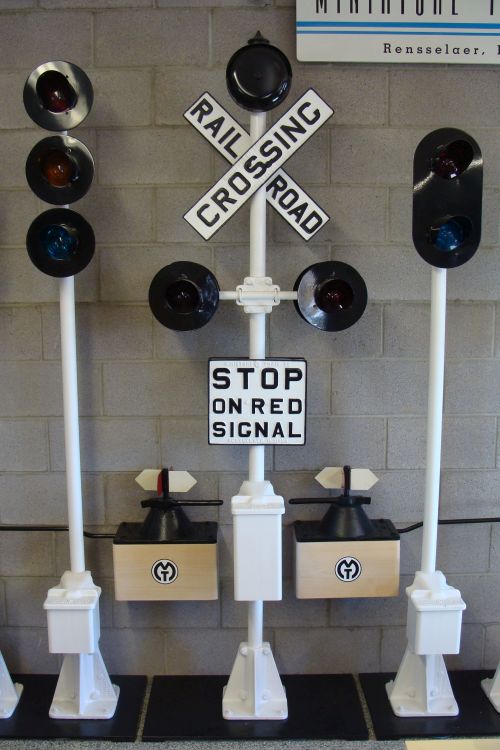
|
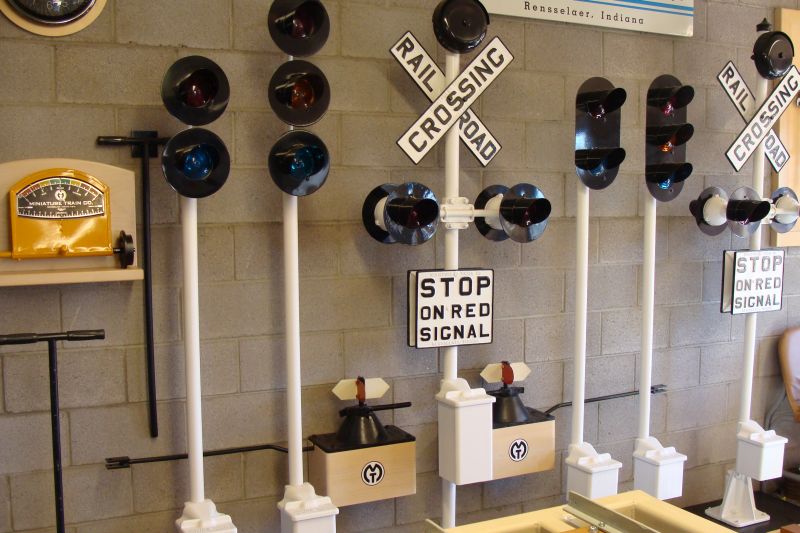
|
We replaced the distributor condenser and adjusted the timing on our Wisconsin AENDL engine in our track inspection car. We also replaced the two battery cables so that we can utilize the same top post batteries that all of our other equipment uses.
We will be replacing all of our non-trestle ties in late 2021 early 2022. In other words, all of the ties that come in contact with the ground will be replaced. We will be replacing 700 ties 30 inches long and the ties in 10 switches which are various lengths. The massive trees that will provide those ties were cut down in Northern California last week. They are being milled into 3 ¾ x 3 ¾ lumber that are 15 feet long. About 2/3 of what we need have been milled. Once the snow clears, the balance will be milled and then all cut to length. Afterward, they will be stacked with stickers in between and covered until October to thoroughly dry. In October, they go to JHBaxter – in Oregon to be pressure saturated with preservative chemical and then shipped to the Arizona and Pacific in December. Once here, we will start the replacement process.
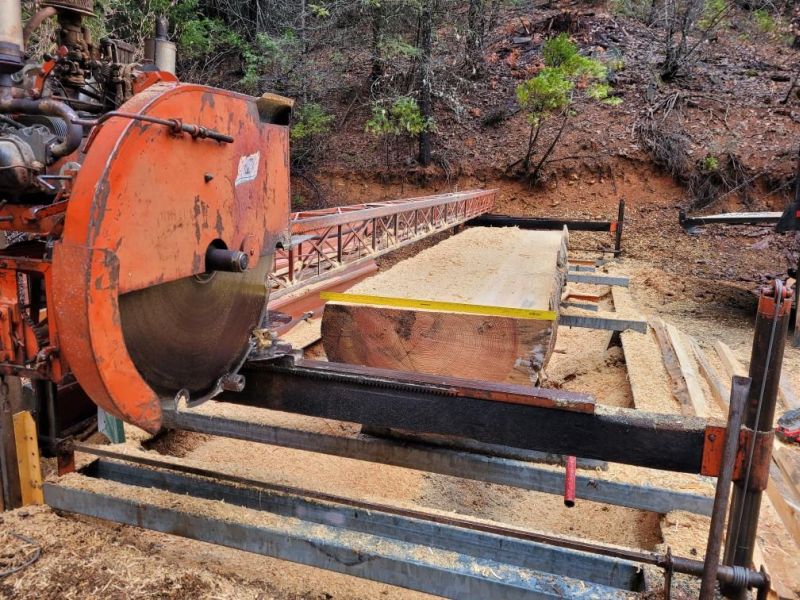
|
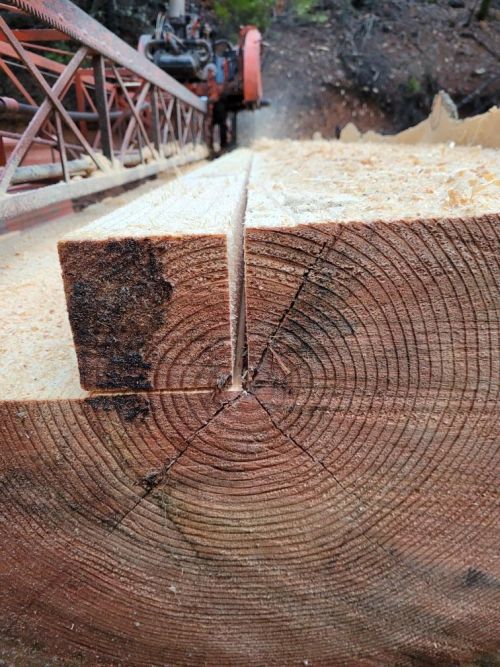
|
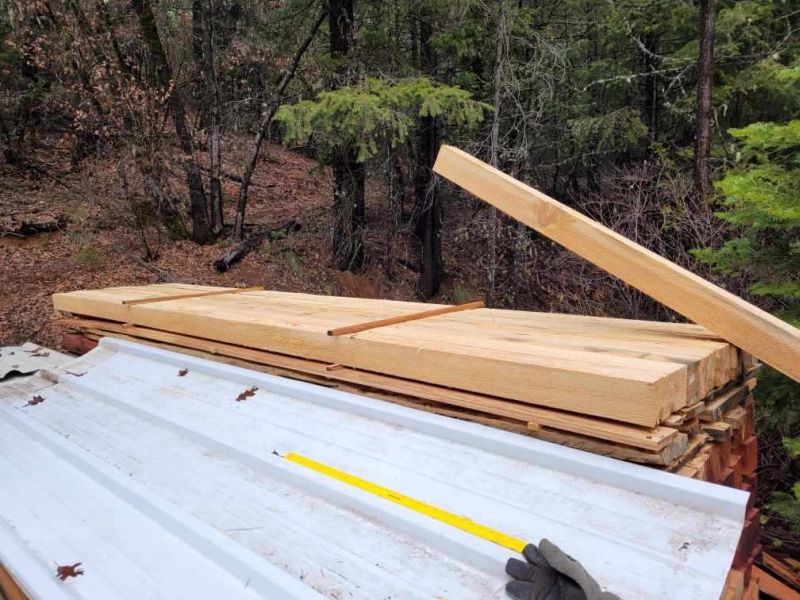
|
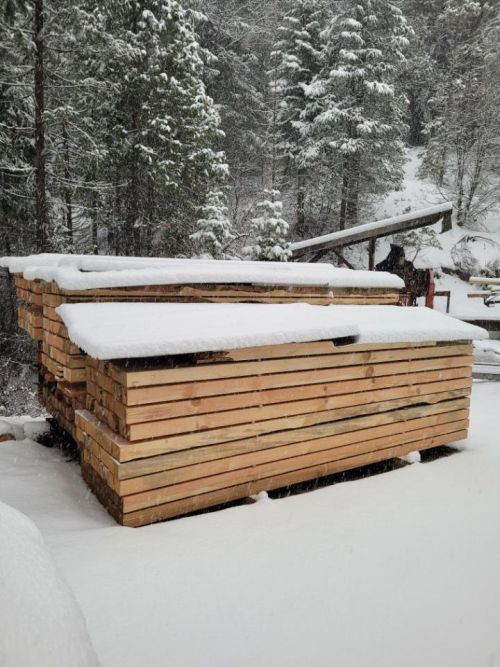
|
The 2020 Annual Report was posted mid-month; you can check it out by clicking here
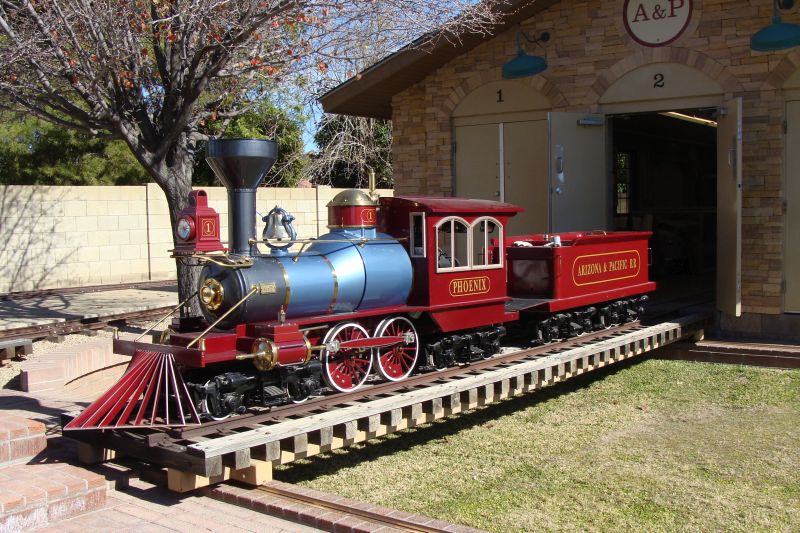
|
Happy and safe railroading everybody!
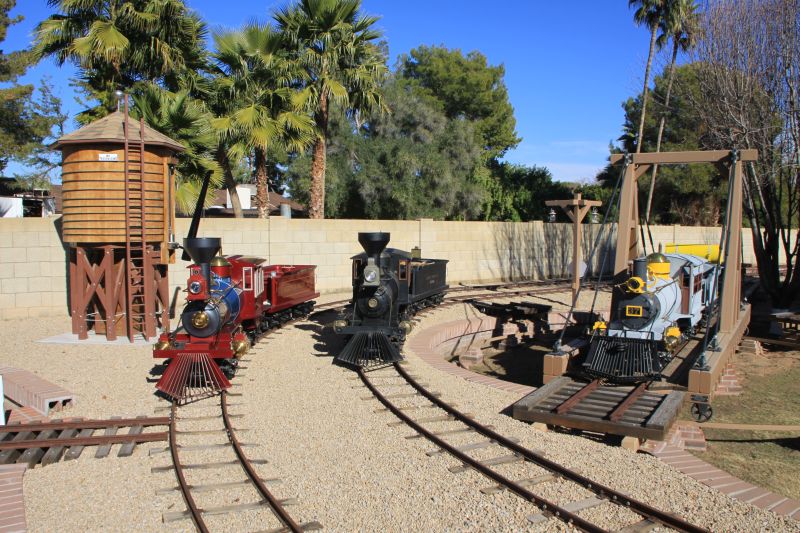
|
01/04/21
When we bought our cache of MTC parts in PA last year, they were 2 owners removed from a long time MTC/AH employee who had purchased and operated the E10 leasing operation and extra parts directly from AH. In the crates, we received many extra parts, castings and tooling. Included with all the other items were 2 wheel gauges which indicate minimum and maximum distance between wheel flanges. The two we obtained are for the G16 equipment when set up for 14 gauge and the second one for 15 gauge. We did not receive the one for 16 gauge. They are nicely marked for MTC in Rensselaer, Indiana. They will go on display in the engine house soon.
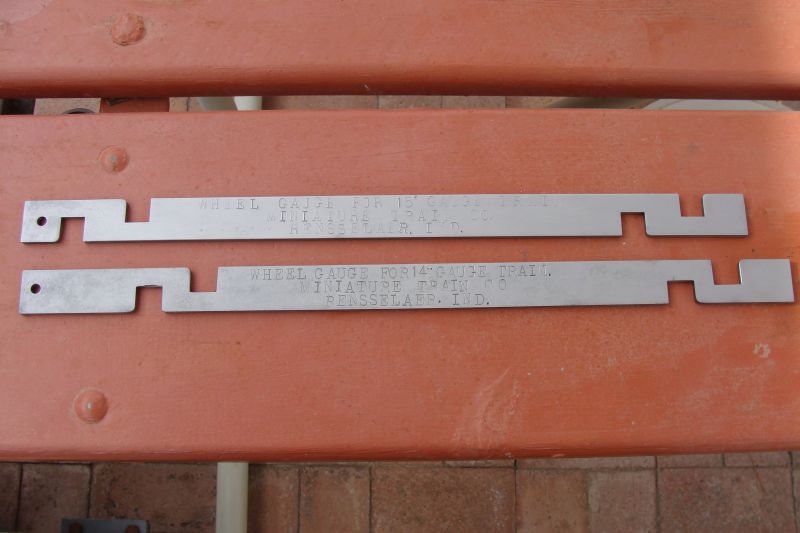
|
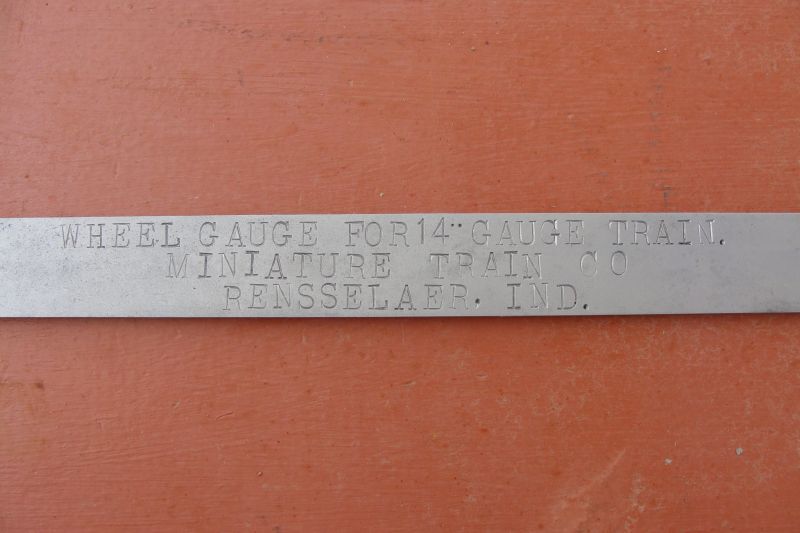
|
The support stands for three displays to showcase vintage MTC trucks were scheduled to be back from the fabricator and powder coater in late December; I was just notified it will be early January before they will be ready for me to pick them up.
We continue work on our G12 locomotive and G12 observation car and hope to have both ready to head to the body shop in February. We fabricated a new seat for the engineer and also one for under the gas tank as both originals have numerous rust pin holes. We also fabricated a new instrument panel as both of ours are a bit rough. We are looking for two hood latches in good shape or if we can at least obtain a complete one, we will fabricate duplicates. We are also missing a frame bulkhead and will fabricate one if we can get detailed dimensions, but I am still looking for an original one. We are missing a tunnel bracket and a couple of other smaller pieces, but it is really starting to come together.
We hope to have the display for our MT & RR Co. torque wrench, original box and literature mounted in December. We have been pushing on a couple of other projects and just haven’t had the time to get it mounted. I have two other wall mounted displays that should also be ready for display soon.
I have decided to use two local body shops for the body work and painting of our E10 and G12 equipment which will take place over the next year (2021). They are each comfortable that they can squeeze one car in every six weeks between all of their more conventional jobs. We have 14 E10 and G12 cars and hope to have all that work completed by the end of the year 2021. I have been looking at old photographs, postcards, sales literature and anything else I can find with various paint schemes. I have settled on the paint scheme and colors for the G12 and one of the E10s. I am still undecided on the colors for the second E10, but have narrowed the choices down considerably. I will share more information on the colors and schemes over the next couple of months. I also have to decide on the colors and paint scheme on an E10 nose and 2 G12 noses that will be on display in the engine house. Once the cars are back from body and paint we will still have the wiring, trim and a number of other tasks before they are complete and ready for run/display.
My second order of Lexan arrived recently. The E10 windows and doors had Lexan widows as did the G12 observation cars. I have about a dozen patterns to make regarding this project; the racks and E10 trucks are in line in front of this one.
We built a jig which we used to build our E10 and G12 track panels for our engine house displays. It locks everything into place while we mount the ties to the rail. It bolts together and has a second set of holes so it can be used for E10 and G12 track panels. We will also use this jig when we rebuild the straight track panels that will be used in running the equipment. The curved rail will be handled differently.
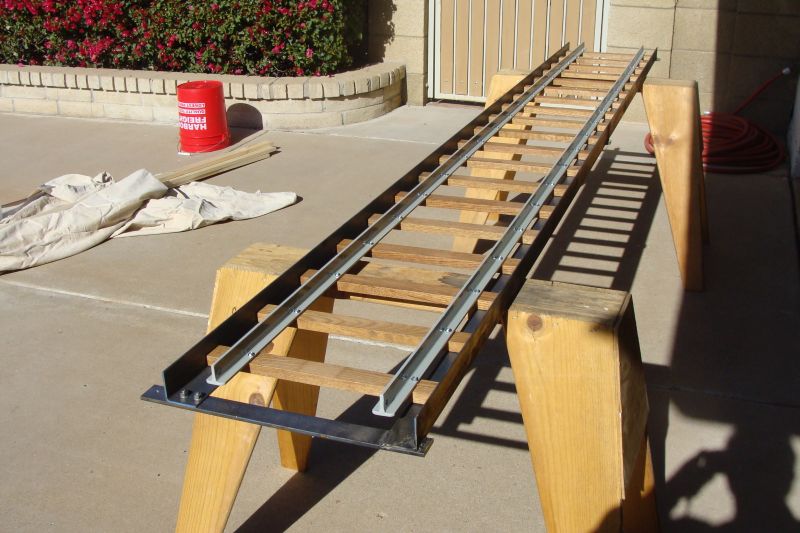
|
Dave and I finished all twelve track panels and it went pretty well. We completed the 8 E10 track panels first and then moved on to the 4 G12 track panels. We refurbished nine (one is for a display) E10 track coupling clips and got them installed this month. They were in pretty ragged shape when we received them. We bead blasted and spent quite a bit of time straightening before polishing them a bit. We made some minor adjustments at the time of installation and now they fit very well.
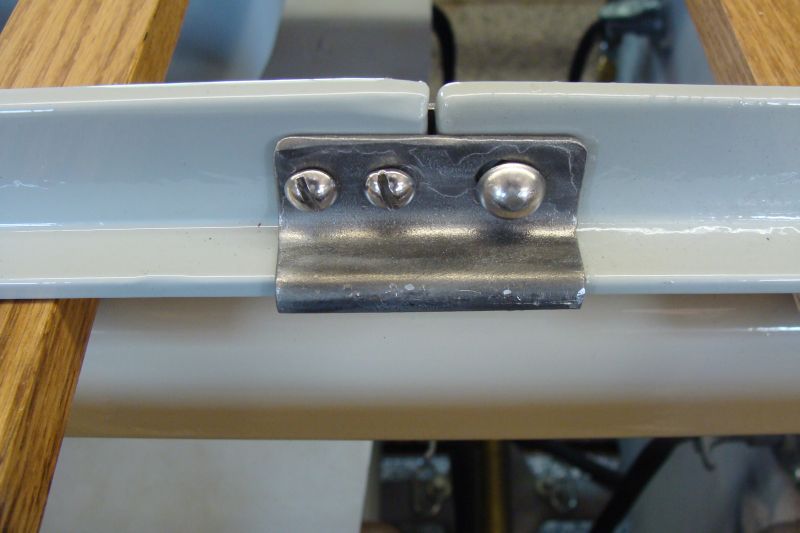
|
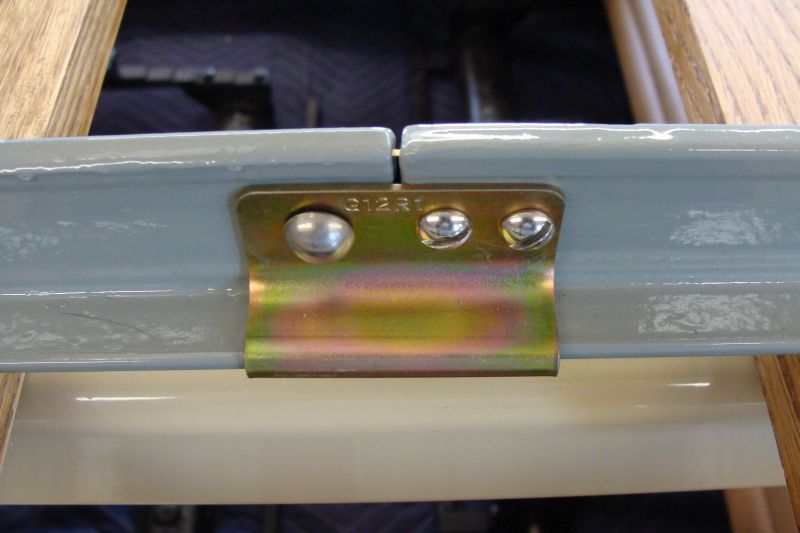
|
One of our two E10 racks has been completed. Each of its 17 foot long track panels are secured to the rack by 12 bolts 5/16" diameter and the racks were drilled and tapped for the bolts. We had hoped to have all three racks completed with rails, clips, stops and logos by the end of the year, but often these projects take a bit longer than anticipated. We should have the second E10 rack and the G12 rack completed in January. We are going to await the return of the equipment from the body shops before we install the stops as I want to make sure they are placed exactly where I want them.
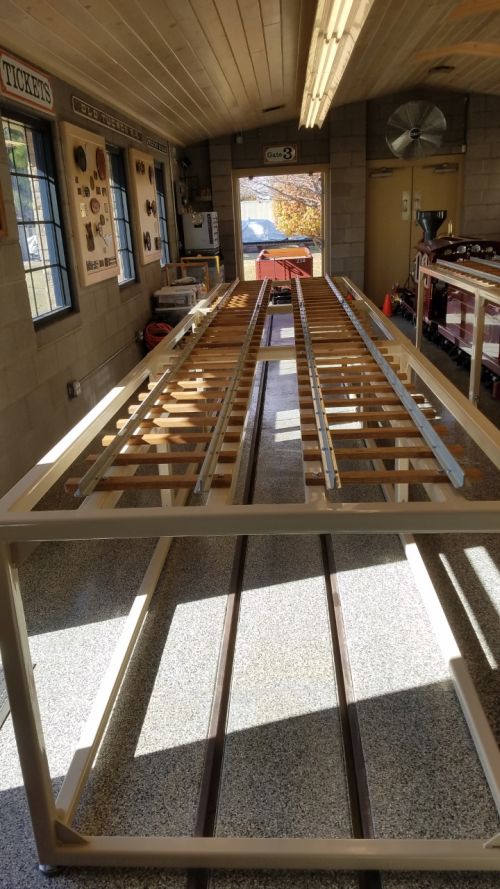
|
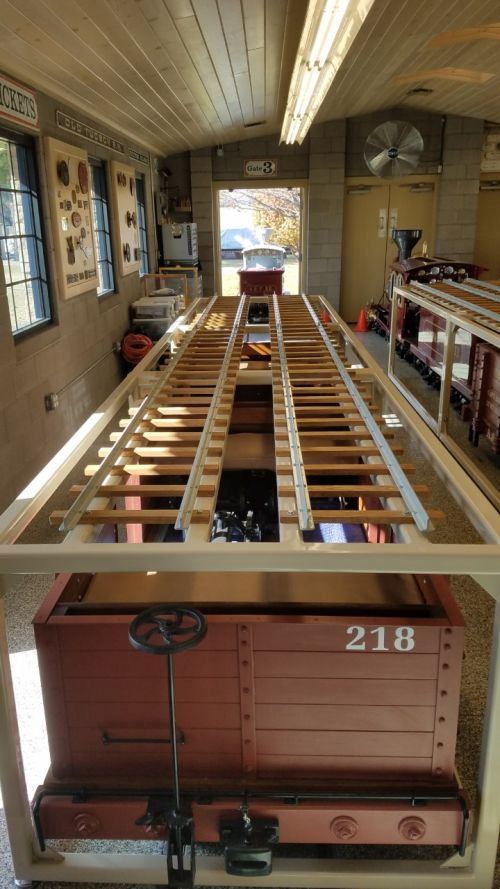
|
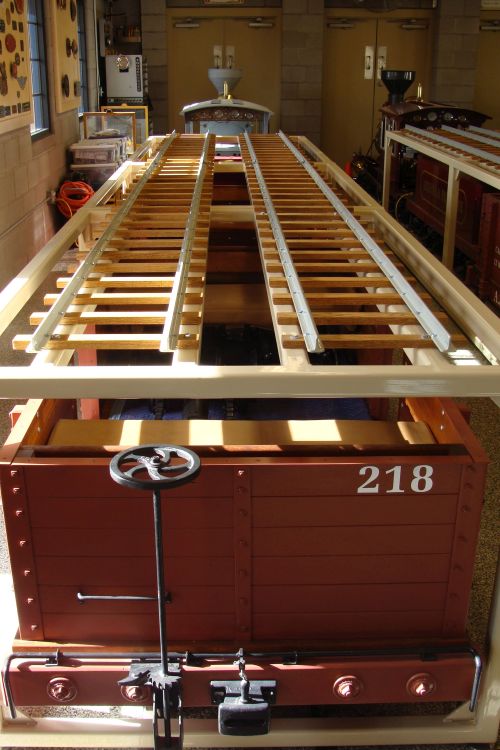
|
The A & P has a large collection of amusement park train literature from the thirties through the eighties and every year Dave manages to find additional photos, sales literature, advertisements and catalogs for our collection and this year was no exception
It is no secret that for years I have wanted to add a NAD builders plate to our collection/display in our engine house and have just missed out on acquiring a couple of them, but so far no luck. Dave located and acquired a NAD Century Flyer headlight and surrounding bezel which is awesome! We just need to figure out how to mount it on our second display board in the engine house.
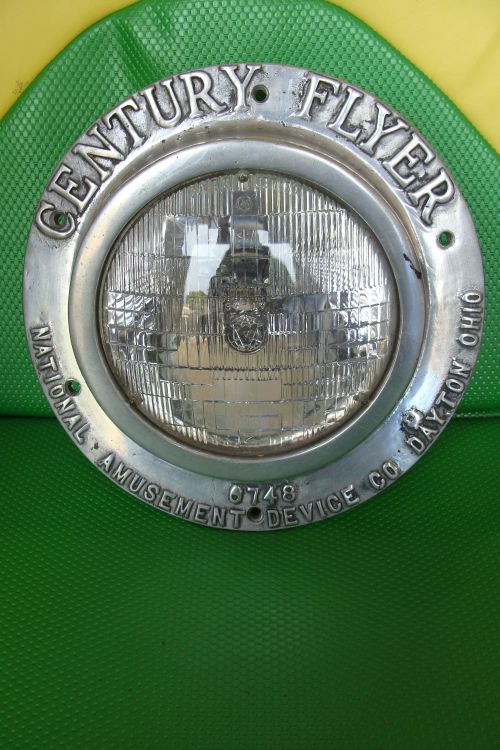
|
Check back for our 2020 Annual Report which will be posted mid-month; everyone have a great 2021.
Happy and safe railroading everybody!

|
12/14/20
Fabrication of the metal display racks for the G12 and the 2 E10s was completed and they were delivered from the powder coater the first week of the month. It was a huge challenge to get them from the trailer in the driveway into the engine house. No, I wasn’t able to transport them on a flatcar as they are a few inches too wide to clear several obstacles along the right of way. Just before fabrication, I made a few last minute modifications that increased the weight of each of the nine modules to roughly 600 pounds each.They are different lengths so some were just under that number and others are in excess of that weight.
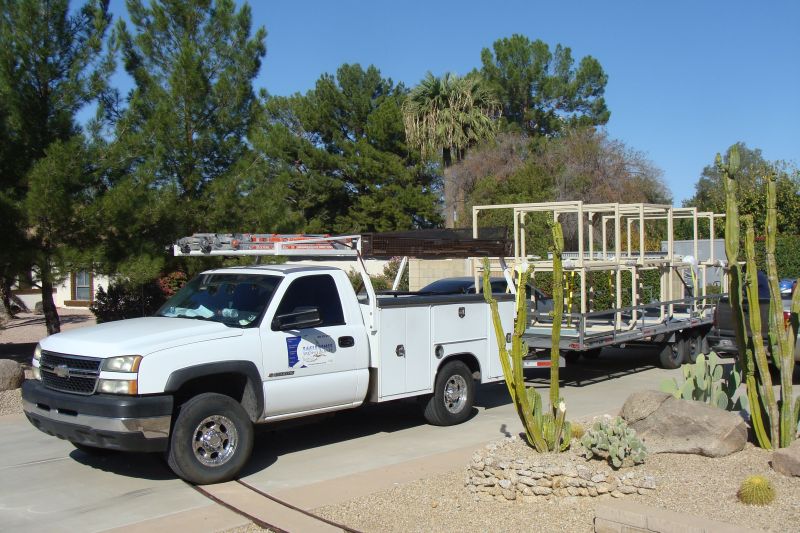
|
The transportation team was supposed to be five guys; three showed up. Of course I jumped in to assist. I think I was just younger than the aggregate age of the other three guys… The four of us struggled, and I do mean struggled, to carry these modules over the gravel driveway in the rear, across the grass yard, up and across the pedestrian walkway, under the Kiefer pear tree and then through the double doors on the north side of the engine house. We saved the heaviest three modules for last which may have been a mistake, but after four hours of really getting after it all of the modules were in the engine house and roughed into place. My hat is off to the three guys that showed up for this move as they really busted their tail ends on this job. Our friend Jerry Graves came by the following weekend and we spent another four hours final positioning the modules, getting them bolted together and leveling and re-leveling them until they were perfectly level.
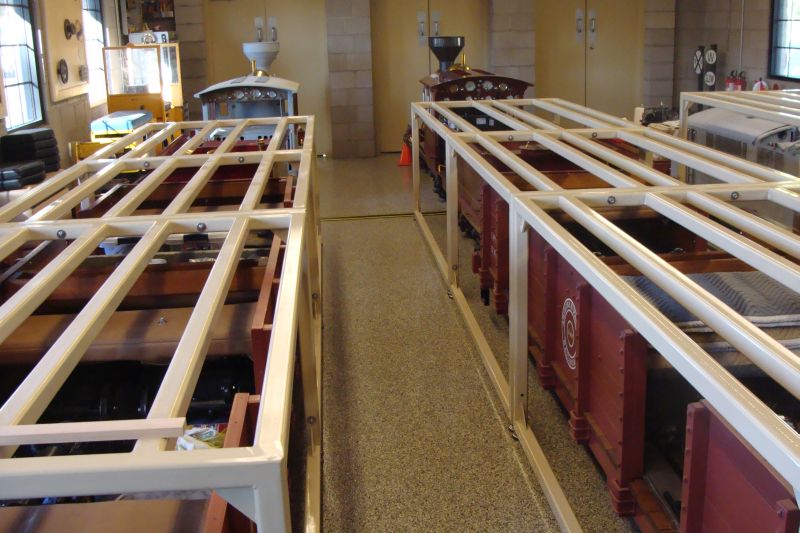
|
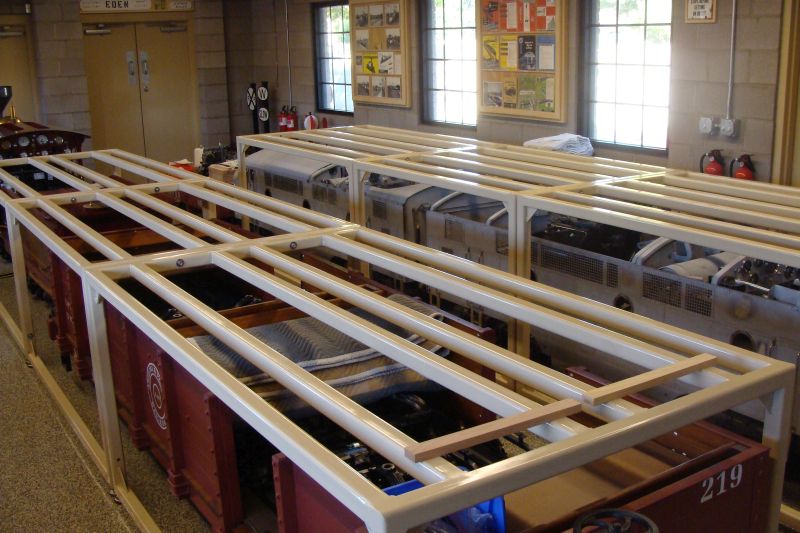
|
Dave and I finished drilling all the holes in the E10 rail and I delivered the rail to the powder coater. All 140 of the Red Oak E10 ties received two coats of Golden Oak stain and a coat of polyurethane finish in preparation for their installation on the E10 racks. I picked up the E10 rail a week later and despite the fact that I wish I had picked a color one shade darker, I’m happy with the way the rails look. Dave and I built a rail jig to center and square all the components while we mount the rail to the ties and once each set of four panels is complete, we’ll mount the ties to their racks. The first week of December, we’ll start our track panel assembly process.
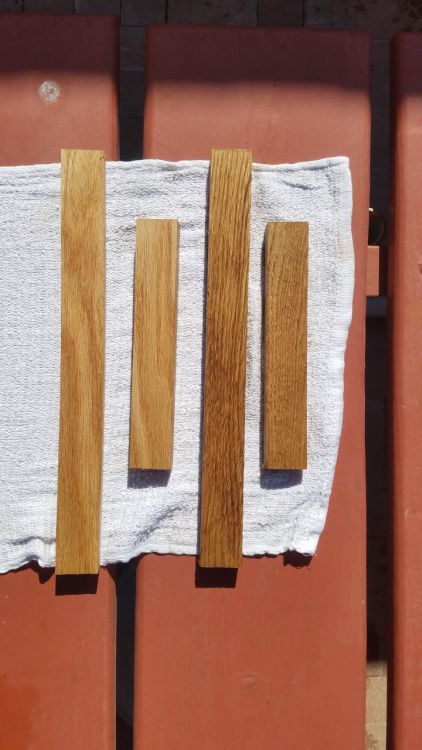
|
Dave and I also finished our work on the G12 rail; it will go to the powder coater on December 5 and be picked up on the 12th. I finished sanding, staining and the poly work on the G12 ties; they are ready to install once we get the G12 rail back from the powder coater. We hope to have the G12 rack fully assembled sometime around Christmas. MTC logos, wheel stops and labeling will complete the racks in late December or early January.
|
Our G12 battery tray is back from the powder coater and I think we can agree it is a big step forward over what we started our restoration project with.
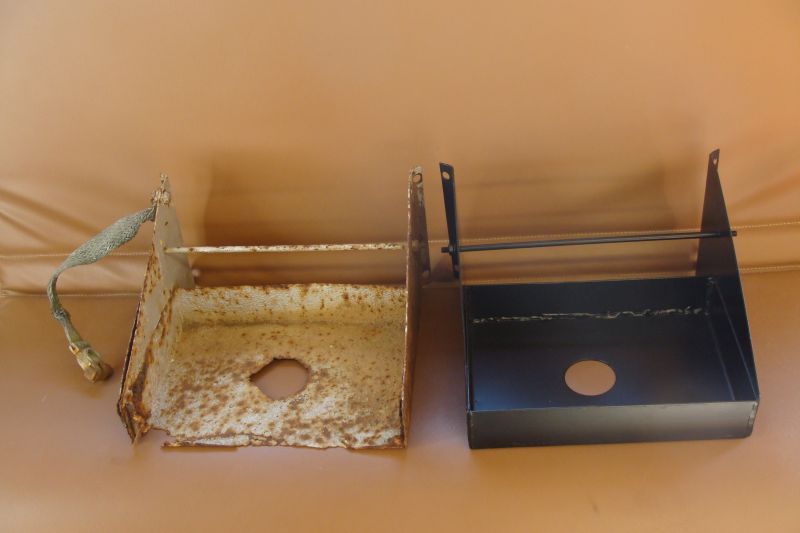
|
Our work continued this month on our G12 restoration project. We finished the fabrication work on our G12 throttle rod and brackets and installed new throttle and brake handles. I have a little Bondo work to do on one of the brackets but the heavy work on the throttle project has been completed. We removed a metal patch that covered the original exhaust port. It was held in place by 8 rivets and 2 spot welds – crazy. We removed the nose from our G12 donor; it will be in a display with another G12 nose and a type 1 E10 nose next year. We started the process of replacing the front hood latch and transferred instrument panel brackets. We are fabricating a new seat for the engineer and also one for under the gas tank as both originals have numerous rust pin holes. We are also fabricating a new instrument panel as both of ours are a bit rough.
|
I finished media blasting all of the 66 E10 wheels this month. As time permits, we will start painting the wheels and getting them mounted on the 15 trucks awaiting them.
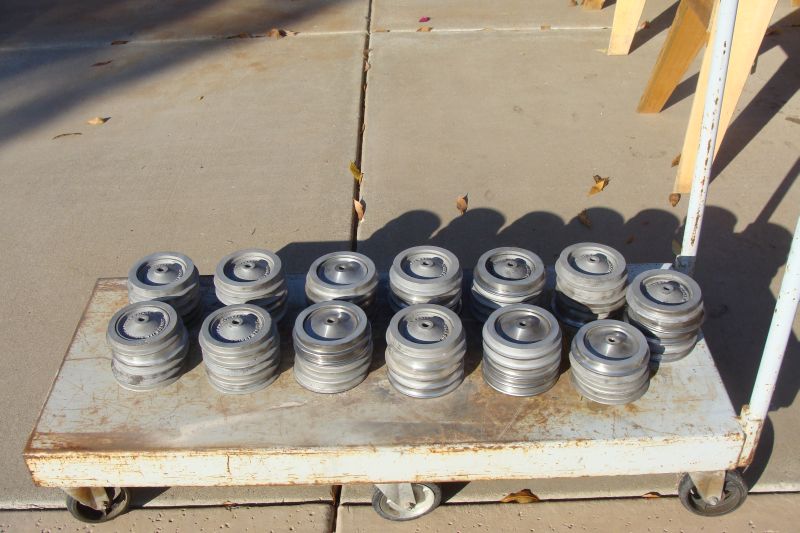
|
We also hope to have the display for our MT & RR Co. torque wrench, original box and literature mounted in December.
I am close to having an agreement with a local shop on the body work and painting of our E10 and G12 equipment which would take place over the next year (2021). They are comfortable that they can squeeze one car a month in between all of their more conventional jobs. We have 14 E10 and G12 cars and hope to have all that work completed by the end of December of 2021. If things work out right, it may be expanded to include the Sandusky, the Red River and the 582 and 506 over the following twelve months (2022). I am cautiously optimistic.
My second order of Lexan arrived recently. The E10 windows and doors had Lexan widows as did the G12 observation cars. I have about a dozen patterns to make regarding this project; the racks and E10 trucks are in line in front of this one.
We modified an engine stand that had previously been used for S16s engines and also for the tenders for use with our E10 and G12 equipment. It is now tri-gauge G16, G12 and E10. It will receive a great deal of use over the next few months.
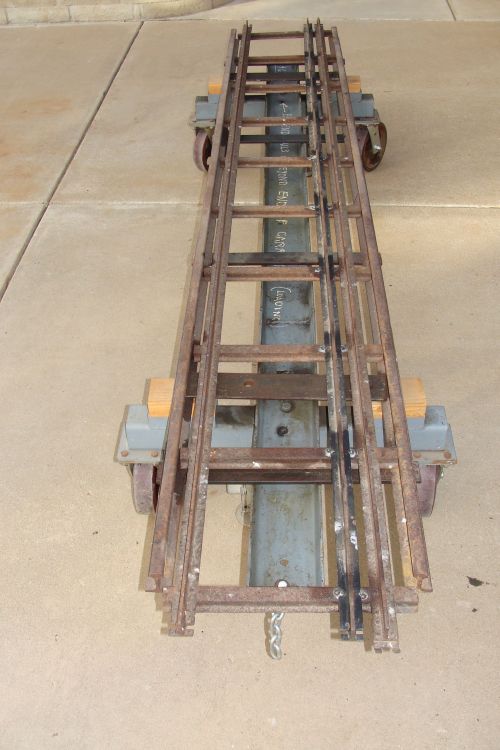
|
We continue rearranging the engine house to maximize the space and create room to easily view all of the exhibits. Some of the extra parts that had been stored in the engine house have been moved to other locations. We are still hoping to have the racks completed with rails, signage and logos by the end of the year, but that might be a little optimistic – we’ll see.
|
Happy and safe railroading everybody!
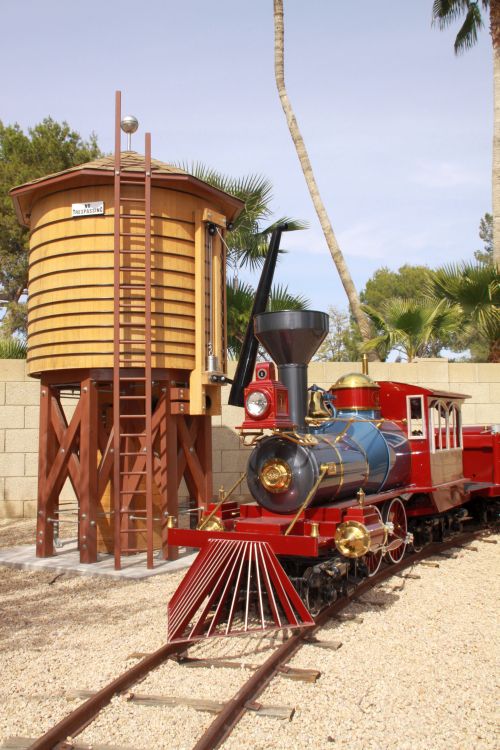
|
11/16/20
We completed mounting the front skirt on the G12. We removed each bolt that we installed last month one at a time, used a countersink tool on the aluminum nose, replaced the bolt with an aluminum rivet and used the riveting hammer to drive and set the rivet. After all the rivets were in place, we used my angle grinder with a floppy sanding disk to sand the rivets flush with the G12 nose. We added a thin coat of red primer and you can’t see the rivets at all. It was a great deal of work fabricating the skirt and mounting it properly, but I think it really makes a statement and I’m happy with the way it came out.
|
|
|
|
We also started on the throttle linkage on our G12. For some inexplicable reason, one of the prior owners had cut off the welded brackets on both ends of the sliding rod that runs from the throttle handle to the engine carburetor linkage. We had a donor rod and brackets. In the engine compartment, we had to cut into the sheet metal panel to access the rod. We welded the donor bracket in place and will close up the sheet metal access area the next time we work on the G12. On the other end (throttle handle end) we were able to leverage what was left of the bracket out far enough to weld an extension to it in place. We still need to cut it to length and shape the bracket like the original. This was a critical project to operating the G12 as designed and was crazy time-consuming, but the worst of it is done and it will work great.
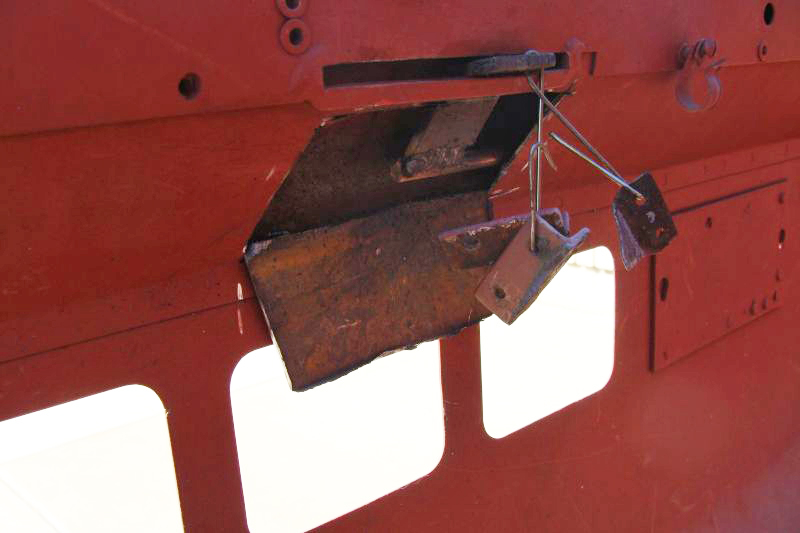
|
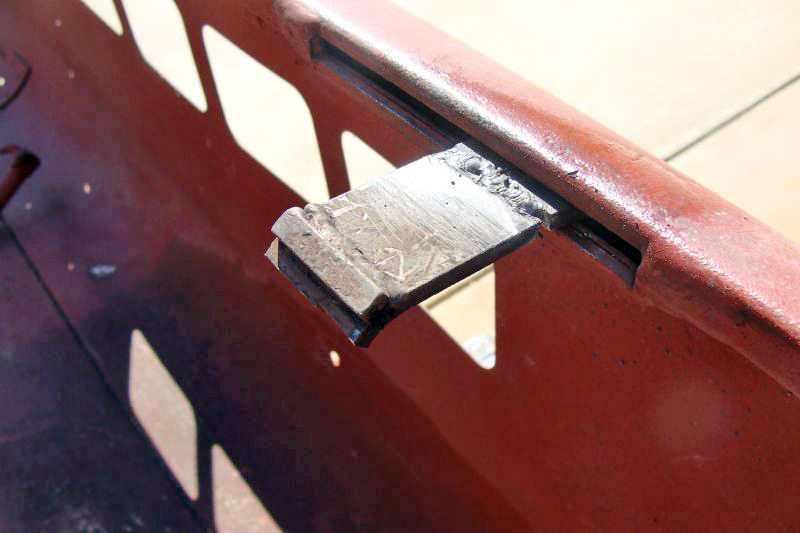
|
We had our two G12 locomotive bodies side by side as we “borrowed” brackets, mounting hardware and truck arch pins from the donor for the one we are restoring. In large areas, the donor is screen and duct tape covered with a quarter inch of bondo. It looked good in the photos when I purchased it off the internet, but it was disappointing when it arrived here a few years ago. It did have enough bolt on parts that when combined with parts from three other locomotives, we have all the parts and panels we need for a really nice restored locomotive.
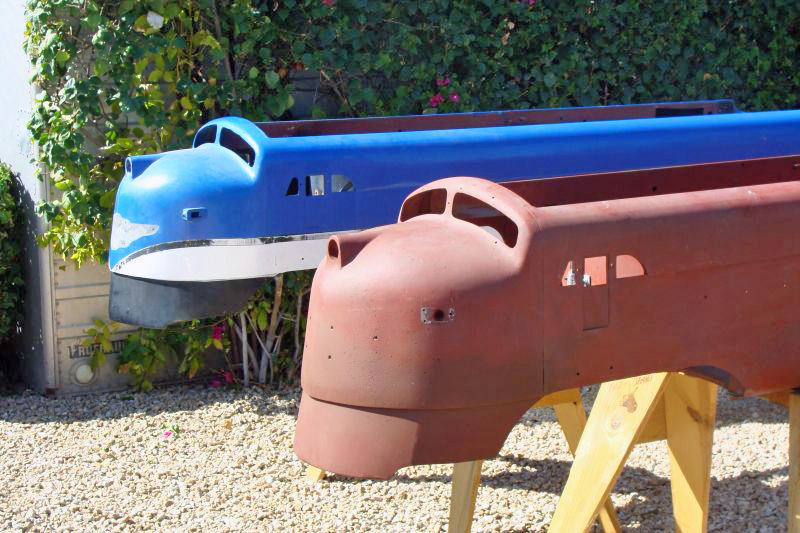
|
I purchased five batteries that are ready to be installed soon. The Red River, Tucson, No. 582, the track inspection car and the Coconino are all getting new batteries.
I did install the new battery in the track inspection car this month. We also drained the old gasoline and added fresh and I changed the spark plug in the Wisconsin AEN that powers that piece of equipment.
We continue rearranging the engine house in preparation of the arrival of the new display racks. The Phoenix has been moved to track no. 2, the Sandusky has moved to track no. 3, the Red River has moved to the original engine house and the no. 582 has moved to track no. 1. Our 4 foot utility trailer is now stored elsewhere and additional changes will take place over the next couple of weeks. In the course of moving everything around, I swept and mopped the floor and cleaned the displays. The brass on some of our locomotives still needs polished, but it is starting to look pretty good in there.
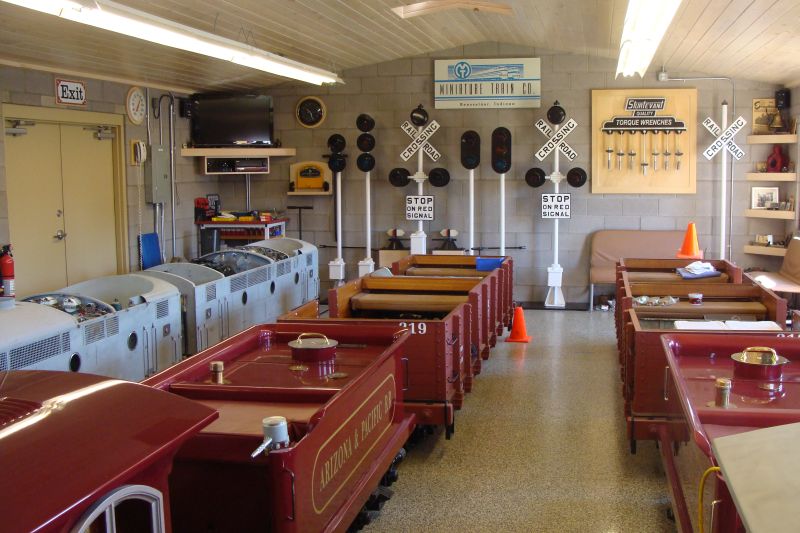
|
|
|
|
Our racks were originally scheduled to be delivered on October 16, but timing issues arose among the fabricator, powder coater and the transportation outfit. If things go according to the current plan, they will be delivered here on November 4. We will get everything into the engine house and roughed into place that day and then start with the actual assembly on the following weekend November 7th and 8th.
It is still 100 degrees plus out here, but should be cooling down around the end of the month and we will get the new batteries installed, carburetors rebuilt and get the old girls on the track for the first time in a few months soon.
Dave and I have continued working with the original MTC rail that will be part of the three large displays as well as three small displays that we have been working on. There is still quite a bit more work to be completed before they are ready for powder coating. Our new battery tray, sixteen ten-foot rail sections and six five-foot rail sections will go to the powder coater in early November. Eight additional 10 foot rail sections, the gas tank and several smaller items will go to the powder coater later in that month.
We received the BKN exhaust pipe and trim that we have been awaiting. I think it looks pretty good. You can be the judge when you view the before and after photos… We also located 2 older style E10/G12 power truck inspection plate fill caps, an original G12 light switch from Cole-Hersee, 4 brake rigging brake shoe clevis pins and an E10/G12 drum head and the red lens for it.
|
We have a supply of E10 rail, G10 rail and G12 rail. There were two different sizes of E10 rail, the early variety and the later version. There were also two different sizes of G12 rail, again the early and the later version. The differences were subtle with the width of the web and thickness of the rail foot, but the differences require matching differences in the track clips. I am learning more than I ever wanted to know about the early MTC rail and track clips…
We aren’t too far away from dry fitting the BKN into the G12 and measuring for the purchase of the two drive lines.
I purchased some Lexan this month and will be making some patterns for the observation car Ob end windows and then experimenting with the best ways to cut and shape the material.
|
|
|
Happy and safe railroading everybody!
|
10/12/20
The remaining 7 E10 wheel hubs and tires were mated with their insulating rings this month and really look good. We now have the 64 E10 wheels completed that we need for our trains. I only have a few more E10 wheels to finish bead blasting and we can start painting them and mounting them on the axles. I am looking forward to having all the E10 wheels painted and mounted and the trucks ready to display.

|
We will be starting on the sheet metal work and painting work in the near future and so we took the opportunity this month to get before restoration roster shots of the G12 equipment. The post-restoration roster shots are still several months away. We will get E10 equipment pre-restoration roster shots probably in late October or early November. We just have so much going on in October and early November with the racks, constructing track panels, finishing displays, bead blasting and painting E10 wheels that it will likely be a few weeks before we get to the E10 shots.
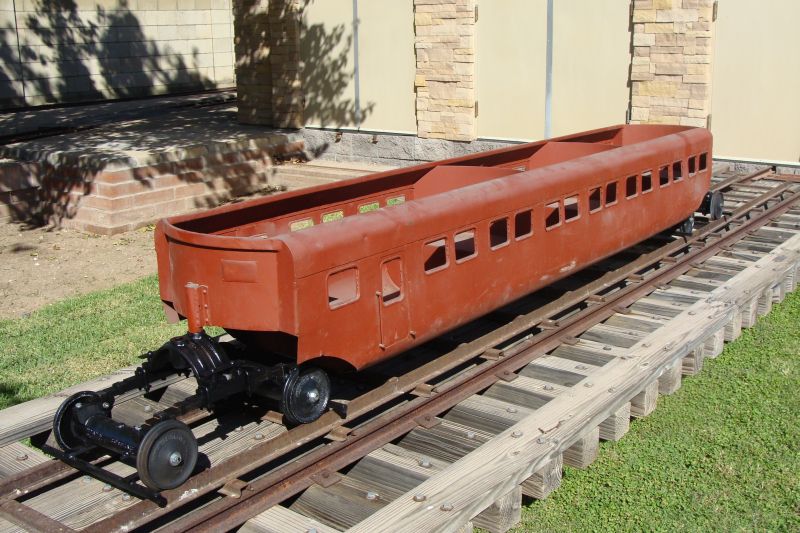
|
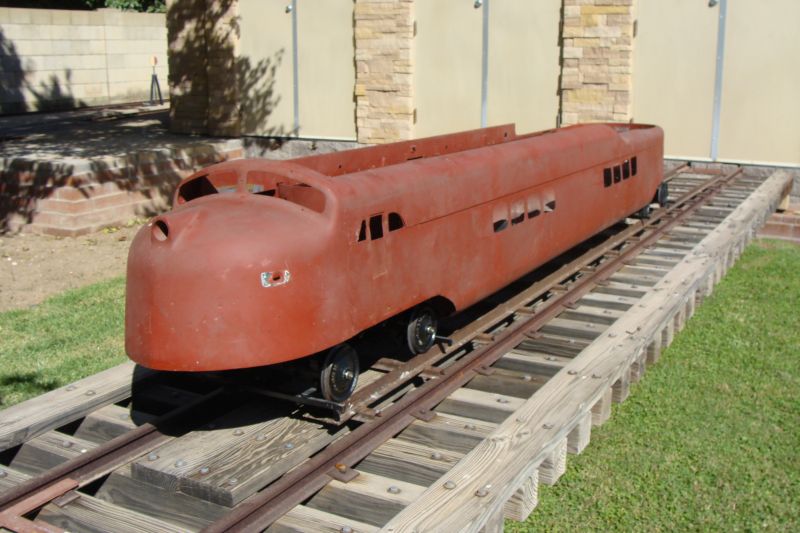
|
Our friend Jerry Graves did a great job fabricating a new front skirt for us with his sheet metal brake. He used a badly damaged one that we had acquired as a pattern to fabricate the new one and it matches exactly. We drilled the rivet holes this morning, and mounted the skirt with bolts so that we could pull the skirt tight after each bolt was installed. I thought I had the correct rivets and as it turns out I did not so they have been ordered. Once they arrive, we will start in the middle and remove one bolt at a time, countersink the hole and install the rivet. Then we will go on to the next bolt. Once all of the bolts are replaced with rivets, we will grind the rivets flush with the nose just as MTC did so many years ago. Gosh, it makes such a big difference in appearance having the new skirt in place.
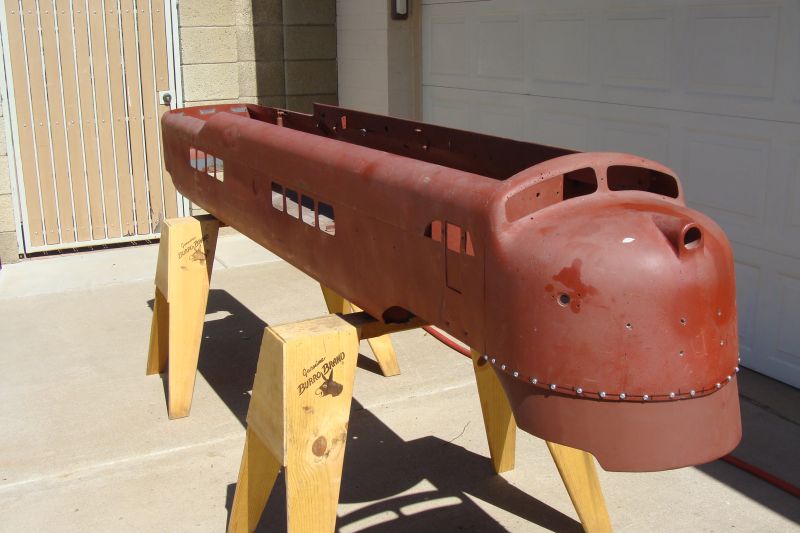
|
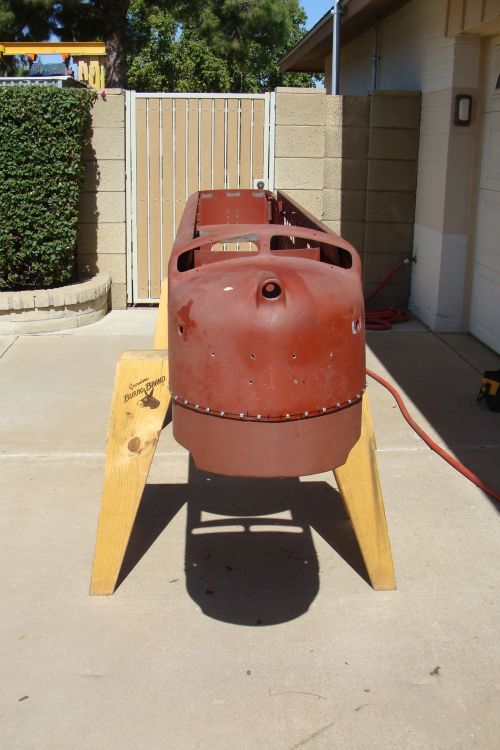
|
I tried numerous sources searching for T beam rail to match that original used by the Miniature Train and Railroad Company on its E10s and G12s without success. We brought back a large quantity of E10 and G12 rail from PA last summer. I measured what we have and made the decision to use original MT & RR Co. rail in our displays. I still have enough track on hand to run both the E10s and G12 in an oval and am hoping to acquire additional G12 rail in the future. So the rail will be original as will be about 1/3 of the ties, but we are taking some liberty with the tie spacing. Originally M T & RR Co. ties were spaced at 12 ½ inches on center. We will be adding an additional tie between the original spacing so the ties in our display will be 6 1/4 on center. I just think that visually for us that it will present a better look. Our G16 ties are spaced at 12 inches.
|
After all the rail is drilled for the additional ties, it will be cut to length, bead blasted and powder coated before it is assembled and added to the display racks. Last month we planed and sanded the ties we will use in the E10 displays. This month we purchased the material for our G12 ties and ripped, cut to length and sanded those ties. We need 80 for the display and had enough material to make 84. The G12 ties are dimensionally the same as the E10 ties except they are two inches longer. Our E10 ties are 14 ¾ inches long and the G12 ties are 16 ¾ long. The ties have all been sanded, but will still have the corners and ends sanded and get stained and then a couple layers of polyurethane will be applied.
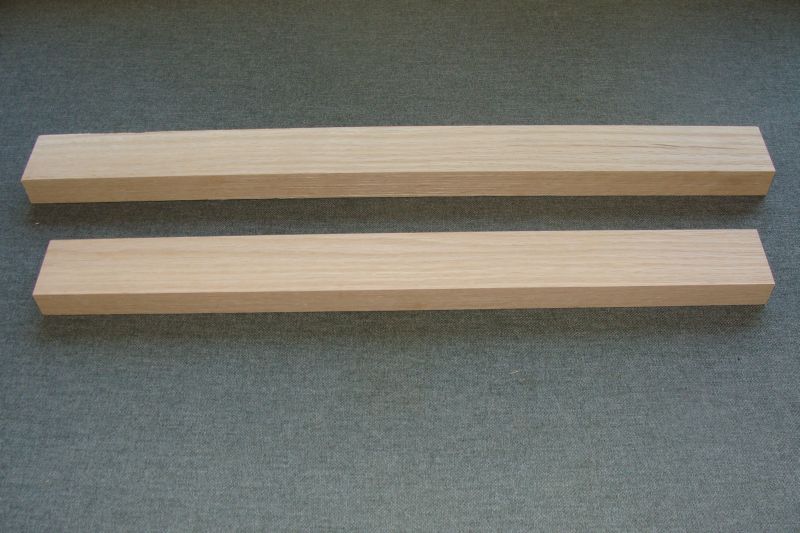
|
After all the rail is drilled for the additional ties, it will be cut to length, bead blasted and powder coated before it is assembled as track panels and added to the display racks. MTC offered a choice of two different styles of track clips. We will be using the wrap around style on the E10 and G12 displays, but the other style will be on display as well in our effort to showcase the full range of MTC products.
Our racks are set for delivery in four weeks and I have a great deal of rearranging to complete in the engine house before they arrive. We moved all of our E10 and G12 bodies out onto the patio for the next four weeks as this is the dry time of the year and no rain is projected. I will remove all of the equipment from the engine house and sweep and mop the floors and dust everything before the equipment goes back inside. It will take me the best part of two weekends to get everything done in there that I need to accomplish so we moved the smaller equipment out this weekend.
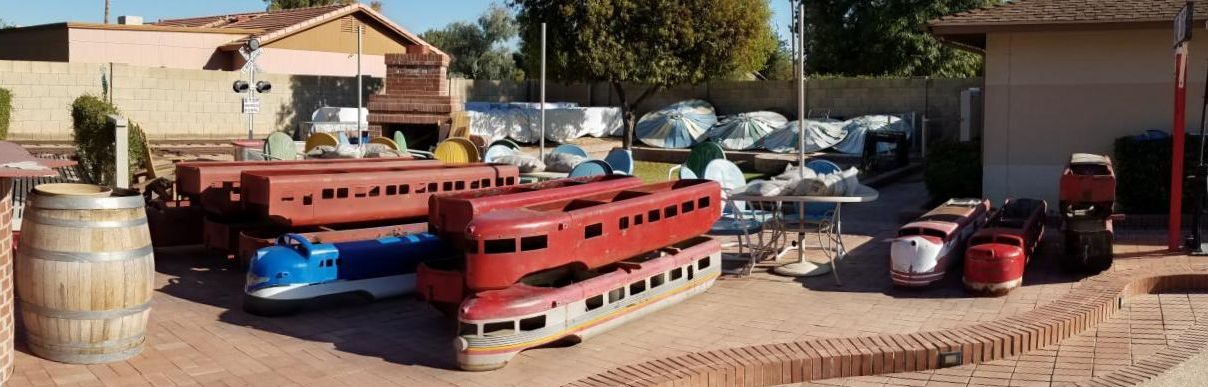
|
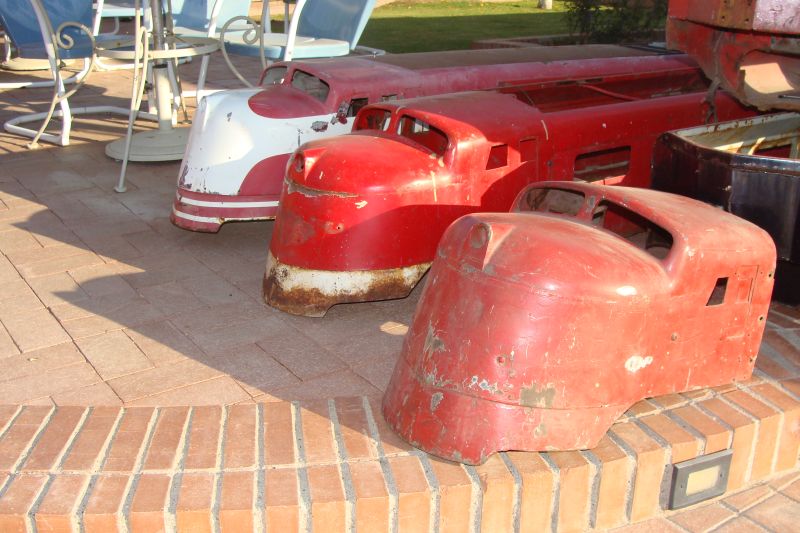
|
We started some of the sheet metal work on our G12 locomotive this month. We cut out the badly damaged front cross member and replaced it with one we had on our parts shelf. We removed close to a dozen bolts from various locations that were sheared off and now they can be replaced with new hardware. We also straightened and tack welded sheet metal in some areas and cut out and replaced sheet metal in others. We still have a great deal more work to complete before it goes to the professionals for finishing the sheet metal work and painting.
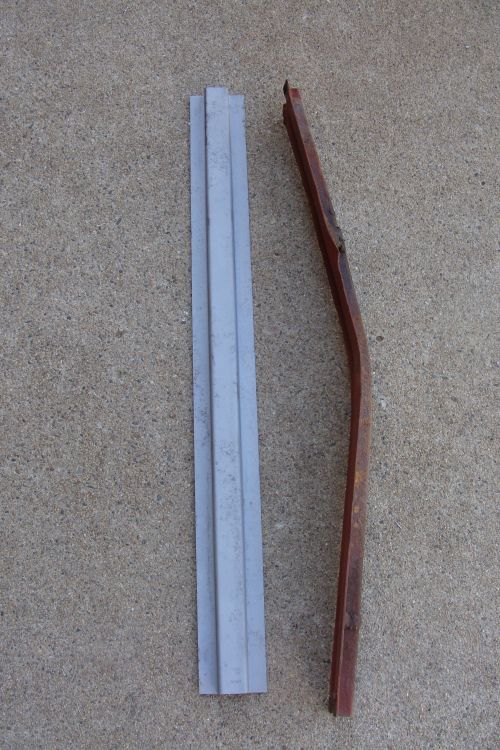
|
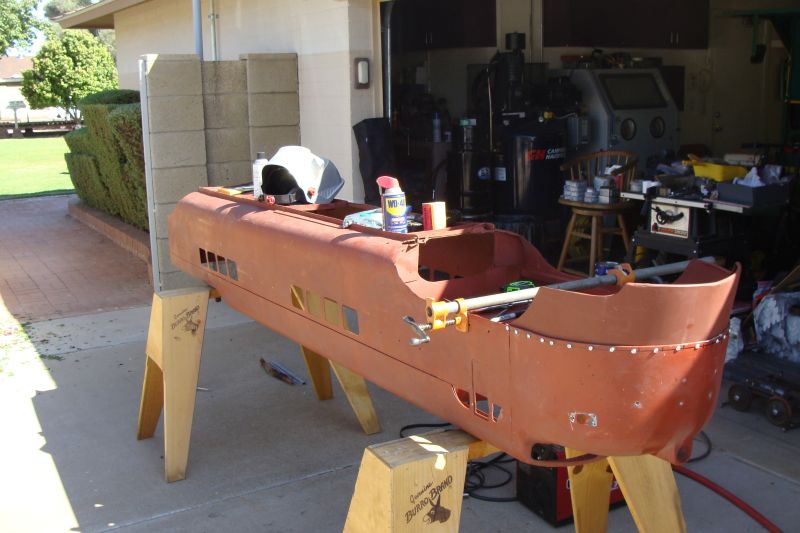
|
I have started sourcing the ties and switch ties that we will use when we replace most of our Arizona and Pacific Railroad 16 gauge ties next year. We have 650 regular ties to replace as well as the switch ties in 10 switches. We are speaking with Northern California and Southern Oregon suppliers. We should know in the next few weeks where our new ties will be shipping from.
Happy and safe railroading everybody!
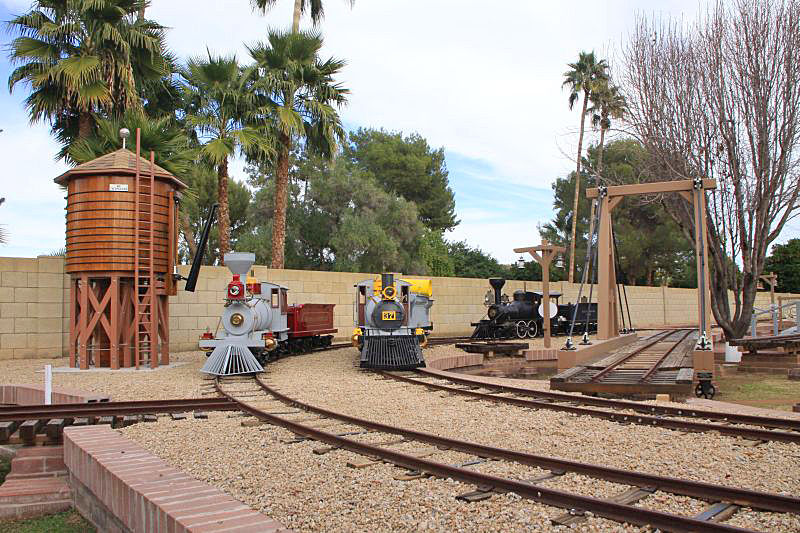
|
09/14/20
I think I shared in one of our earlier updates that we were lucky enough to find a complete NOS gasket set for our Wisconsin motor that will go in our G12. This month our Wisconsin motor specialist, Jerry Graves who used to own one of the two Wisconsin motor franchises in town, took our motor to his “retirement” shop and replaced all of the gaskets and shaft seals. He also freshened up some of the paint. We look forward to leak-free operation once the G12 in placed in service. The engine is still sitting in the original pan. I am still working to track down the springs and clevis pins we need to complete the brake rigging and will then move everything to the new mounting pan.
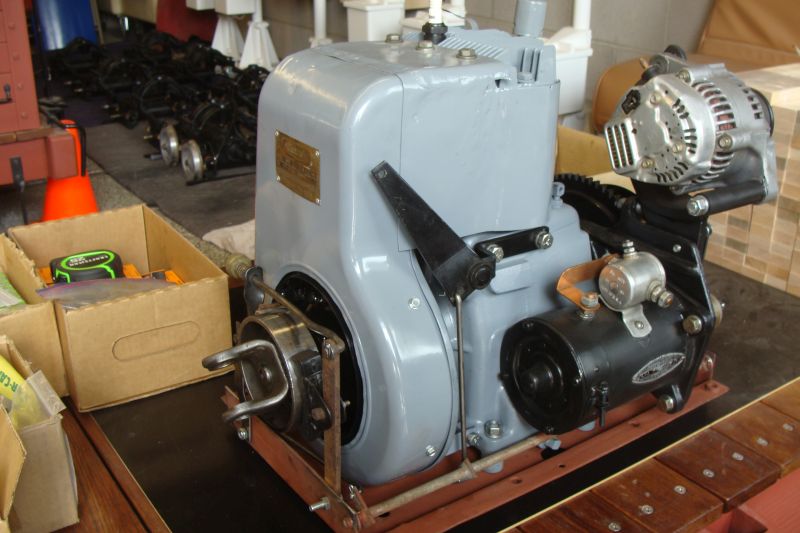
|
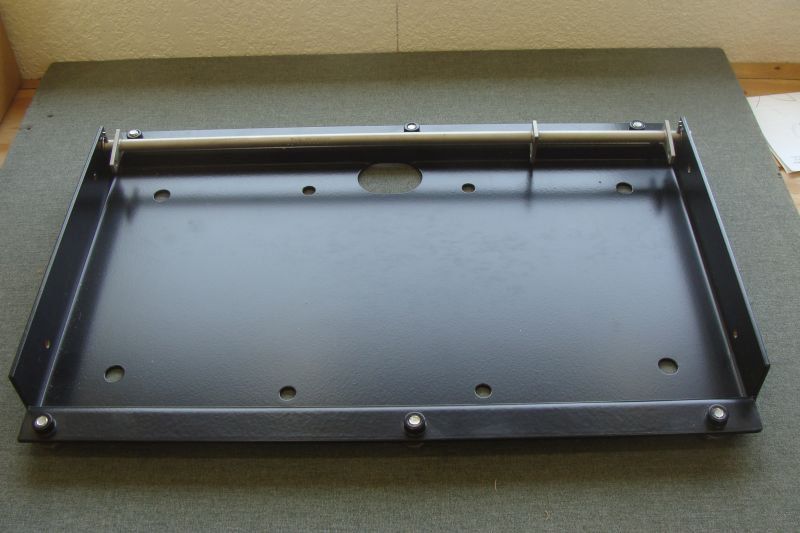
|
Progress was made on our newest MTC display this month. The display will feature an original 1938 torque wrench box, its torque wrench and the paperwork that came in the box explaining what a torque wrench was, its applications and its price - $9.75. We hope to have the display completed and ready to hang in September.
We got the new bead blasting cabinet compressor run through its break in period and got all the head bolts re-torqued per factory directions and specifications. I got all of the side frames and arches bead blasted and many of the E10 wheels bead blasted as well.
Dave and I got the last two G12 coach trucks assembled and wheels mounted. They will need a little bit of touch up once everything is on our large display racks.
Our 20 CNC created E10 wheel hubs were delivered this month and look really good. We are in the process of having 22 new tires completed and these components will be mated with bakelite insulators next month to complete 22 new E10 wheels. We had two extra original wheel hubs in our parts bin thus the disparity in the number of the new components. Fifteen of the tires were completed this month and the wheels pressed together. The last seven of the tires are still in process and we should have them next month.
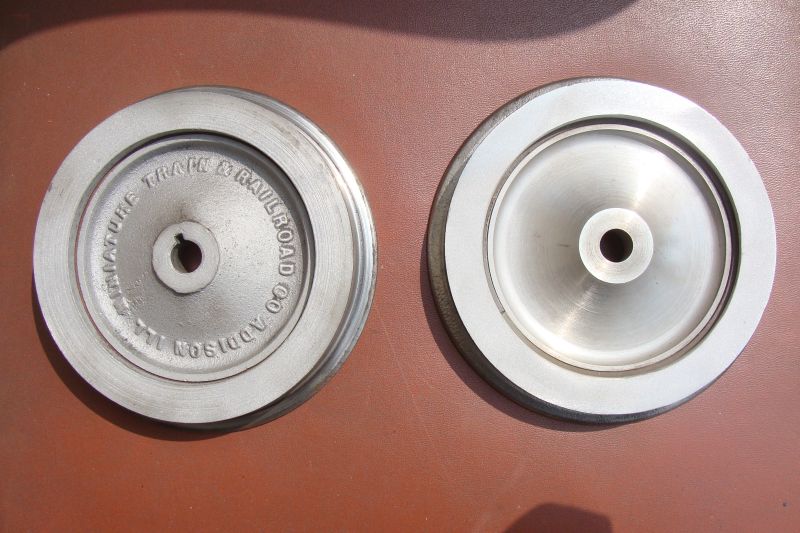
|
I met twice this month with the gentlemen we have selected for the fabrication of our metal display racks (Eaglewings Ironcraft) for the G12 and the 2 E10s. We made a few minor last minute modifications and I signed off on the final drawings and provided the initial payment. We hope to have the fabrication phase completed and racks back here from powder coating during the third week of October. Then we will need to assemble the modules into the full racks, level all the modules, mount 220 ties and then add the rail and some MTC logos. We will push to have everything completed by the end of the year, but that may be overly ambitious.
We started preparing the ties that will be used on the racks. We brought about 80 ties back from Pennsylvania last summer; they had been wet at some point and got pretty dirty over the years, but it was important to me that they be used in this project. We spent several hours this month trimming the ends, planing and sanding the Red Oak ties. They are slightly smaller than they were originally, but look really great. We need 70 ties for each E10 rack; we made 144 counting the ones from PA and the ones we made from new material. We need 80 more for the G12 rack and they are 2 inches longer. We hope to rip, trim, plane and sand the G12 ties in two weeks. Then all will get a medium oak stain and a spray polyurethane finish. There is still a great deal of work needed to complete the racks, but it is full speed ahead.
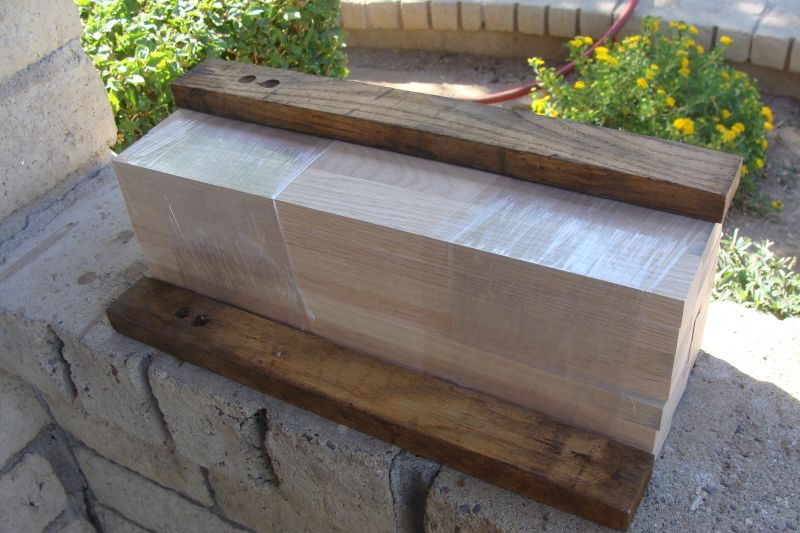
|

|
Several of the arch pins on our cars (E10 and G12) were badly bent. We drilled out the rivets, removed and straightened the pins and are conflicted between re-riveting them or simply using a button head bolt which looks similar to mount the pins back on the car bodies. We’ll decide on the attachment hardware next month.
I ordered the first dozen of the levelers for the bottom of the three racks. Each module has 4 levelers so we will need a total of 36. I will order the remaining 24 later this week.
|
We are going to fabricate a new front skirt for our G12. A friend of ours has a sheet metal brake and a roller. The contour of the skirt is a little tricky as it has a much smaller diameter at the top where it mounts than at the bottom where it extends above the rail. We have a damaged skirt that we can use as a pattern; we’ll see if we can recreate it exactly or have to have a professional fabricator take it on.
For a number of years, Dave and I have talked about modifying one of our crossing signals in the engine house MTC display to operate on modern electronics and be activated by a simple remote key fob. Well it was much more complicated than that just sounded, but that project is complete and visitors can watch a MTC crossing signal operate and hear the bell ring out its warning. Click here to see and hear it operate It adds another dimension to our displays and also works into safety programs for the younger kids.
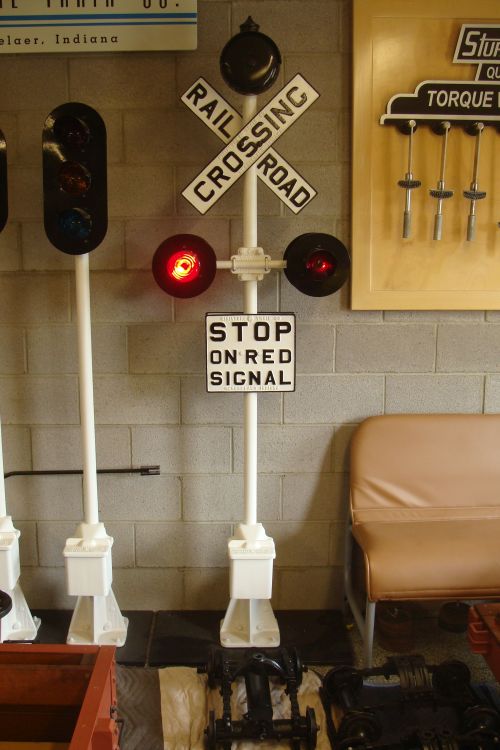
|
Next month (September 25, 1995) is the 25th anniversary of the Arizona and Pacific Railway. It really is hard to believe that it has been that long since we acquired the Phoenix at an auction and started work on our first railroad restoration project and little railroad. Once this Covid pandemic is over, we will have some kind of a run day open house for anyone who is interested in attending. Hopefully we can host in the spring or fall of 2021; we will just have to play it by ear.
I have a couple of problem areas for my lawn on the A & P. The east side of the engine house and also south of the transfer table are in the shade most of the day. I have planted grass and laid sod in those areas with Bermuda in the past and each year the grass gets thinner and thinner. My dad had good success at his house with St. Augustine which is a much thicker bladed grass, but will thrive with as little as four hours of direct sunlight a day. I found a local turf farm that grows St. Augustine and added 200 square feet in the problem areas. If this grass takes off and does well, I will add another 200 square feet to these and other problem areas next year.
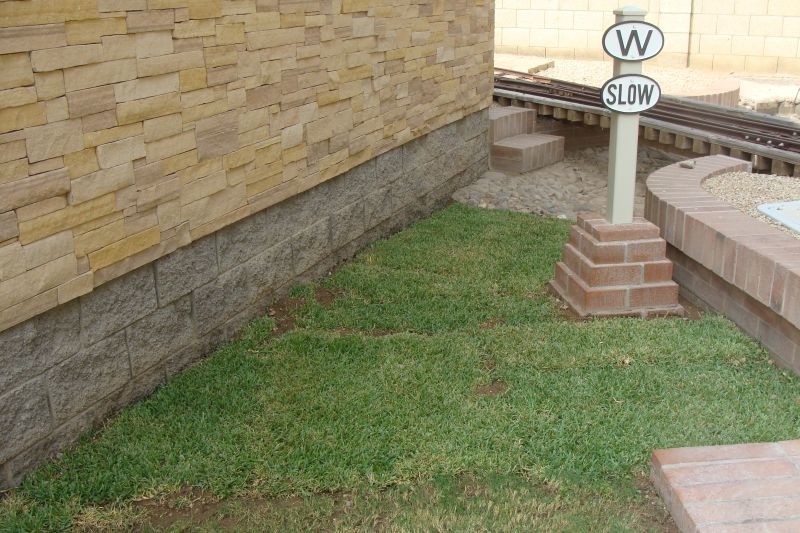
|
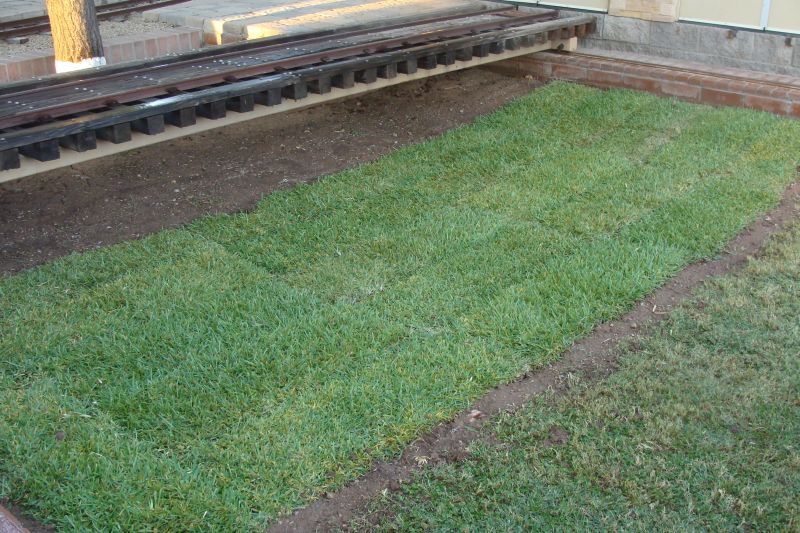
|
Happy and safe railroading everybody!
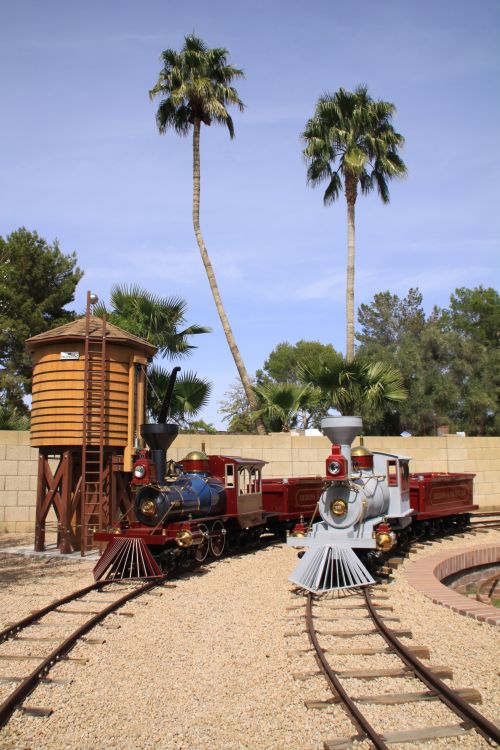
|
08/17/20
We installed our new tires and Bakelite insulation rings on our 13 E10 wheels that were in bad shape. The wheels are now like new. I still need to bead blast, prime and paint the 44 E10 wheels we have and install them on 11 of our E10 trucks. We have two additional E10 wheels, but one is for display and one has a hairline tire crack and the tire will be replaced, but hasn’t been yet. The 4 G12 trucks and the G10 truck that we just rebuilt will receive very nice G12 wheels after they are bead blasted, primed and painted. I am still trying to find additional E10 wheels and have beautiful G12 wheels and other goodies to trade or will buy outright.
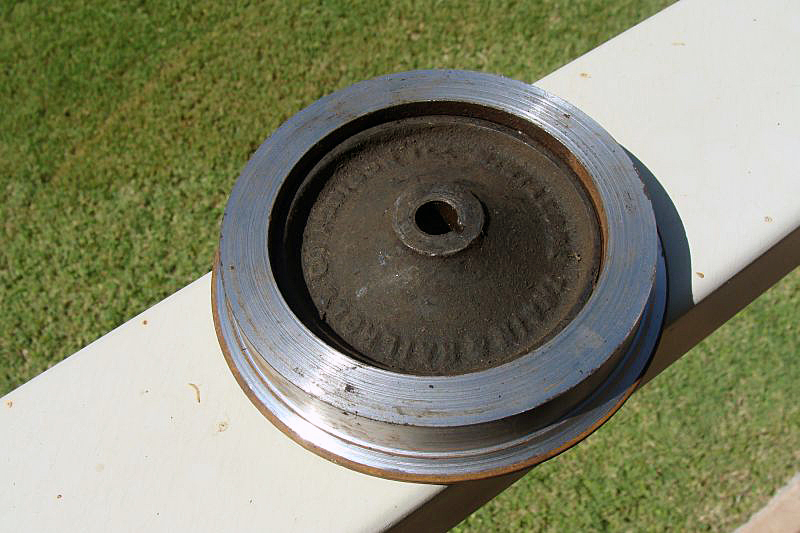
|
I made the decision to have 20 new E10 wheels manufactured via CNC machine. They will be delivered the second week of August. Then I will need 22 more tires finished so that we can match them with the new wheels for our remaining five trucks awaiting those wheels. I hope to have all those wheels completed in early September and bead blasted, primed and painted later that month.
I acquired a 2 ton electric hoist for our gantry crane. We had to build new mounting brackets and a new mounting bar to secure it to the trolley. It will make lifting some of our heavy loads a little less sketchy. My previous one was rated at 400 lbs and 800 if using the pulley. This one is rated at 4000 lbs and 8000 pounds with the pulley in use.
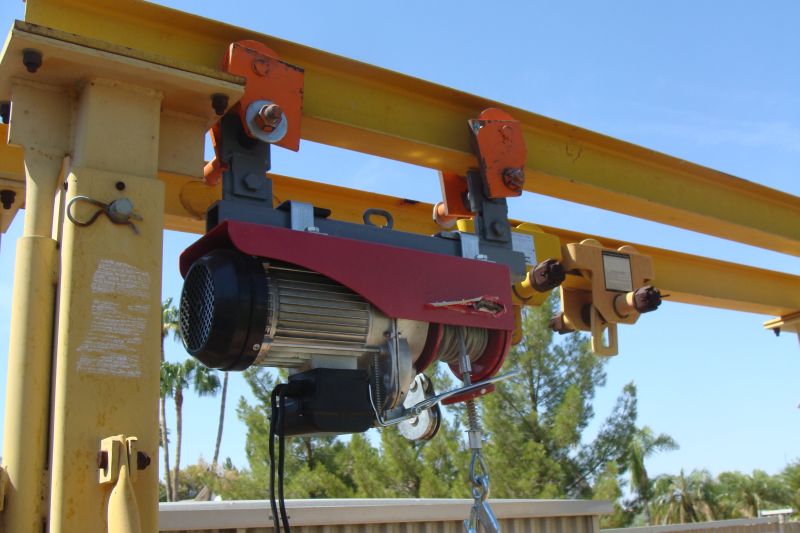
|
Dave had a tremendous find this month – the electrical connections for the E10 and G12s. We also acquired the polarized plugs and receptacles for the G12.
|
|
Dave and I rewired all of our seven E10 trucks and the E12 power truck with 10 gauge wire. We originally wired them with 14 gauge wire which is fine for automobiles and the G16s and S16s. The E10s use a direct short emergency button for emergencies and immediate stops. The fuse in the large transformer is supposed to blow immediately, but if it doesn’t, it starts frying the wiring of the trucks and engine with the smallest gauge wires going first. We decided to upgrade to the 10 gauge wire to prevent burning up the wiring if we have to apply the emergency stop switch and the transformer fuse doesn’t pop immediately.
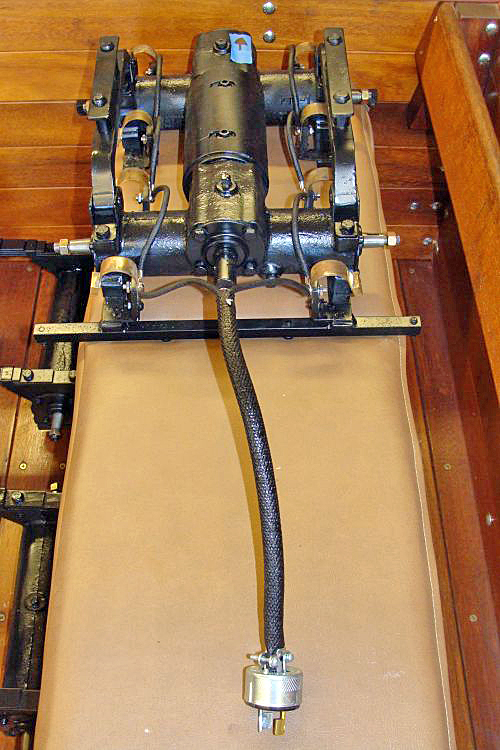
|
We located the four period transformers we need to convert 32 volts to 6 volts to operate the various side marker lights, drum head light, head light etc. in the E10s.
The wiring for the new compressor to operate my bead blasting cabinet was finally completed two weeks ago. I still need to complete the break-in period and then I can start bead blasting. I have 14 truck arches, 4 G12 leaf springs and several side frames awaiting bead blasting, priming, painting and installation on trucks.
|

|
We sent out bid requests for the steel cutting and welding work on our three large display racks. The display racks will be built in modules for ease in transportation; each finished rack will be almost twenty feet long and weigh just at 1000 pounds once fully assembled. They will be completed in four phases: 1.) the welding and fabrication of the individual modules, 2.) powder coating the modules, 3.) assembly of the modules and leveling pads, 4.) adding the ties, rail and finishing touches.
The first rack will come here and be fully assembled to make sure we have everything designed and constructed just the way we want it. If we have no changes to make, we will green light racks 2 and 3 and disassemble rack one and take it to the powder coater.
We have two track gauges. One is a Miniature Train Company gauge that we have restored and is on display in our engine house. The second one is exactly the same but instead of being the familiar MTC yellow, it is black and has a Chance name plate. This is the one that we actually use on our railroad. For the diehard MTC fans and collectors, you know that the track gauges were manufactured in Rensselaer. There were two varieties of wheels over the years. The more common variety has the lubricant add port and cap and is otherwise plain. The rarer and highly desirable version is track gauge casting TG-2 and has the casting number, Miniature Train Company name, logo and city of manufacture in the casting. One of our great friends had a track gauge with the highly desirable wheel set and sent them to me to swap for my unmarked wheel set. He said the ornate wheels need to be on display for others to see and that is what my MTC exhibits are all about and he wanted them here where people can view them. What a class act he is and I appreciate his act of kindness so much.
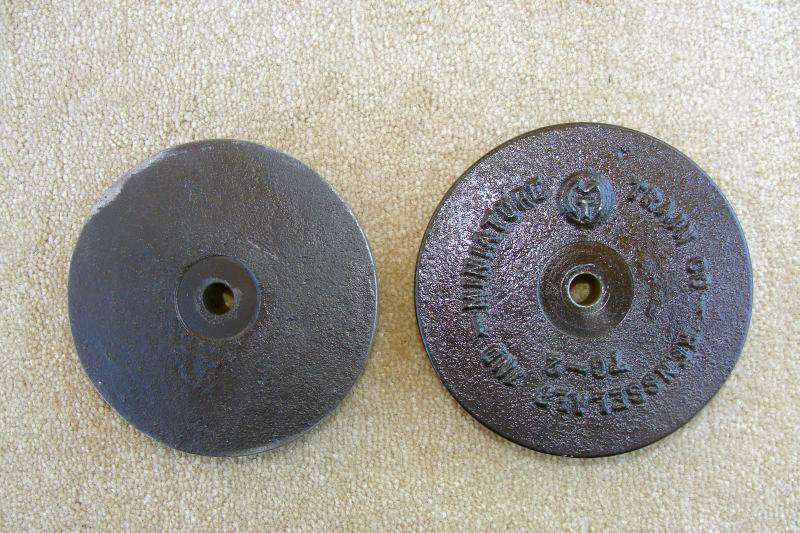
|
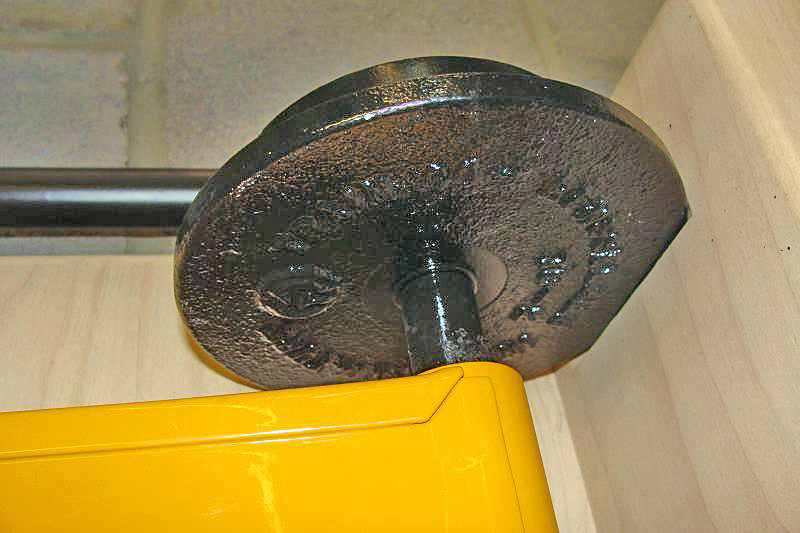
|
I hope to get the wheels and arches on the trucks next month and maybe over the Labor Day weekend get us some roster photos of the E10 and G12 equipment in front of the engine house. They will provide a nice before and after contrast.
It has been 110 degrees plus here for about three weeks and the next two weeks look pretty much the same so it has been a little tough to get motivated on the heavier outside work, but progress is being made.
I received the 8 custom Ubolts that I ordered and which allowed me to assemble the spring pad assemblies for two additional G12 trucks.
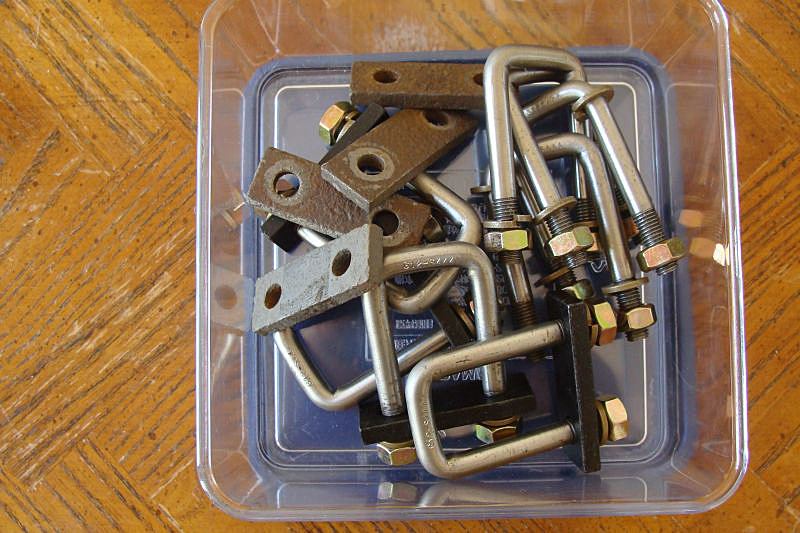
|
Dave and I spent quite a bit of time this month on displays in the engine house. As I mentioned earlier, we swapped out the wheels on our MTC track gauge, we designed and are working on a display for the 1938 torque wrench box, paperwork and wrench and have been working on one of our crossing signals so we can activate it from a key fob and can chose to have the bell operating or not.
Happy and safe railroading everybody!
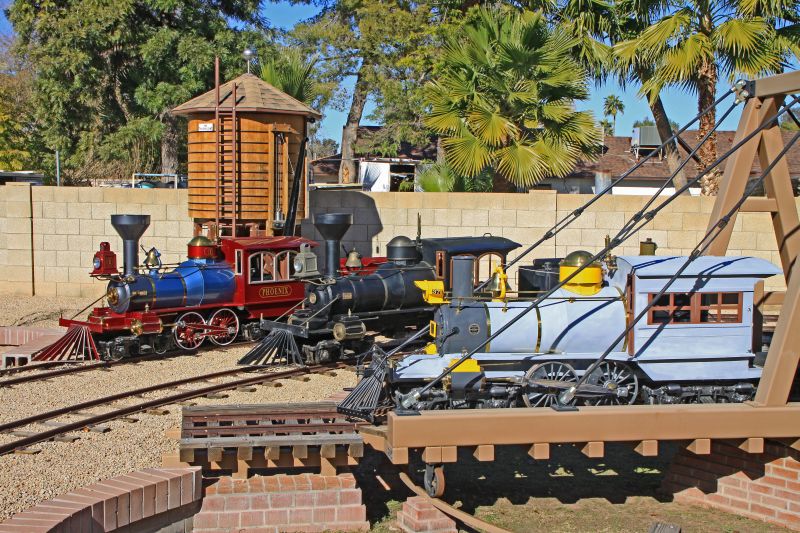
|
07/14/20
Our Wisconsin motor in our G16 was partially rebuilt this month. It was rebuilt completely several years ago, but then sat inside under a tarp for a few years while it awaited installation in our G16. It had the proper amount of Mystery oil and Stabil in it, but over the years the gas still turned to a sticky gel and the motor never ran quite right once it was installed in no. 582. The cylinders, heads and all internal components were cleaned thoroughly, new head and pan gaskets were installed and the carburetor was rebuilt. We also drained the gas out of the gas tanks and replaced it with new gasoline. We reinstalled the Wisconsin into no. 582 with our gantry and electric hoist which saves fingers and makes shimming and lining everything up so much easier than my conventional engine hoist! We reinstalled the hood and I bought a new battery as the previous one was on its last legs.
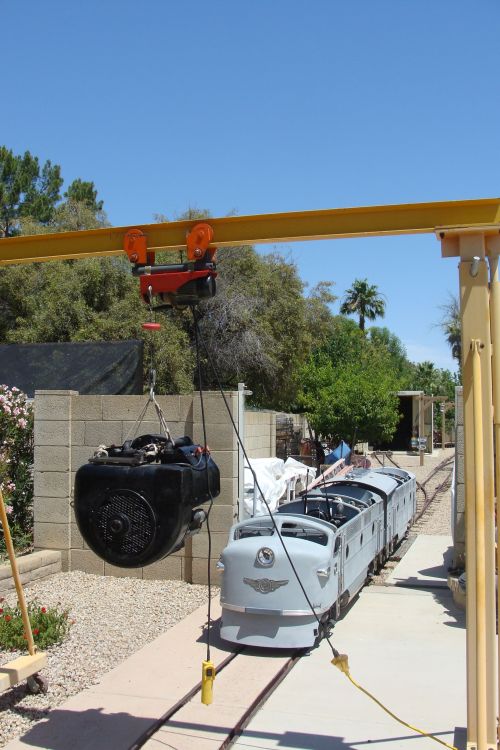
|
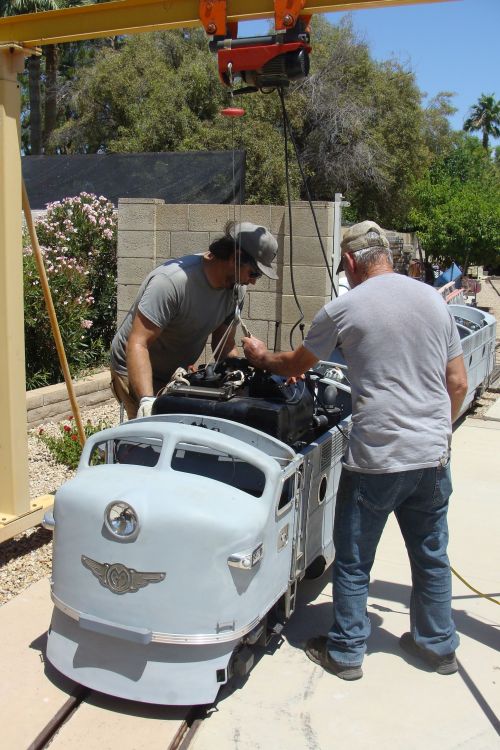
|
We completed fabrication of four more spring pad assemblies and four more G12 coach leaf spring assemblies this month. I am awaiting the arrival of 8 more Ubolts to complete assembly of these two G12 coach trucks.
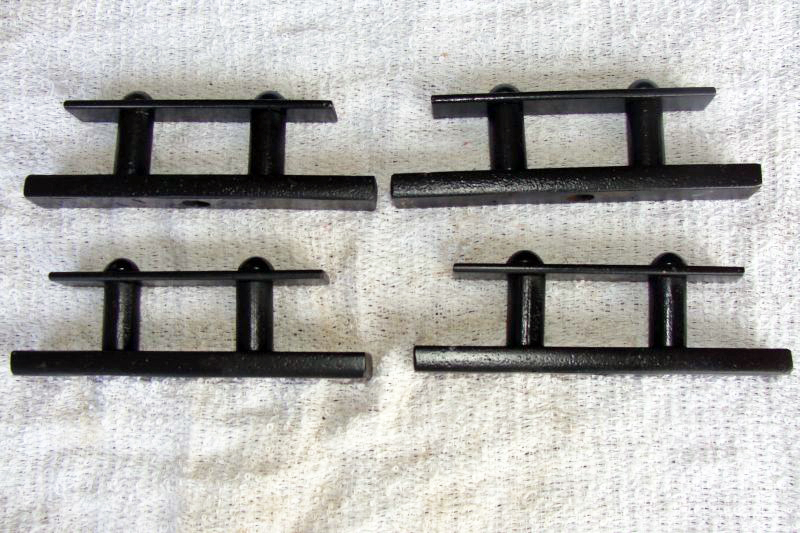
|
With our PA parts cache, we received 30 partially completed E10 tires. We had 11 of them bored and faced as tires for existing E10 wheels that are badly worn. We pressed off the six tires that were in bad shape and pressed on the new tires and we also built five new wheels with existing hubs and Bakelite insulators. The complete wheels came out very nice. This gives us 44 very nice wheels. I still need 20 more E10 wheels for our restoration projects. I have 15 partially completed tires that we can finish with boring and facing. I could have 5 tires made from blanks. I would still need 20 hubs. I am still contemplating having some hubs cast next year, but would much rather find some. Another alternative is having a CNC machine just make me 20 more hubs.
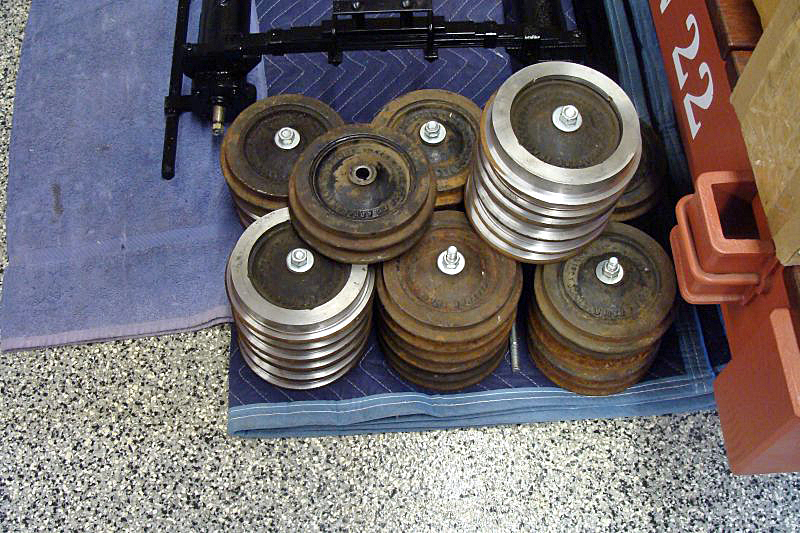
|
I replaced two batteries this month – no. 582 and the Red River.
I was set to have an electric sub panel installed outside the shop with a dedicated circuit for the new 220 volt, single phase, air compressor, but two days before they were supposed to start the work I received a call that three of the company employees had contracted Covid 19 and the entire company was undergoing testing and lockdown. The work will get done next month by that company or another one. I did have to rearrange a bit in there, but this will really be a great set up once completed. I am also having a 110 V, 50 amp circuit installed for when friends visit with motor homes and travel trailers or when we are using the line feed welder. We refurbished my bead blasting cabinet with new bead blasting material, new window screen and new nozzle. We also re-plumbed a couple of things to accommodate the new compressor.
We were able to locate and acquire a complete gasket set for the Wisconsin BRN that will go in our G12. I wasn’t sure that we needed it, but it has a couple of small leaks and since it is still on the table anyway, we will replace all the gaskets before final installation of the motor in our G12.
We have finally completed the rebuild of the G10 power truck and it is sitting next to the E12 power truck. They both still need finishing touches. They need their aches, I am searching for two more of the old style oil fill caps that are in nice shape, I want to bead blast the side frames, and they will be partially disassembled, primed, painted, reassembled and wheels added. The E12 also still needs wired.

|
I partially disassembled the E10 and G12 trucks that we have recently rebuilt. I primed, painted, reassembled and touched up the paint on 20 trucks this month. Two trucks are awaiting their leaf springs and spring pad assemblies and 8 trucks are awaiting their arches, but everything is rebuilt and just awaiting those parts. All of those parts are here and just awaiting bead blasting, prime, paint and assembly. There are 14 arches, 4 leaf springs and 4 side frames awaiting bead blasting.
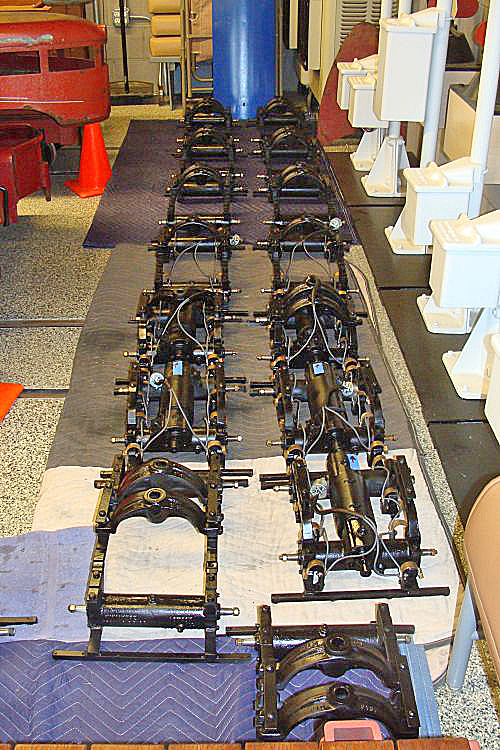
|
Dave and I completed mounting the wheel sweeps, jumper cables and loop cables on the five E10 power trucks and the 2 electrified E10 coach trucks (rear trucks – observation cars). We built the main wiring harnesses including the Hubbell 2 prong polarized twist plug for each truck. As you would expect, the harness is a very different length for the observation cars than it is for the power trucks. Dave was able to acquire brand new NOS Hubbell plugs and receptacles for our E10s that are the same exact parts used in the E10s originally. These were really great finds; even the old boxes are very cool. It is much easier doing this work without the wheels on the axles and for photographic purposes there is a much better view of the sweeps and wiring than after the wheels are on the axles.
After completing this wiring project with 14 gauge wire, we changed our minds and are rewiring the trucks with 10 gauge cloth covered wire that we located. We already know the exact lengths we need for everything so this will go more quickly than our original work did.
I made a pattern for the G12 engineer seat and the rear seat of the G12 observation car and also made a pattern for the E10 engineer seat and rear seat of the E10 observation car. I cut out enough pieces of plywood for 1 G12 engineer and 1 G12 rear ob car seat and 3 E10 engineer seats and 2 E10 rear observation car seats. The E10 and G12 seats are very different in shape and size. My next door neighbor does high end upholstery of custom street rods and speed boats, but is always willing to assist with my crazy train projects and is able to tone things down enough to work for my applications. When I took the plywood seat bases over last week, he was just finishing a complete interior of a super cherry, all metal, 34 Ford. The entire car was incredible! I got the seats done in basic black and just got them back this week; they look pretty good.
|
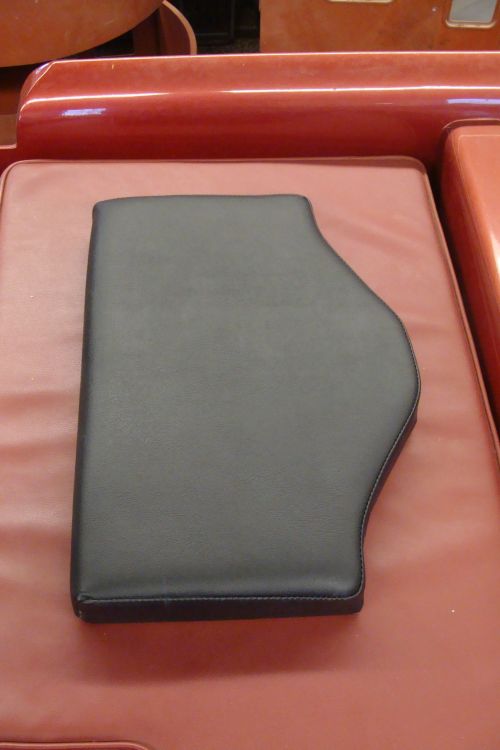
|
We may have another cool find or two for our MTC collection that I hope to be able to share in the next couple months – no not additional trains or cars, just MTC items that I have been hoping to come across for some time and may have done so.
I finally broke down and bought a 10 x 10 nylon canopy to protect us from the sun when I need electric access and am working in the driveway. It will come in handy as it was 111 when I was working out in the driveway yesterday…
|
Happy and safe railroading everybody.
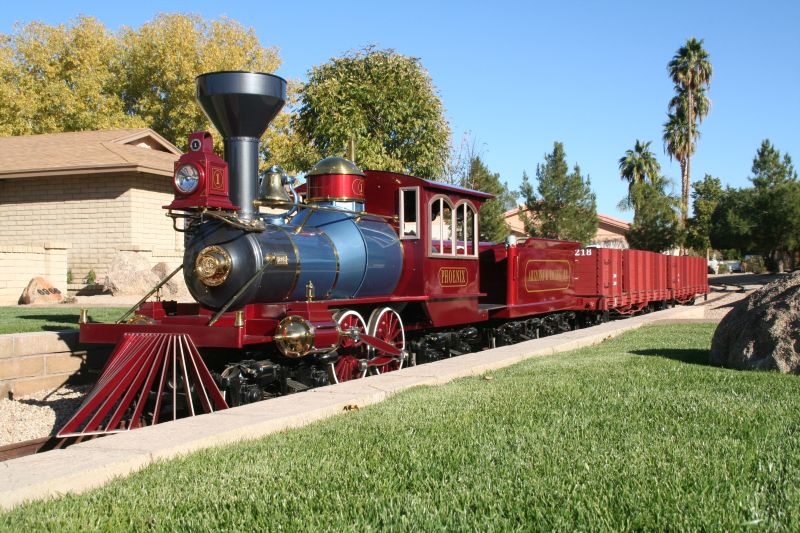
|
06/08/20
We finished fabricating a pair of G10 safety bars, 4 pair of G12 safety bars and a pair of E12 safety bars. We also built eight more spring pad assemblies.
Dave and I finished making 30 additional wheel sweeps. We got the contact pads cut to size, cleaned and cut the sweeps themselves to length and drilled both required holes. We soldered the pads in place, drilled and tapped the pads and added the pad screws and washers on part of another workday. After cleanup, we used our jig to bend each sweep to the correct shape. This gives us a total of 74 sweeps. We needed 64 and wanted to have a few extras on hand.
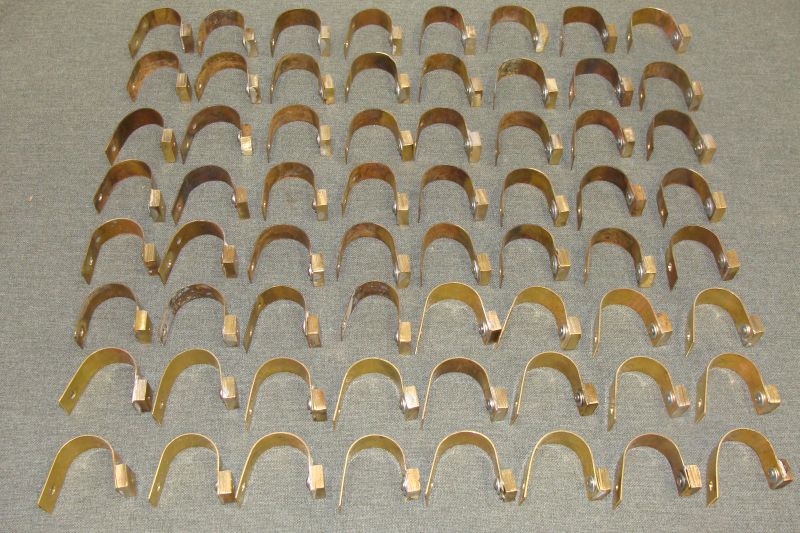
|
Dave and I started on the wiring harnesses for the eight electrified trucks. We completed the 32 jumper cables and the 16 loop cables. As with the sweeps, we will make several extra jumper and loop cables as we always like extras of all parts on hand. Still to come are the main harnesses.
|
|
We got our new battery box for the G12 back. Wow what an improvement from the original one that was all roached out from rust. The new box will be powdered coated in black before its final installation.
|
|
My low output shop air compressor has always struggled to keep up with my bead blasting cabinet. This month I purchased a larger unit rated at 25 CFM which should be plenty for my needs. This will make bead blasting projects much more efficient and be less frustrating going forward. The new unit is much larger and will require some rearranging of floor space, but will be well worth the effort. I will also be able to operate some air powered shop tools. I still need to have some additional wiring pulled before it will be ready to use. Happy birthday to me.
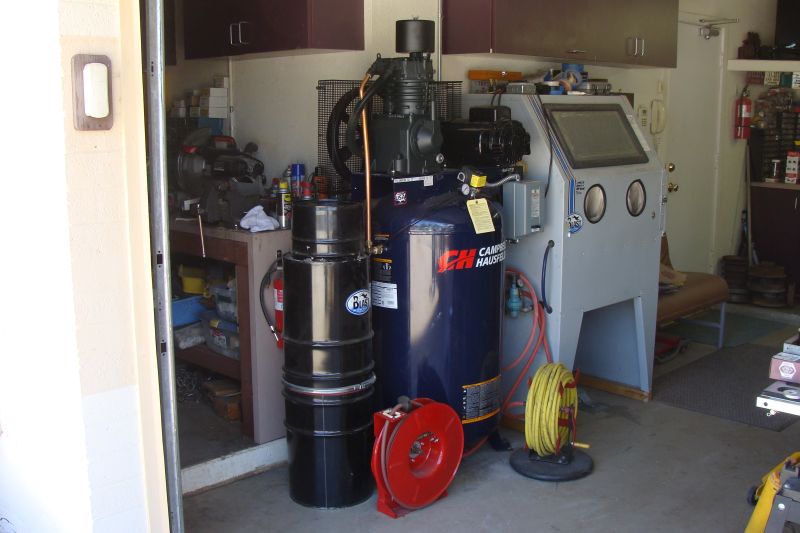
|
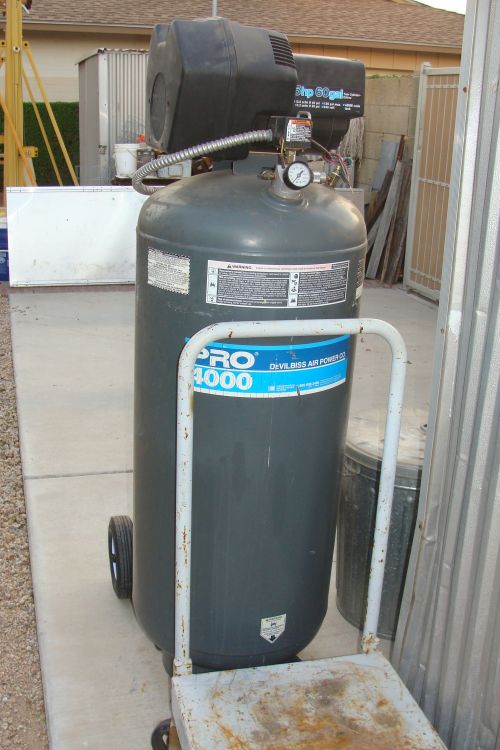
|
We rebuilt six G12 trail truck axle assemblies and attached our newly fabricated safety bar assemblies to each. I am still fabricating the leaf springs, but hope to have these trucks completed in early June.
We pulled our Wisconsin motor out of G16 no. 582 and have our Wisconsin engine expert Jerry Graves looking at cylinder four and diagnosing the issue. It has been sluggish and always had an unexplained lope ever since it was rebuilt.. As any of you know that have pulled or mounted an engine in a G16, an automobile engine hoist isn’t configured quite right to do the job. We have modified a piece of 2 x2 tubular steel with .250 walls as an extension and it works great for pulling the motors. Note: I am not advocating that anyone else do this and I am certain this would not be OSHA approved, but we have utilized this method a few times on various pieces of railroad equipment and so far so good! I have to replace a bad caster, but we’ll use the gantry hoist next month when we reinstall the Wisconsin engine.
We still have a G10 power truck to rebuild and that is the last of the total of 21 trucks (E10 and G12) that we have been working on. We will have it completed early next month and then we can move to the paint and wheels part of the process. In preparation for our shop focus shifting to wheels soon, we built a shop tool for pressing apart and back together our E10 wheels.
I partially disassembled, primed, painted, reassembled and touched up the seven E10 trucks that will have electrical components. We will start adding the wheel sweeps and wiring next month. We will also add wheels next month after we swap out some tires and the new bead blaster is in place and functional to give them all a quick once over. A couple of these trucks are also awaiting arches that the bead blaster will clean up. We have fourteen more trucks that will need partially disassembled, primed, painted, reassembled and touched up next month.
As any long-time visitor to this site is aware, we have a collection of Miniature Train and Railroad Company torque wrenches on display in our little MTC museum showing the different variations and changes as they evolved. The Holy Grail of MT & RR Co. torque wrench collection for me has always been one of the original 1938 torque wrench boxes and paperwork. I have been looking for one for many years. This month, we were fortunate to obtain a very early Miniature Train and Railroad Company torque wrench and original box and paperwork. In 1938, the Miniature Train and Railroad Co. torque wrench cost $9.75. As you would expect, the number of these boxes that have survived eighty plus years is very few. I have been collecting MT& RR Co. and MTC artifacts for more than twenty-five years and have only seen photos of one other torque wrench box. The wrench itself is in mint condition. I am so excited to add these items to our MTC collection and display. The box and paperwork will soon be displayed in a specially designed area on our MTC display wall!
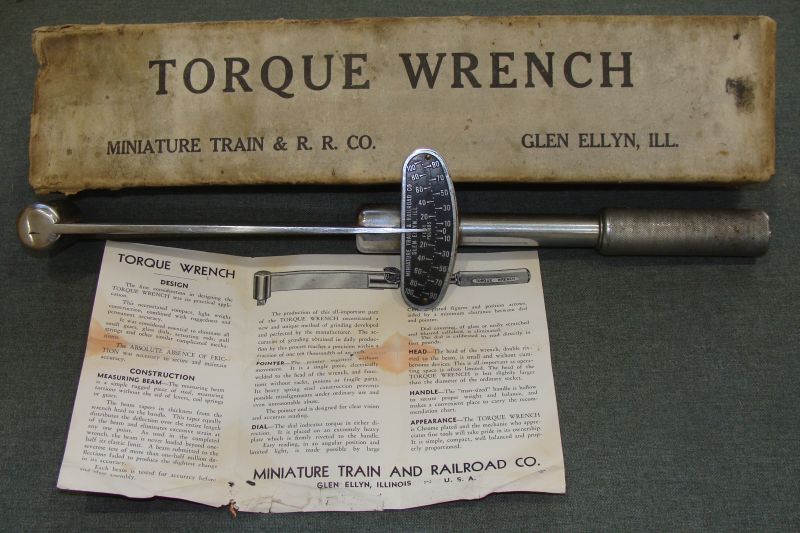
|
I am still looking for a MTC track gauge box (we have a fully restored track gauge) from the 1950’s to add to our collection. Theses boxes are ten or twelve years newer than the earliest torque wrench box, but are still seventy years old and again few of these boxes exist any longer. I have only seen photos of two of these boxes over the years.
We continue to refine our design work on the engine house display racks for our E10 and G12 equipment and I am pretty far along in pricing out the materials from various suppliers. We hope to get started on actual construction of these racks in late June as soon as all the E10 and G12 trucks are completed and painted. The racks will be a big undertaking and it will be late in the year before they are completed with powder coating, ties, rail, lettering and MTC equipment sitting on top. Next year, 2021 will be the year that the sheet metal work gets completed on the E10 and G12 car bodies and they get their new, but period looking paint jobs. I am still looking for a few sheet metal and bolt on parts so I will continue chasing those this year.
Happy and safe railroading everybody!
05/11/20
We received our ten shortened, bored and sleeved trail truck castings back from the machine shop this month. They started life as G12 trail truck castings and we have modified them into E10 coach castings. The machine shop bored and sleeved the castings for the bearings, drilled and tapped the new mounting hole for the leaf spring assembly and re-drilled and re-tapped the bearing retainer holes. We installed our half axles that we have been working on, new cotter keys, new seals and all new bearings. We built new bumper assembles and new leaf spring and spring pad assemblies for these trucks. We ran a die over the axle threads of all 84 axles and added new axle nuts. The trucks still need painted and wheels added, but it is very rewarding to have them essentially completed and it’s a huge space saver too!
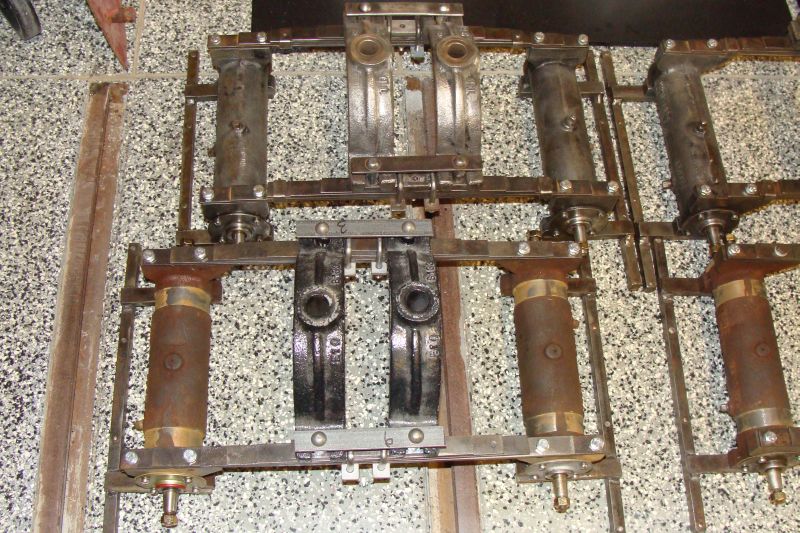
|
We completed rebuilding three power truck axle assemblies this month and now have all ten E10 power truck axle assemblies completed and started assembling the components of the power trucks themselves. We added the side frames to all five power trucks and will add the arches next month. I am still working on cleaning the last few arches for the power trucks. We also plan to install the safety bars (bumpers) to the power trucks in May.
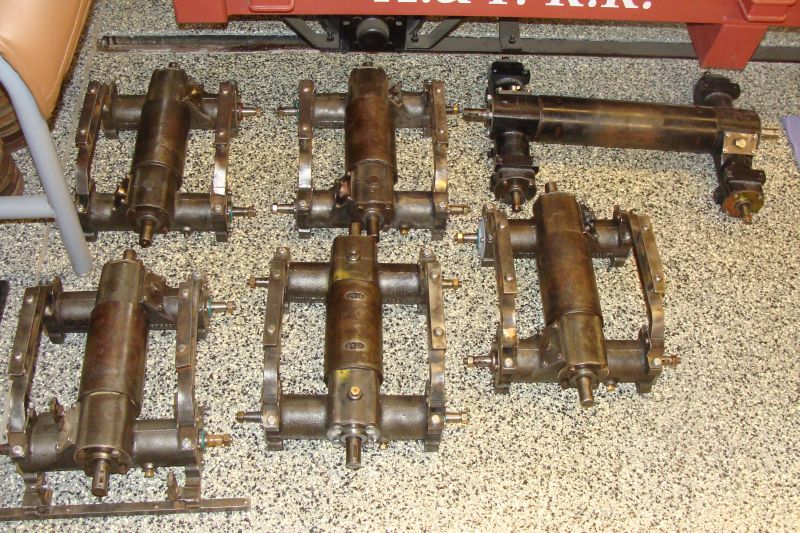
|
We will have 15 E10 trucks (5 power and ten coach trucks) ready for paint and wheels and hope to complete that process in May. We also completely rebuilt one G12 power truck and its leaf springs and spring pad assemblies this month; is also ready for paint and wheels. We are also in the process of rebuilding three G12 coach trucks that are missing several parts, have bolts sheared off in the castings and have been pretty much abused previously. We have located most of the parts. We are also working to preserve an E12 prototype power truck for display and a G10 power truck for our Miniature Train Company collection and displays. We hope to have all 21 of these trucks completed by the end of May except for wheels.
I now have all of the G12 wheels that we need and extras; I need 64 E10 wheels and have 44 in various conditions. I am not sure at this point if I will have some cast or use the E10 wheels on the power trucks and G12 wheels on the other cars. If you know anyone that would like almost new G12 wheels in exchange for E10 wheels, please let me know. We will be running our E10s on battery power so we can run the G12 wheels without issue, but clearly we would rather have the correct wheels if possible.
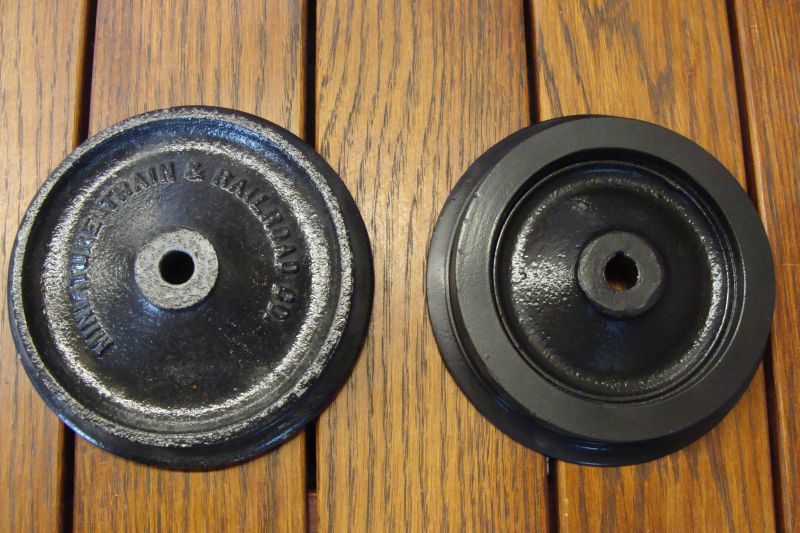
|

|
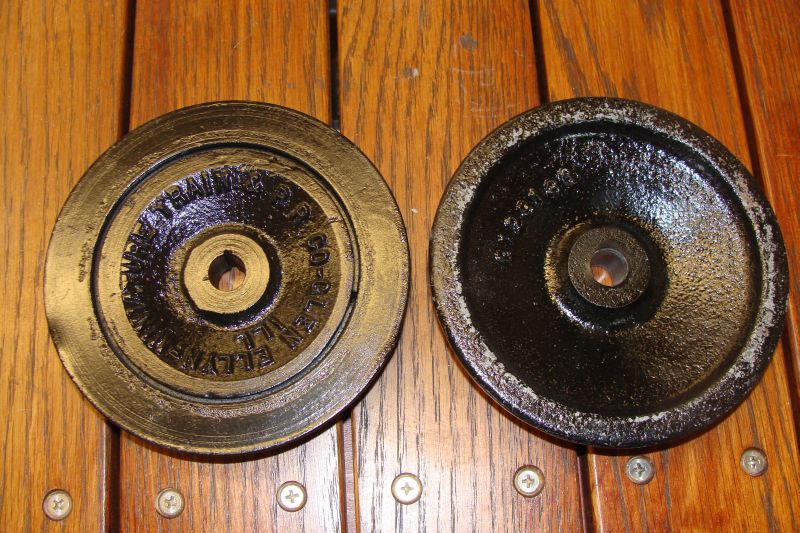
|
We finished mounting the Bakelite insulators on the last three power truck safety bar assemblies. All fourteen that we are rebuilding or fabricating will soon be ready for the assembly of the power truck components. As with the locomotive, the observation car pulled its power from the rails and utilized a transformer to reduce that to 6 volts to operate the drum head, side markers and rear light. We have five power trucks and two observation car rear trucks thus the fourteen safety bars with electrical components.
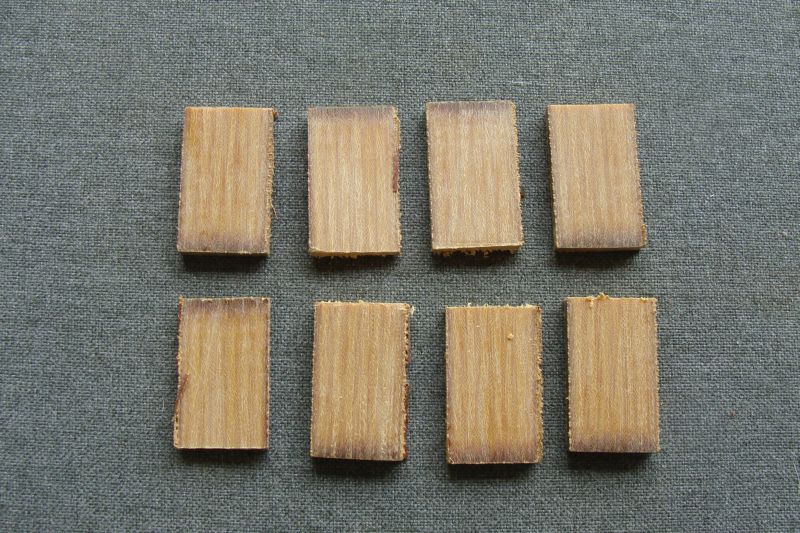
|
We started fabrication on our last batch of safety bars (bumpers). We are working on ten G12 bumpers and a G10 bumper set.
I ordered another thirty axle bearings and seals to complete the current projects and to have a few extras on hand for other projects that may present themselves.
Dave and I completed the drilling, tapping and soldering of 44 of the 64 needed wheel sweeps this month and devised a jig utilizing a 5/8 diameter mop handle to bend smooth and consistent curves in our brass wheel sweeps. We bent the first 44 sweeps this month and hope to bend the balance of the sweeps in May. We also ordered the cloth covered 14g wire for the jumper wires between the wheel sweeps. We hope to have the wiring on all the power trucks completed in June.
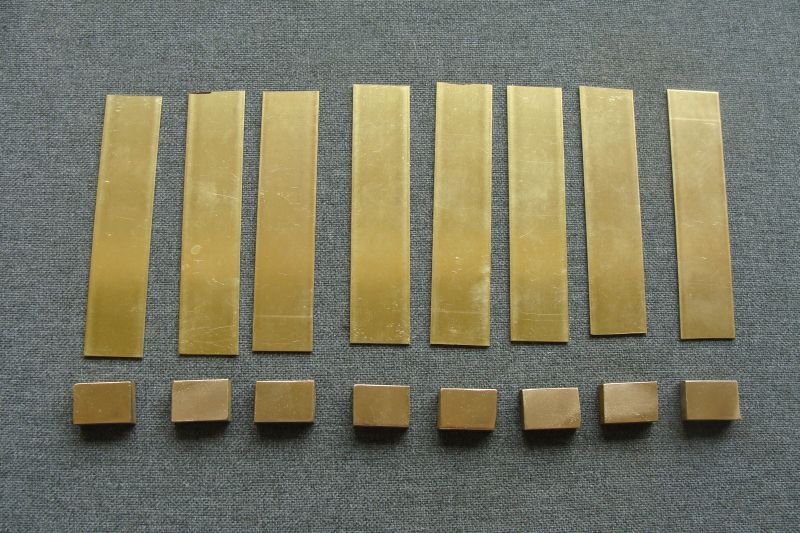
|
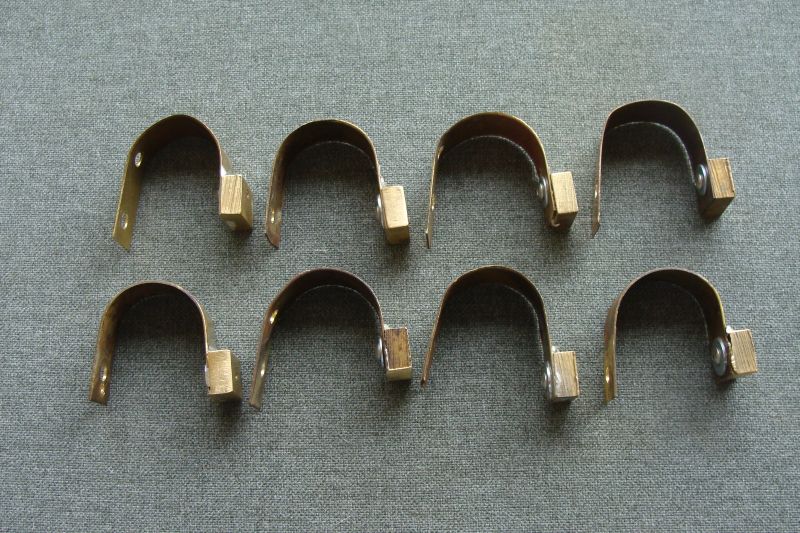
|
As mentioned earlier, we started on rebuilding six G12 trail truck axle assemblies. We will get these trucks assembled in May as we are still working to fabricate a few more safety bar assemblies.
We still have one more G12 power truck and a G10 power truck to rebuild and then we can move to the paint and wheels part of the process. l am starting to get a bit burned out on rebuilding trucks and I’m looking forward to having all the trucks finished and starting on the mechanicals for the G12 locomotive, 3 E10 locomotives, G12 observation car and 2 E10 ob cars soon. We will also start working on three large and four smaller display racks this summer. It is going to be a very busy next several months out here…
We had hoped to receive our Wisconsin stainless steel exhaust and exhaust trim ring for our G12 Wisconsin motor that we had ordered some time ago, but it looks like it will arrive next month. It will look great once installed.
I sent our original G12 battery tray pieces out for new pieces to be water jet cut. I should have the new pieces here early next month and then I’ll get the pieces for the battery tray to a friend with a sheet metal brake and then we’ll weld the pieces in place and add the threaded rod and battery ground cable.
I have been talking about it since last September, but I think we’ll be in a position to take Roster photos of our additional G12 and E10 equipment on their rebuilt and freshly painted trucks in June and we can update the website with photos.
We obtained a number of yoke style track clips that will be utilized inside the engine house on the display racks and track we will be building soon. These racks will straddle the gondola cars and tenders of our S16s in the engine house. Each will be double tracked with either G12 or E10 rail. The G12 rack for example will have a locomotive and coach on one track and an observation car and coach right next to it on the second track. The ob end and the locomotive nose will both be facing our other MTC displays. There will be two E10 displays with the same design just a little shorter as the cars are shorter. These racks will have the cars at nice display height and with a stool and some assistance allow little ones to sit in the locomotives.
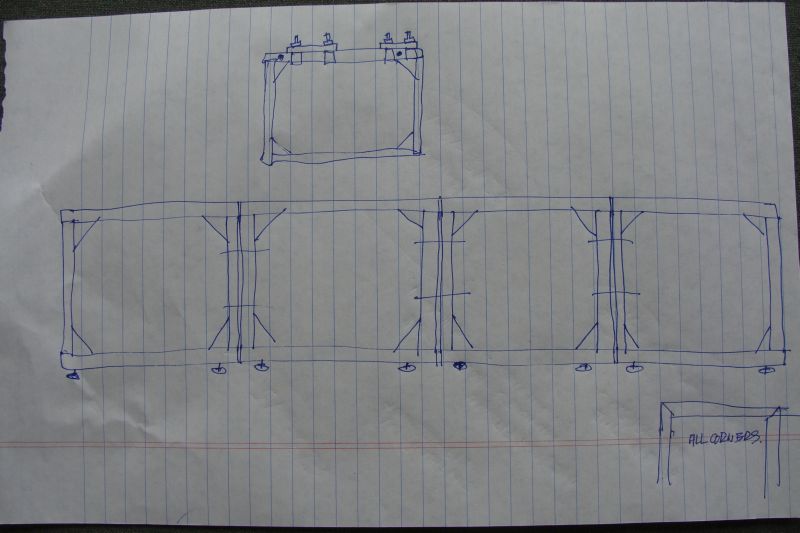
|
I am starting to spec out all the materials from various vendors and the cuts that will be required in construction of the racks. We are going to build one and fine tune it before we build the other two. Each rack will be two sections that bolt together for ease of transportation. They will be powder coated and have wood ties. They should look very nice. I anticipate these will consume much of our July, August and September shop time.
Happy and safe railroading everybody!

|
|
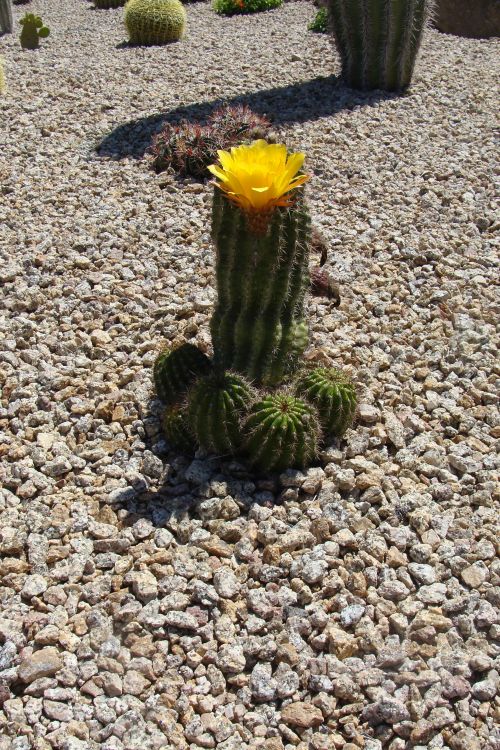
|
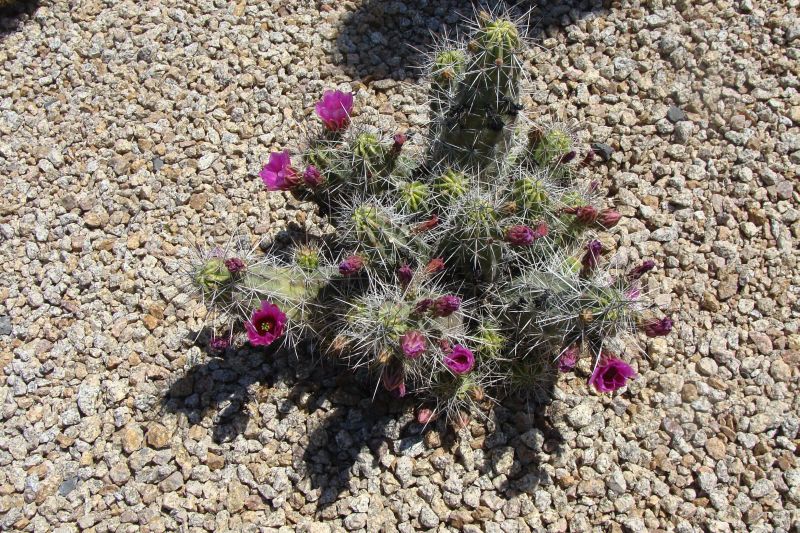
|

|
|
04/13/20
We now have twenty half axles of the correct length matched and ready to build five new E10 trucks once we finish facing and sleeving the castings for the bearing shoulders. There is still a great deal of work to do on that front, but I hope to have the trucks completed in May.
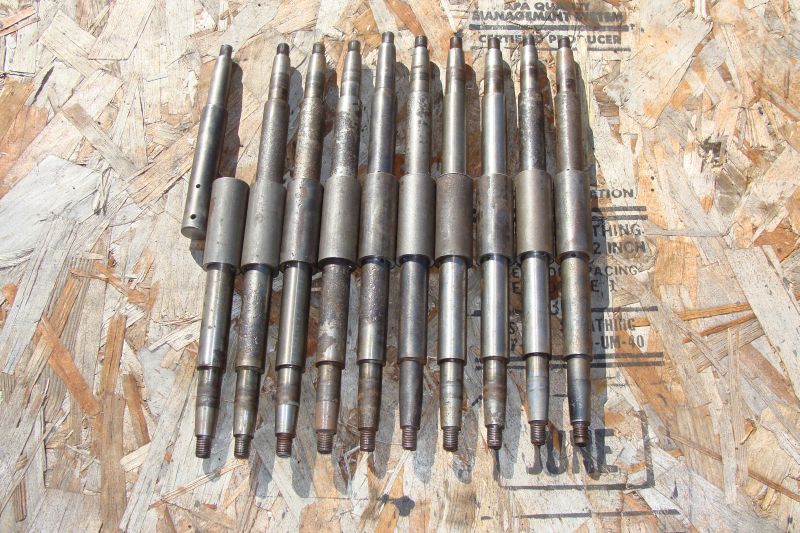
|
We completed rebuilding another three power truck axle assemblies this month. We have seven completed and three more to go. One of the axle assemblies we completed this month was a very early E10 Addison casting. The casting is an Addison PTD-1 casting and hand stamped next to the oil fill is PTD no. 13. There are numerous differences between it and later castings that I won’t bore you with, but the differences are very cool to me.
The work on facing and sleeving the E10 castings is underway, but far more involved than we originally envisioned.
We sent six arches out to be repaired and have five of them back. New feet were made from ½ inch thick steel plate. The original arches are cast iron and welding steel to cast iron is a little involved and not for the faint of heart. We sent these out for repair, but I watched one being repaired. The cast iron arch and replacement foot were placed in a jig and pre-heated to 500 degrees in a propane grille cranked up full blast. While still close to 500 degrees, they were welded together with special nickel rod. The assembly jig with arch was then placed in a metal trash can lined with several layers of thick ceiling insulation which allowed the arch to cool off gradually over more than three hours. The repairs came out pretty nice and we have additional arches to use in our restorations.
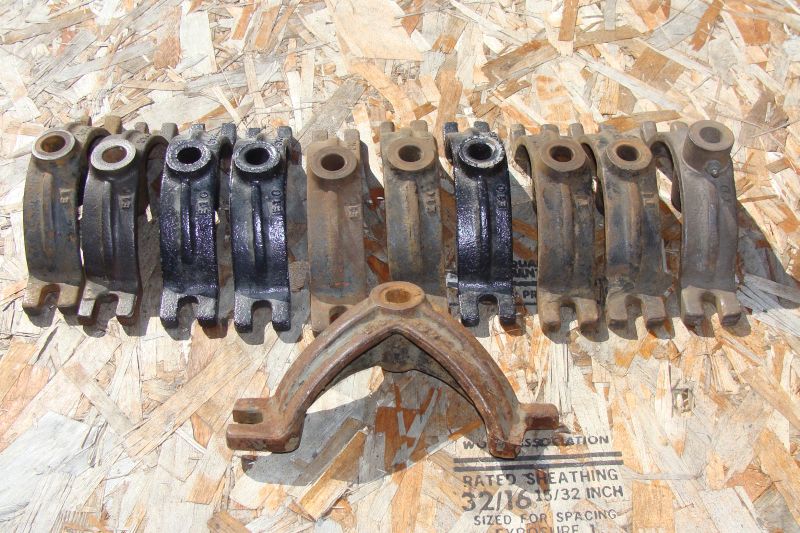
|
Dave and I started working on the electric components for the power truck safety bars. We sliced and trimmed 32 bakelite insulators from material that we had on hand. We used the table saw to slice the material at ¼ inch thickness; this was not as easy as that sounds as we had several issues, but eventually worked out a solution. Then we cut the insulators to 1 1/2 inch length and drilled the mounting hole and the sweep mounting hole. We now have insulators on 11 of the 14 power truck safety bar assemblies. The remaining pieces are cut and drilled and just await assembly.
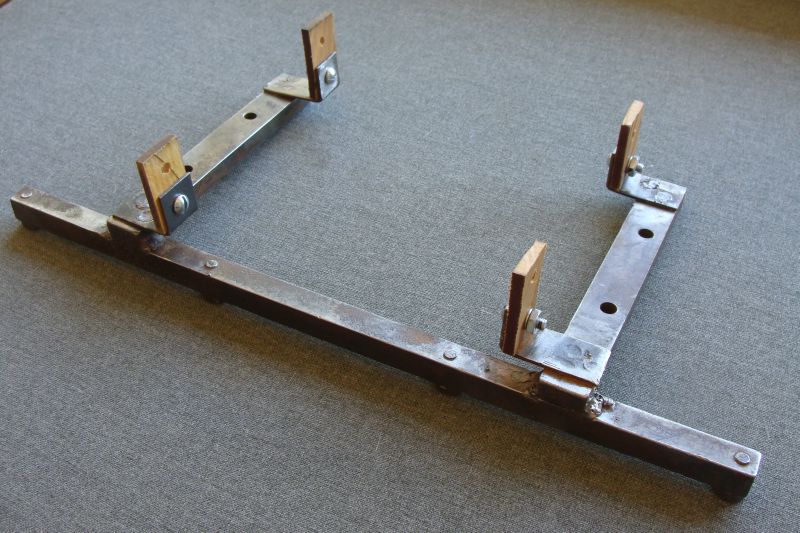
|
We also built 32 wheel sweeps from material that we acquired last summer in Pennsylvania. We need 16 additional wheel sweeps so we are currently sourcing additional period correct materials to complete this part of the project. It is interesting see the variation in wheel sweep designs. Our earliest E10 power truck is a 1936-38 version, the E10 was built by MTC through 1948 and many ran in department stores well into the 1990s. The electrical components changed over the years as availability and price became factors. We have three distinctly different styles of wheel sweeps and will have examples of the two older styles displayed in our collection.
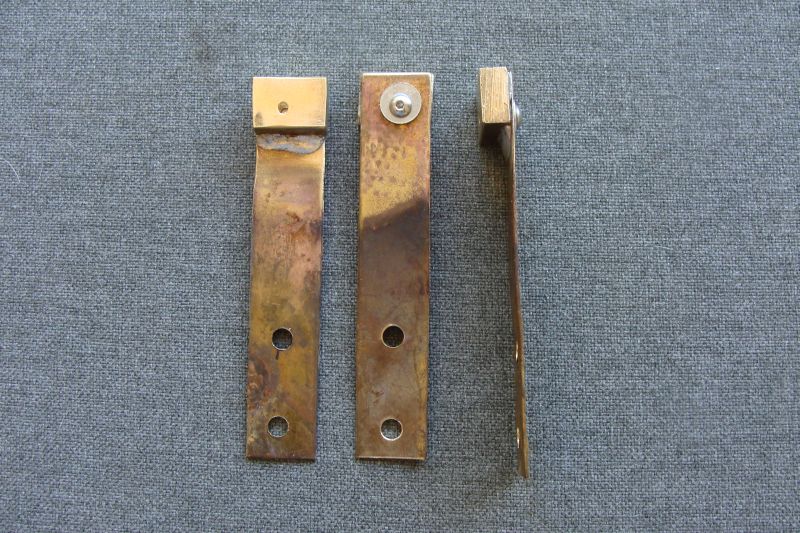
|
We have E10 ob car no. 20 which was an early Addison product and also have an E10 observation car made in Rensselaer in 1947 (which for various reasons I know is somewhere between ob. car no. 23 and 30). The differences are subtle, but significant. Our earlier version has less symmetrical window spacing, the location of the door is different, has a small window next to the door, the size, shape and spacing of the observation end windows are unique and the observation light is mounted much lower than on the later version. There are structural differences that I won’t bore you with. I just find the changes as this equipment evolved fascinating.
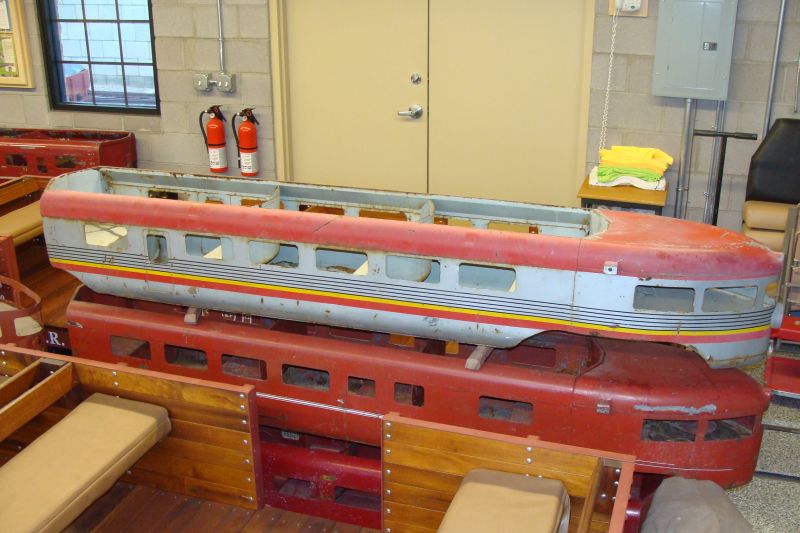
|
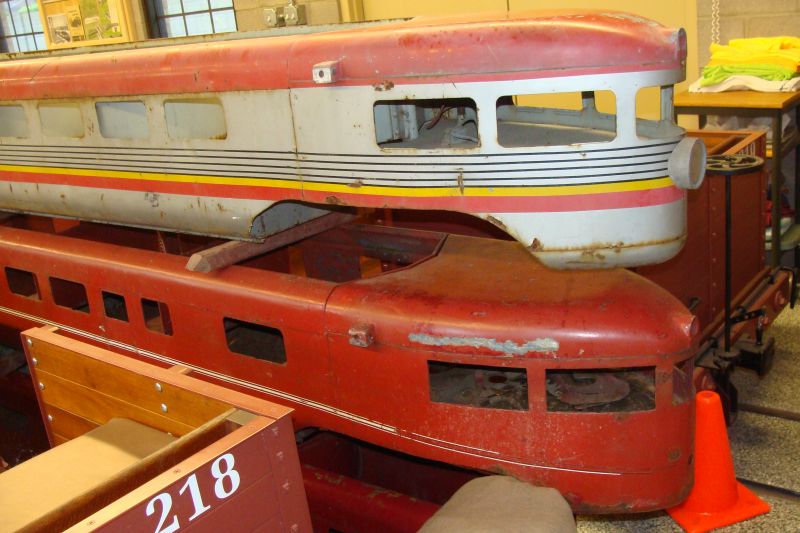
|
The E10 wasn’t called the E10 until 1946 when the G16 was created. After that the “Addision train” was renamed the G12 and the “Department store train” was renamed the E10. We have many of the earlier castings with the original PTD and TD numbers. The Rensselaer castings all carried the newer E10 casting numbers.
We located the inspection plates and gaskets for all of the power axle assemblies that we are rebuilding and with new hardware got the plates mounted.
A friend of mine in Massachusetts had Rensselaer G12 no. 495. The sheet metal had significant and advanced rust damage, but the trucks, car body pins, aluminum trim parts and many other internal parts were in excellent shape. Over the past two years, I have purchased pretty much everything but the sheet metal bodies and Wisconsin engine from him. This month, we acquired the builders plates from no. 495 and will proudly add the one from the observation car to our park train builders board later this month. Although we have MTC represented on the board, we don’t have a G12 builder’s plate mounted.
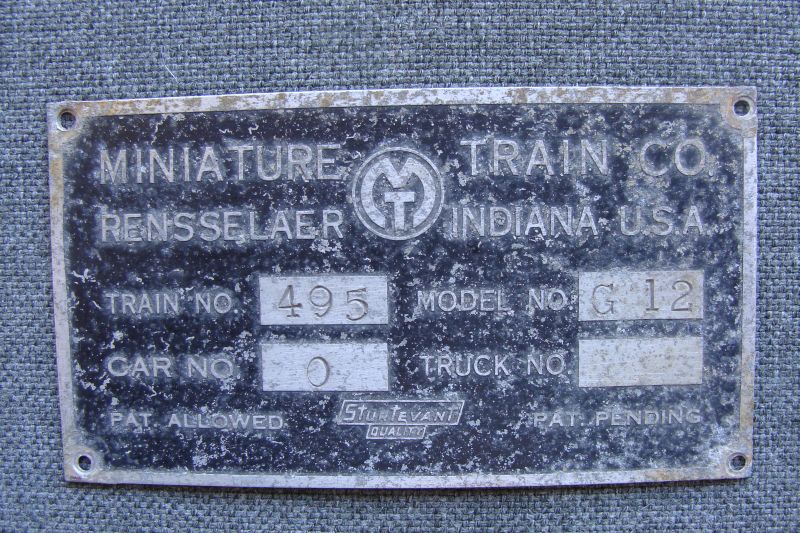
|
We received our 2020 t shirts this month. We went back to gray this year as Dave and I both have multiple dogs and the dog hair really shows up on the burgundy ones. We did add that 2020 is the 25th anniversary of the Arizona and Pacific; it is hard to believe that we have been at this that long.
|
|
In the March update, I neglected to mention that on February 29 I traveled out to the Chandler Railway Museum to celebrate Arizona Railroad Day. It was great weather and a great turnout of railroad fans of all ages and sizes. Every year there is newly acquired equipment and restoration projects are notably advanced.
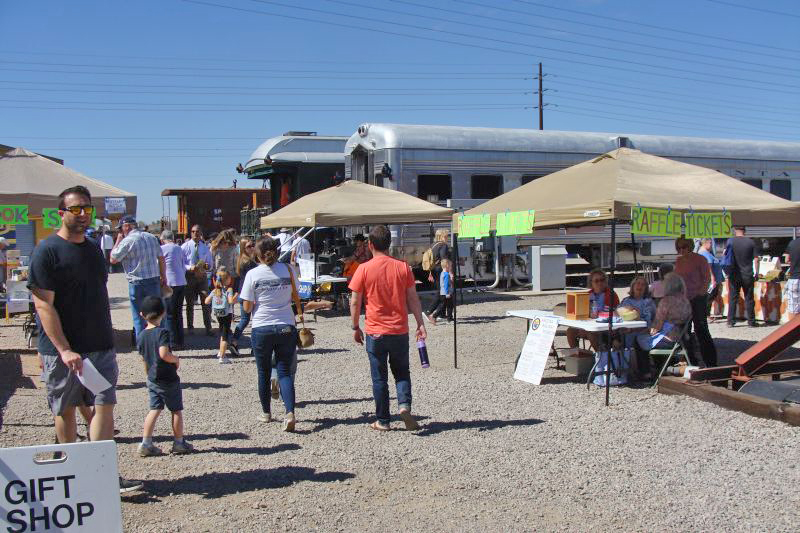
|
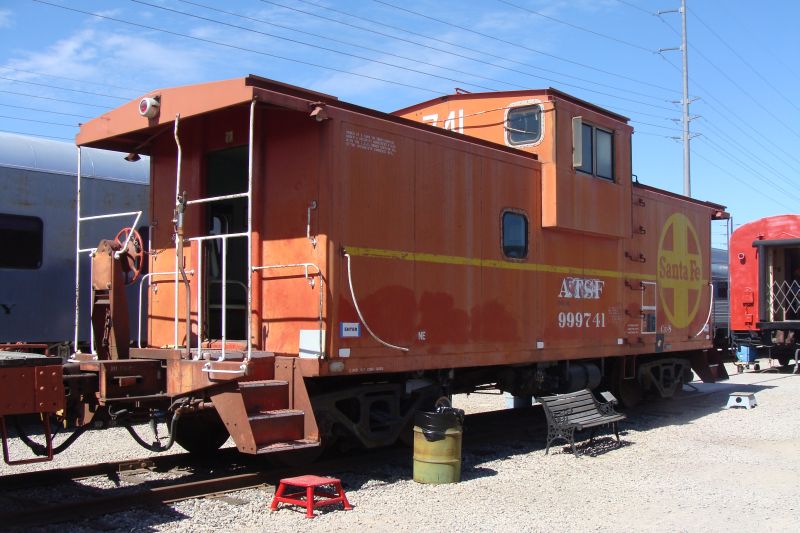
|
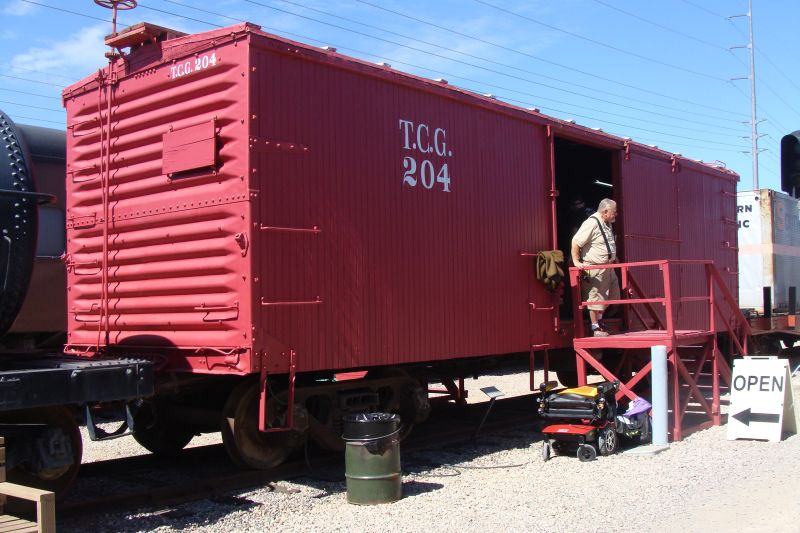
|
The Covid 19 situation has limited access to some of the machine shops and parts suppliers that I frequent and support out here, but we still managed to get a few things done this month. I am hopeful that we’ll get the last three E10 power truck axle assemblies rebuilt in April and hopefully complete sleeving the ten E10 trail truck axle assemblies in April as well.
Happy and safe railroading everybody!
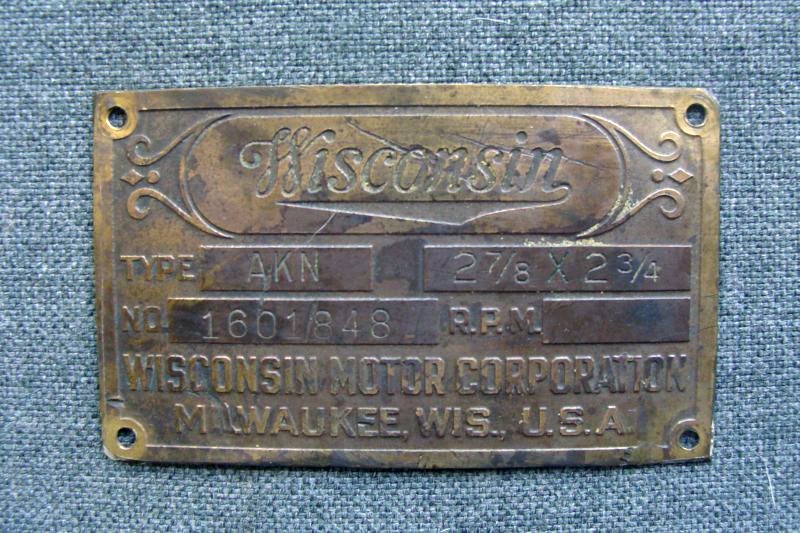
|
03/16/20
We finished the 6 non-electrical safety bars for our new trail trucks, finished welding on the four electrical safety bars we are building and finished welding repairs and replacing parts on ten other electrical power safety bars that needed work. Next the electrical safety bars will get primed and painted and then the electrical components will start being added.
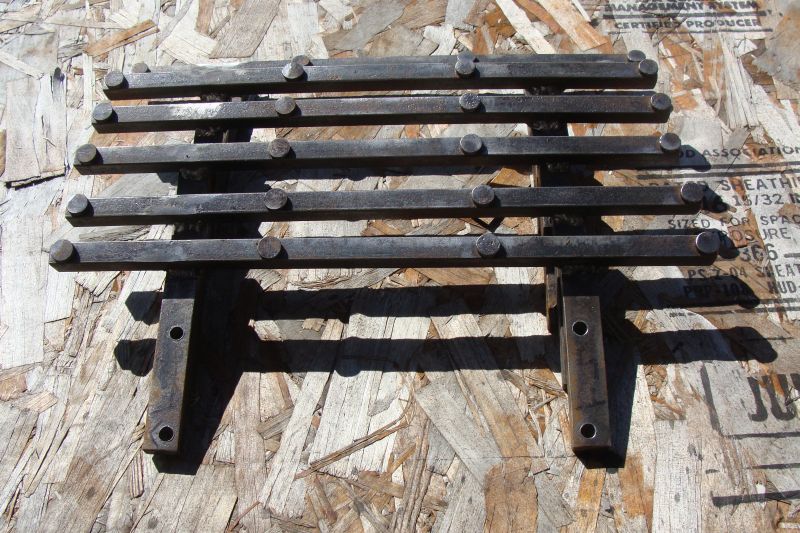
|
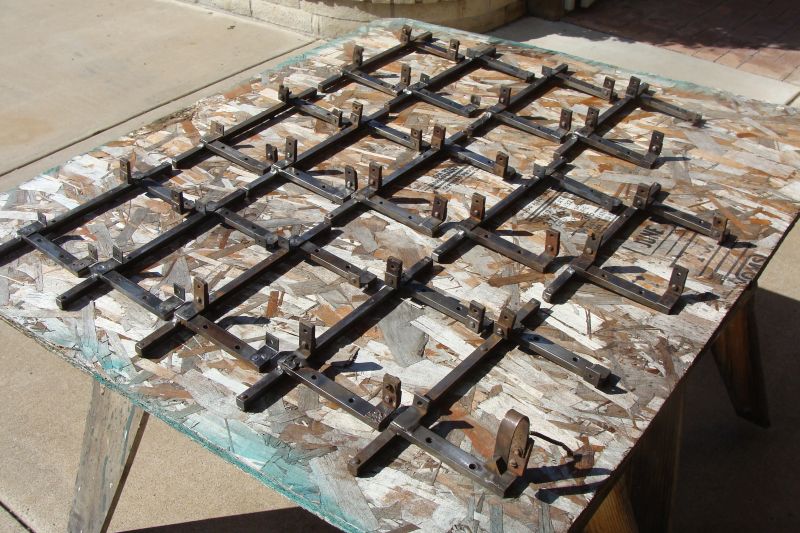
|
We will still need to make eight safety bar assemblies for G12 trucks and four more for E10 trucks. I have all the materials here, but that is a project that is a few weeks down the road.
We replaced bearings and seals in three more E10 axle assemblies so four are done which will allow us to assemble two complete power trucks. We still have six more axle assemblies to rebuild so that we can complete our five power trucks. Of the six that need rebuilt, we have two apart and both of those drive axles need a new Woodruff key slot cut. The original slots are all wallowed out. There is actually a great deal more involved on these power truck rebuilds than just bearings and seals. We are replacing as needed the bronze gear, worm gear and the worm shaft coupler. There were also a number of bolts sheared off in different castings. We got lucky and got them all out by welding a nut onto the remnants of the bolt and with some WD-40 ratcheted the nuts loose.
I acquired the torque hub “O” rings that we need for our ten E10 torque hubs.
We received several additional E10 U bolts that I had made which will allow us to join our E10 spring pad assemblies and leaf springs together as assemblies.
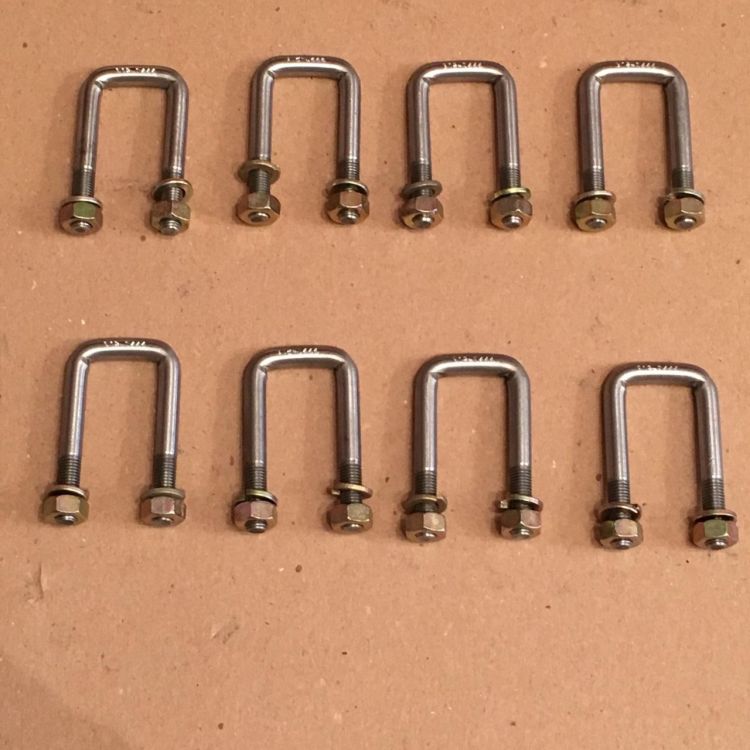
|
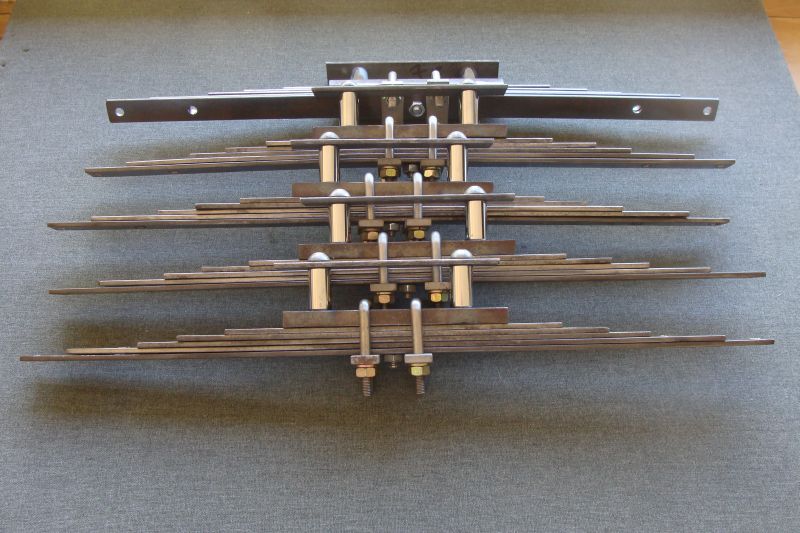
|
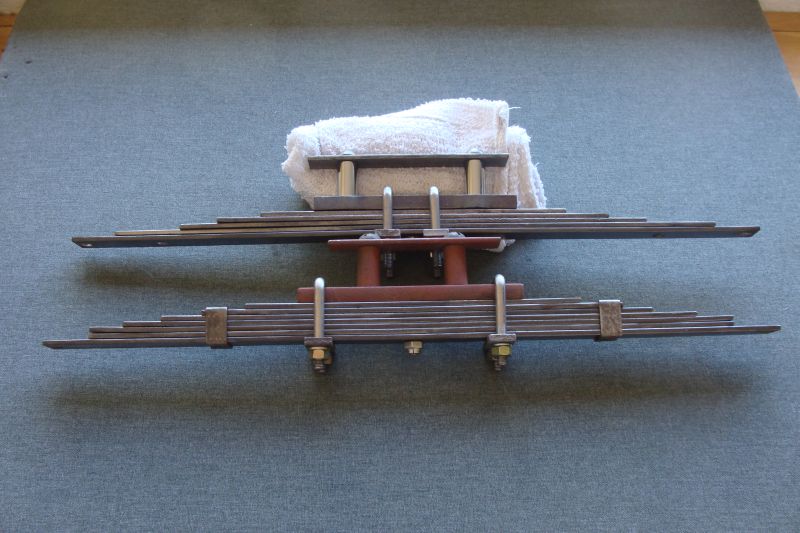
|
I had hoped to prime and paint the five rebuilt trail trucks this month, but frequently things take longer than I hope and I never got to them. I still need to clean up some wheels and get some wheels on at least two of the trail trucks.
I now have accumulated a combination of twenty additional E10 and G12 half axles that are in the machine shop to shorten the longer axles and match them for length and drill new cotter key holes in the ones that are shortened.
I originally thought that the E10 and G12 trail truck castings were exactly the same and just the machining was handled differently. They are the same on the exterior except for the machining, however, once you machine away the extra inch on each end of the G12 axle housing casting you lose the internal shoulder that supports the bearing. We are working to see if we can either sleeve the casting or machine and press fit a shoulder in from each end. Not having the castings ready for assembly with the other components will delay that project, but we have plenty of other things to work on.
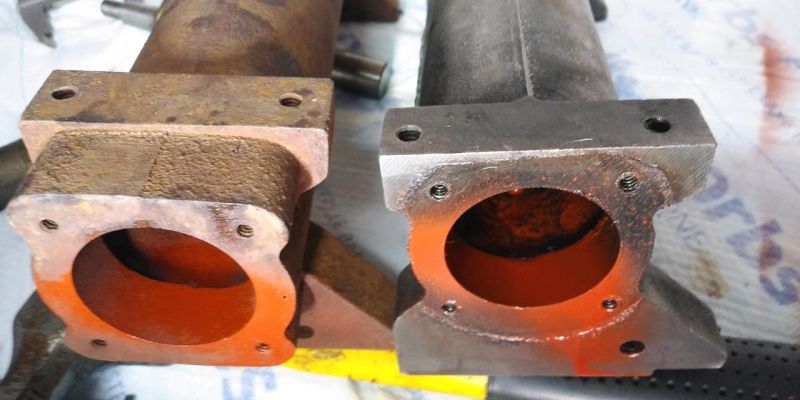
|
I acquired four additional arches this month and took three broken ones I had in reserve to a welding specialist to have new toes welded on one foot of each arch. I also took two E10 engine arches in for the same procedure. Once repaired, we will have the arches we need for our restoration projects.
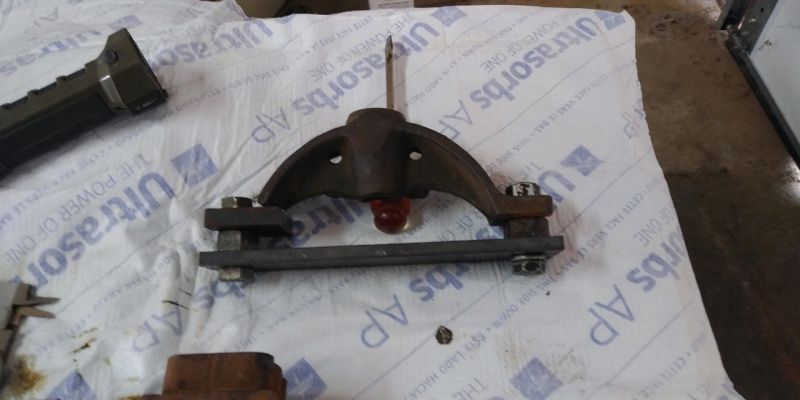
|
I acquired an additional set of decorative horns for the latest E10 locomotive that we acquired.
I shared a few weeks ago that we obtained 2 NOS red lexan lenses with retainer clips for the observation car drum heads in our PA parts purchase. The drum heads on the E10 and G12 are the same. Unfortunately, the two lenses were just tossed in a parts tray with other hardware and over the past 70 plus years they had been scratched pretty severely in places. One of our friends at the A & P, Marc Tiu, works locally for an international high tech company, but as a hobby specializes in detailing and polishing high end car restorations worked on buffing and polishing out the scratches for us. They look pretty good, only the remnants of the deepest scratches remain and we will be using the lenses in our restorations. It is cool for me to know they are original MTC parts.
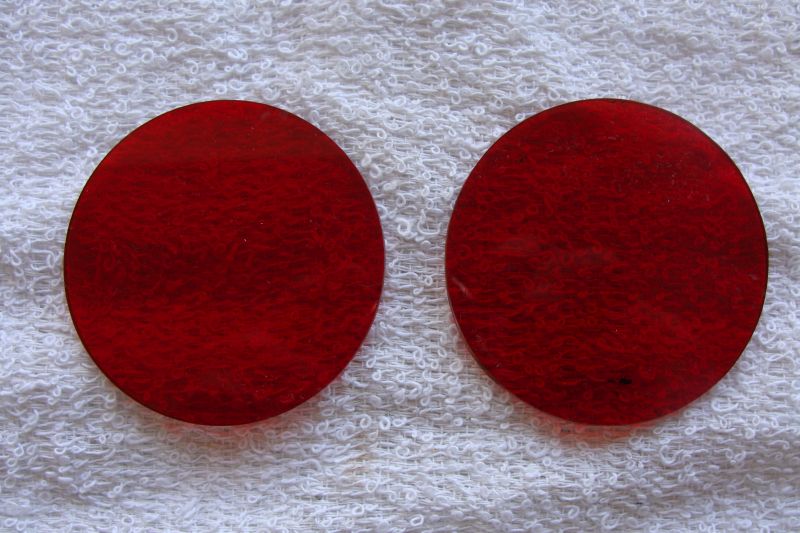
|
I just finalized a deal to bring another G12 parts cache this way in April of this year. It has many of the hard to find and unusual parts that are always needed when working on these older pieces of equipment. I am really excited about the parts in this grouping.
I started repainting one of our cast iron “Stop Look Listen” railroad signs near the right-of-way in the back yard. I added some new sprinklers two years ago and one sprays on the sign – I need to work through a solution so this doesn’t get wet three days a week, but the grass stays green. It is great to have original cast iron signs, but one of the advantages of reproduction aluminum signs is that they don’t have the surface rust issue. I still have a few more letters to detail in black and it will go back up next month.
The Miniature Train and Railroad Company was enjoying great success with its “department store” trains in 1938 (later named the E10). The Sturtevant research and development team was working on E series prototypes for a G10 model as well as developing G12 and E12 models. It is believed that a handful of both G10s and E12s were built pre-war before it was decided to focus on the E10 for inside use and develop the “Addison train” (later named the G12) for outdoor use. We have been lucky enough to acquire a prototype of the G10 power truck and a prototype of the E12 power truck recently for our MTC display and collection. They look a little odd today knowing that neither of those configurations ever caught on. They should be here soon and I’ll have photos next month.
The Thompson Family from Champaign, Illinois stopped in for a visit of the A & P this month. They own a S16 and a G16 that they run on their private estate. We discussed all things Allan Herschell and Miniature Train Company and a little bit of Mopar was worked into the conversation for good measure. It was a fun visit.
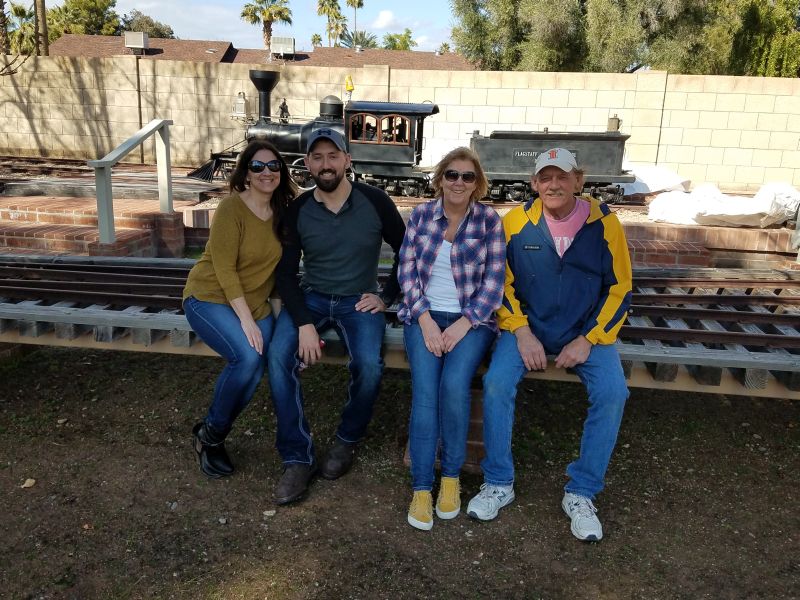
|
Happy and safe railroading everybody!
02/04/20
We sourced the parts and material and fabricated eight E10 spring pad assemblies. We acquired two extra of the assemblies with our Pennsylvania parts cache so we now have the ten assemblies we need for the five E10 coach trucks that we are building. The two original ones still need cleaned and some straightening. We built them the same way they were built originally and utilized ¾ inch bar stock from our PA cache in the newly fabricated ones and they match the original ones in every way.
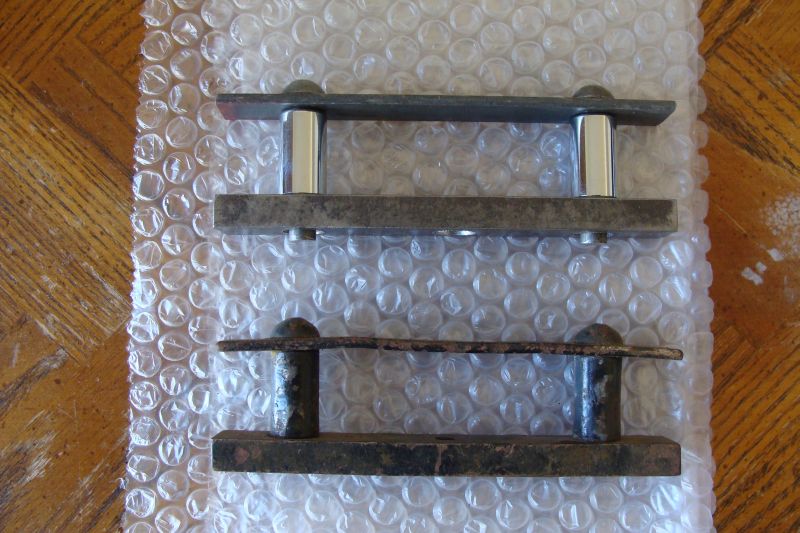
|
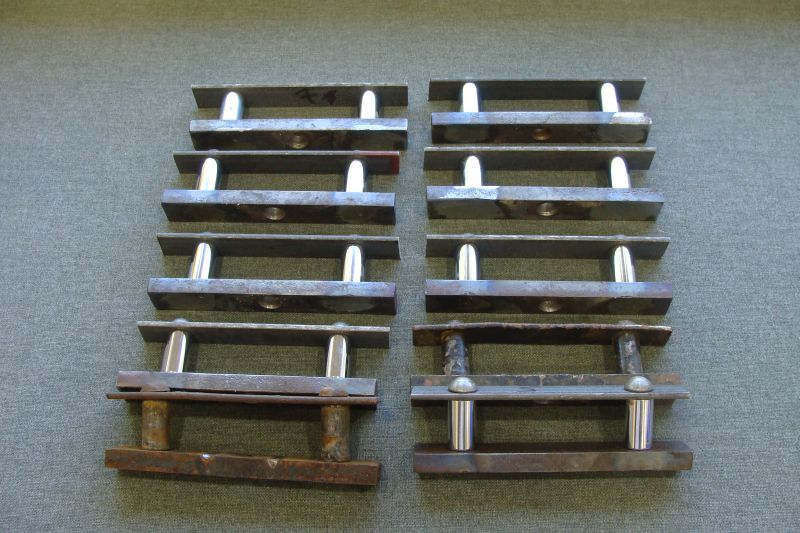
|
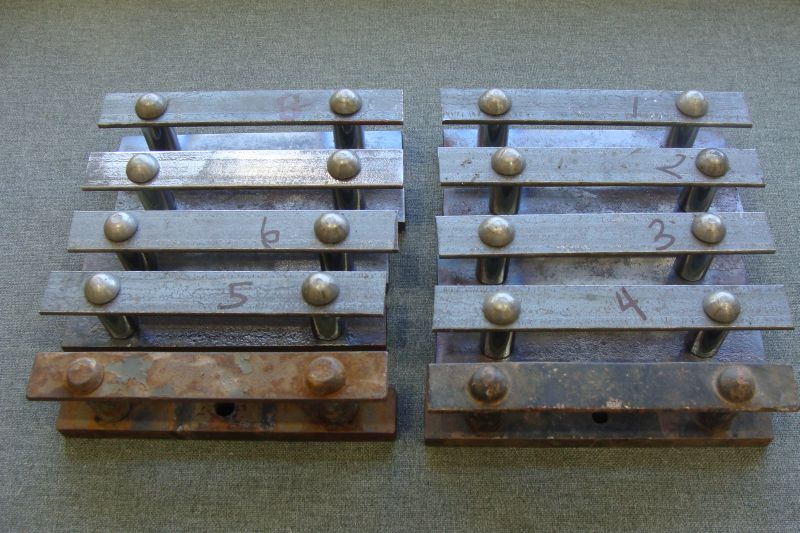
|
We went through each of our coach trucks and inspected the bearings and seals. Most of the bearings were rough, but there were a few that must have been replaced relatively recently and were very nice. We just repacked them and they are good for many more years of services. We replaced the rest of the bearings. All the seals were petrified and we replaced all of them. These trucks are now ready for wheels and paint.
|
|
I completed phase 2 of cleaning the 5 E10 power trucks this month. They all look reasonably clean. We have all of the power trucks disassembled to the point where we are ready to pull and replace the bearings and seals. We completely disassembled one of our E10 power trucks. We replaced the bearings and seals on one axle and also replaced the bearings and seals on the corresponding worm gear shaft. The second axle assembly is completely disassembled and ready to go back together. None of these assemblies came apart easily as everything is rusted or corroded in place and fought us at every opportunity. I was able to find all of the parts we will need to have five fully functional E10 power trucks. Many, but not all, of the power truck parts are shown in the photo as some are still being cleaned and others are stored out of view.
|
We have some of the very early E10 power truck castings from Addison, some of the second version of Addison castings and a couple of the Rensselaer castings. The older Addison castings do not have the inspection plate and oil fill cap. Instead oil was added through a fill plug on top of the casting and the worm gear shaft and axle had to be removed to check the wear on the bronze worm gear as well as the steel worm gear. Clearly, the inspection plate which is the same as on the Rensselaer G12 was a big advancement in terms of ease of maintenance.
|
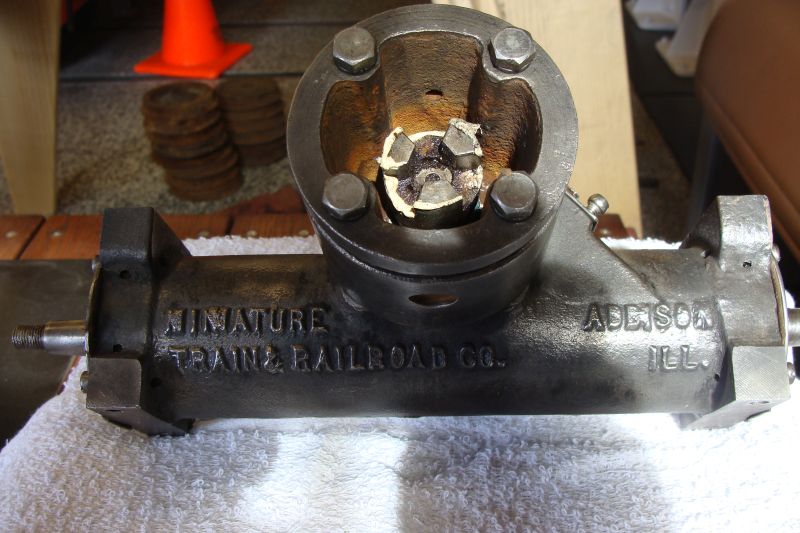
|
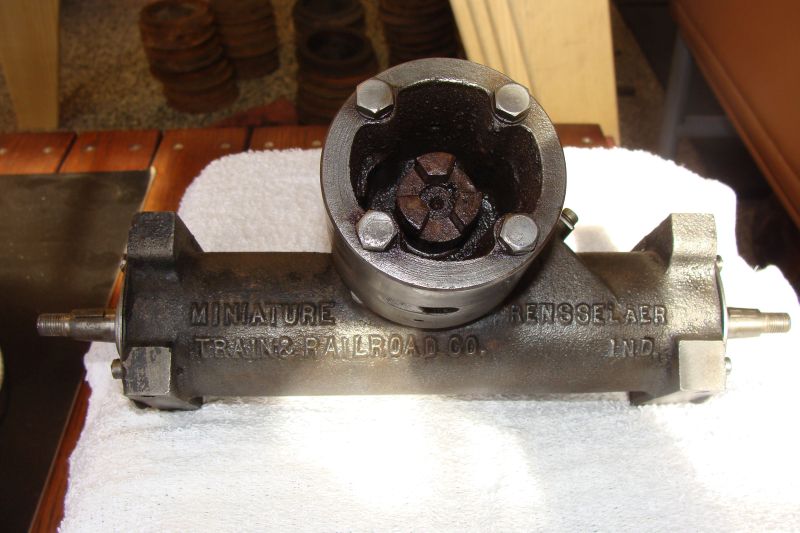
|
We started fabrication of four E10 safety bar (bumper) assemblies that will be used on the coach trucks under the back end of the two E10 observation cars. Unlike the G12 which passes power from the alternator through each car back to the observation car, the E10 observation car pulls its power directly from the rails via the rear truck of the observation car. The power is used for the rear drumhead light, side marker lights and the rear marker light. These safety bar/bumper assemblies match those of the power units with the wheel brushes and wiring. We are also building six E10 standard coach safety bars for additional E10 coach trucks that we are building. We have more E10 cars than we have trucks for currently.
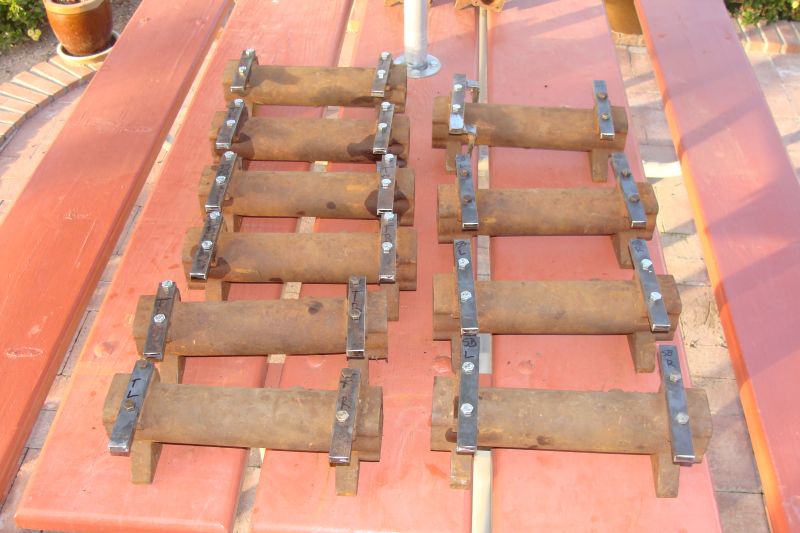
|
We acquired a case of unused MTC G12 bumpers this year and although there are similarities, the E10 bumpers are shorter by two inches and the flat head rivet pattern is different. We are modifying some G12 bumpers (cutting, welding, replacing T rivets) so that they will be exact duplicates of those of the E10. It isn’t rocket science, but has been very time consuming. Although we have made considerable progress, it will be February before this project is complete.
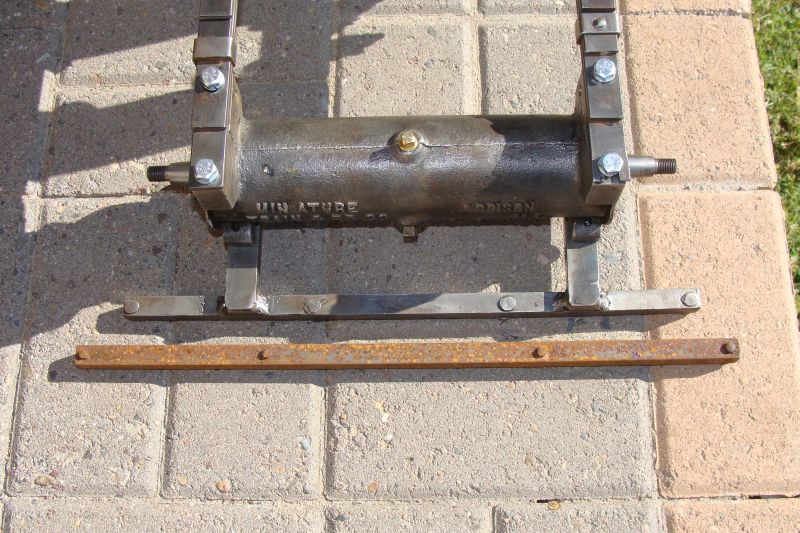
|
|
Three of the existing power unit bumper assemblies need significant metal repair and parts replacement. All of the power unit safety bars will need rebuilt with new electrical, but that is the next phase of the power truck rebuild.
Dave and I finally completed drilling the leafs for the 10 E10 spring assemblies this month. The spring steel in these leafs is brutally hard and none of my regular drill bits would even make a dimple. I acquired a few carbide tipped drill bits and it was still a challenge, but doable. I cleaned each leaf individually and they will be primed and painted next month. I have located and acquired the twelve additional Ubolts we need (20 total) to attach the leaf spring assemblies to the spring pad assemblies and they will be here early next month.
|
As the first 5 E10 coach trucks are ready for wheels and paint, cleaning and detailing wheels will be one of the February projects.
I cut and punched a dozen power truck inspection plate gaskets this month.

|
Once I have two of the E10 coach trucks and two of the power trucks completed, I will spend a day moving car bodies out onto our transfer table and will get some roster photographs to add to that section of our website. Obviously, there is sheet metal work, trim and paint work needed on the coaches plus electrical and mechanical work needed on the engines. The roster shots will give us a before and after opportunity for comparison.
I have started gathering and cleaning the axles that we will use in the 5 E10 trucks that we are building. Some are G12 axles that I have obtained and will be shortening by an inch while others are E10 axles and G12 axles acquired in Pennsylvania with our cache of parts last August. The gentleman I purchased them from had always stored them inside as he prized these parts as much as I do, but clearly one of the prior owners had them stored outside for a period of time and there was a fair amount of surface rust.
|
|
I also gathered the 10 trail truck castings that we will use with the axles. The castings were exactly the same for the E10 as they were for the G12, but the machining was different. An extra inch was machined off each end on the E10 version and as the leaf springs attach differently one of the mounting holes is in a different location. We will have these machined to size in either March or April.
I had shared previously that with our PA parts purchase last summer that we acquired a number of NOS Miniature Train Company E10 and G12 parts. Among those parts were a number of Rensselaer trail truck castings for G12s. Some of the castings were machined and some were still raw castings. I thought it was pretty cool to find the raw castings in the mix.
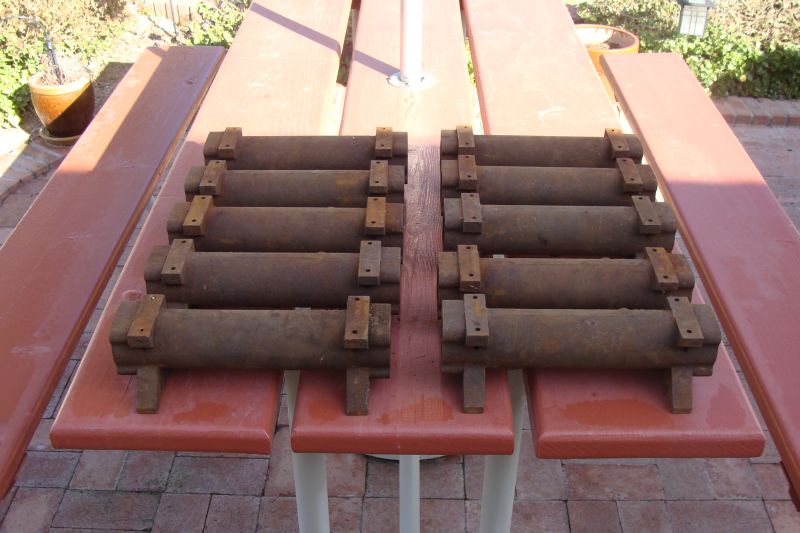
|
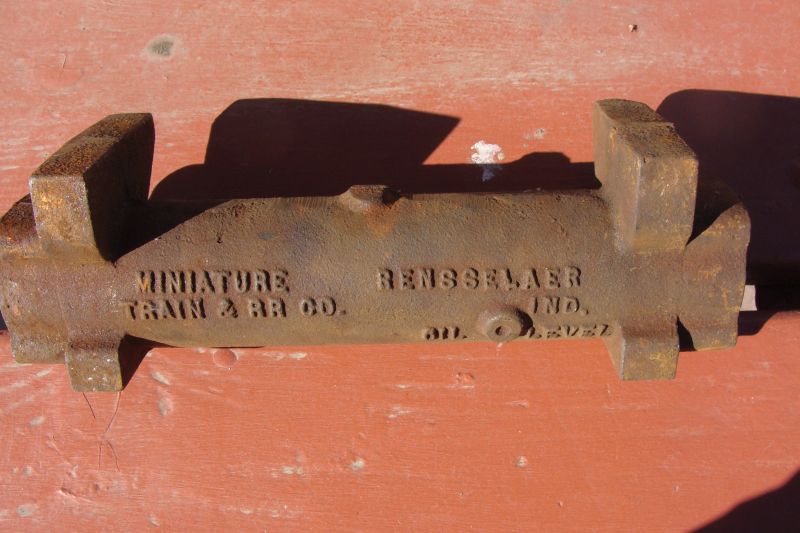
|
Happy and safe railroading everybody!
01/11/20
My friend and Wisconsin engine expert, Jerry Graves, came over this month and we got the Wisconsin AKN engine that will go in our G12 running. It had been sitting in storage for some time in Kansas and I was anxious to know if it would run. I spent quite a bit of time last month cleaning all the grease and grime off of it and matching hardware to all the brackets that no longer had any hardware. We changed the oil which was black and filthy and changed the spark plug.
We had to get a little creative with our gravity feed gas can for the fuel supply and used jumper cables from a battery and a short jumper to
get her to turn over. The second try and she started right up and ran well. Once we knew she would run we replaced one of the fluid clutches
which was wobbling all over the place. Here's a
Video of the Wisconsin Engine for the G12 Running
We are still missing some of the throttle and brake linkage, in particular the linkage from the sliding rod brackets on both the brake and throttle to the carburetor on the throttle side and to the motor bracket on the brake side. We are pretty fortunate in that we have the rest of the linkage that I have mixed and matched from several sources over the years. We still need the springs that keep the brake shoes positioned properly and secure in the engine mounting pan, but I am not quite sure what size springs these are supposed to be at this point.
It turns out that our Wisconsin AKN engine is actually a BKN engine. The exhaust port exits the head at 45 degrees instead of 90 degrees as with the AKN. Once you know that obvious distinction, telling the difference is pretty easy. These engines replaced the AKN in the G12 in the mid-fifties. Once I track down the springs and remaining linkage, I will repaint the motor, clean up the linkage and mount them in the really nice mounting pan.
The five E10 coach trucks have been disassembled and cleaned. We will start replacing the bearings and seals in January.
I have the five E10 power trucks disassembled and the first phase of degreasing completed. There is still a great deal to be done. Almost all of the power truck frames had at least one of the mounting tabs sheared from the foot. Dave and I spent quite a bit of time, removing good feet and bushings from frames with one good foot and matching them to another in similar condition. With all the mixing and matching, we were able to assemble 12 complete frames. Currently we only need eight, but I have plans for more in the future.
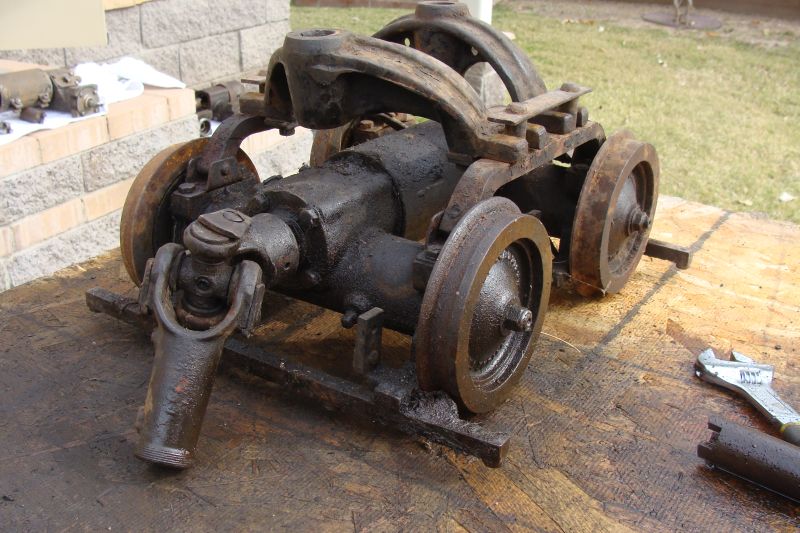
|
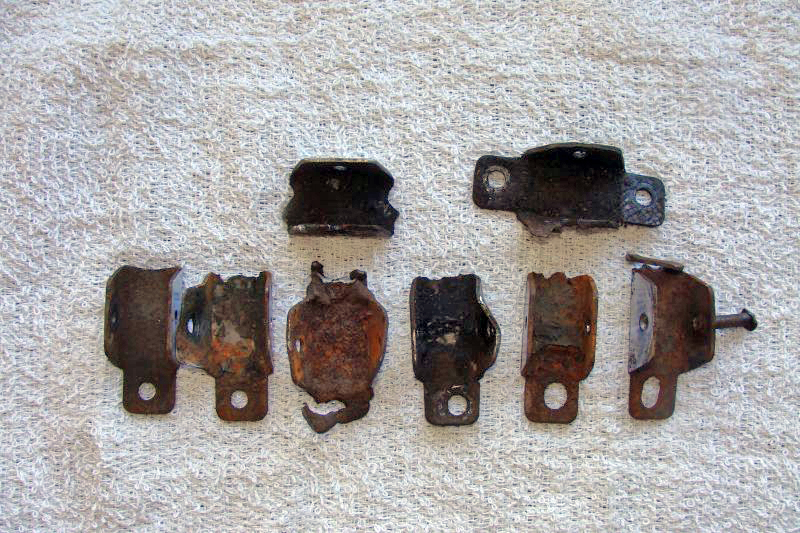
|
These are the second version of the E10 power truck frame assemblies. We are rebuilding four power trucks with this configuration and one for display with the original E10 frame which had zero flex and was very unforgiving if the track wasn’t perfect. The zero flex frames were the frames used on the original E10, G10 and pre-war G12 models. All were upgraded over time.
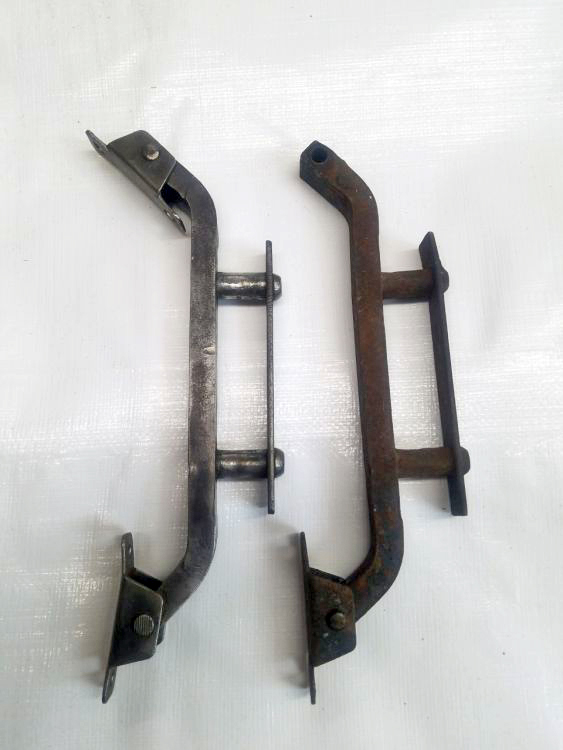
|
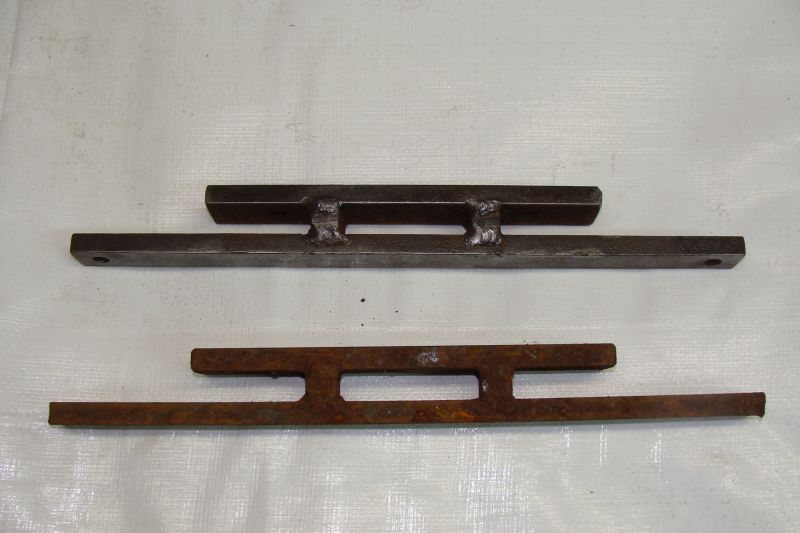
|
I degreased and cleaned the six arches we need for the four E10 power trucks. We have started cleaning and rebuilding the ten power truck safety bar (bumper) assemblies. We need to fabricate four E10 safety bar assemblies that will be used on the coach trucks under the back end of the two E10 observation cars as unlike the G12 which passes power from the alternator through each car back to the observation car, the E10 ob car pulls its power directly from the rails via the rear truck of the observation car. The power is used for the rear drum head light, side marker lights and the rear marker light. These safety bar assemblies match those of the power units. We are also building ten E10 standard coach safety bars as we have more E10 cars than we have trucks for currently.
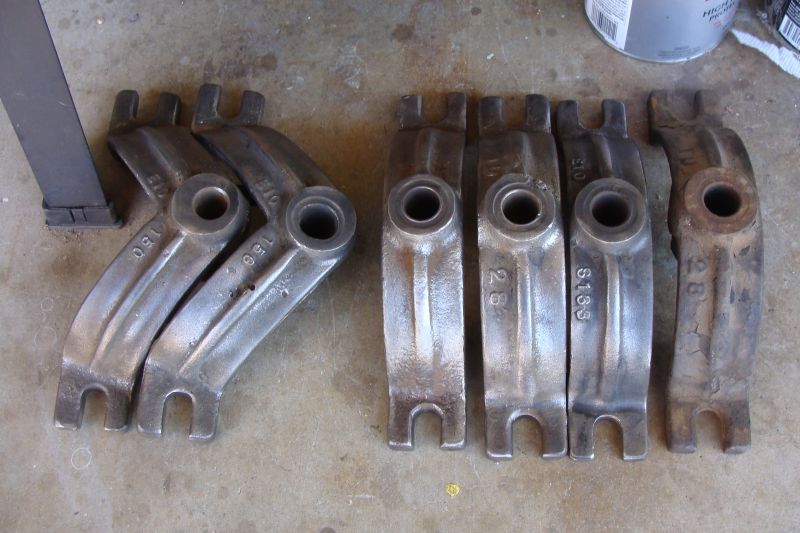
|
We acquired a case of unused MTC G12 safety bars this year and although there are similarities, the E10 safety bars are shorter by two inches and the flat head rivet pattern is different. We are modifying some G12 safety bars (cutting, welding, replacing T rivets) so that they will be exact duplicates of those of the E10. It isn’t rocket science, but will be a little time consuming.

|
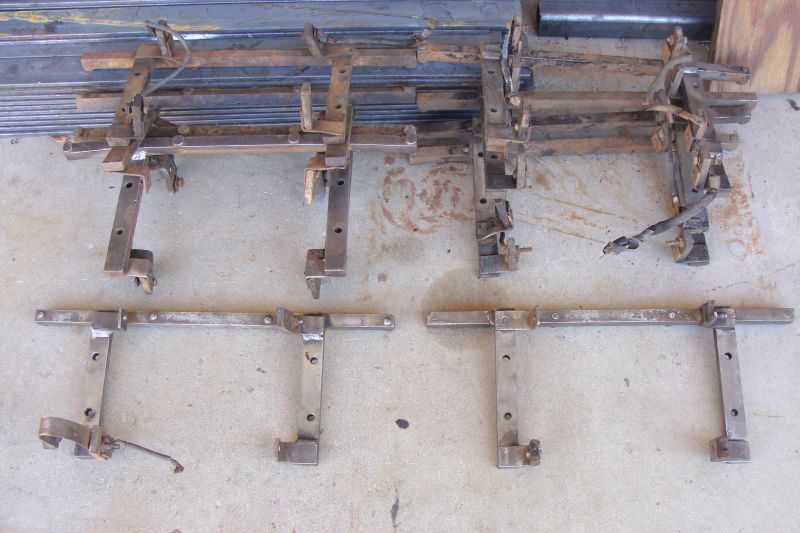
|
We have also acquired the rivets, spacers, bottom and top flat bar to build ten E10 spring pad assemblies. There will still be quite a bit of drilling and fitting, but these will be a January project.
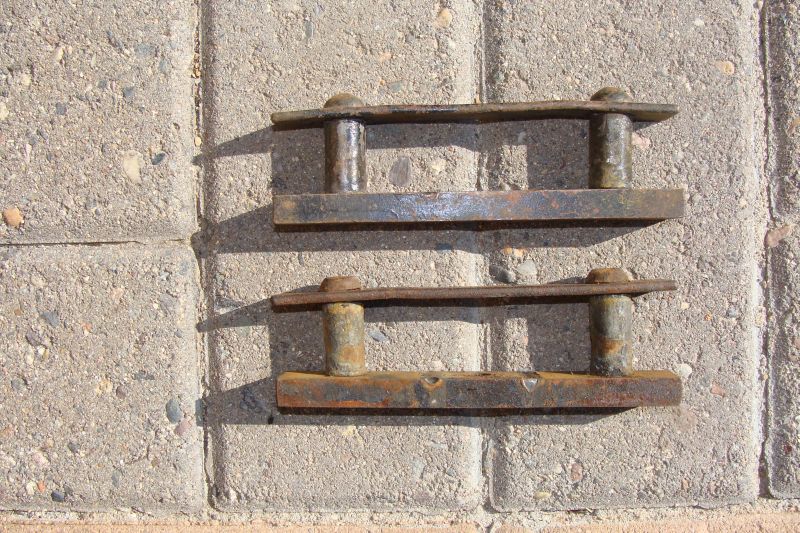
|
I spent a few hours cutting and punching out 104 gaskets for the E10 and G12 axle assemblies. I know some guys send the specs to a vendor and have these punched out, but this is more of a low tech operation than that out here.
|
We will start replacing bearings and seals in January and hope to make a big dent in the backlog for that operation.
We will be fabricating a G12 battery tray either in January or February. It seems like things always take longer than I hope so think February.
We added several AH catalogs, early press photos of S16s and other park train photos to our collection this month. We also added several catalogs of other park train and carnival equipment manufacturers to the collection. We also added three MTC torque wrenches (one was almost mint) to the collection. The challenge remains of how to display these in such a way to do them justice. I will be redesigning our display at some point.
As has become my tradition, I made it out to the Maricopa Live Steamers track at Adobe Mountain for its Holiday Lights display. For years, they have operated the trains for free and have a donation jar that they point out after the ride. I have stood and watched half a dozen trains unload with only a couple folks actually making a donation. This year, a ticket was required to board the train. The kids were free, but they asked for “$5.00 or whatever you can afford” for the adults. No one left without a ticket, but it was a dramatically different approach and I heard a number of complaints. The train rides and lights were still impressive and the ride was worth the wait.
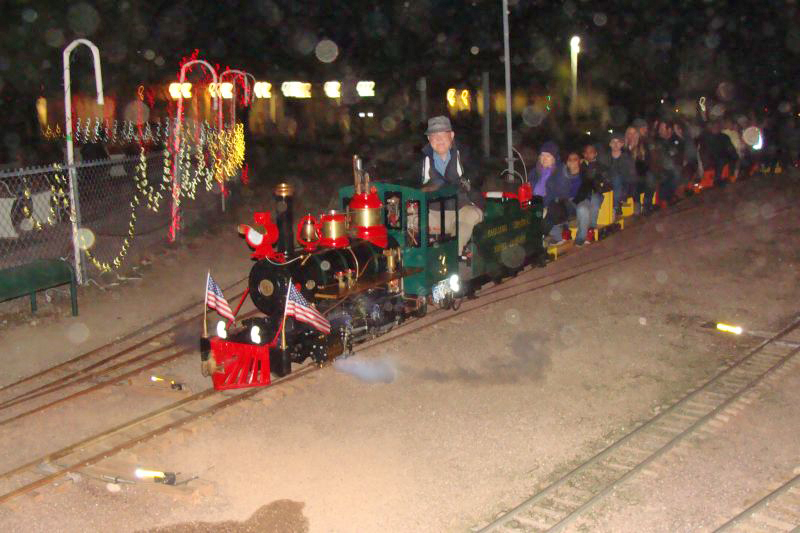
|
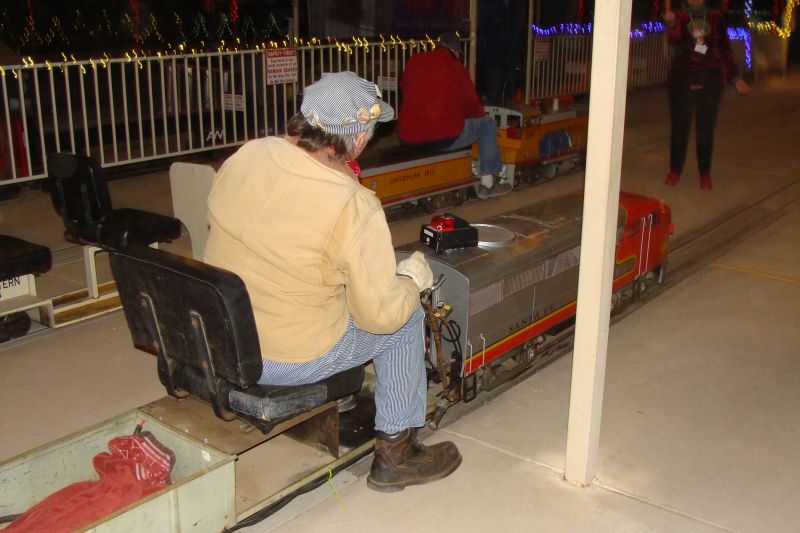
|
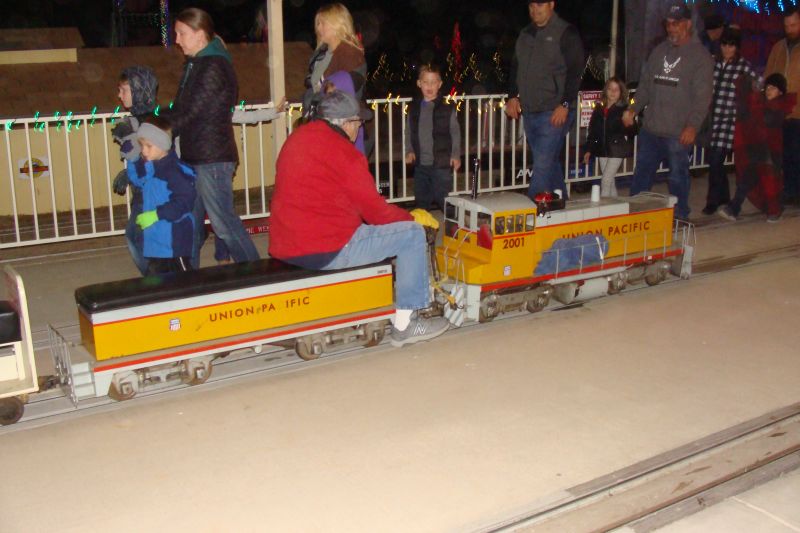
|
|
I also made it out to McCormick – Stillman Railroad Park in Scottsdale for its Holiday Lights display. I have been attending this event for years and was never rained on until this year. It started as a sprinkle and turned into a steady rain. It was a 2 hour and 20 minute wait in the line to ride the train. It should be pointed out that this ride is $5.00 and is not a donation; fast pass tickets were $15.00. The Scottsdale clientele is a very different socioeconomic group from the single moms hoping to get their children a train ride at Adobe Mountain. Next year, I will take a smaller group and go for the fast pass. We were wet, cold and tired by the time we boarded the train, but theride and lights were as impressive as ever. By the time we finished our ride on the Paradise and Pacific, the model displays and Scottsdale Live Steamers had shut down for the night. That will give me an excuse to head over there in a few weeks to check those groups out and enjoy their hard work.
|
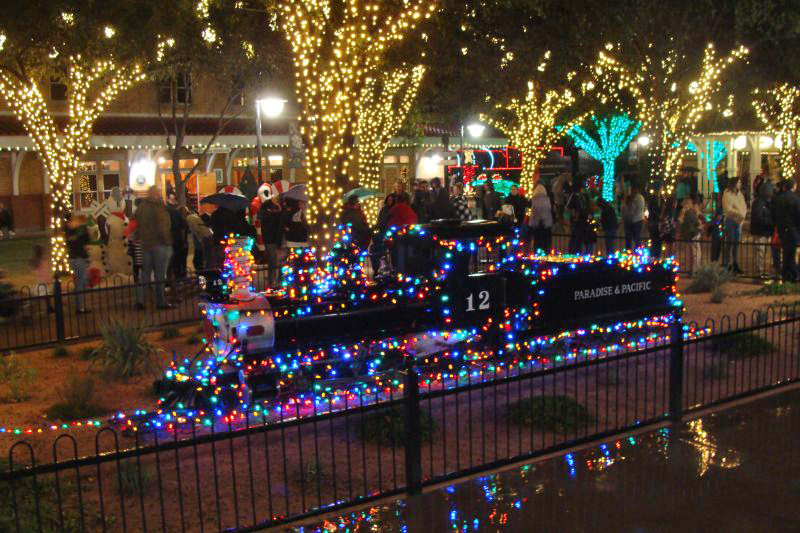
|
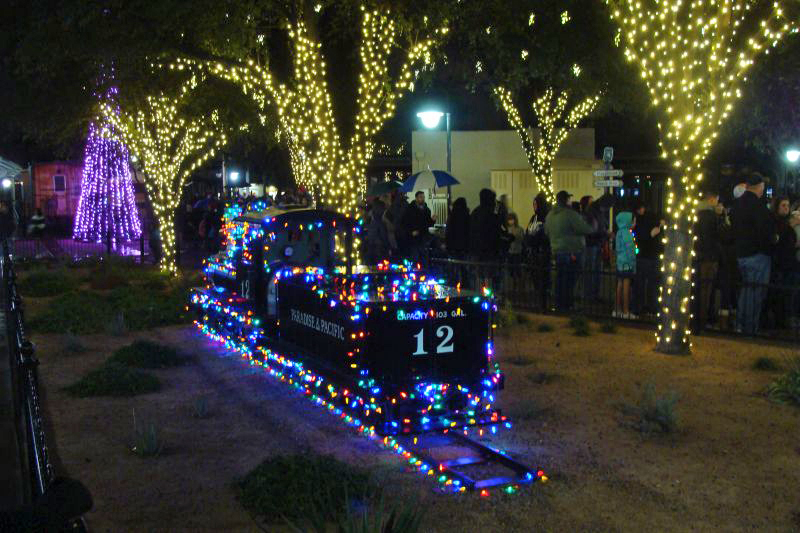
|

|
Happy New Year and happy and safe railroading everybody!
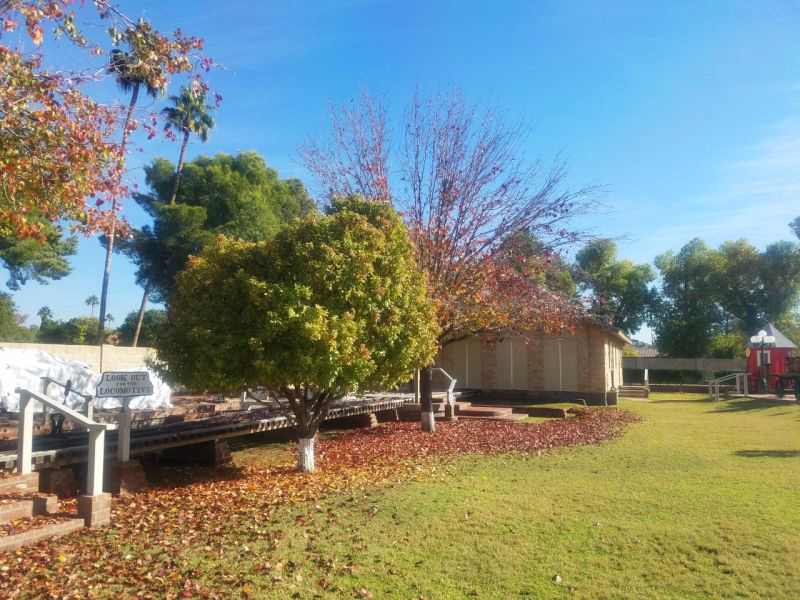
|
12/21/19
Our AKN engine finally arrived this month. It was pretty greasy, but is here and I am happy to have it after a long search and then a long wait… I spent almost five hours with degreaser, brushes and rags and got most of the grease and grime off of her. I touched up the paint on the starter and some brackets. There are some odds and ends that we will have to come up with in terms of hardware, clips, engine wiring, brake linkage etc. We also did not obtain the motor mounting pan with the purchase, but I have a rough extra one that we will place in service for now and I recently obtained a really nice one that will be used in the final assembly.
|
|
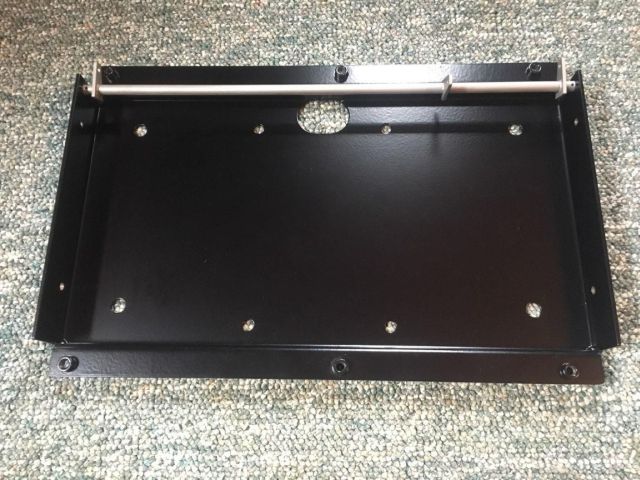
|
The front fluid clutch is noisy even when turning the motor by hand. I will need to look into that a bit further. I have two G12 fluid clutches on the parts shelf and will grab one of them if this one is problematic. Hopefully, by the end of the year we can determine if she runs and if there are any major mechanical issues. After we determine if she will run and I locate the remaining brake linkage springs etc. everything will get touch-up painted, lubricated and reassembled. We are missing the old style Wisconsin badge so I am on the lookout for one of them. We still have lots of work to do on it, but we are much closer than we were a few months ago.
Our G12 observation car that we brought back from Pennsylvania is missing the top aluminum casting. We obtained a rough casting with our parts cache purchase. The casting is very nice, but is about 3/8 inch shorter than needed for a really nice fit. I attributed the difference to shrinkage of a new one cast from an existing casting rather than a pattern. I had the chance to obtain the one from G12 no. 495 which is a Rensselaer product. I thought it would fit perfectly, but I was wrong. The rough casting and the casting from G12 no. 495 are exactly the same size. We will use the no. 495 casting and weld in some pieces to make it fit just right.
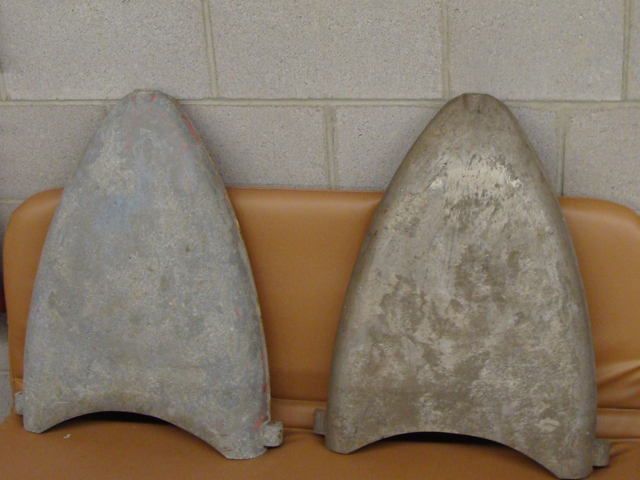
|
We got quite a bit of work done on our five E10 coach trucks this month. They were really oily and grimy. I am certain it has been many, many years since they were cleaned and serviced. I spent several hours disassembling, degreasing, wire brushing and sanding all of the external surfaces. I extracted broken bolts, replaced bad, mismatched or incorrect nuts and bolts and replaced a couple of damaged leafs in the springs. Two of the trucks are older than the others and have the very first E10 design spring pad assembly and Ubolt mounting plates. The E10, just like the G12 and G16, underwent numerous changes and updates over its years of production; some of the changes are not that noticeable except to a few of us extreme MTC enthusiasts.
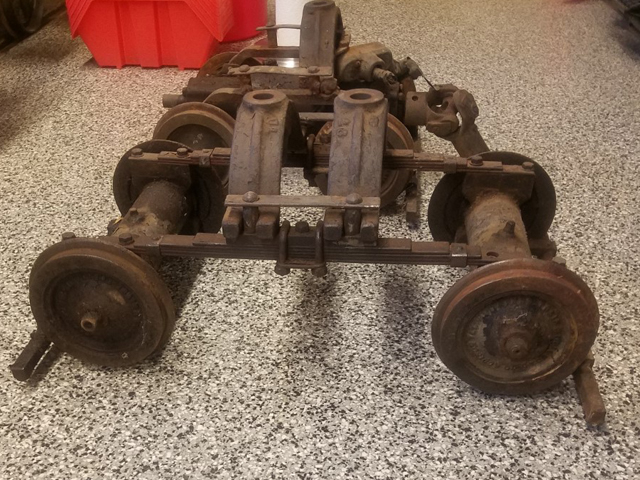
|
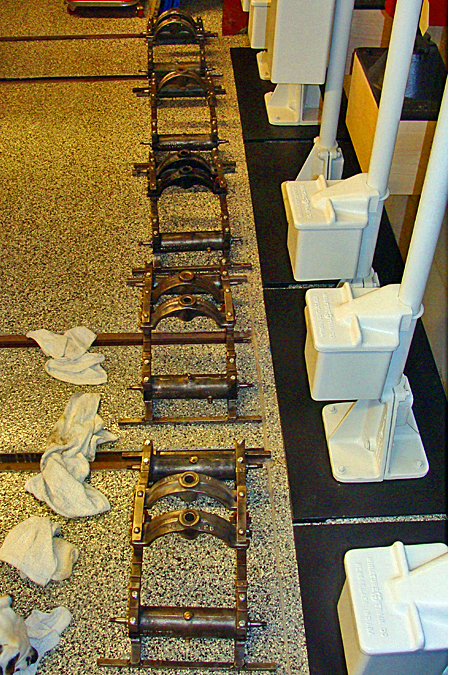
|
The five E10 coach trucks are ready to have the bearings and seals replaced. I have five E10 power trucks, but all are missing various pieces. We received many extra pieces with our PA acquisitions and I am still working to match all of the parts with the parts missing from the various trucks and I’m not quite done with that process yet. I am not yet sure if we have the parts to rebuild all five or just four for now. I am working on degreasing and cleaning two of the five power trucks. They are every bit as dirty or dirtier than the coach trucks had been... I hope to have the five E10 coach trucks completely cleaned, rebuilt, primed and repainted in January and the E10 power trucks rebuilt (mechanically), primed and repainted in February – the electrical part of the rebuild will come later.
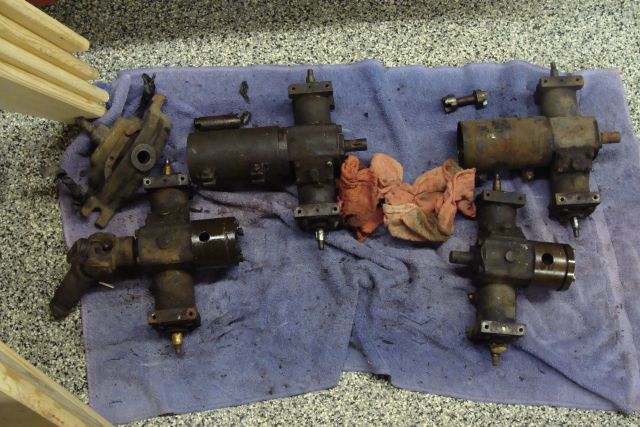
|
I ordered all the bearings and seals for the thirteen trucks (I also have 2 G12 trucks to rebuild and will be building one beyond that) we are currently working on and they should be here next week. I will order the bearings and seals for the additional 5 E10 trucks we are going to build in the spring when I am closer to needing them
I hope to place a couple of sections of either E10 rail or G12 rail on the S16 transfer table early in 2020 and get some good pre-restoration (sheet metal and electrical) roster shots of each of the E10 cars and locomotives as well as the G12 cars and locomotives that are now part of the Arizona and Pacific Railroad. I already have enough G12 trucks restored for roster shots of the G12 equipment.
Our most recent E10 acquisition, No. 26, ran for many years at the Titche’s Department store in downtown Dallas, Texas and was named Titche’s Christmas Choo Choo. It is one of the E10 trains of which we have a promotional postcard. We are excited to have both the train and the post card in our MTC collection. The plans at this point are to restore her in that long-time paint scheme and replace the signs of her as the Titche’s Christmas Choo Choo.
|
|
|
Just as with our G16 equipment, our E10 and G12 equipment is not matched sets. All of them are orphans that we have located in different locations at different times and they have found their way here and into our MTC collection.
The E10s were originally all owned by the Miniature Train and Railroad Company and not for sale; they were available for lease only. In 1956 they were all sold to the Allan Herschell Company. In 1964, they were all acquired by Bob Beach and in 1972 he sold them as a lot to KenPen Amusements of Pittsburgh. KenPen Amusements sold several sets to the department stores that had been leasing them for years. The remaining units got co-mingled and were stored in several trailers before most were sold in the early eighties to another large ride dealer. From there, they were sold in several transactions and scattered across the country.
Of our three E10s (nos. 20, 24 and 26), we acquired one in Kansas, one in Pennsylvania and one in Indiana. One is an Addison product and two are early Rensselaer products. On the early E10s, serial numbers were only placed on the locomotives and the observation cars as they were the only cars with both mechanical and electrical components and the vins assisted the MT & RR Co. with keeping its maintenance records. We found locomotive no. 20 in Kansas and found the matching observation car (no. 20) in Pennsylvania.
We have G12 locomotive bodies from Florida and Pennsylvania with power trucks obtained in Minnesota, the motor came from a G12 in central Kansas and many parts came from Pennsylvania (3 different sources) and numerous parts were acquired in Minnesota, New York and Massachusetts. Our other G12 car bodies, trucks and trim parts have also come from a variety of locations across the country. For many reasons that I won’t bore everyone with, I believe both the G12 locomotive and the observation car that we brought back from PA are both post-war Addison units. The tags were removed at some point so there is no way to know what serial numbers they may have been.
I have several people to thank for assisting me this month in locating missing parts for these E10 and G12 projects. Richard Nairn, Gerry Warner, Ed Janulionis and Ron Witt were instrumental this month in providing parts which allowed me to cross a few more parts off of the parts needed whiteboard. Thank you.
Happy and safe railroading everybody!
Older project update pages can be accessed (by year) by clicking the links below: