Arizona and Pacific Railroad Construction Articles
Featuring
The Turntable
Arizona and Pacific Railroad Turntable Construction
The Arizona and Pacific Railroad was much shorter in those days, but December 15, 2012 will be the ten year anniversary
of our first run over the A & P. Over the course of this year, we will add a number of articles on the construction of
the turntable, water tank, trestle No. 5, trestle No. 1, transfer table, the very first construction on the Arizona and
Pacific and a few other topics. Some of these projects date back to the mid-1990s long before we had monthly updates –
or even the website. I hope you enjoy reading about how this all got started.
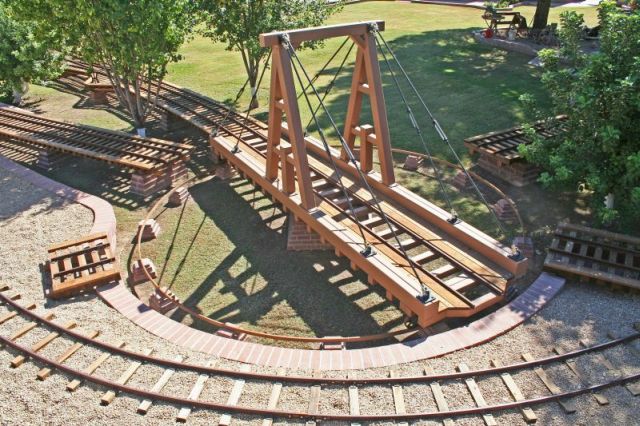
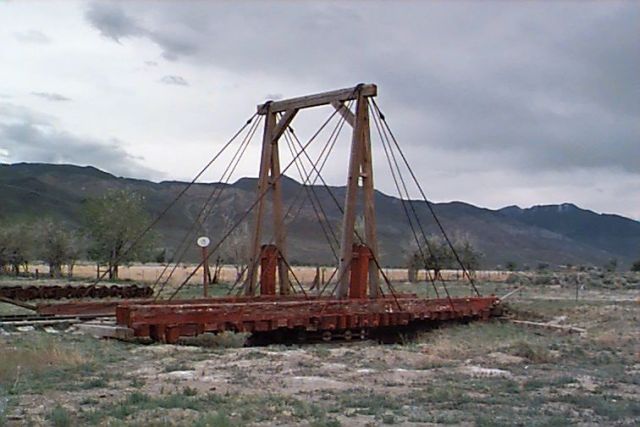
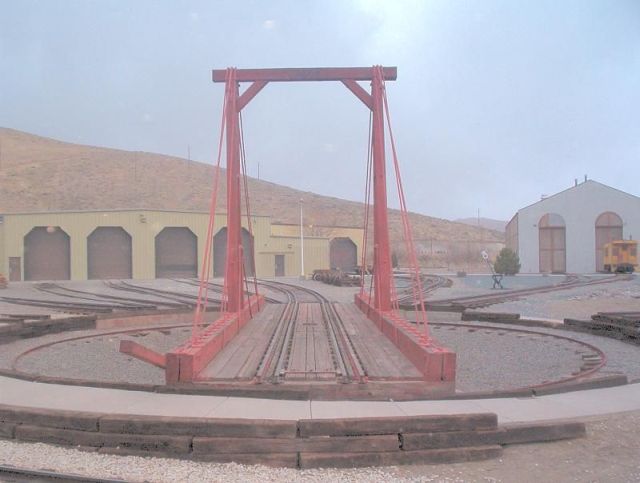
I spent the last few months of 2004 and first month of 2005 doing research on 1880s period railroad turntables;
I studied every photograph or drawing I could get my hands on and by February of 2005 I knew what I wanted the
appearance of our turntable to be. I selected features I liked from different versions of gallows style turntables
and created the look I wanted for the Arizona and Pacific. I scaled the turntable at 5/12 scale (25 foot diameter)
even though our railroad is 16 inch gauge.
|
|
|
|
Our engine and tender are just over nineteen feet long; I determined that 25 feet gave us plenty of room to work
with from an operational perspective. We didn’t get too far along before I realized I could not fit a 25 foot
turntable into the space I had available. The larger table would have conflicted with the siding and would have
changed the location of trestles No. 2 and No. 5 and cost me several additional nice trees. I determined that
we could operate with a 23 foot diameter table.
|
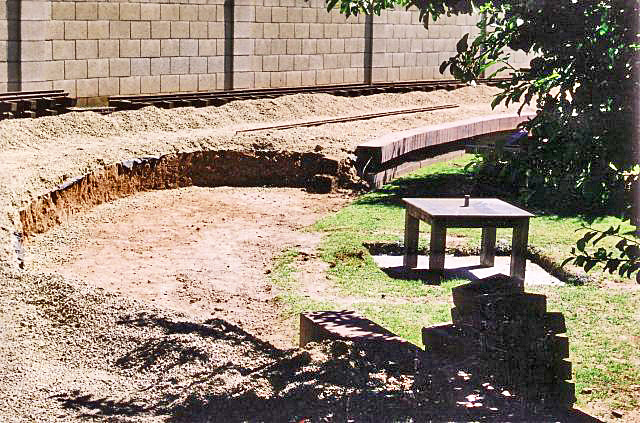
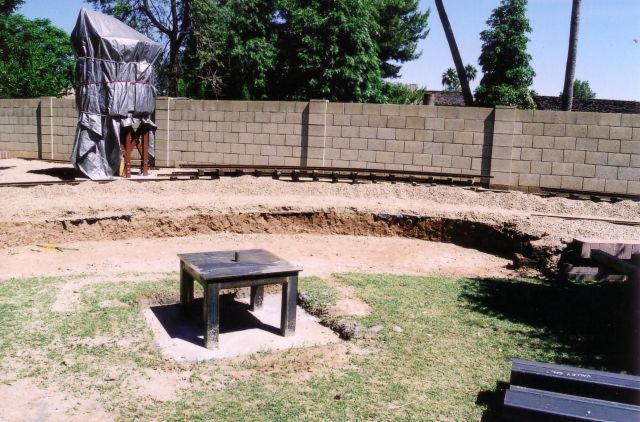
We had to remove two medium size trees and had to demo quite a bit of our block work and cut into our existing
railroad grade to even shoehorn in the 23 foot diameter turntable. I knew that instead of using wood timbers
as the builders did more than a century ago, I wanted to use steel, but I still wanted the timber look. Instead
of one long horizontal piece of steel on each side of the turntable, I chose to use two pieces of steel back to
back on each side just as the railroads used wood beams back to back in the day.
I also knew I had some unique challenges that the builders didn’t have to confront a century ago. My backyard
gets “irrigated” every two weeks with 12 inches of water from the local lake and dam system. Instead of the
prototypical turntable pit, the A & P turntable needed to be elevated to keep all the bearings up out of the
water. It also meant it needed an unusually large base to keep the heavy table from shifting with the soaking
and drying of the soil around the base.
I am not an engineer or an architect, but I drew my plan in my head and then on a sheet of paper and had some
of my engineering friends run some numbers for me and they told me it was way over-engineered – I said perfect
that is exactly the way the railroad would do it!
The center support foundation is 5 feet wide by 5 feet long by 6 feet deep and filled with steel, rebar
and concrete. There isn’t much of the steel base to see above ground level, but it is extensive and very
solid. It will be real interesting to remove for the next property owner… We lowered the steel assembly
into the hole using a huge forklift a friend borrowed from a large construction site – don’t ask… Getting
the top plate perfectly level was every bit as difficult as it sounds. I had never built a turntable previously,
so I learned a few things as we went - a great number of things actually…
|
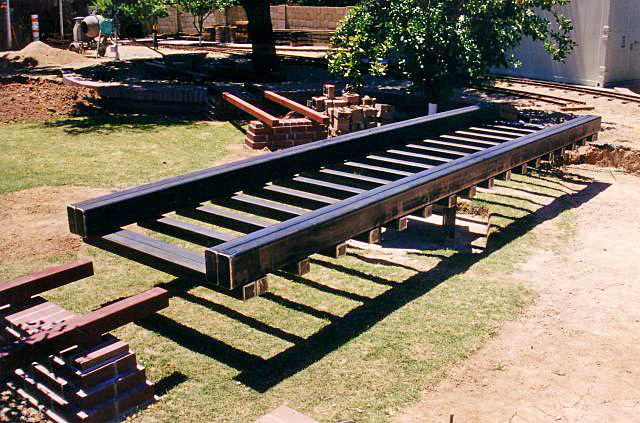
All the steel used in the turntable is Ľ inch thick and is heavy! This meant we had to build the rest of
the turntable in place or in small enough sections that several of us could lift it into place as I didn’t
have any more access to big lifting equipment. The horizontal table was the next assembly we built and we
started with the center plate and horizontal beams. With clamps and bracing we keep everything straight
and square and then tacked strap across each end as we worked our way from the middle a few feet at a time
in each direction welding the permanent metal 4 x 4 ties in place.
|
This was a huge undertaking and took several weekends of work to accomplish. A certified structural
welder I know by the name of Art Parra did the structural welding on the turntable as I wanted to make
sure there weren’t ever any issues. By May 8, 2005, the steel platform was complete and resting on
the steel base.
|
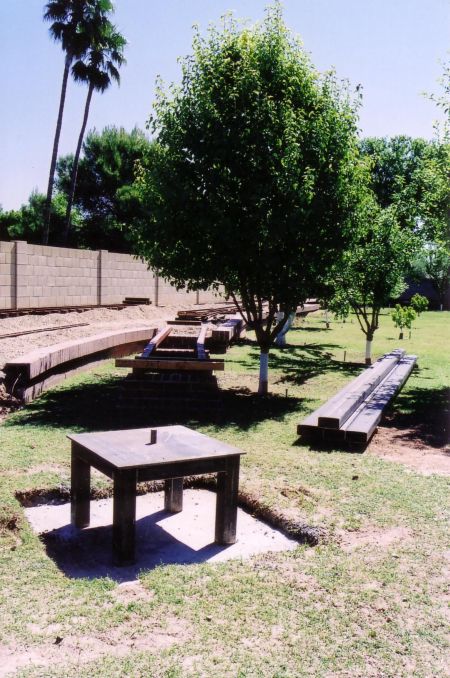
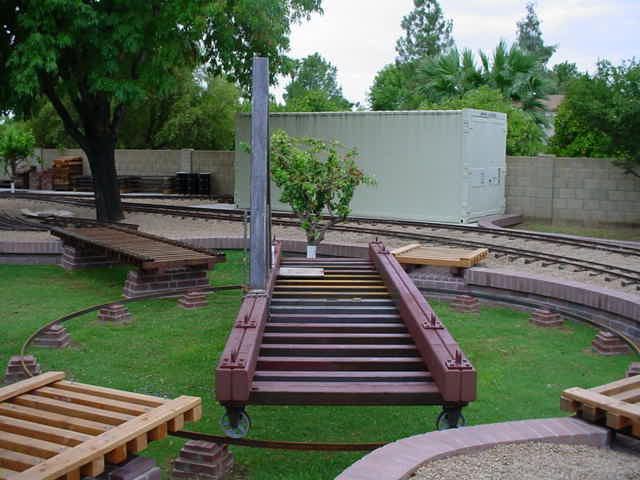
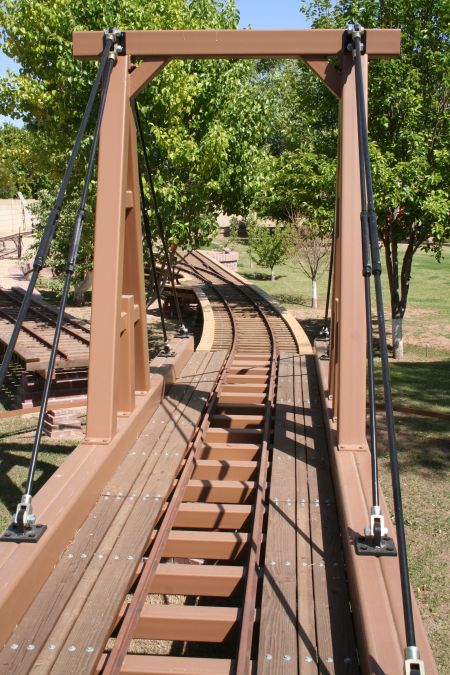
The ring rail was the next big challenge. It had to “float” several inches above the backyard grade,
be nearly exactly circular and supported in such a way that it added not detracted from the overall steel
and brick theme. The ring is one solid piece that started as 4 twenty foot long pieces of 1 inch by 3 inch
pieces of flat bar. I had calculated the size of the circle we needed to build and had the four pieces
commercially rolled to those specs. You lose about 2 ˝ feet on each end of the flat bar as it stays straight
and has to be cut off. Getting the ring rail one continuous smooth piece of metal, almost perfectly circular,
100 percent level and floating above the backyard took almost three months and was easily the most difficult
part of the construction.
|
There are sixteen 2 x 2 steel supports, each more than 2 feet deep in concrete, that support the ring rail.
Even the block work around each support and around the base was time-consuming to complete. The ring rail
and the block work around the base and each of the ring rail support foundations was completed between May
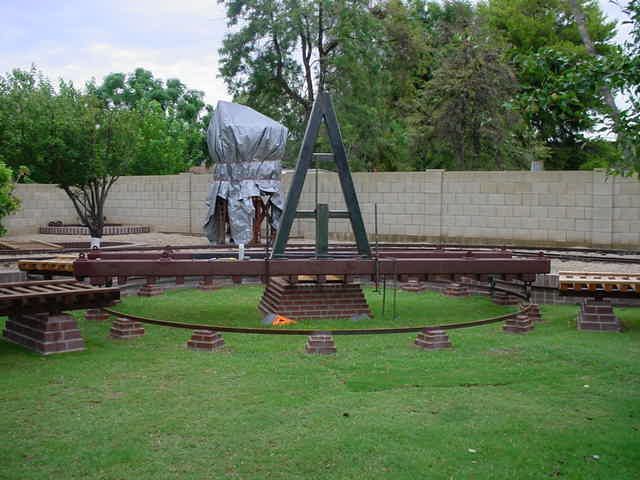
and July of 2005. In mid-July, we started on the A-frame portion of the turntable. We completed the basic
construction of each side on the ground. We really struggled to get the A lifted up onto the table and squared
and secured in place; there are some weekends when my friends really cringe when I call…
|
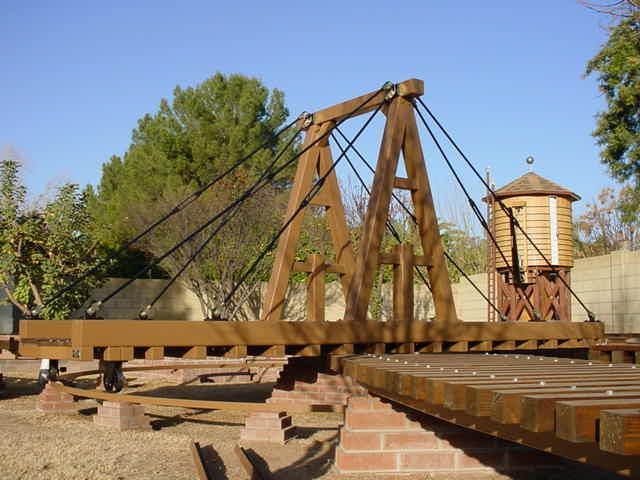
In late August, we managed to get the second A-frame and the top cross brace in place. We still had to
fabricate the ˝ thick mounting plates for the tension rods and thread the rods themselves out of ˝ diameter rod.
This was about the time I discovered a flaw in my design for the last “tie” on each end of the turntable and we
had to cut and grind and weld the expanded ties into place.
|
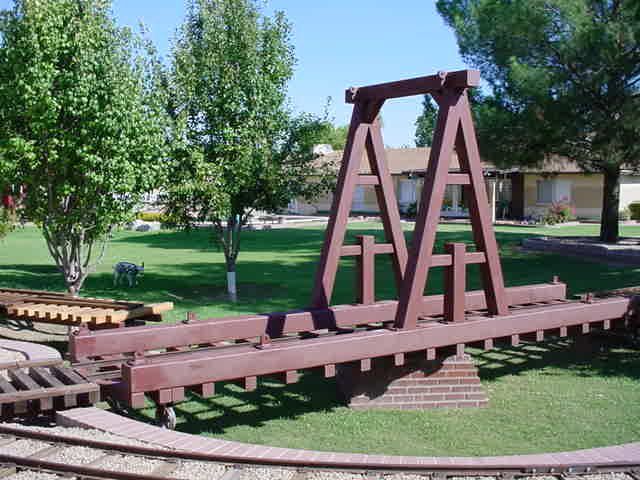
We still had to weld the rail in place which is much trickier than you might think. It has to be centered
perfectly or when you spin the table 180 degrees the rail will not line up properly. I know this because we
had the opportunity to reset the rail a couple of times until we got it dead nuts right. We added the wood
planking and drilled and tapped for each of the bolts holding the planking in place.
|
By late September, we had the A frame tension rods in place and the entire turntable in primer. Adjusting
the eight tension rods to distribute the weight properly between the center bearing and the ring rail bearings
is another little challenge that you learn how to handle in the field… It makes a BIG difference how the rods
are adjusted. We made a few minor modifications to the length of the rail that extends off the end of the turntable,
added additional zerk fittings for lubrication and finally got the tension rods adjusted optimally. On January 8, 2006
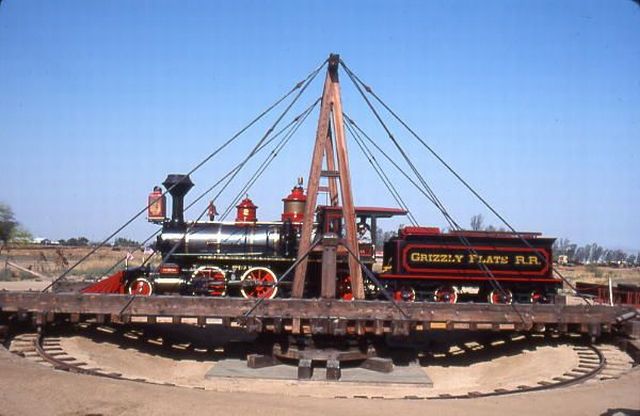
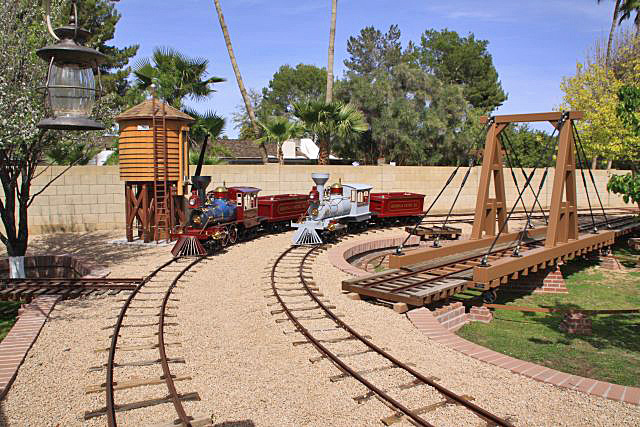
it was painted and complete. In time, there may be another couple of tracks that are served by the turntable – we’ll see.
|
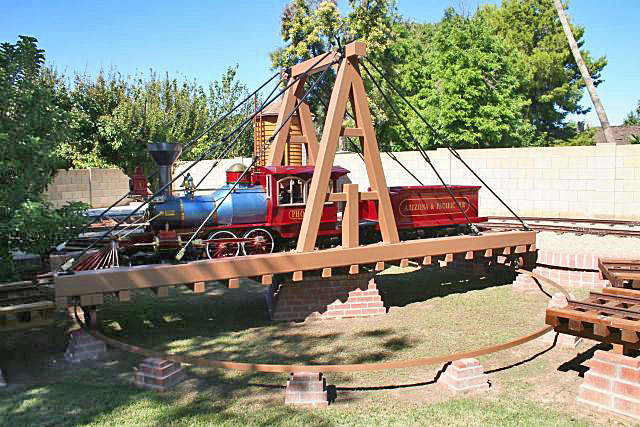
It took well over a year from the time I started my research to the time it was completed. It has been in
place seven plus years and continues to work great and gets quite a number of comments from visitors. I
have been asked how much it weighs; I knew at one time but don’t remember. The above ground structure alone
is well more than a ton… I have also been asked how much it cost to build – thankfully, I don’t remember that
number either… smile. If this were a TV show, they would tell you not to try this at home; I am just a little
crazier than most!

|
|
|